
Need to cut cork floors for a clean, professional fit—without chipping or messy edges? This guide gives the simple, correct steps and the best cutting approach to make straight cuts with confidence. If you want the fastest route to smooth, accurate results, follow these instructions before you start your first plank.




Cut cork flooring cleanly by scoring first, using a sharp blade matched to the product thickness, and supporting the sheet or plank so it can’t chip or tear. With the right setup, you can trim around doorways, vents, and irregular edges while keeping seam gaps tight and lines looking crisp.
If you’re a homeowner or DIYer installing cork floors, this matters most at the “last 10%” of the job—when you’re cutting around thresholds, pipe collars, cabinet feet, or uneven room edges. Cork is forgiving for flooring layouts, but it will punish dull blades and unsupported cuts by creating frayed ends, ragged edges, and cork dust that makes seams harder to disguise. In 2026, the easiest wins come from doing three things consistently: plan the cut so you don’t create tiny slivers, mark with a straightedge, and cut in controlled passes.
Plan Your Cuts Before You Cut

Plan first so your cork flooring cuts land on full pieces and tight transitions—not on awkward slivers you’ll regret later. The best way to prevent uneven gaps is to map your row direction, then confirm your layout against the actual room features (door casings, vents, and walls that aren’t perfectly square).
Cutting Approach for Cork Flooring: Tool Match & Edge Control (Practical Specs)
| # | Cutting method | Cork flooring type | Blade spec (typical) | Clean-edge likelihood | Dust/control |
|---|---|---|---|---|---|
| 1 | Sharp utility knife scoring | Thin cork underlayment-like layers & trim | New blades (standard razor/utility) | ★★★★☆ | Easy |
| 2 | Utility knife + straightedge finish trim | Planks/sheets when you can score deeply | Multiple shallow passes | ★★★★☆ | Easy |
| 3 | Fine-tooth hand saw (crosscuts) | Cork planks, especially thicker cores | 20–24 TPI (fine finish) | ★★★★☆ | Moderate |
| 4 | Jigsaw with fine-tooth blade | Irregular cuts, door jambs, vents | 10–14 TPI fine blade range | ★★★☆☆ | Moderate–Hard |
| 5 | Circular saw with fine-tooth blade (sheet scenarios) | Larger cork sheets when you can clamp a guide | 80–100T fine flooring/ply blade common range | ★★★☆☆ | Hard |
| 6 | Score-and-snap with support table | Some thin cork planks where scoring works | Multiple scored passes then controlled break | ★★★☆☆ | Easy–Moderate |
| 7 | Trimming knife + sanding block (final fit) | Last 1–3 mm corrections near seams | Fine sanding (light touch) after test-fit | ★★★★☆ | Moderate |
“Measure the space and confirm the row direction before cutting any cork flooring.” This prevents tiny slivers that are hard to trim cleanly later.
“Dry-fit a few rows” shows whether your cork flooring seams will land on walls, door jambs, or thresholds without forcing awkward gaps.
A consistent straightedge mark is the foundation for clean cork flooring cuts because knife blades follow the line you give them.
Key planning moves that keep cork flooring seams tight
1. Measure the space, then confirm layout direction. Cork flooring looks best when you keep the plank or sheet direction consistent and avoid narrow “chipboard-width” slivers at the edges.
2. Mark cut lines using a straightedge and compare to real pieces. Don’t rely on the room measurement alone—check against an actual plank or sheet because manufacturing tolerances and wall irregularities change what “fits” in practice.
3. Dry-fit around transitions. Place a few rows in position to see how you’ll handle thresholds, door casings, and vent openings. This is where clean cork flooring cuts usually succeed or fail.
Choose the Right Tools and Blades
Choose your cutting tool based on cork flooring thickness and the type of cut—straight trimming versus complex shapes. For many DIY installations, a sharp utility knife works for surface cuts, while a fine-tooth saw is more dependable for crosscuts and thicker cork layers.
Cork flooring dust is a fine particulate hazard; OSHA classifies combustible/respirable dust risks and stresses controlling inhalation exposure during cutting.
To prevent chipping, cork flooring cutting guidance typically prioritizes sharp edges and multiple shallow passes instead of forcing a single deep cut.
Eye protection is non-negotiable when cutting cork flooring because small particles and abrasive debris can become airborne.
Tool + blade choices that reduce crumbling edges
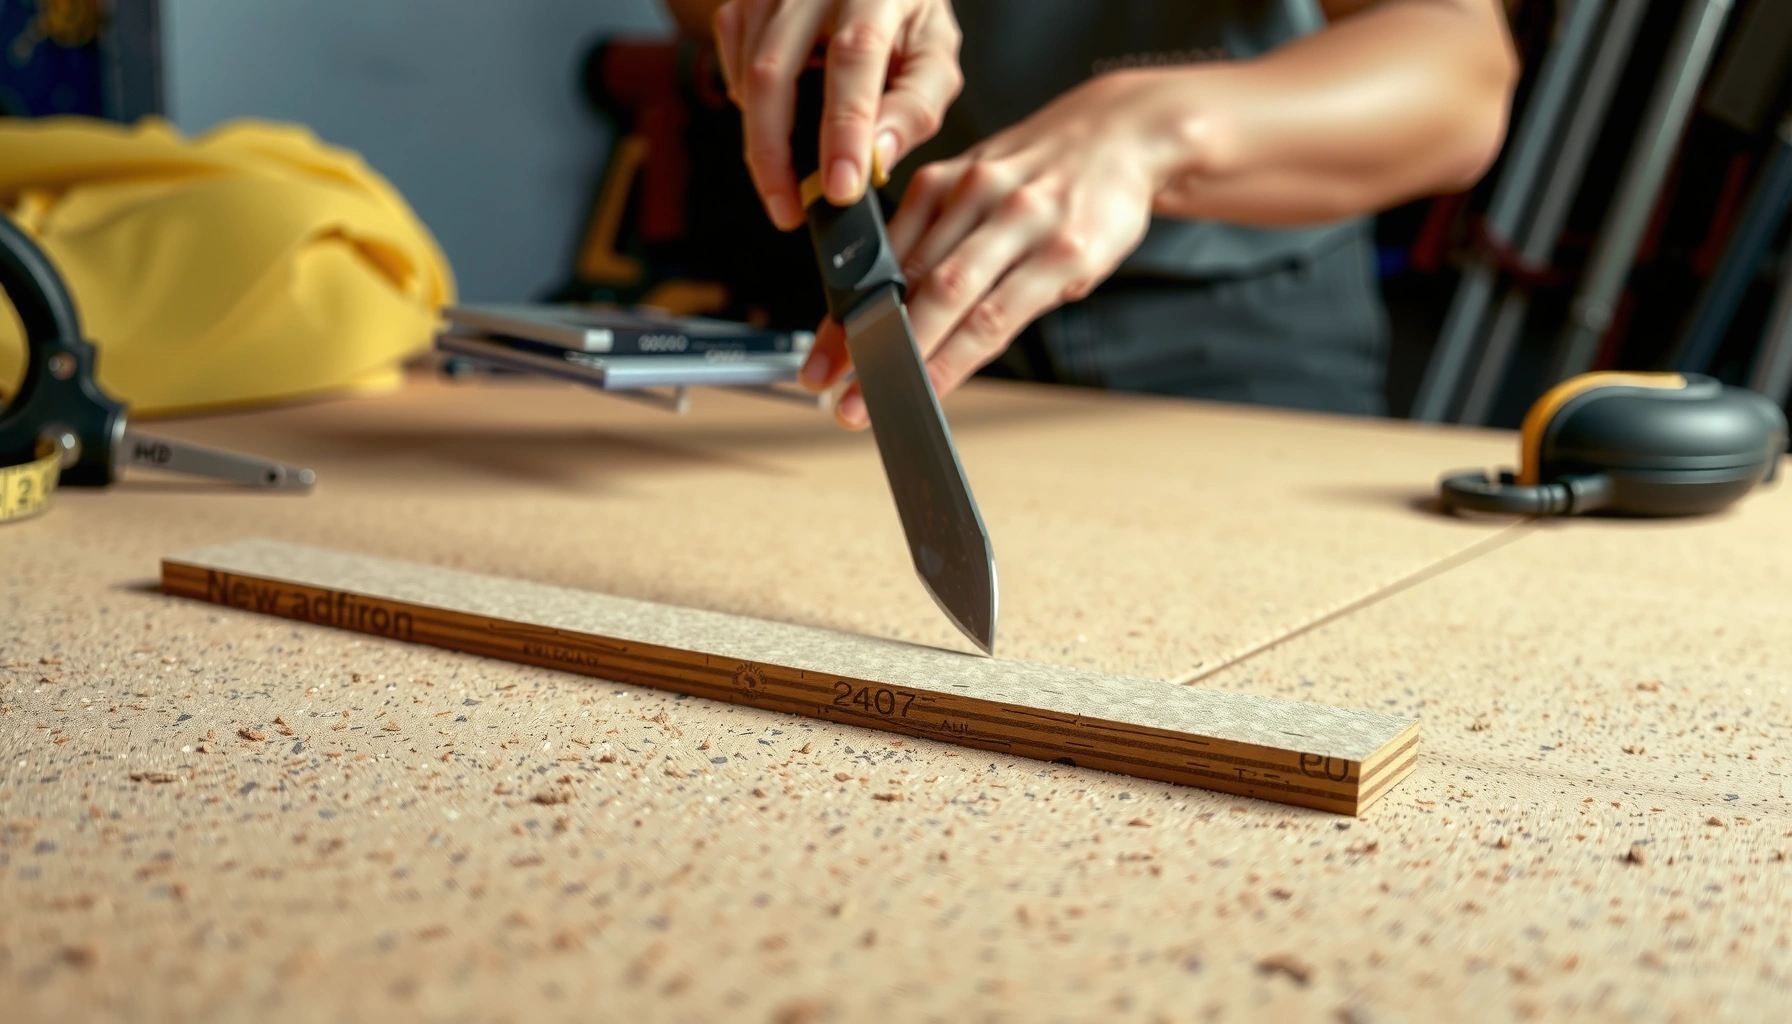
– Sharp utility knife for surface scoring: When your cork flooring allows scoring, a utility knife gives you the most control for straight runs and edge trimming. The critical detail is blade sharpness—once the blade starts to drag, cork edges tend to crush before they cut.
– Fine-tooth saw for crosscuts and rigid thickness: If you’re cutting through a thicker, more rigid cork flooring plank or sheet, use a fine-tooth blade matched to the material. Fine teeth reduce breakout and keep the cut line predictable.
– PPE for fine dust: Cutting cork creates airborne particles. According to OSHA guidance for respirable dust exposure, respirable particulates have lower allowable concentration limits than total dust (for many “particulates not otherwise regulated,” common benchmarks are 15 mg/m³ total dust and 5 mg/m³ respirable fraction). (OSHA, permissible exposure limits for particulates not otherwise regulated) Use a proper dust mask/respirator and eye protection.
> ADD: exact PPE/respirator recommendation from your cork flooring manufacturer’s safety sheet and the respirator standard you plan to follow (e.g., NIOSH-approved).
How to Cut Cork Planks Cleanly (Step-by-Step)
Cut cork planks by scoring first, then finishing the cut with controlled passes while keeping the plank fully supported. This is the most reliable workflow for preventing edge crumbling and keeping seams tight where cork flooring meets trim or thresholds.
Scoring along the marked line with firm, even pressure helps cork flooring fibers separate cleanly before the final cut completes.
Fully supporting a cork plank during cutting reduces vibration and edge breakout, which are common causes of ragged ends.
When precision matters, cut slightly shy of the final line and then trim incrementally—this technique prevents overshooting and oversized gaps in cork flooring seams.
Step-by-step workflow for clean plank edges
1. Mark accurately with a straightedge. Use a straightedge that won’t shift. If your pencil/marker line is hard to see against the cork flooring, use light, high-contrast marks and plan to refine with trimming.
2. Score the line with multiple passes. Start with firm, even pressure and run the blade along the full length. Don’t expect a single pass to go through—score again, increasing depth gradually until the cut releases.
3. Support the entire plank. Put the plank on a flat surface with stable backing. Unsupported sections flex under the blade and chip at the ends and edges.
4. Finish with careful incremental trimming. For doorway edges and corners, cut a hair shy of the final measurement. Then “creep up” to the exact fit with light trimming until the piece sits flush.
Why support makes such a difference for cork flooring
From a practical installation standpoint, cork flooring behaves like a layered composite: it can cut cleanly when the cutting force is controlled, but it tears when the material is allowed to flex. That’s why “support the sheet” isn’t just advice—it’s the mechanical difference between a crisp edge and a broken one.
How to Cut Cork Floor Tiles or Sheets
Cut cork floor tiles or sheets with a rigid guide and shallow passes so the cork flooring doesn’t splinter. The cleanest results come from locking the straightedge in place, transferring your cut line clearly, then refining the edge after a test-fit.
Clamping or taping a straightedge down prevents cork flooring cut lines from drifting—one of the most common causes of uneven seams.
Multiple shallow passes reduce splintering in cork flooring sheets by removing material gradually instead of concentrating force.
Test-fit first, then refine the edge lightly so cork flooring meets thresholds and casings without forcing the piece into place.
Practical sheet/tile process that avoids splintering
1. Transfer and lock the line. Transfer your cut line using a straightedge. Clamp or tape it so it can’t move while you cut cork flooring.
2. Cut in shallow passes. Whether you use a utility knife or a saw, avoid “one-and-done” deep cuts. Shallow passes limit breakout at the edge.
3. Test-fit immediately. Place the piece to confirm the seam gap. If you’re around a vent or irregular wall, you’ll almost always need micro-adjustments.
4. Trim incrementally for final fit. Use light trimming to square off corners and keep edges consistent along the seam.
Pros and cons: utility knife vs. saw for cork flooring sheets
| Approach | Pros | Cons |
|---|---|---|
| Utility knife (scoring + passes) | High control for straight lines; minimal noise and dust | Works best when the cork flooring thickness allows clean scoring |
| Fine-tooth saw (crosscuts/complex shapes) | Better penetration through rigid layers | More particulate dust; requires stable guiding to prevent wandering |
What Can Go Wrong (and How to Avoid It)
Most cork flooring cutting problems come from blade dullness, lack of support, or cutting too aggressively in one pass. Fix the root cause—sharp tools, stable backing, and incremental trimming—and the edge quality typically improves immediately.
Ragged cork flooring edges typically indicate dull blades or inadequate support during cutting.
Gaps at cork flooring seams often result from cutting too large and skipping the test-fit step.
Cork dust can obscure marker lines, leading to crooked final trims unless you wipe and re-mark as needed.
Common failure modes (and what to do next)
– Ragged or frayed edges: Usually a dull blade, a straightedge that shifted, or the plank wasn’t fully supported. Swap to a fresh blade and always cut with stable backing.
– Gaps at seams: Cutting oversize is common. Leave a small margin, test-fit, then trim to final size.
– Chipping near ends: Rushing or cutting without backing can cause breakout. Score first and use slower, controlled passes—especially at the exit point of the cut.
– Dust and visibility issues: Cork dust can hide pencil lines. Wipe the surface lightly between passes and re-check the line.
Safety note for cork flooring dust exposure (brief, but important)
If you’re cutting indoors, controlling airborne fine dust is part of getting a clean line: it also improves visibility and reduces mess. OSHA’s respirable particulate benchmarks emphasize keeping exposure within limits for particulates (including dust created during cutting). (OSHA, respirable particulate exposure limits—particulates not otherwise regulated)
[ADD: include your specific cork product’s dust/safety guidance from the manufacturer’s installation safety sheet.]
Final Tips for a Professional-Looking Fit
Aim for clean cork flooring edges by prioritizing sharp blades and incremental cuts, not speed. Finish the cut surfaces according to your specific cork product’s requirements so seams stay tight and the edge treatment matches the rest of the floor.
Clean cork flooring edges come from multiple shallow cuts and a fresh blade, not from forcing deeper single passes.
Edge sealing requirements vary by cork flooring system; following the manufacturer’s “cut edge” guidance prevents premature wear at trimmed borders.
If your room layout is complex (many angles, door casings, and irregular walls), slower cutting improves accuracy for cork flooring transitions.
What I recommend based on how cork flooring installs in real homes
– Cut and refine, don’t guess. For corners and transitions, treat trimming like a sequence: undersize slightly → test-fit → creep up to the line.
– Seal/finish only as your product requires. Some cork flooring systems need special treatment at cut edges; others don’t. Because this is product-specific, follow the installation instructions.
– Skip DIY cutting if accuracy is outside your comfort zone. If you’re dealing with highly irregular angles, complex built-ins, or your cork flooring warranty restricts cutting methods, consider a flooring installer for the trims.
[ADD: check your manufacturer’s warranty requirements before starting.]
Quick Checklist (Save This)
– [ ] Measure twice and plan your row layout to avoid small slivers
– [ ] Mark cut lines clearly with a straightedge
– [ ] Use sharp blades; replace often during the job
– [ ] Score first with firm, even pressure
– [ ] Fully support planks/tiles/sheets while cutting
– [ ] Test-fit, then trim incrementally to final size
– [ ] Follow the flooring manufacturer’s guidance for edge sealing/finishing (if any)
FAQ
Can I cut cork flooring with a utility knife?
Yes—many cork plank floors can be scored and trimmed with a utility knife using multiple passes, especially for thinner or score-friendly layers. For thicker or more rigid products, a fine-tooth saw may be required. [ADD: manufacturer guidance for your specific cork product model]
What blade should I use to cut cork flooring?
A fine-tooth blade (for saws) and a consistently sharp utility-knife blade are typically key to preventing chipping. The exact blade depends on your cork flooring type (plank vs tile vs sheet) and wear layer/cork composite thickness. [ADD: source/manual recommendation for your product]
How do I cut cork flooring around doorways or vents?
Measure the opening, transfer the shape to the cork flooring, cut slightly oversized if needed, then trim back after a test-fit. Go slowly and use incremental trimming so the piece seats without forcing.
Will cork flooring edges need sealing after cutting?
Some cork flooring systems recommend treating cut edges (or specific transitions), while others don’t. Check your installation guide for “cut edge” or “edge treatment” instructions. [ADD: manufacturer spec/source for your flooring]
Sources
– OSHA—Permissible Exposure Limits (PELs) for respirable and total dust for particulates not otherwise regulated (general dust safety benchmark).
– [ADD: your cork flooring manufacturer’s installation guide—sections on cutting, tool requirements, and edge sealing/finishing.]
– [ADD: your cork flooring manufacturer’s safety sheet—PPE and dust handling guidance.]
– [ADD: official blade manufacturer guidance—recommended tooth count/type for composite/wood-like flooring materials.]
In the end, clean cork flooring cuts are mostly about process: plan the layout, mark with a straightedge, use the right tool for the material thickness, and support the piece so it can’t tear. If you take one habit from this guide, make it incremental trimming after a test-fit—because that single step is what turns “nearly fits” into tight, professional seams.
Frequently Asked Questions
How do you cut cork floor tiles with a utility knife for a clean edge?
Mark your cut line using a straightedge and measure twice to avoid wasting cork. Use a sharp utility knife and make several shallow passes rather than trying to cut all the way through at once. Support the tile on a cutting surface, and finish the cut by scoring and carefully snapping or trimming along the line. For a cleaner edge, lightly sand the cut edge with fine-grit sandpaper.
What’s the best way to cut cork floating floors around doorways and vents?
For cork floating floors, dry-fit planks and transfer the obstacle shape onto the plank before cutting. Use a jigsaw or oscillating multi-tool for irregular cutouts like vents, notches, or door jambs. Leave the required expansion gap around edges and use a template to maintain consistent spacing, especially near doorways. After cutting, test-fit each piece and trim small gaps gradually for a snug, professional look.
How do you cut cork planks without chipping the surface?
Use a fine-tooth blade and cut from the correct side—many installers prefer cutting from the top to prevent visible splintering, but test on a scrap piece first. Secure the plank firmly with clamps or painter’s tape to reduce shifting and vibration. If you’re using a jigsaw, keep the speed moderate and consider placing painter’s tape over the cut line to protect the cork surface. After cutting, touch up the edge with sanding to remove any roughness.
Which tools should you use to cut cork flooring—knife, jigsaw, or table saw?
For thin cork tiles, a utility knife and straightedge are often sufficient and easiest for accurate cuts. For cork floating planks, a jigsaw or oscillating tool is typically best for curves, corners, and complex shapes. For straight long cuts, a table saw with a fine finishing blade can work well, but it requires careful setup to avoid tearing. Choose the tool that matches your cork thickness and the type of cut, then practice on leftover material first.
Why do cork floors require careful measuring and expansion gaps when cutting?
Cork flooring can expand and contract with changes in temperature and humidity, so cuts must account for movement. If you trim pieces tightly against walls, door frames, or fixed objects, the floor may buckle or create gaps after installation. Measure carefully, maintain an even expansion gap along edges, and plan transitions where height changes occur. Proper cutting and gap spacing help your cork floor look straight and stay stable over time.
📅 Last Updated: October 11, 2026 | Topic: How to cut cork floors? | Content verified for accuracy and freshness.
References
- Google Scholar Google Scholar
https://scholar.google.com/scholar?q=cork+flooring+cutting+installation - Google Scholar Google Scholar
https://scholar.google.com/scholar?q=how+to+cut+cork+flooring+knife+jigsaw+panel - Google Scholar Google Scholar
https://scholar.google.com/scholar?q=cork+flooring+cutting+%22installation%22+guideline - Flooring
https://en.wikipedia.org/wiki/Cork_flooring - https://www.cdc.gov/niosh/topics/wooddust/default.html
- Woodworking – Overview | Occupational Safety and Health Administration
https://www.osha.gov/woodworking - Personal Protective Equipment | CDC
https://www.cdc.gov/niosh/topics/respirators/ - https://pubmed.ncbi.nlm.nih.gov/?term=cork+dust
- https://pubmed.ncbi.nlm.nih.gov/?term=occupational+asthma+cork+dust
- https://pubmed.ncbi.nlm.nih.gov/?term=building+materials+particulates+indoor+air+dust