
Want to prevent water damage to rubber floors? Focus on quick spill removal, preventing standing water with proper drainage and mopping practices, and sealing high-traffic seams so moisture can’t seep in. If you follow these steps, you’ll dramatically reduce bubbling, swelling, and premature wear—without relying on constant replacement.



Water damage to rubber floors is best prevented by controlling moisture at the source, sealing edges/joints, and keeping spills from sitting—then reinforcing those controls with quick, rubber-safe cleaning and fast dry-down. If your rubber flooring is installed in tiles/sheets (common in garages, gyms, basements, and laundry/mud areas), the most reliable results come from treating where water enters and where it can migrate: seams, edges, and transitions.
If you have rubber flooring in a garage, gym, basement, laundry/mud area, or any space where spills or condensation happen, these steps are for you. It’s especially relevant if your rubber is installed in tiles/sheets and you’ve noticed damp spots around seams, edges, or entrances.
Identify where water gets in (and stop it first)
The fastest way to prevent water damage to rubber floors is to stop recurring moisture at the source before you “treat” the symptoms. In most installations, water appears to be “a floor problem,” but it usually originates from a plumbing leak, tracked-in rain, wet cleaning habits, or condensation migrating toward seams and transitions.
Preventing water damage on rubber flooring starts by controlling moisture at the source, because repeated wetting eventually works into seams and transitions.
Seams, edges, and transitions are common migration paths for moisture under/through rubber flooring systems—so stopping the entry point reduces risk more than surface-only cleaning.
When indoor humidity rises, mold can begin growing on damp materials in as little as 24–48 hours according to U.S. public health guidance.
Start with a structured inspection. Here’s what to check first in real-world spaces:
– Leaky plumbing and appliance condensation: Look behind/under sinks, laundry machines, water heaters, and any hose bibs. Even minor seepage can create chronic dampness near perimeter runs.
– Wet mopping practices: If your cleaning routine uses too much water, it can saturate surface texture and creep into grout-like joints between rubber tiles.
– Tracked-in rain or snowmelt: Garage entries, gym doors, and basement walkouts often introduce water every day—especially after hosing concrete or washing vehicles.
– Condensation from HVAC or ductwork changes: Temperature swings cause indoor air to deposit moisture on cooler surfaces. That moisture can collect at edges where air movement is different.
Then inspect the pattern of moisture:
– Center of the floor stays dry, but edges are damp: Often points to perimeter entry, underlayment/moisture migration, or condensation gradients.
– Damp spots align with tile seams or transitions: Often indicates water migration through joints, poor edge sealing, or inconsistent installation interfaces.
– Dampness increases after cleaning: That usually means the cleaning method or amount of water is driving moisture into the seam network.
From a risk-management standpoint, think in terms of water exposure frequency and drying time. According to the U.S. EPA, mold can begin growing on damp materials within 24–48 hours (2017 guidance). U.S. EPA / mold guidance This is why “occasional spills” still matter if the floor stays wet too long.
Likely Moisture Sources for Rubber Floors (Typical Facility Settings)
| # | Moisture entry point | Common location on rubber | Primary driver | Risk reduction impact |
|---|---|---|---|---|
| 1 | Tracked-in rain/snowmelt | First 3–6 ft from entrances | Daily foot traffic + wet footwear | High |
| 2 | Wet mopping/excess rinse water | Texture valleys + seam lines | Over-wetting and slow dry-down | High |
| 3 | Laundry/appliance leaks | Perimeter around machines | Hose failure or overflow events | Very High |
| 4 | Condensation from HVAC change | Edges and corners | Humidity swings + cool surfaces | Medium-High |
| 5 | Hosing/washing activities | Near drains and low spots | High-volume water events | Very High |
| 6 | Perimeter gaps at walls/thresholds | Base edges and thresholds | Unsealed junctions | High |
| 7 | Humidity-only (no spills) | Wider area haze/soft spots | Condensation on cooler sections | Medium |
Keep water off with a smart entrance and daily habits
You prevent most rubber floor water damage by reducing how much water arrives on shoes and by avoiding “soak-cleaning.” Rubber resists moisture, but it still needs control of exposure time—because moisture that sits is what drives swelling, odor, and seam breakdown.
Entrance matting reduces wet-tracking, which is one of the most common causes of recurring moisture near rubber floor seams.
Damp cleaning followed by immediate drying lowers the chance that water migrates into edges and textured valleys compared with soaking mops.
If water exposure is unavoidable (pets, plants, frequent boot wear), containment tools like drip trays limit spread and shorten clean-up time.
Practical habits that work in garages, gyms, basements, and laundry/mud rooms:
– Use mats at entry points: Place a scraper mat outdoors and an absorbent mat indoors. Aim for a “two-step” capture system so wet grit doesn’t get ground into texture.
– Promote dry traffic rules: In a shared space, add a simple instruction: wipe boots at the mat, not after they cross the threshold.
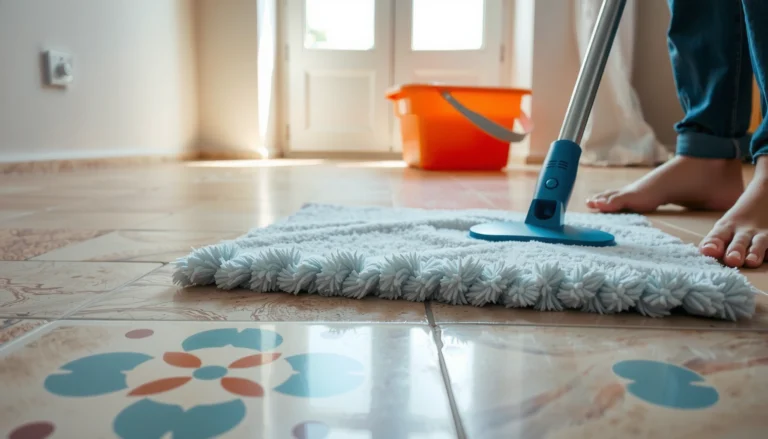
– Avoid soaking cleaning methods: Instead of flooding, use damp mop heads, spray-and-wipe, or lightly wetted microfiber pads—then immediately wipe up residue.
– Contain predictable wet activity:
– Shoe racks with drip trays
– Pet feeding stations on trays (for bowls)
– Plant watering zones with a catch pan or waterproof mat
A simple workflow we recommend for daily operations is:
1) pre-capture water (mats/containment), 2) wipe up what remains, 3) dry the floor surface and check edges.
Seal seams, edges, and any exposed substrates
You prevent long-term water migration by sealing the pathways where moisture travels: seams, perimeter edges, and transitions. Even if your rubber looks sealed at the top, small gaps at joints can allow repeated wetting to travel into the system.
Perimeter sealing matters because moisture often migrates at edges and transitions even when the main floor field appears dry.
Use sealants and joint treatments that are explicitly compatible with your rubber flooring system to maintain performance and adhesion.
Installation moisture requirements for substrates (e.g., concrete) control whether your rubber floor can safely resist damp conditions over time.
Key steps:
– Inspect joints and transitions: Look for gaps, lifted edges, or inconsistent contact between tiles/sheets and at thresholds.
– Use a manufacturer-compatible sealant: Apply an appropriate seal/joint treatment designed for rubber flooring systems.
– [ADD: source for recommended sealant type from your rubber flooring manufacturer]
– Verify underlayer/moisture barrier planning when rubber sits over concrete or other substrates:
– [ADD: source for manufacturer moisture requirements]
Why this matters: many rubber flooring systems are moisture-resistant, not “waterproof” in the sense of standing-water flooding. Performance depends on construction, seams, and how the installer addressed substrate moisture.
Quick comparison: sealing vs. skipping it
Sealing isn’t just about aesthetics—it’s about stopping the moisture pathway.
| Approach | What it protects | Main benefit | Main downside |
|---|---|---|---|
| Compatible seam/edge sealing | Seams, perimeter gaps, transitions | Reduces moisture migration into the floor system | Must be applied correctly; wrong product can cause failure |
| “Leave it as-is” | Only the surface | Minimal upfront work | Dampness often reappears at edges and joint lines |
| DIY “waterproofing” chemicals | Often everything (but sometimes incorrectly) | Marketing claims of barrier protection | Incompatible chemicals can degrade rubber or compromise warranty |
Clean safely to avoid leaving moisture behind
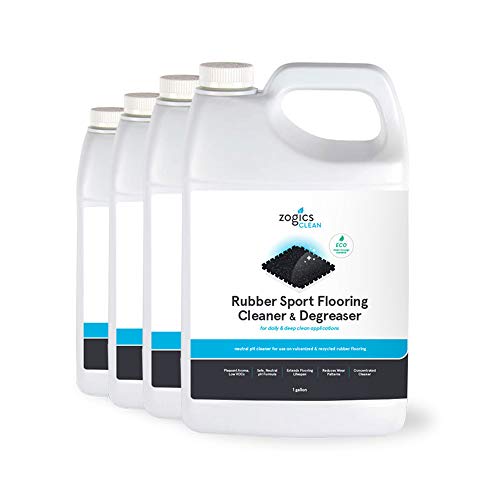
You protect rubber floors by cleaning with rubber-safe products using a damp method, then drying promptly. The goal is residue-free cleanliness without leaving water pooled in texture, interlocks, or seam micro-gaps.
Damp cleaning reduces the risk of driving water into seams and textured valleys compared with wet mopping that leaves moisture behind.
Using rubber-appropriate cleaners and following manufacturer care instructions helps prevent degradation from aggressive chemicals.
After cleaning, dry-down is essential for textured and interlocking rubber areas where water can remain in small recesses.
Safe cleaning practices:
– Use a rubber-floor-appropriate cleaner and follow the rinse/dwell directions so water doesn’t remain trapped.
– [ADD: manufacturer cleaning spec link/name]
– Dry the floor after cleaning: Use a dry microfiber mop, absorbent towels, or a wet-dry vacuum (where appropriate) to remove lingering moisture.
– Avoid harsh solvents and aggressive chemicals: Some cleaners can swell adhesives or degrade surface polymers over time. Stick to what the manufacturer says is safe for routine maintenance.
If you’re managing a facility, standardize the process:
– Pre-clear grit (dry sweep/vac)
– Damp mop or wipe with approved cleaner
– Immediate dry-down at the end of the shift
Improve drainage and reduce lingering humidity
You prevent water damage when you shorten the time between “wet” and “dry.” That means both removing liquid quickly (spills, washing) and managing humidity that causes condensation even without spills.
When moisture comes from spills, a wipe-immediately routine plus airflow shortens dry-down time and lowers damage risk.
When moisture comes from the air, dehumidification and air circulation reduce condensation on cooler surfaces.
Indoor humidity is a key factor in mold growth; CDC guidance notes mold can grow when materials stay damp, often within 24–48 hours of moisture exposure.
Use targeted controls based on the moisture source:
– For spill events (liquid-driven):
– Wipe immediately (don’t wait for the end of the day)
– Use fans to increase dry-down speed
– If there’s a drain nearby, prevent water from spreading across the floor field
– For condensation (air-driven):
– Add dehumidification where necessary
– Improve airflow around corners and exterior-wall-adjacent areas
– For wet workflows (repeat events):
– Create a “wet zone” with containment (drip mats, trays, or floor-protecting shields)
– Move the wet step where possible—especially in laundry/mud rooms and garages
Two risk anchors to keep in mind:
– According to the CDC, mold can begin growing on damp materials in as little as 24–48 hours (CDC mold guidance, referenced in public health resources).
– The EPA also emphasizes that controlling moisture is the primary prevention strategy (U.S. EPA mold and moisture guidance).
As of 2025–2026 facility maintenance practices, these moisture-control principles align closely with common restoration and IAQ (indoor air quality) playbooks: stop water entry, remove water quickly, and keep humidity stable.
What can go wrong (common mistakes and edge cases)
You usually see recurring water damage when the root cause isn’t removed, when edges/seams remain unprotected, or when cleaning methods introduce more water than they remove. Rubber floors can handle occasional moisture, but failure patterns come from prolonged wetting and incompatible materials.
Flood cleaning and over-wetting can drive moisture into rubber seams and underneath the flooring—so “more water” can worsen the outcome.
Assuming “rubber is waterproof” can lead to under-sealing at joints and edges, which are often the true failure points.
Underlayment mismatch can trap moisture, so rubber installations often require specific moisture-barrier planning per manufacturer instructions.Common mistakes to avoid:
– Flood cleaning: Mopping too wet, using a high-saturation mop head, or letting puddles sit can push moisture into seams and under edges.
– Ignoring perimeter edges: Even if the center looks fine, wet transitions and perimeter gaps can create slow, cumulative damage.
– Using the wrong products: Unknown cleaners, solvents, or abrasives can damage rubber performance over time and reduce future water resistance.
– Thinking rubber is “waterproof”: Many rubber systems are moisture-resistant, not designed to resist standing water across seams indefinitely. Confirm the exact claim for your product.
– Skipping underlayment requirements: Some installations require specific underlayment or moisture barriers; installing the wrong layer can trap moisture.
Edge cases worth considering:
– Heavy-duty flooding events (e.g., burst hose, sump failure): Even well-sealed rubber may need professional assessment and drying procedures.
– Large temperature swings: HVAC changes can cause persistent condensation cycles. You’ll need humidity control, not just cleaning.
– High-chem exposure: Automotive fluids, strong degreasers, and bleach-based disinfectants can interact with rubber compounds—follow product-specific care directions.
Verdict / tip (what to do first, and who should skip)
Start with the highest-impact actions: prevent tracked-in water, stop pooling immediately, and seal/maintain seams and edges according to your rubber flooring manufacturer’s guidance. Then keep cleaning methods damp-not-wet and prioritize quick dry-down after any wet cleaning.
The best first step is reducing recurring wetting—especially at entrances—and addressing pooling quickly before moisture migrates into seams.
Sealing and maintaining edges/joints using manufacturer-approved treatments is usually more effective than relying on chemical “waterproofing.”
If moisture persists beyond occasional spills, substrate moisture and installation system compliance should be investigated per manufacturer guidance.
Who should skip (or at least pause and verify):
– Do-it-yourself sealing without manufacturer compatibility: Incorrect sealants or “universal” waterproofing products can compromise adhesion, damage the surface, or void warranties.
– Ongoing dampness with no clear cause: If you see persistent damp spots around seams/edges, stop and assess substrate moisture and installation system requirements. Follow the manufacturer/installer moisture troubleshooting steps.
– [ADD: source for manufacturer warranty/installation moisture guidance]
Also, if you’re working around active leaks, always fix the leak first. In facilities, the quickest wins come from combining moisture control with consistent housekeeping routines.
Quick scan checklist (save this)
– ☐ Mat at entrances to reduce wet tracking
– ☐ Wipe spills immediately; never leave standing water
– ☐ Damp cleaning only; avoid soaking/mopping wet
– ☐ Dry the floor after cleaning (especially seams/textures)
– ☐ Inspect and seal gaps at edges/joints per manufacturer guidance
– ☐ Improve airflow/dehumidification where humidity is the cause
FAQ
Is rubber flooring waterproof?
Rubber flooring is typically moisture-resistant, but whether it’s “waterproof” depends on the product design, seams/joints, and installation method. Check your manufacturer documentation for the exact water-resistance/waterproof claim.
Can I use a regular mop and cleaner?
You can usually clean with a damp method, but you should use a cleaner that the manufacturer approves for rubber and avoid saturating the surface. If you notice water pooling in texture or seams, switch to a drier wipe-down approach.
How do I prevent water damage around seams and edges?
Inspect joints and perimeter areas regularly, then address gaps using a compatible seal/joint treatment recommended by the flooring manufacturer. Keeping water out of those pathways is usually the biggest long-term improvement.
What if water problems keep coming back even when I’m careful?
Recurring dampness often points to moisture from the substrate, poor drainage, or an air-humidity issue. In that case, follow the manufacturer’s moisture troubleshooting guidance or [ADD: contact installer] for an assessment.
Sources
– [ADD: manufacturer installation guide/spec sheet for your specific rubber flooring product—moisture/water-resistance claims and approved cleaning/sealant guidance]
– [ADD: manufacturer care and maintenance instructions for rubber flooring—approved cleaners and cleaning method]
– [ADD: manufacturer warranty terms—what maintenance is required to keep warranty coverage valid]
– U.S. EPA, mold and moisture guidance (moisture control and mold growth context)
– CDC, mold and dampness guidance (mold growth timeline on damp materials)
Frequently Asked Questions
How can I prevent water damage to rubber floors in high-moisture areas?
Use a regular cleaning routine that removes water, soap residue, and grit before they settle into the rubber floor pores. Place doormats and use absorbent rugs in entryways, bathrooms, gyms, or basements to reduce standing water and splashing. If your space is prone to leaks or flooding, address the source immediately and dry the area quickly with fans or a dehumidifier to limit swelling and mold risk.
What are the best ways to protect rubber flooring from spills and standing water?
Wipe spills promptly using a damp mop or microfiber cloth rather than letting liquid sit on the surface. For standing water, remove it as quickly as possible and then dry the floor thoroughly, paying attention to seams and edges where water can collect. Avoid harsh chemicals that can degrade rubber—use a rubber-safe cleaner recommended for your floor type and follow label dilution guidance.
Which cleaning methods should I avoid to prevent water damage on rubber floors?
Avoid soaking the floor with a wet mop, steam cleaner, or pressure washer, as excess moisture can seep into joints and underlayment. Don’t use aggressive solvents or bleach-based products, which may weaken rubber and reduce water resistance over time. Instead, use minimal water application, gentle pH-balanced cleaners, and dry-buff after cleaning to help prevent moisture retention.
Why do rubber floors swell or curl when exposed to water, and how do I stop it?
Water can penetrate through seams, damaged edges, or porous surface areas, causing the rubber to expand and adhesive layers to weaken. To stop it, seal vulnerable areas with a suitable floor-safe sealant (if compatible with your product) and repair any chips, cracks, or lifting tiles right away. Maintain stable humidity levels and ensure proper drainage or subfloor moisture control, especially in basements and laundry rooms.
What maintenance schedule helps reduce the risk of water damage to rubber flooring?
Sweep or vacuum regularly to remove debris that holds moisture and scratches the surface, and clean with a rubber-safe cleaner on a consistent basis (for many homes, weekly or biweekly). After any water exposure—such as mopping, spills, or wet weather—dry the floor promptly and check corners, seams, and transitions. Periodically inspect for wear, loosened seams, and edge gaps so you can prevent water from getting underneath the rubber before it becomes a larger problem.
📅 Last Updated: October 11, 2026 | Topic: How to prevent water damage to rubber floors? | Content verified for accuracy and freshness.
References
- Mold
https://en.wikipedia.org/wiki/Mold - Mold | US EPA
https://www.epa.gov/mold - https://www.cdc.gov/mold/default.htm
- WHO guidelines for indoor air quality: selected pollutants
https://www.who.int/publications/i/item/9789289002134 - Mold – Overview | Occupational Safety and Health Administration
https://www.osha.gov/mold - https://pubmed.ncbi.nlm.nih.gov/?term=prevent+indoor+dampness+and+mold
- https://www.cdc.gov/healthyhomes/mold/index.htm
- Google Scholar Google Scholar
https://scholar.google.com/scholar?q=prevent+water+damage+rubber+flooring - Google Scholar Google Scholar
https://scholar.google.com/scholar?q=moisture+control+resilient+flooring - Google Scholar Google Scholar
https://scholar.google.com/scholar?q=water+intrusion+subfloor+prevention+mold