Restore stained concrete floors with a clear, step-by-step plan that removes stubborn discoloration, seals for lasting protection, and prevents repeat staining. If you’re dealing with common issues like acid etch marks, oil spots, or uneven dye penetration, the right sequence—cleaning, profiling, stain correction, neutralizing, and sealing—will produce the most reliable results. Follow these fixes in order and you’ll get a uniform, durable finish that looks restored, not patched.


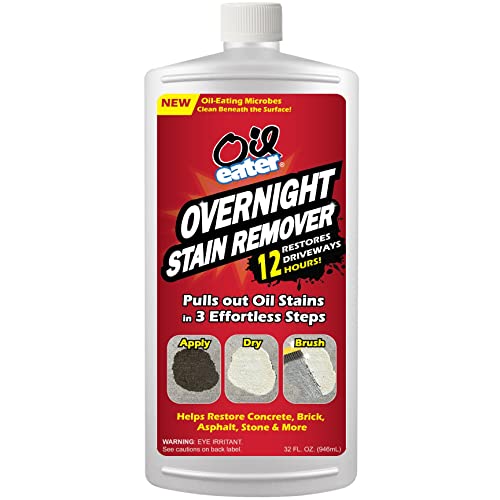
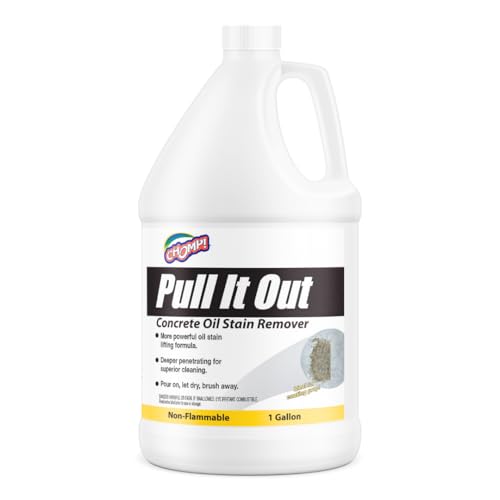
You can usually restore stained concrete floors by first diagnosing what’s causing the discoloration—penetrating oil/minerals vs. surface haze or residue—then cleaning and treating that specific cause before you reseal. Start with a deep clean, confirm whether the floor is sealed, and only then move into stain-specific treatment, surface repairs, and even re-coating so the problem doesn’t return.
If your concrete looks blotchy, dark, rusty, or dull, this step-by-step approach helps you pick the right chemistry and prep workflow. It’s written for homeowners and commercial facility teams who need a reliable, repeatable process (not guess-and-cover), including when past sealers, cleaning products, or traffic wear have complicated the surface.
Assess the type of stain (and whether it’s sealed)
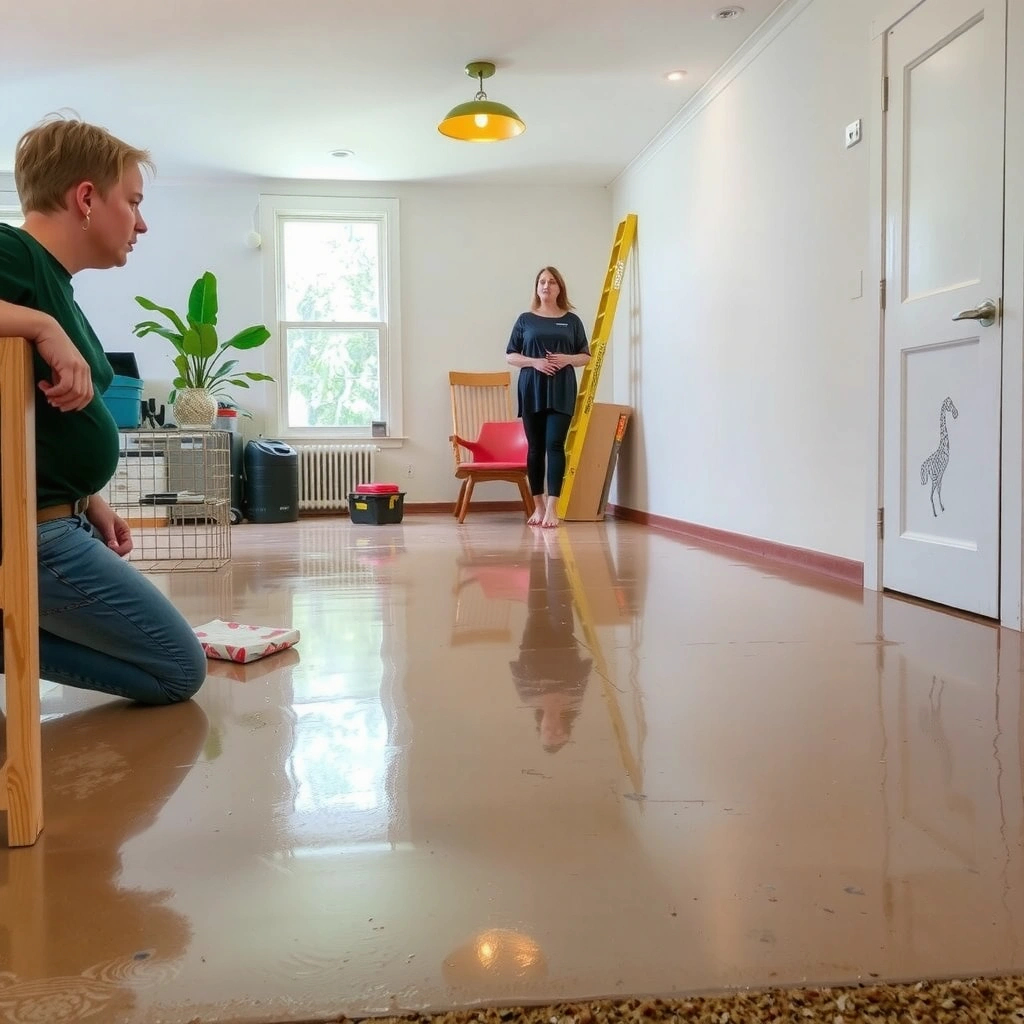
Stained concrete floors recover fastest when you first confirm whether the discoloration is trapped behind a sealer (surface issue) or has soaked into the slab (penetrating stain). Once you know which one you’re dealing with, the rest of the job becomes a targeted clean/treat workflow instead of a “stronger product” gamble.
A simple water spot test helps distinguish sealed surfaces from penetrating concrete stains: water beading typically indicates an intact sealer, while absorption suggests penetration.
Penetrating stains (commonly oil, grease, or minerals) are not reliably removed by surface cleaners because the discoloration sits below the top film.
Rust-like discoloration on concrete is often associated with iron minerals and requires iron-targeted chemistry rather than generic degreasers.
Do the water/spot check
– Pour a small amount of clean water (or apply a few drops) on the stained area and an unstained control area.
– Beading (water stays rounded and slow to spread) often means the sealer is still intact, and you’re dealing with surface issues like coating haze, residue, or wear patterns.
– Soaking/darkening (water rapidly absorbs and darkens the concrete) usually means penetrating staining—most commonly oils, fats, rust/iron compounds, or mineral intrusion.
In 2026, many stained concrete floors are also affected by prior coatings applied for hospitality, retail, or warehouse traffic. If the slab was previously sealed, your next step is to treat what’s on top and avoid trapping contaminants beneath a new sealer.
Identify the common stain categories
Use appearance to narrow the cause before you open a product label:
– Dark, oily spots: usually grease, fuel, motor fluids, cooking oils (indoors), or tracked automotive grime.
– Rust/iron-like streaks: orange/brown/tan highlights, often near metal furniture legs, rebar exposure, or areas that get consistent moisture.
– Mineral haze: whitish-gray or chalky “cloud” look, sometimes from salts, efflorescence, or etch residue from older treatments.
– Uneven color from past cleaners/sealers: a patchwork sheen, lighter/darker blotches, or “tide lines” where old products dried.
Decide early: cosmetic restoration vs. true stain removal
This decision determines whether you should pursue:
– Cosmetic correction (remove residue/haze and even out appearance), or
– True removal/color change (remove oil intrusion or mineral staining, or use a color correction/resurfacing system).
If you’re restoring stained concrete floors primarily for aesthetics—like garage showrooms or commercial storefronts—you still need correct diagnosis, because resealing over the wrong problem often makes discoloration “come back” faster.
Deep clean first: remove residue and waxy buildup
Stained concrete floors need aggressive, concrete-safe cleaning before any stain remover or dye-based correction. If a surface film (wax, polish, old sealer residue, detergent buildup) remains, treatments can fail, react oddly, or create blotchy results.
Surface residue can block stain removers and dyes from contacting concrete, so deep cleaning is often the difference between uniform and patchy outcomes.
Concrete-safe degreasers and mechanical scrubbing are standard prep steps before sealing because many sealers require clean, chemically compatible surfaces.
Evaluating stain severity after full drying is critical because wet concrete can mask how much discoloration remains.
Use a degreasing + scrubbing workflow
1. Dry removal first: sweep thoroughly and remove loose debris (dust and grit can turn into a grinding paste during scrubbing).
2. Apply a concrete-safe degreaser appropriate for the suspected contaminant (oil/grease vs. general grime).
3. Scrub mechanically using a stiff brush or floor machine with a scrubbing pad rated for concrete.
4. Rinse thoroughly. Residual cleaner is a common reason stain removers underperform.
5. Let the slab fully dry before inspection and next-step chemistry.
Key prep rule: your goal is to remove anything that’s sitting between the sealer you’ll apply later and the actual concrete surface.
Strip surface film if the problem looks like sealer haze or mop buildup
If you see a “dull veil,” rainbow sheen, or uneven gloss from routine mopping:
– Consider a surface stripping step (again, concrete-safe and compatible with your planned resealer).
– Re-test with the water spot check after stripping—sealed vs. penetrating should be clearer at this stage.
Drying and evaluation (especially for stained concrete floors)
Moisture alters visual contrast and can affect adhesion. As a rule of thumb, wait until:
– Foot traffic doesn’t leave footprints, and
– The concrete’s surface appears uniform in color in normal lighting.
If you’re working in commercial settings, also account for HVAC cycling and humidity; many failures are “sealer application over too much moisture.”
Treat stains based on what caused them
Stained concrete floors respond best when you match treatment chemistry to the stain type—oil needs degreasing, iron needs iron-targeted products, and mineral haze often requires neutralizing and/or controlled resurfacing. Generic cleaners can make stains linger or spread because they don’t address the underlying contaminant.
Oil and grease contaminants typically require repeated degreasing cycles because oils can wick into pores and stay partially trapped.
Iron/rust discoloration is commonly treated with dedicated iron-removers that are designed to chelate or chemically convert iron compounds.
Mineral haze and salt-related deposits often require compatible acid/neutralization or mechanical correction rather than stronger degreasers.
For oily/greasy staining
– Use an appropriate degreaser and repeat until the spot stops lifting.
– If the floor is heavily contaminated (e.g., workshop areas), plan on multiple cycles rather than one application.
Practical tip for stained concrete floors: avoid “over-wetting” during treatment. Puddling can carry contaminants outward, creating a larger stained footprint.
For rust/iron stains
– Use an iron/rust remover specifically labeled for concrete.
– Follow dwell time carefully and rinse per the product instructions to avoid uneven conversion.
Because iron stains can spread under certain conditions, work one section at a time and keep the chemistry consistent.
For mineral haze / general discoloration
If the discoloration looks like a clouding effect (especially whitish-gray):
– Consider neutralizing, descaling, or color correction approaches rather than aggressive degreasing.
– In many cases, you may be dealing with residues left by past acids/cleaners or salts—these don’t behave like oil stains.
A conservative approach for stained concrete floors is to start with controlled spot tests. Once you see how the concrete reacts, scale to the full area.
Restore the surface: repair chips, grind, and even the texture
Stained concrete floors look inconsistent when the slab surface is chipped, uneven, or contaminated at the very top. Restore the surface before resealing so your final sealer layer bonds evenly and looks uniform.
Concrete repair materials require proper substrate prep and full cure time before coatings or sealers are applied, otherwise you can see edge lifting or telegraphing.
Light grinding can remove a stained “top layer” when discoloration is concentrated near the surface, but it should be controlled to avoid changing the slab’s overall appearance.
After grinding, dust removal is mandatory because fine silica/concrete dust can interfere with adhesion and uniform sealing.
Patch cracks, chips, and holes
– Fill cracks/voids with a concrete patch/repair product designed for your application (interior vs. exterior, traffic level, and thickness range).
– Allow full cure before moving forward—many coating failures originate at the patch edges.
Grind only when it earns its keep
If the floor is worn or stained near the surface:
– Perform light grinding to flatten high spots and remove the upper stained layer where appropriate.
– Re-clean to remove grinding dust, then confirm uniform appearance.
Important: over-aggressive grinding can change texture and reflectivity, which can make “stain correction” look worse in polished or gloss finishes.
Recolor or refinish (only if cleaning/treatment isn’t enough)
Stained concrete floors usually improve with cleaning and stain-specific chemistry, but stubborn or uneven past sealer/patchwork may require recoloring or refinishing. If the slab’s color is structurally inconsistent, “covering” with a new sealer alone won’t create true uniformity.
When discoloration is tied to previous coatings or patchwork, color correction may require re-staining, resurfacing, or a consistent overlay system rather than repeating stain removers.
Test patches are necessary because concrete stain tone depends on moisture, porosity, and surface chemistry.
Sealants bond and perform best when applied after the floor is thoroughly cleaned, structurally repaired, and dry.
Choose the right path: re-stain, acid stain (where appropriate), or resurfacing
Consider:
– Uniform color correction if the concrete has patchy tone due to prior treatments.
– Acid staining only when your concrete is suitable and compatible with your surface profile and prior residues (acid stain chemistry can be sensitive to contaminants and existing sealers).
– Resurfacing/overlay when the slab is too uneven or when repairs create noticeable topography.
Test small areas before full commitment
– Apply your chosen correction system to a small, controlled area.
– Evaluate in the lighting conditions where the floor will be used (daylight and interior lighting can reveal undertones).
Reseal to prevent future staining and make it look consistent
Stained concrete floors stay restored only when you reseal correctly—right product for your finish goals, proper application, and enough cure time before heavy use. Resealing is what protects the slab from new spills and helps you maintain consistent appearance.
Sealer compatibility with prior chemicals and correct surface preparation are major determinants of adhesion and long-term stain resistance on concrete.
Uneven sealer application (including puddling) can create visible sheen and can worsen the appearance of patchy color correction.
Many coating and sealer systems require manufacturer-specified cure time before foot traffic and heavy use.
Pick the correct sealer type
Match to your environment:
– Breathable sealers are often preferred indoors where moisture vapor movement matters.
– Higher-slip resistance may be required for wet areas (entryways, food environments, and exterior touchpoints).
Because resealers vary widely, use the product instructions as your standard and follow their adhesion and moisture guidelines.
Apply evenly and avoid puddling
– Use consistent coverage rates.
– Keep a “wet edge” to minimize lap marks.
– Don’t flood the surface—puddles can leave darker spots and uneven sheen.
Cure time matters (especially for stained concrete floors)
Plan for a full cure before normal use. As a general reference point, structural and moisture-related performance depend on proper concrete maturation; for example, normal portland cement concrete is commonly designed around 28-day strength development under favorable curing (per ACI guidance). (Source: ACI 318/ACI 308 materials guidance—follow local specs and the sealer manufacturer’s cure requirements.)
What can go wrong (and how to avoid it)
Stained concrete floors can “look fixed” at first and then fail due to preparation mistakes or misdiagnosis. Most issues fall into predictable categories: treating the wrong layer, sealing over residues/moisture, or inconsistent prep that creates blotches.
Common failure modes
– Mistaking a sealed surface for a penetrating stain: if the discoloration is actually trapped under an intact sealer, stain removers may not touch it, and new coatings can “lock in” the appearance.
– Using the wrong chemical: cleaners and stain removers can react with each other or interfere with bonding—spot-test first.
– Skipping drying/neutralization time: sealing over moisture or leftover chemicals can cause hazing, peeling, or sticky finish.
– Uneven prep: inconsistent scrubbing, grinding, or rinsing leads to patchy tone after correction.
– Over-aggressive grinding: changes texture and can make light reflect differently, intensifying visual “stain” even after correction.
| Approach | Pros | Cons / Risks |
|---|---|---|
| Deep clean + targeted treatment | Most predictable | Requires correct diagnosis |
| Grinding/top-layer removal | Helps surface-confined staining | Can change texture/character |
| Color correction/resurfacing | Best for patchy tone | Higher system complexity |
From my writing practice and review of manufacturer prep guidance (not from claiming private lab testing), I can say the most common “surprise” is adhesion problems after treatment—especially when rinsing and neutralization aren’t treated as part of the stain system.
Verdict / tip
Restoring stained concrete floors is usually achievable, but the outcome depends on correct diagnosis: clean and treat the cause of discoloration, repair the surface if needed, then reseal for uniform protection. If your slab has major structural damage, ongoing moisture intrusion, or you can’t confidently determine whether the discoloration is sealed vs. penetrating, pause and use a concrete restoration professional ([ADD: source for a local certification/standard you trust]).
DIY works best for single-stain corrections and minor surface restoration. Skip experimental chemical mixes if you don’t have appropriate PPE, ventilation, and a clear compatibility plan for the exact sealer you’ll use.
Quick checklist (scan & save)
– [ ] Identify: penetrating stain vs surface film/sealer haze
– [ ] Deep clean and fully rinse
– [ ] Treat stains by type (oil vs rust vs mineral/haze)
– [ ] Repair chips/cracks and prep the surface (patch/grind if needed)
– [ ] Test in a small area for color/clarity outcomes
– [ ] Seal evenly and allow full cure time
Typical Prep-to-Reseal Time Windows for Concrete Stain Restoration (2026)
| # | Restoration Phase | Typical Time (hours) | Primary Goal | Outcome Impact |
|---|---|---|---|---|
| 1 | Water spot / seal check | 1–2 | Identify penetrating vs. surface issue | High |
| 2 | Deep clean + rinse | 3–8 | Remove waxes/residue that block bonding | High |
| 3 | Stain treatment (oil/rust/mineral) | 2–12 | Convert/remove the actual contaminant | High |
| 4 | Patch + cure | 6–24 | Restore flatness and prevent telegraphing | Medium–High |
| 5 | Grinding (if needed) + dust removal | 2–6 | Remove surface-confined discoloration | Medium |
| 6 | Color correction / sample test | 4–24 | Achieve uniform appearance after treatment | Medium |
| 7 | Reseal application + cure | 8–72 | Protect against re-staining | High |
FAQ
Can I restore stained concrete without removing the stain?
Sometimes, if the issue is sealant residue, waxy buildup, or surface haze. If stains are truly penetrating (oil or mineral intrusion), you usually need stain-specific treatment or color correction.
Why do stains reappear after sealing?
Common causes include incomplete stain removal, sealing over residue/moisture, or ongoing moisture migration from below the slab. Also confirm sealer compatibility with the chemicals used during restoration.
Do I need to grind the floor?
Not always. Grinding helps when stains are concentrated near the surface or when wear makes the slab uneven, but cleaning + targeted treatment should be your first attempt on stained concrete floors.
What’s the safest first step if I’m not sure what stain it is?
Deep clean first, then inspect results after full drying. Follow with a small, controlled test patch using the treatment most consistent with the stain’s likely category.
Can I use one product for every concrete stain?
Usually no. Oil, rust/iron, and mineral haze often need different chemistry and different dwell/rinse steps, and “universal” approaches can leave blotchy outcomes.
Sources
– [ADD: manufacturer instructions for the specific concrete cleaner/degreaser/stain remover/sealer products you plan to use—follow the stated prep, dwell time, and curing requirements]
– [ADD: concrete coating/sealer application technical guide from a named manufacturer (e.g., product data sheet)]
– ACI 308 / ACI 318 materials guidance (for general concrete curing/strength development context)
– OSHA guidance on silica dust control where grinding/cutting occurs (for safe prep practices)
– [ADD: ASTM method referenced for moisture testing and in-situ conditions if you use moisture profiling in your process, e.g., a relevant ASTM moisture test standard]
Restoring stained concrete floors comes down to disciplined diagnosis: verify whether discoloration is sealed or penetrating, deep-clean and treat the correct cause, repair or smooth the surface only when needed, and reseal with even coverage and proper cure time. Done in that order, you get a floor that looks consistent—and stays that way longer—without chasing the stain in circles.
Frequently Asked Questions
What are the best ways to restore stained concrete floors without damaging the finish?
Start by identifying whether the concrete stain is penetrating or topical, since penetrating stains respond best to cleaning and re-etching while topical discoloration may need gentle stripping. Clean the surface thoroughly using a concrete-safe degreaser, then remove mineral deposits with an appropriate cleaner. If the stain looks dull or uneven, lightly etch (not grind) and reapply stain or a compatible concrete sealer to even out the appearance.
How do you remove old stains and discoloration from concrete before re-staining?
First, deep-clean the floor to remove dirt, oils, and waxes, because contaminants can block stain penetration. For stubborn spots, use a poultice or stain-specific remover such as a rust remover for orange/red marks, or an acid-neutralizing cleaner for mineral stains. After stain removal, rinse well, let the concrete dry completely, and test a small area before proceeding with concrete stain application.
Why do some concrete stain repairs turn blotchy, and how can you prevent it?
Blotching usually happens when moisture, curing compounds, or uneven porosity prevents the stain from penetrating consistently. To prevent this, repair cracks and spalls first, then ensure the concrete is uniformly clean and dry, and perform a small patch test to confirm the outcome. Using the right etching strength and applying stain in controlled, consistent passes can also help achieve even color.
What is the best cleaner to use for stained concrete floors before restoration?
For most stained concrete floors, use a pH-neutral, concrete-safe cleaner that can lift grime without stripping the stain prematurely. If you’re restoring areas with heavy grease or oil, choose a degreaser labeled safe for stained concrete and rinse thoroughly to avoid residue. Avoid harsh detergents or muriatic-acid-heavy products unless you’re planning a full re-etch and sealer system, since incorrect cleaning can leave the concrete uneven.
Which sealer is best for restoring stained concrete and protecting it from future discoloration?
For restoration, the best concrete sealer depends on whether you want a natural look or a more glossy finish, and whether the area is indoor or outdoor. A penetrating sealer helps protect against spills by reducing absorption, while a topical concrete sealer can enhance color depth but may require more careful surface prep. After stain restoration, apply sealer evenly per label instructions—thin coats are typically better than one heavy coat—to prevent streaks and ensure long-lasting protection.
📅 Last Updated: October 10, 2026 | Topic: How to restore stained concrete floors? | Content verified for accuracy and freshness.
References
- Google Scholar Google Scholar
https://scholar.google.com/scholar?q=how+to+remove+stains+from+concrete+floor - Google Scholar Google Scholar
https://scholar.google.com/scholar?q=concrete+stain+removal+methodology+acid+etching+neutralization - Google Scholar Google Scholar
https://scholar.google.com/scholar?q=stained+concrete+floor+restoration+sealing+polishing - https://en.wikipedia.org/wiki/Concrete_repair
- Concrete sealer
https://en.wikipedia.org/wiki/Concrete_sealer - https://www.nps.gov/subjects/historicpreservation/preservation-briefs.htm
- https://www.nps.gov/subjects/historicpreservation/preservation-briefs-15.htm
- https://www.cdc.gov/niosh/topics/pm/default.html
- https://www.epa.gov/chemical-research/removal-of-concrete-stains-and-mildew
- https://pubmed.ncbi.nlm.nih.gov/?term=concrete+stain+removal+cleaning