You can install polished concrete floors around stairs cleanly and safely—if you follow a proven edge-detail approach that prevents cracking at the risers and lips. This guide answers how to cut, grind, and finish polished concrete to fit stair geometry, including how to handle transitions, expansion control, and traction on treads. Expect step-by-step direction on what to do first, what to avoid, and how to get a sharp, durable finish where stairs meet polished concrete.




If you want polished concrete around stairs, the key is planning the layout first, then finishing each stair surface (treads, nosing, and risers) with the right edge method so the sheen stays uniform and the edges don’t chip. Start by protecting stair edges and using wet/dry grinding plus crack/joint preparation so your polished concrete transition is durable at the exact geometry that fails first.
This guide is for homeowners, contractors, and installers working on polished concrete floors that must transition cleanly around stair geometry. It’s especially relevant when you’re polishing a slab that meets stair framing or concrete stairs and need tight, durable edges.
Assess stair conditions and plan your finish path
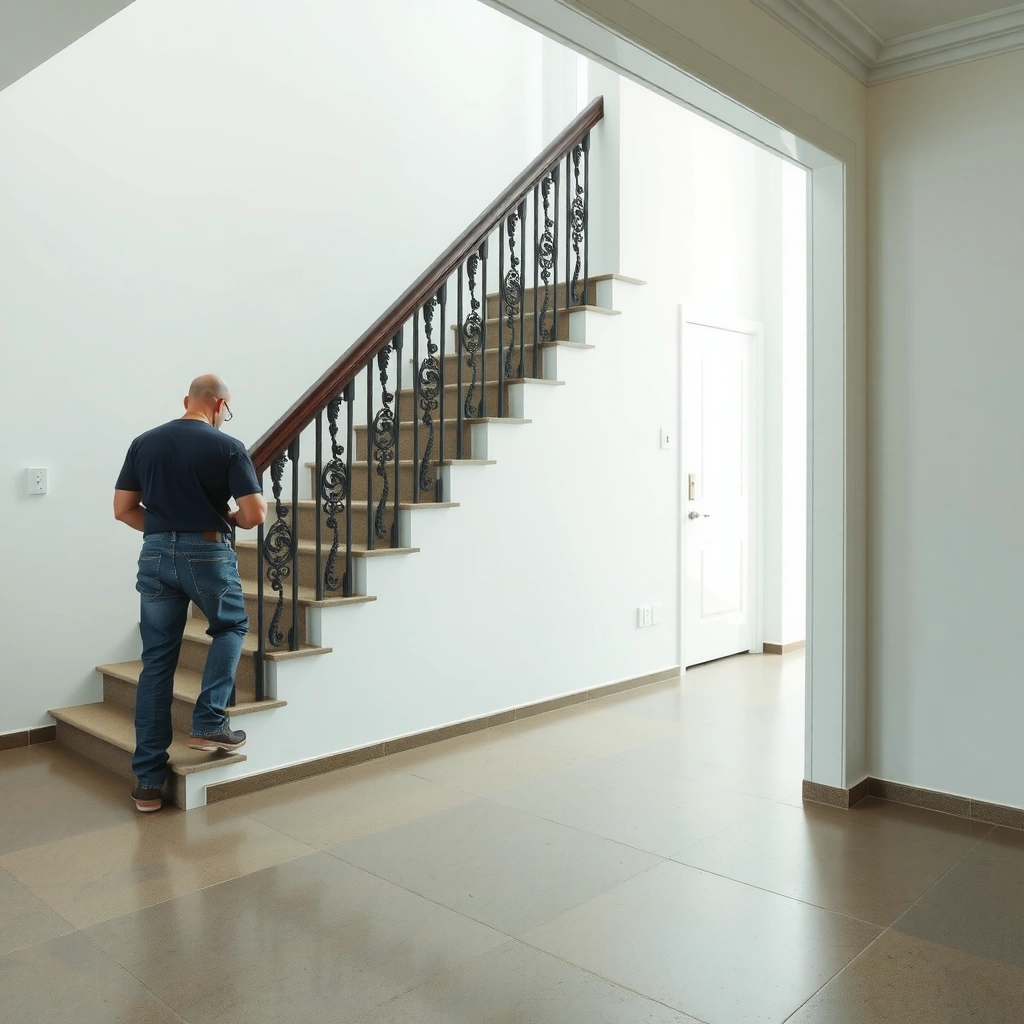
You get better results around stairs when you treat the stair surfaces as separate “finish zones” and plan how the polishing system will move across them. Before you touch a grinder, confirm what you’re actually polishing (tread, nosing, riser, or only the surrounding floor) and how joints/cracks must be honored.
Stair nosings are the highest-risk areas for polished concrete chipping because the edge is both load-bearing and more exposed to grinding-induced rounding if the finish path isn’t planned.
Polished concrete systems typically require honoring control joints and structural cracks to avoid reflective cracking and premature edge failure.
A planned finishing path that defines where you grind stops (and where you blend) is often the difference between a uniform sheen and visible seam “lines” at stair transitions.
Identify what you’re finishing (tread vs. nosing vs. surrounding floor)
Start by identifying what areas require polishing:
– Slab-to-stair transition: The interface where the slab meets the first tread/nosing and where level changes often occur.
– Full stair treads: The horizontal walking surface that must meet flatness and uniform sheen expectations.
– Nosing: The chamfer/rounded front edge; this is the most vulnerable to chipping.
– Risers: The vertical face; many polished looks avoid full high-gloss riser polishing to reduce glare and edge wear.
Each surface changes how you grind:
– Treads demand controlled flatness and consistent surface profile.
– Nosing demands edge-friendly abrasion and a deliberate stop pattern.
– Risers often need either a lighter polish approach or an intentionally designed finish profile to prevent visible tooling marks.
Map joints/cracks and decide how they’ll be treated
Joints and cracks aren’t cosmetic issues in polished concrete—they control where stress concentrates. Plan whether you will:
– Honor existing joints by maintaining a clean separation line through grinding and sealing, or
– Repair/prepare cracked areas with compatible patch materials, then polish without “burying” movement joints.
According to OSHA, respirable crystalline silica exposure limits apply during concrete grinding: the action level is 25 µg/m³ (8-hour TWA) (OSHA silica final rule, respirable crystalline silica; 2016). That’s relevant because joint/crack work often increases how long you grind near edges—more time means more dust risk.
Choose the edge finishing strategy before polishing begins
Decide up front whether stair edges will be finished using:
– Mechanical/abrasive edge finishing (e.g., careful grinding and polishing passes),
– A designed profile (chamfer/round profile maintained or recreated),
– Targeted patch-and-polish (repair first, then restore the intended edge geometry).
This decision determines your tooling plan, your stop points, and how you protect adjacent finishes.
Prepare the surface for polished concrete near stair edges
Surface prep determines whether your polished concrete looks continuous across stair geometry or develops “shadow lines” and low spots. Near stair edges, you need two things: level corrections and consistent profiling, while keeping slurry/dust from contaminating surrounding finished areas.
Unevenness at the stair line amplifies during polishing because grinding removes material where it’s accessible and leaves micro-dips where it isn’t.
Consistent profiling near nosing edges helps prevent post-polish “gloss bands,” where some zones polish deeper and reflect light differently.
Robust dust and slurry protection matters more on stairs because slurry can migrate into walls, rail bases, and cavities during edge work.
Remove contaminants and correct unevenness
Before grinding:
1. Remove coatings, curing compounds, paint, and adhesive residues (or they can cause blotchy polishing and poor bond of any repair patch).
2. Correct unevenness so grinding doesn’t create a visible dip at the stair line. This is especially common when the stair component was poured or formed separately from the slab.
From a standards perspective, concrete compressive testing and repair qualification rely on standardized sampling and measurement. For example, ASTM C39 uses specific specimen sizes such as 6 in. × 12 in. cylinders (or 4 in. × 8 in.) (ASTM C39/C39M compressive strength standard; applies for strength evaluation). While your project may not require cylinder testing, it underscores why material consistency and verified prep matter before finish work.
Clean and profile consistently (especially around nosing edges)
When polishing transitions around nosing:
– Keep the surface profile consistent on both sides of the transition.
– Avoid grinding patterns that undercut the nosing (which can cause early spalls).
– Plan your “workfront” so the grinder head reaches the nosing without aggressively rounding the edge.
Protect adjacent areas (railings, drywall, and finished surfaces)
Stair areas are tight. Dust and slurry control should include:
– Barrier sheeting behind rail bases and at wall lines,
– Careful containment under stair edges,
– Wet slurry management if your process uses wet grinding (or a controlled dust extraction system if dry grinding is specified by your polishing setup).
Because OSHA’s silica limits apply to grinding, you should treat dust control as a safety system, not a cleanup chore—OSHA lists the respirable crystalline silica PEL at 50 µg/m³ (8-hour TWA) (OSHA silica final rule; 2016).
Practical scan: “gloss shadow” risk mapping
A quick visual method before you polish: use raking light (side lighting) to locate low spots and tooling access limits. Where your equipment can’t reach evenly, you may need:
– A targeted edge pass (different tooling),
– A temporary stop-and-grind correction,
– Or a repair to rebuild the geometry so the same polish depth is achievable.
Grind and polish safely around treads, nosing, and risers
You’ll get a durable, attractive stair finish when you grind in controlled sequences and treat edge finishing as a dedicated step—not an afterthought. Use your system’s approved grit progression and manage access limits so treads and nosing achieve the same surface profile and sheen.
A correct grinding sequence—coarse to finer—builds uniformity and reduces the risk of uneven reflections at stair edges.
Stair treads should be kept flatter during grinding to prevent rocking surfaces and to maintain consistent gloss across the walking plane.
Nosing edges often need intentional edge-friendly finishing so you avoid undercutting that leads to chipping under impact and foot traffic.
Use the grinding sequence your system specifies
Most polished concrete systems follow a sequence like:
– Coarse grinding to remove surface imperfections,
– Intermediate steps to establish uniform profile,
– Finer steps to build sheen.
Follow your chosen system’s documentation for grit order and dwell/pressure requirements. If your system includes stain/silicate chemistry or densifiers, incorporate them only at the specified stages—otherwise you can get uneven darkening or variable gloss across the stair.
Work in small sections near stairs to maintain tread flatness
Stairs demand short work cycles:
– Polish tread sections while controlling flatness and avoiding localized rounding.
– Edge-finish the nosing with narrower passes that maintain the intended geometry.
– Manage transitions between tread and riser so tooling doesn’t “dig” into corners.
Keep edge finishing intentional (this is where failures show)
Edge failures tend to show up first as:
– Micro-spalls along the nosing,
– Gloss bands where the surface profile differs,
– Tool marks that remain visible in low lighting.
So, plan your tooling reach and your stop pattern. A continuous blend can be visually appealing, but durability comes from maintaining a stable, well-prepared edge—not from trying to mechanically grind every surface the same way.
Decision snapshot: edge method vs. visible risk
The table below summarizes practical tradeoffs installers commonly manage when polishing stair geometry:
Stair Surface Finishing Choices vs. Typical Defect Risk
| # | Stair Finish Zone | Best-Fit Finish Intent | Most Common Risk | Relative Risk Level |
|---|---|---|---|---|
| 1 | Tread (walking plane) | Flatness + uniform profile | Uneven sheen bands | ★★☆☆☆ |
| 2 | Nosing (leading edge) | Edge durability + controlled rounding | Chipping/spalling | ★★★☆☆ |
| 3 | Riser (vertical face) | Tool-mark control + glare control | Visible tooling marks | ★★☆☆☆ |
| 4 | Slab-to-stair junction line | Seam invisibility + continuity | Visible transition “lines” | ★★☆☆☆ |
| 5 | Control joint locations | Movement-safe honoring | Reflective joint visibility | ★★★☆☆ |
| 6 | Edge repairs (patch zones) | Uniform repair thickness | Patch mottling | ★★☆☆☆ |
| 7 | Adjacent floor field near stairs | Consistent sheen reach | Sheen mismatch at corners | ★☆☆☆☆ |
Install/repair before polishing to avoid brittle edges
Don’t rely on polishing to “fix” weak edges—repair and leveling must happen before grinding and finishing. If you patch too late or with incompatible materials, the finished nosing can look great initially and then fail early under traffic and impact.
Spalls, honeycombs, and surface voids near stair edges should be repaired before polishing so grinding doesn’t expose weak concrete.
Level mismatches at the slab-to-stair boundary create thin feather edges that wear faster under foot traffic.
Use patch and resurfacer products compatible with your polished concrete workflow and respect manufacturer cure times before grinding.
Patch spalls, honeycombs, and surface voids
Stairs often have edge damage from formwork, handling, or prior construction. Repair before polishing so:
– The edge geometry is rebuilt (not merely smoothed),
– You don’t grind through weak material and “reopen” voids.
Address mismatches at the slab-to-stair boundary
Common issues include:– A subtle height step that becomes obvious after polishing,
– Thin repairs that are easy to over-grind,
– Feather edges that crack or abrade quickly.
Plan your repair thickness to support a durable, polishable profile—then polish to match the surrounding system profile.
Confirm underlayment/resurfacer compatibility (if used)
If you’re using an underlayment or resurfacer, confirm compatibility with:
– Your grinder and chemistry workflow,
– Your densifier/sealer requirements,
– Cure and moisture conditions.
[ADD: source for compatibility guidance — manufacturer spec or technical bulletin explaining whether the chosen resurfacer is approved for polished concrete systems and what cure timeline is required.]
What can go wrong (and how to prevent it)
Stair polished concrete problems usually show up in three places: the nosing edge, the transition seam, and the sheen across the tread. Prevent issues by controlling prep, honoring joints, and keeping edge finishing intentional.
Chipping at stair nosing typically starts with weak or under-supported concrete combined with edge rounding/undercutting during grinding.
Visible “lines” at transitions are commonly caused by inconsistent grinding depth or patch/joint decisions made after the polishing workflow has already progressed.
Uneven sheen on treads vs. the surrounding field often results from tooling access limits that prevent the same surface profile from being achieved near corners.
Fast comparison: avoid common stair failure modes
Common root causes (and what to do early)
– Aggressive rounding of nosing: Your finish may look smoother but fail faster—edge geometry should remain supported.
– Polishing over untreated joints/cracks: Even if the crack “looks fine” today, movement can create a seam later.
– Inconsistent patch finishing: Repairs can polish differently than surrounding concrete, especially near edges where reflections are strongest.
[ADD: source for joint handling guidance — manufacturer or system specification describing how control joints are honored during grinding/sealing in polished concrete.]
Verdict: best-practice approach (and who should skip DIY)
The most reliable way to get polished concrete around stairs is to treat treads, nosing, and adjacent floor as separate finishing zones—prep and repair first, then grind/polish in controlled passes with edge-focused technique. The downside is time, dust control complexity, and the higher likelihood of visible seam lines if tooling access is constrained—so DIY makes sense only for very simple stair geometries and when you can control safety and containment.
Stair polishing works best when the workflow is zone-based, not “one big continuous grind,” because edges and access limits require different tooling and tolerances.
Dust control during concrete grinding must consider respirable crystalline silica exposure limits established by OSHA.
If you cannot protect stair areas from slurry migration and cannot maintain consistent edge geometry, hiring an experienced polished concrete installer is usually the safer value decision.
When to DIY (and when not to)
DIY is most reasonable if:
– Stair edges are intact (minimal spalls/voids),
– The finish plan clearly defines where you stop grinding to avoid seam lines,
– You have the correct equipment and dust/silica controls.
Skip DIY and hire a crew if:
– There are significant edge failures requiring rebuild/repair at scale,
– You don’t have professional polishing equipment with edge control,
– Your stair area is enclosed and you can’t establish safe containment and cleanup.
Quick checklist to save while you work
– [ ] Identify joints/cracks and plan how they’ll be honored at stair transitions
– [ ] Repair spalls/voids and correct level differences before polishing
– [ ] Protect railings/walls and set up dust control for stair-area grinding
– [ ] Grind in stages from coarse to fine, with edge-focused passes near nosing
– [ ] Verify consistent sheen across treads and surrounding floor before final finishing
– [ ] Confirm final seal/coating (if used) is rated for stair traffic and compatible with your polish system
– [ ] Do a careful visual check at lighting angles to spot seam/patch lines early
FAQ
Can I polish concrete around stairs without finishing the risers?
Yes—if your design only targets the surrounding floor and the stair tread/nosing area. You’ll still need a deliberate transition line and edge treatment so the polished zone doesn’t chip or look uneven next to untreated surfaces.
Should I grind across stair edges to get a continuous sheen?
Usually you’ll want the finish to look continuous, but you shouldn’t indiscriminately grind so you damage the stair edge. The goal is a consistent surface profile and a durable edge, not simply blending everything.
What’s the biggest cause of chipping at the nosing?
Most often it’s weak or damaged concrete at the edge, incorrect repair timing, or edge rounding/undercutting during grinding. Fix the prep and edge finishing steps first—those determine durability.
Do expansion/control joints need special handling?
Yes. Joints and cracks are structural/functional, and polished concrete systems typically require honoring them rather than burying them. If you’re unsure how yours should be treated, check the joint/seal recommendations from your concrete system documentation: [ADD: source for joint handling guidance].
Conclusion
Polished concrete around stairs looks best and lasts longest when you plan the finish path first and then finish treads, nosing, and adjacent floor as separate zones. Repair and level corrections must happen before grinding, joints must be honored rather than buried, and dust/safety controls are non-negotiable during edge work. If your stair edges are fragile or you can’t control slurry, seams, and silica dust exposure, the most practical option is hiring an experienced polished concrete installer for the stair portion.
Sources
– [ADD: manufacturer documentation for polished concrete system you’re using—grinding sequence, compatible repairs/patches, and final seal/coating requirements]
– [ADD: manufacturer/specification guidance for concrete repair materials used near edges—cure times, compatibility, and surface prep]
– [ADD: primary reference on concrete joints/control joint purpose and treatment—e.g., relevant ASTM/ACI guidance]
– OSHA respirable crystalline silica standards (action level and PEL; 2016)
– ASTM C39/C39M (compressive strength testing specimen size standards)
Frequently Asked Questions
What’s the best way to install polished concrete flooring around stairs?
To install polished concrete around stairs, measure each tread and riser carefully and plan for tight reveals where the slab meets the stair edges. Use a compatible flooring system (typically a thinset-set concrete or concrete look tile approach) so the material can be cut accurately for nosing and corners. Finish with proper edging or stair trim and ensure every joint is sealed or filled to prevent moisture intrusion and cracking at stress points.
How do you cut polished concrete to fit stair treads and risers cleanly?
Use a wet saw with a diamond blade designed for concrete and stone to minimize chipping along the polished surface areas. Dry-fit each piece and label sections by stair position so you can match patterns and keep the polished concrete look consistent. After installation, use a grinder and diamond polishing pads only where necessary, then apply a compatible concrete sealer to protect cut edges and maintain the polished concrete finish.
Why do polished concrete floors crack around stairs, and how can you prevent it?
Cracking commonly happens because stairs experience movement and higher impact loads, and because rigid materials can’t flex at transitions. Prevent issues by using the correct underlayment or substrate, installing expansion joints or movement joints where needed, and using the right thinset/adhesive with a suitable mortar bed thickness. Also verify the subfloor is flat and properly prepared—uneven surfaces increase stress on corners and edges near the stair nosing.
Which adhesive and underlayment are recommended for installing polished concrete around stairs?
For polished concrete flooring installations near stairs, choose an adhesive and thinset that is rated for interior commercial or residential use, with good bond strength and crack resistance. If you’re installing concrete tiles or concrete-look products, a high-quality modified thinset is often used, while the underlayment should be selected to ensure stability and minimal deflection. Always follow the manufacturer’s installation instructions and confirm moisture conditions so the polished concrete remains durable and slip-resistant.
How do you seal and finish the edges where polished concrete meets stair trim?
After cutting and installing around stair edges, seal exposed cut lines with a product compatible with polished concrete or the flooring system you used. Use a grout/epoxy or edge filler designed for concrete surfaces, then apply a clear sealer to protect from wear, moisture, and staining—especially in the high-traffic stair zone. Finally, install stair nosing or edge trim securely and verify the final profile is smooth to prevent snagging and to keep the polished concrete floor looking uniform.
📅 Last Updated: October 10, 2026 | Topic: How to install around stairs polished concrete floors? | Content verified for accuracy and freshness.
References
- Polished concrete
https://en.wikipedia.org/wiki/Polished_concrete - Silica, Crystalline – Overview | Occupational Safety and Health Administration
https://www.osha.gov/silica - Silica and Worker Health | Silica | CDC
https://www.cdc.gov/niosh/topics/silica/ - Google Scholar Google Scholar
https://scholar.google.com/scholar?q=how+to+install+polished+concrete+floor+around+stairs - Google Scholar Google Scholar
https://scholar.google.com/scholar?q=polished+concrete+stair+edge+grinding+detailing - Google Scholar Google Scholar
https://scholar.google.com/scholar?q=concrete+floor+polishing+process+including+edges+and+corners - Google Scholar Google Scholar
https://scholar.google.com/scholar?q=How+to+install+around+stairs+polished+concrete+floors? - How to install around stairs polished concrete floors? – Search results
https://en.wikipedia.org/wiki/Special:Search?search=How+to+install+around+stairs+polished+concrete+floors? - https://www.ncbi.nlm.nih.gov/search/research-articles/?term=How+to+install+around+stairs+polished+concrete+floors?