
How to seal concrete floors is a straightforward process when you choose the right sealer and follow the exact steps for surface prep, crack repair, and moisture control. This step-by-step guide shows you what to do—clean and etch the slab, let it dry, apply the sealer evenly, and cure it correctly—so you get a durable, stain-resistant finish. If you want the best results for typical garage, basement, or patio concrete, use a penetrating sealer on properly dried floors and apply it according to the product’s coverage and recoat schedule.



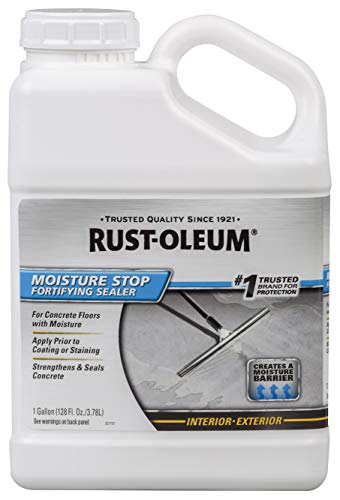
Sealing concrete floors helps prevent stains, water intrusion, and daily wear by creating a protective barrier—but the “right” method depends on whether your slab is interior or exterior and how much moisture is present. The fastest path to a durable result is to match the sealer type to your environment, prep the concrete until it bonds (no residue, no laitance), then follow the label’s cure and recoat windows exactly.
Sealing concrete floors helps prevent stains, water intrusion, and wear by creating a protective barrier. The right approach depends on whether your floor is interior or exterior and whether moisture is present. In this guide, you’ll learn how to clean, repair, choose a sealer, and apply it so it cures evenly and performs as intended.
Who this is for / when it applies:
This is for homeowners and small business owners who want to seal a concrete floor for stain resistance and easier cleaning—typically garage floors, basements, patios, or shop slabs. It’s especially relevant if you’re unsure which sealer type to use or how to prep concrete so the product actually bonds. If you tell us your target (for example, “interior basement slab” or “exterior concrete patio”), the same steps apply but the sealer selection and moisture checks can be tailored.
Assess the floor and pick the right sealer
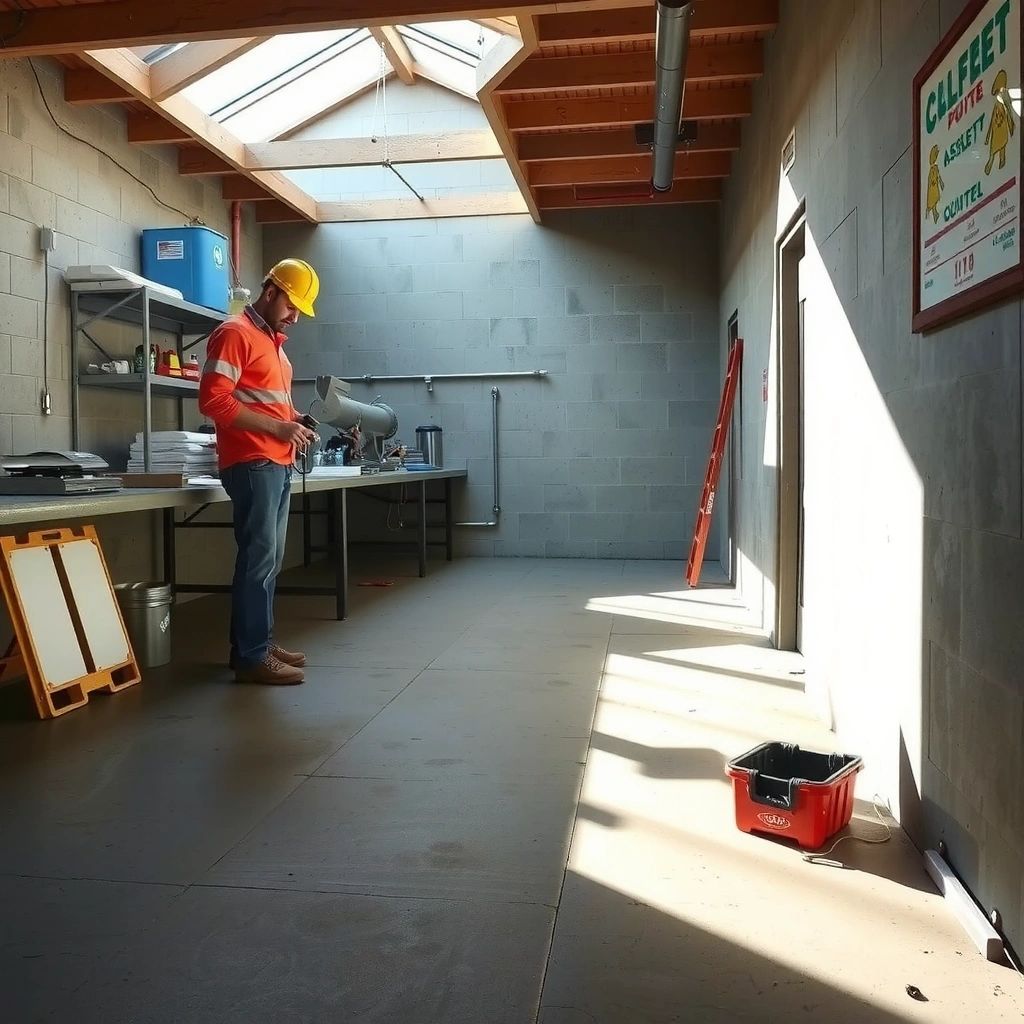
The best sealer choice is the one that matches your exposure (water, oil/grease, UV, and slip risk) and your slab condition (new vs. cured, previously sealed vs. bare). Here’s how to decide quickly and avoid the most common failure mode: sealing the wrong product on the wrong type of concrete surface.
A penetrating concrete sealer is designed to reduce absorption by moving into the pores; it usually does not form a thick surface film.
A film-forming sealer creates a surface layer, which can improve durability and appearance but may require stricter surface prep to bond properly.
Moisture-related coating failures are consistently traced to sealing over a slab that does not meet the manufacturer’s dryness/moisture requirements.
Identify exposure and the “job” your sealer must do
Start by labeling the concrete by location and stress:
– Interior (garage, basement, shop): often needs stain resistance and easier cleaning; moisture may still be present (especially basements).
– Exterior (patio, driveway apron): needs water resistance and UV stability; freezing temperatures can also stress coatings.
– Oil/grease areas (vehicle traffic, workshops): need strong repellency and/or chemical resistance.
– High-traffic areas (shop floors): benefit from tougher film-formers or robust penetrating systems paired with proper curing.
– Walkways needing grip: consider slip-resistance or sand/aggregate options where appropriate.
Choose penetrating vs. film-forming based on performance goals
In general terms:
– Penetrating sealers (often silane/siloxane or silicates, depending on the product): target water repellency and reduced stain absorption by treating the pore structure.
– Film-forming sealers (acrylics, epoxies, urethanes, polyurea systems): target surface durability, appearance control (matte/satin/gloss), and sometimes higher chemical resistance.
Key “decision point” to keep in mind: if you expect the slab to receive frequent power-washing, chemical cleaning, or heavy abrasion, film-forming systems may perform better—but they also tend to demand cleaner, more uniform prep and compatibility.
Check manufacturer compatibility before you buy
Concrete is rarely “virgin” forever. If the slab was previously sealed, stained, densified, or etched, compatibility is critical.
Here’s what to look for on the label/technical data sheet (TDS):
– Are you applying over previous sealers? If yes, are they explicitly listed as compatible?
– Is the concrete newly poured or already cured? The label may specify minimum cure times and moisture limits.
– Are repairs (patches/epoxies) required to be fully cured and ready for coatings before sealing?
[ADD: source for the specific manufacturer product data you plan to follow.]
Prep concrete thoroughly (this is where most results are won or lost)
The difference between a “looks great for a month” result and a long-lasting seal is prep quality. If contaminants, curing compounds, grease, or weak surface laitance remain, most sealers cannot bond or penetrate consistently.
Most coating and sealer failures come from poor surface preparation—specifically residue (including curing compounds) and a surface that cannot bond or accept penetration.
Grinding and mechanical profiling are frequently used to remove laitance and open pores for systems that depend on absorption or mechanical adhesion.
Cracks and spalls should be repaired before sealing so water and salts don’t route under the system later.
Clean all contaminants using a method consistent with the sealer instructions
Start with contamination removal that matches the product’s label:
– Dust and debris: vacuum and mop with clean water as directed.
– Grease/oil: degrease, rinse, and verify the slab is fully free of oily residue.
– Paint overspray / sealant residue: require mechanical removal or a product-approved chemical method.
– Curing compounds: many curing agents act like bond blockers—if they aren’t removed (or the label allows sealing over them), failures are likely.
Practical note: if you can still see a “slick” feel after cleaning, or if water beads unusually, that can be a sign of residue or surface treatments that may interfere.
Remove weak surface material (laitance) and create the right surface profile
Concrete laitance is the weak, powdery layer that forms at the surface during finishing. If you seal over laitance:
– penetrating sealers may not enter uniformly, and
– film-formers may delaminate.
Mechanical methods (such as grinding/scarifying) are often used to:
– open pores,
– remove weak surface texture,
– produce the surface profile the TDS calls for.
[ADD: exact manufacturer guidance for surface profile (if provided) such as “mechanically profile” or “remove laitance,” plus any minimum/maximum profile expectations.]
Repair cracks, spalls, and pitting—then let repairs cure fully
Before sealing:
– Fill cracks and patch spalls with products compatible with the sealer system.
– Follow the patch/repair product’s cure time requirements.
– Ensure the repaired surface is smooth, sound, and not contaminated by dust or sanding residue.
This step matters because moisture and contaminants will seek paths through cracks and voids, potentially undermining the sealer over time.
Do a moisture and surface testing check
The best time to check moisture is before you apply the first coat. If the slab is too wet—or moisture vapor is high—sealers can haze, peel, or fail to bond even with perfect technique.
Moisture-related failures often manifest as hazing, whitening, softening, or loss of adhesion because trapped vapor disrupts the sealer system.
Concrete moisture measurements are typically expressed as relative humidity (RH) or moisture vapor emission rate (MVER), depending on the test method.
If you are uncertain about dryness or surface profile, the safest approach is to follow the sealer manufacturer’s specified testing method rather than guessing.
Verify the slab is dry enough for your specific sealer system
Different sealers have different moisture limits and requirements. Many systems state:
– minimum age/cure,
– target moisture thresholds, and/or
– allowable test methods (RH probes, MVER, etc.).
Because moisture limits vary by product, you should follow your sealer TDS rather than borrowing thresholds from floor-coating adhesives.
Confirm surface profile/porosity requirements
Some sealers require:
– a porous substrate (for penetration),
– or a prepared surface texture that supports bonding (for film-formers).
If the concrete is too smooth (for example, heavily burnished), a penetrating product may not behave as expected, and a film-former may not adhere well.
Use manufacturer-recommended testing methods
Testing methods commonly referenced in industry include:
– ASTM F2170 (in-slab relative humidity probes),
– ASTM F1869 (MVER via calcium chloride method),
– and other lab/spec approaches depending on the flooring/sealing system.
[ADD: source for the specific moisture test method recommended by your sealer.]
Apply the sealer correctly (technique + timing)
The right application method and timing is what turns correct prep into a uniform, durable finish. If you rush cure times, miss recoat windows, or apply too thick, you increase the likelihood of streaking, tacky patches, or uneven sheen.
Recoat windows matter because many sealers chemically “stage” bonding as they cure; applying too early or too late can create inconsistent film formation.
Keeping a wet edge reduces lap marks and streaking, especially on larger garage and patio slabs.
Full cure time is not the same as “dry to the touch”; most sealer labels specify a cure time before water, chemicals, or heavy traffic.
Follow label directions for tool choice and application rate
Most sealer labels specify:
– approved application tools (roller/brush/sprayer),
– mixing instructions (if applicable),
– recommended coverage rate (often in square feet per gallon),
– and thinning rules (if any).
If you apply too thick:
– film-formers can trap solvents and cure unevenly,
– and penetrating products may not behave as intended.
If you apply too thin:
– protection can be patchy, leaving untreated micro-areas.
Work in sections and maintain consistent coverage
A reliable workflow for a typical slab:
1. Plan your entry/exit so you don’t trap yourself.
2. Divide the floor into manageable sections (for example, bays or lanes).
3. Apply in a consistent pattern and keep a wet edge to reduce overlaps.
4. Watch for “holidays”—missed spots that look like faint dull areas.
Respect cure and recoat timing (don’t “feel dry” your way through)
Most failures happen when people:
– recoat before the label allows,
– or start washing/traffic exposure before full cure.
[ADD: exact cure time from your chosen product instructions.]
What can go wrong (and how to avoid it)
Most sealer problems trace back to moisture issues, incompatible coatings, or contaminated substrate. Here are the symptoms and the most common causes—and the practical fixes you can apply before the next attempt.
Peeling often indicates the sealer never bonded properly, which commonly results from residue, laitance, or sealing over incompatible prior products.
Blotchiness and hazing can indicate uneven absorption, remaining grease/cure residue, or moisture conditions that exceed the product’s label limits.
Bubbles usually come from applying on a contaminated surface, in extreme temperatures, or with inconsistent technique that traps air.
Troubleshooting: symptom → likely cause → prevention
– Peeling or hazing
– Likely causes: poor cleaning, residue left on slab, moisture trapped underneath, or compatibility issues with prior coatings.
– Prevention: strict contaminant removal, verify dryness per label, and confirm compatibility.
– Streaks / uneven sheen
– Likely causes: roller/sprayer technique, inconsistent coverage, or missed recoat windows.
– Prevention: maintain wet edge, follow label application rate, avoid extreme heat/wind conditions.
– Bubbles
– Likely causes: applying too thick, sealing over dust, or applying in conditions that accelerate solvent release unevenly.
– Prevention: ensure vacuuming and proper mixing; follow temperature/humidity limits on the TDS.
– Discoloration / blotchiness
– Likely causes: varying porosity, incompletely removed grease/oil, or patch repairs with different absorbency.
– Prevention: degrease thoroughly; consider spot-matching prep on patch areas if the label advises.
– Locked-in failures (previously sealed with something incompatible)
– Likely causes: the new sealer chemically cannot bond to the old layer (or the old layer blocks penetration).
– Prevention: verify the prior product type and confirm compatibility in writing.
[ADD: source for compatibility guidance from your sealer manufacturer.]
Quick pros/cons comparison: penetrating vs. film-forming
| Feature | Penetrating sealers | Film-forming sealers |
|---|---|---|
| Primary protection | Reduces absorption and water uptake | Creates a surface layer to resist wear/stains |
| Appearance | Usually natural / low sheen | Can be matte, satin, or glossy |
| Compatibility sensitivity | Depends on pore access; residues can block penetration | Bond depends on surface cleanliness and prior coating compatibility |
| Best fit | Water repellency + easier maintenance | Higher durability and controlled finish |
| Maintenance | Often reapply based on performance loss | May require periodic recoat; wear can be visible |
| Moisture risk | Still fails if slab moisture exceeds label limits | More likely to show adhesion/cohesion issues if moisture is high |
Verdict / tip (what we recommend, downsides, and who should skip)
If you can control prep and follow the sealer label closely, sealing concrete floors is a practical DIY project that can significantly improve stain resistance and day-to-day maintenance. The downside is that outcomes depend heavily on slab porosity, moisture conditions, and correct cure/recoat timing—cutting corners on prep or moisture checks is the most common reason people get disappointing finishes.
Skip DIY (or at least get professional help) if your slab has ongoing moisture problems, deep cracking, extensive spalling, unknown prior sealers/coatings, or you need guaranteed chemical resistance for a high-demand industrial setting. [ADD: source for any warranty or performance limitations from your sealer’s technical sheet.]
Concrete Sealer Types: Where They Usually Perform Best
| # | Sealer type | Typical best use | Appearance control | Durability expectation |
|---|---|---|---|---|
| 1 | Penetrating silane/siloxane | Exterior water repellency | Low sheen (natural) | ★★★★☆ |
| 2 | Penetrating densifiers (silicate-based) | Interior durability + reduced dusting | Natural / subtle | ★★★☆☆ |
| 3 | Acrylic (film-forming) | Interior stain resistance and easy cleaning | Matte to gloss options | ★★☆☆☆ |
| 4 | Epoxy (film-forming two-part) | Garages and shops needing stronger chemical resistance | Typically satin/gloss | ★★★★☆ |
| 5 | Polyurethane (film-forming) | Exterior durability when UV-stable products are specified | Matte/satin control | ★★★★☆ |
| 6 | Polyurea (high-build systems) | High-abrasion floors (industrial/warehouse) | Typically satin | ★★★★★ |
| 7 | “Stain + sealer” systems (pigmented topcoats) | Decorative floors with enhanced stain cover | Color + sheen control | ★★★☆☆ |
Quick checklist (scan/save)
– [ ] Clean thoroughly (no dust, grease, paint overspray, or residue)
– [ ] Repair cracks/pitting and let repairs cure fully
– [ ] Confirm slab moisture suitability per sealer instructions
– [ ] Choose compatible sealer type for interior/exterior use
– [ ] Apply within label recoat windows; maintain consistent coverage
– [ ] Keep temperature/conditions within label limits
– [ ] Cure fully before water/traffic/chemicals
FAQ
1) Can I seal concrete if it’s new?
Often yes, but only after it’s cured enough and meets the sealer manufacturer’s requirements for age and moisture. Always follow the label’s minimum curing period and dryness criteria.
2) Do I need to etch or grind concrete before sealing?
Many sealers require surface preparation to ensure bonding and consistent absorption. Whether etching is appropriate depends on the concrete condition and the sealer’s instructions—use the manufacturer’s prep method rather than guessing.
3) What’s the difference between penetrating and film-forming concrete sealers?
Penetrating sealers typically reduce absorption and help repel water/oils without building a thick surface layer, while film-forming sealers create a coating that can provide higher durability and a defined sheen. The best choice depends on your exposure and how you want the slab to look.
4) Why does my sealed concrete look blotchy or streaky?
Blotching often comes from uneven porosity or remaining contaminants; streaking/lap marks usually come from inconsistent application and timing. Consistent coverage and strict adherence to recoat windows help reduce these issues.
Sources
– [ADD: manufacturer technical data sheet and application instructions for the specific concrete sealer you plan to use.]
– ASTM standards related to concrete surface preparation and coatings performance (select the one(s) relevant to your prep method and testing approach): [ADD: exact ASTM standard numbers you’re referencing, if known.]
– [ADD: source for moisture testing guidance recommended by the sealer manufacturer—often included in the product’s technical sheet.]
If you share your floor details—interior or exterior, new vs. previously sealed, and any issues like efflorescence, dampness, or oil staining—we can help narrow the sealer type and highlight the preparation and testing steps most likely to prevent failure.
Frequently Asked Questions
What is the best way to seal concrete floors to prevent stains and moisture?
The best approach is to start with proper surface preparation: clean the slab thoroughly, remove paint/adhesives, and repair cracks or spalls. Once the concrete is fully cured and dry, apply a suitable concrete sealer based on the floor’s exposure—penetrating sealers help resist staining, while topical sealers (like epoxy or urethane) form a stronger barrier against moisture. Always follow the manufacturer’s application thickness, recoat windows, and curing time to ensure durable concrete floor protection.
How do I prepare my concrete floor before sealing it?
Preparation is critical for successful concrete floor sealing. Sweep and degrease the surface, then remove efflorescence and old coatings using appropriate cleaners or mechanical methods; any remaining contamination can cause sealer failure. Check moisture levels (especially on basement slabs), allow the concrete to dry completely, and address cracks with compatible concrete repair materials before you apply the concrete sealer.
How many coats of concrete sealer do I need and how long should I wait between coats?
Most concrete sealing systems require multiple coats, commonly 2 coats for penetrating sealers and 2–3 coats for certain topical sealants, but the exact number depends on the product. Follow the sealer’s recommended coverage rate and recoat window, which can vary widely based on temperature, humidity, and porosity. Waiting too little can trap solvents and reduce adhesion, while waiting too long may require light abrasion or priming before the next layer.
Why does my concrete sealer look cloudy or peel after application?
Cloudiness, haze, or peeling usually indicates moisture issues, surface contamination, or applying sealer to concrete that wasn’t dry enough. If the slab has rising damp or high internal moisture, some coatings can fail or turn milky, especially water-based products. Peeling can also happen when the floor was painted, sealed previously without proper prep, or cleaned with residues—use the manufacturer’s troubleshooting steps and consider a moisture test and surface grinding if needed.
Which type of concrete sealer should I use for garages, basements, or interior living spaces?
For garages and outdoor concrete floors, look for a concrete sealer rated for UV resistance, chemical resistance (oil/grease), and moisture control—often an epoxy/urethane system or a high-performance topical sealer works well. For basements and damp areas, prioritize moisture tolerance and consider a penetrating concrete sealer designed for hydrostatic moisture conditions, or consult a specialist if there’s active water. For interior floors, a penetrating sealer is great for stain resistance without changing the look much, while decorative overlays may benefit from a clear protective coating compatible with the finish.
📅 Last Updated: October 10, 2026 | Topic: How to seal concrete floors? | Content verified for accuracy and freshness.
References
- https://www.canada.ca/en/public-services-procurement/services/surplus/repairs-maintenance/concrete-coatings-floor-sealers.html
- https://www.cdc.gov/mold/cleanup/steps.html
- https://www.epa.gov/fedfacilities/external-sealants-and-coatings-concrete-and-masonry
- https://www.osha.gov/sites/default/files/publications/OSHA_FS-3967_Waterproofing.pdf
- https://www.britishpathe.com/people/tile-and-concrete
- Google Scholar Google Scholar
https://scholar.google.com/scholar?q=how+to+seal+concrete+floor+surface+preparation - Google Scholar Google Scholar
https://scholar.google.com/scholar?q=concrete+sealing+moisture+vapor+barrier+epoxy+application - Google Scholar Google Scholar
https://scholar.google.com/scholar?q=penetrating+concrete+sealer+comparison+water+repellents+ASTM - https://pubmed.ncbi.nlm.nih.gov/?term=concrete+sealers+durability+penetrating+sealants
- Google Scholar Google Scholar
https://scholar.google.com/scholar?q=How+to+seal+concrete+floors?