
Choosing terracotta floors comes down to one decision: whether you want the durable, color-stable option for heavy traffic or the more rustic look that needs more care. This guide tells you exactly how to pick the right terracotta—matching tile grade, finish, thickness, and sealing to your room conditions and lifestyle. By the end, you’ll know which terracotta floor will deliver the best look and the right build for your home.




If you want terracotta floors that stay beautiful, choose tile specs that match your traffic and moisture exposure, then pair them with the right sealing system and a realistic maintenance routine. Start by selecting the matte (natural) versus glazed look you want, and then confirm slip resistance and water absorption/porosity before you buy—because those two numbers usually determine whether you’ll see staining, uneven wear, or finish failure later.
This guide is built for homeowners, renovators, and DIYers planning terracotta flooring in kitchens, entryways, living rooms, and outdoor-covered spaces. It’s also helpful when replacing existing floors and trying to avoid the familiar “looks great at first” problems that happen when the tile’s intended use, installation system, and upkeep plan don’t align.
Who this is for / when it applies:
This is for homeowners, renovators, and DIYers choosing terracotta flooring for kitchens, entryways, living rooms, or outdoor-covered spaces—especially if you’re weighing different tile qualities, finishes, and sealants. It’s also useful if you’re replacing existing flooring and want to avoid common “looks great at first” problems.
Measure first: size, layout, and where the floor goes
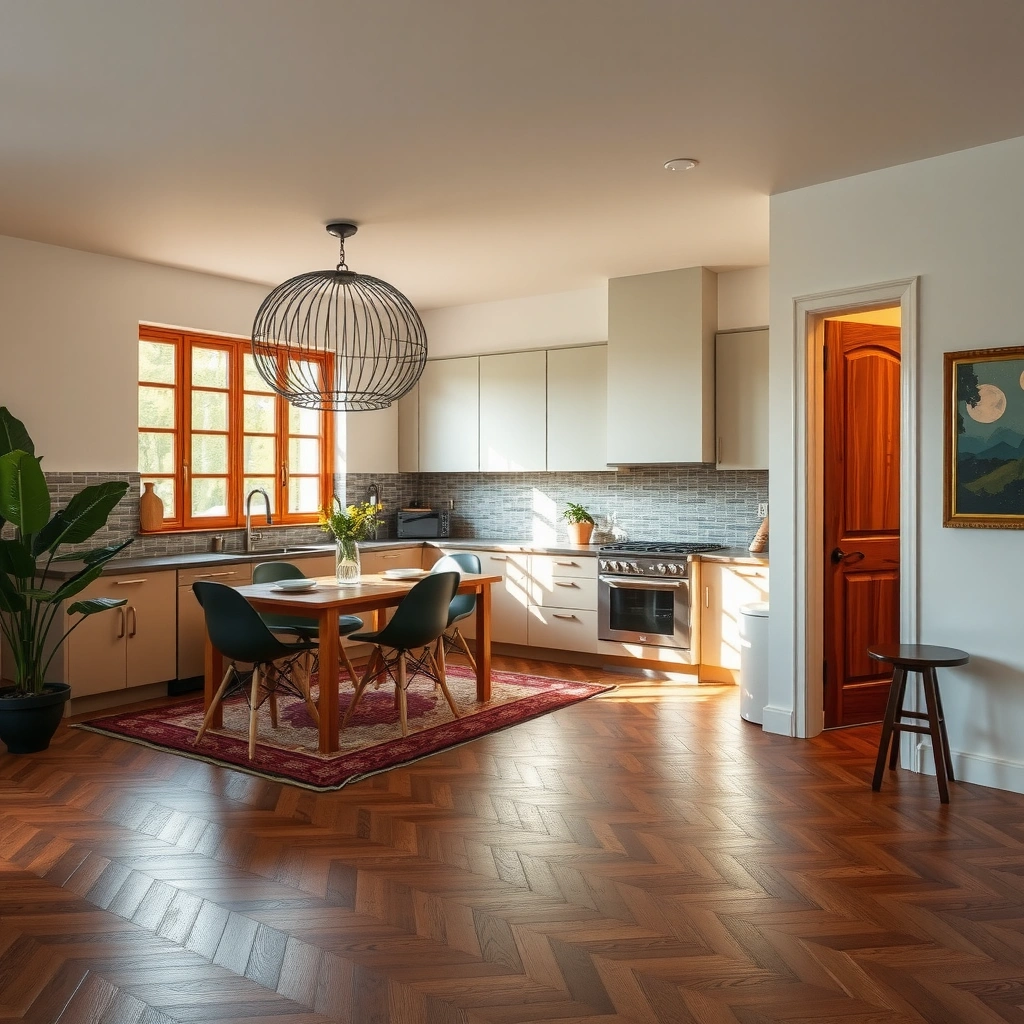
The fastest way to avoid visible waste, misaligned patterns, and edge problems is to measure the room carefully and plan tile orientation based on where moisture and wear will concentrate. You also need to verify the exact installation location (indoors vs. covered outdoor), because terracotta’s porosity means moisture behavior—not just aesthetics—will shape how it ages.
Measure your room and add waste so you can keep grout lines straight and avoid awkward sliver cuts at transitions.
Identify whether the installation is fully indoors or in a covered outdoor zone, because terracotta performance changes when moisture exposure increases.
Subfloor flatness and adhesion readiness come first—terracotta tile can’t compensate for movement or bumps without telegraphing them through the surface.
Step-by-step what to do before you order
– Measure the room (length/width) and convert to tile count using your tile’s usable dimensions (including thickness and any lipped edges). Then add waste for cuts around doorways, vents, radiused openings, and pattern alignment. In practice, waste is often higher for DIY diagonal layouts or existing-floor replacements with irregular geometry ([ADD: recommended waste % from your tile installer’s guidance or manufacturer instructions]).
– Map installation transitions: entry doors, hallways, kitchen work zones, and any wet-traffic paths (where shoes, spills, and splashes concentrate). Terracotta will still perform outside of your plan, but the “wear story” becomes harder to manage.
– Confirm location conditions: “covered outdoor” still counts as a moisture exposure risk. Ask yourself:
– Will the floor get driven-in rainwater or only occasional condensation?
– Is the HVAC seasonal humidity shift significant (basements vs. main levels)?
– Are there exterior doors opening frequently (more tracked-in moisture)?
Subfloor check that matters for terracotta
Terracotta is unforgiving when the substrate is not right. Before you install, verify:
– Flatness: Tile systems telegraph ridges and humps even when the tile looks visually “rustic.”
– Bond readiness: Laitance, dust, or weak patch compounds can prevent proper adhesive curing and contribute to hollow spots.
– Movement control: expansion joints and changes in plane need correct planning so stress doesn’t crack grout or loosen edges.
Pick the terracotta type and finish (matte vs glazed)
The most important finish decision is whether you want a matte/natural terracotta look (more color character, more care) or a glazed look (often easier to wipe clean). After you decide the appearance, confirm the tile is actually rated for floor installation and that the surface finish and finish coverage you want matches your cleaning habits.
Matte/natural terracotta usually highlights natural color variation, but its open structure typically requires more diligent sealing and spill management.
Glazed terracotta surfaces are generally easier to wipe clean, but you still must verify slip resistance and confirm the glaze system is appropriate for floors.
“Decorative” tiles aren’t always engineered for floor load, abrasion resistance, or slip performance—use documentation, not showroom intent.
What to consider in plain terms
– Natural/matte terracotta
Pros: authentic movement in color, a warm, earthy texture.
Cons: more sensitive to staining if sealing is missed or maintenance drifts.
– Glazed terracotta
Pros: often more stain-resistant because the surface is sealed by design, easier routine cleaning.
Cons: slip risk can vary by finish; some glazes look “slick” when wet even if the tile is beautiful dry.
A key standard to keep in mind
Many jurisdictions and specifiers treat terracotta as a ceramic tile product and expect adherence to recognized testing frameworks for properties like water absorption and slip resistance. Look for data tied to:
– EN 14411 (ceramic tile classification, including performance categories) and/or
– ASTM test methods referenced on the spec sheet (manufacturers often include the standard number even if the tile is sold through showrooms).
If you can’t find spec documentation, that’s a warning sign—terrazzo-style “artisan” looks can be real, but your performance numbers still need to exist somewhere.
Check absorption, slip resistance, and durability ratings
The best terracotta floors aren’t the ones with the prettiest samples—they’re the ones whose absorption (porosity) and slip resistance match your environment. If you only check one spec sheet detail, check absorption/porosity first (it drives sealing and staining risk), then verify slip suitability for your household and entry/wet exposure.
ANSI A326.3 commonly references a DCOF of 0.42 as the threshold for level interior floors, which is a useful benchmark when a manufacturer provides DCOF test results.
For slip resistance, dry-only performance is not enough for entries, kitchens, and exterior-covered zones where water and cleaning residue can be present.
Water absorption (porosity) is a direct predictor of how quickly liquids can penetrate an unsealed or under-sealed terracotta body.
Absorption / water absorption: why it affects staining
Porous terracotta can absorb oils, coffee, wine, and muddy water if the system isn’t sealed correctly—or if sealing is allowed to degrade. You want:
– A documented water absorption/porosity value (from the manufacturer’s technical sheet), and
– The manufacturer’s recommended sealer type and maintenance interval.
A useful comparison point:
– According to ISO/industry performance definitions used for classification, porcelain tiles are typically defined as having water absorption ≤ 0.5% (while many porous non-porcelain ceramic tiles absorb more). This matters because terracotta is commonly more absorbent than porcelain, which shifts the sealing strategy. [ADD: source for the absorption threshold definition used by your region/specification]
Slip resistance: don’t guess
Slip risk is not solved by “choosing a grippy look” alone. Floors need tested slip performance relevant to your context.
– For interiors, many projects rely on the DCOF benchmark (0.42) referenced in ANSI/industry documents used alongside ADA considerations. [ADD: source for ANSI A326.3 / DCOF benchmark text]
> Practical interpretation: If you have kids, pets, lots of tracked-in water, or you’re near exterior doors, you should require documentation of slip suitability (and ideally tested results for conditions that resemble your real use—especially wet/damp cleaning).
Durability: match rating to traffic, not marketing
Durability is usually communicated through documentation tied to wear/abrasion expectations (for floors) and sometimes frost/water cycling claims for exterior-covered spaces. Don’t rely on the label “terracotta” alone—verify:
– Is it rated for floor use?
– Does it include guidance for installation on floors (not just wall mounting)?
– Are there recommendations for exterior or freeze/thaw climates (where relevant)?
Terracotta spec at a glance (what to ask for)
Below is a “what good looks like” dataset to help you compare tiles and sealing plans from manufacturer documentation. The numbers are spec-type targets and ranges you can use to interpret real data—not universal properties of every terracotta tile.
Terracotta Floor Decision Targets (for comparing manufacturer specs)
| # | Specification to request | Why it matters | Typical “safer” direction | Fit score |
|---|---|---|---|---|
| 1 | Water absorption / porosity (manufacturer value) | Predicts staining & sealer dependence | Lower absorption is generally easier to protect | ★★★★★ |
| 2 | Slip resistance test method + rating (surface conditions) | Determines safety when damp | Documented suitability for wet/damp areas | ★★★★★ |
| 3 | Floor rating / intended use statement | Avoids decorative-only selection | Explicit “for floors” approval | ★★★★☆ |
| 4 | Abrasion / wear guidance (as provided) | Helps match to household traffic | Documentation supports expected foot traffic | ★★★☆☆ |
| 5 | Sealer compatibility (manufacturer pairing) | Prevents coating failure or residue | Uses a sealer system documented for the exact tile | ★★★★★ |
| 6 | Outdoor/Freeze-thaw suitability (if applicable) | Prevents moisture-driven deterioration | Documented suitability for your climate exposure | ★★☆☆☆ |
| 7 | Recommended grout system + joint plan | Limits staining at edges and movement paths | Matched grout + joint width for movement | ★★★★☆ |
> Note: Specific thresholds vary by tile line and testing method. Use the “request these docs” approach so you compare like-for-like from real manufacturers.
Plan sealing and ongoing maintenance
The right sealing plan is the difference between “aging beautifully” and “permanent spotting.” Decide whether your selected terracotta needs sealing based on its porosity and finish, then set a maintenance schedule that you can actually follow—because sealing is rarely permanent.
Sealers manage staining risk by reducing liquid penetration, but they must be compatible with your tile and re-applied according to documented performance.
Terracotta maintenance works best when you use the recommended adhesive, grout, cleaner, and sealer system together—not random individual products.
Harsh cleaners can degrade some sealers and leave residue that dulls matte finishes over time.
Decide whether sealing is required (and what type)
For natural/uncoated terracotta, sealing is commonly part of the system. For glazed tile, sealing requirements can vary; glazed surfaces may not need the same type of topical sealer, but joints and edges often still matter.
What to do:
1. Read the tile spec sheet for sealing requirements (some lines require specific sealers).
2. Choose sealer type based on finish and manufacturer guidance:
– penetrating sealers (reduce absorption),
– topical coatings (create a surface barrier),
– or systems built for natural stone/ceramic—only if the manufacturer allows it.
> [ADD: source for your specific sealer manufacturer’s compatibility chart and reapplication interval guidance]
Use the right grout + adhesive system
Terracotta failures often happen at interfaces:
– grout that stains faster than expected,
– adhesive that doesn’t cure properly,
– joints that let water follow capillary pathways.
Use grout and adhesives recommended for terracotta and consistent with sealer chemistry. If your sealer system specifies “compatible grout chemistry,” treat that as mandatory.
A simple maintenance routine that prevents surprises
Create a routine you can repeat:
– Daily/regular cleaning: neutral pH cleaner compatible with the finish and sealer.
– Spill protocol: blot immediately; avoid aggressive scrubbing that can abrade matte finishes.
– Periodic checks: look for early signs of water beading loss (if using a penetrating system that changes surface behavior).
– Avoid: acidic or abrasive chemicals unless the manufacturer explicitly confirms compatibility.
Here’s a practical pros/cons comparison to help you choose a realistic plan:
| Approach | Best for | Pros | Cons / watch-outs |
|---|---|---|---|
| Penetrating sealer + gentle pH cleaning | Natural/matte terracotta, busy households | Reduces liquid penetration and helps prevent deep staining | Still needs reapplication; harsh cleaners can shorten its life |
| Glazed terracotta with compatible routine cleaning | Homes that want easier wipe-down | Often more stain-tolerant on the surface | Still verify slip resistance; grout/edges can still absorb |
| Skipping sealing on high-absorption terracotta | Very low-spill environments (rare cases) | Lower upfront step | Higher risk of permanent spotting; can be expensive to correct |
Installation matters more than you think
The most carefully selected terracotta can still underperform if the installation system is wrong. Proper underlayment/subfloor preparation, adhesive selection, grout/joint planning, and controlled curing are the “invisible specs” that determine whether the finish holds up.
Installation failures often appear at edges, transitions, and grout joints because movement and water pathways concentrate there.
Using adhesives and grout systems outside the manufacturer’s compatibility guidance can cause bond or finish problems that aren’t obvious until later.
Proper curing and acclimation reduce risks like lippage, cracking, and premature breakdown of surface protection.
Key installation decisions
– Underlayment/subfloor prep: follow the tile system instructions. Flatness and correct moisture conditions matter more than people expect.
– Adhesive: select the adhesive system recommended for the tile body and finish, including the required bed thickness and open time.
– Grout selection: grout should match your expected staining risk, and joint width should align with movement needs.
– Curing and acclimation: don’t rush tile installation conditions. Temperature/humidity affect adhesive cure and tile stress.
Joint planning is not optional
Terracotta is porous and the finish can show irregularities under certain light. To keep the look consistent:
– Plan grout-line alignment and layout.
– Match tile selection across batches (color variation can be beautiful, but you need control).
– Use movement joints where required by substrate and project conditions.
What can go wrong (and how to prevent it)
Even with the right tile, terracotta can disappoint if the sealing/cleaning plan is mismatched or the installation introduces movement paths. The best prevention strategy is to identify the failure mode early: staining, dulling/peeling, slipperiness, uneven appearance, or damage from incompatible products.
Deep staining typically occurs when absorption is high and sealing is skipped, incomplete, or not maintained.
Finish dulling or patchiness can happen when sealers and cleaners are incompatible and leave residue on matte surfaces.
Slipperiness is preventable when you verify slip resistance performance for the actual environment, especially wet entry and damp cleaning conditions.
Common failure modes and prevention
– Staining from unsealed/under-sealed tile
Prevention: require absorption documentation, follow sealer system instructions, and maintain the schedule.
– Finish peeling or dulling
Prevention: confirm compatibility between tile finish, sealer chemistry, and cleaners. Use manufacturer guidance—not generic “stone tile cleaner” claims.
– Slipperiness in wet areas
Prevention: confirm tested slip resistance suitability for wet/damp zones and your traffic profile.
– Uneven look after installation
Cause: natural batch variation + lighting changes + inconsistent selection.
Prevention: select tiles consistently and plan layout to balance variation.
– Damage from the wrong cleaning products
Prevention: use manufacturer-recommended cleaners and avoid high-acid, high-alkaline, and abrasive pads unless explicitly approved.
Verdict / tip: choose with specs, not just color
Terracotta floors can be a great choice when you manage sealing and cleaning—but you should treat absorption and slip resistance as primary decision criteria, not afterthoughts. If you want minimal fuss and maximum stain tolerance, consider glazed terracotta (and still verify slip performance), or choose a less-porous material instead of relying on uncoated natural tile.
If you’re unsure about the sealing schedule for your exact product line, verify it directly in writing from the tile and sealer manufacturers: [ADD: specific step to confirm with the tile/sealer manufacturer for your exact product line].
Who should skip this approach?
If you won’t be able to follow a maintenance routine, you’re likely to experience spotting and finish degradation over time—especially in entryways and kitchens where spills and moisture occur frequently.
Quick checklist: terracotta floors to choose confidently
– [ ] Where will it be installed (indoors, kitchen, entry, covered outdoor)?
– [ ] Tile is rated/approved for floor use
– [ ] Water absorption/porosity specs reviewed (from manufacturer documentation)
– [ ] Slip resistance suitability confirmed for your traffic/wet exposure (with test method/rating)
– [ ] Finish chosen (matte/natural vs glazed) matches your cleaning habits
– [ ] Sealing plan exists (type + reapplication expectations from manufacturer docs)
– [ ] Installation system compatible (adhesive, grout, and subfloor prep per tile instructions)
– [ ] Cleaning plan uses manufacturer-recommended products (no generic substitutions)
FAQ
Are terracotta floors good for kitchens and entryways?
They can be, but only when the finish and specs match real use. Prioritize slip suitability for wet entry conditions, confirm documented absorption/porosity, and follow a sealing + cleaning plan you can maintain. If spills are frequent and cleanup is inconsistent, consider glazed options or verify whether the manufacturer rates the specific line for your use pattern.
Do terracotta floors need to be sealed?
In many cases, especially for natural/uncoated terracotta, sealing is recommended because porosity drives staining and moisture penetration risk. The most reliable answer is in the tile line’s documentation: follow the manufacturer’s written guidance for your exact product. [ADD: source for your tile manufacturer’s sealing requirement section, once you have the specific product line.]
Will terracotta floors be slippery?
That depends on the surface finish and the tile’s documented slip resistance for the environment. For entryways and damp zones, request tested slip results or guidance for wet/damp conditions—not only dry performance.
How do I keep terracotta from staining?
Use the approved sealer system (if required), clean gently with compatible products, and wipe spills promptly. Avoid harsh chemicals or abrasive pads unless the manufacturer confirms they’re safe for the tile finish and sealer coating.
Can I install terracotta over an existing floor?
Sometimes, but it depends on subfloor condition, flatness, and compatibility with the adhesive/underlayment system. Follow the manufacturer’s installation requirements and verify the existing floor meets the preparation standard—don’t assume it’s acceptable because it looks level.
Sources:
– [ADD: manufacturer installation instructions/spec sheet for your terracotta tile line, including absorption/porosity, slip resistance guidance, and whether sealing is required]
– [ADD: manufacturer guidance for the recommended sealer/cleaner system compatible with terracotta and the chosen finish]
– [ADD: manufacturer documentation for recommended adhesives and grout compatibility with terracotta]
– [ADD: ANSI A326.3 / DCOF benchmark source used for interior slip references]
– [ADD: ISO/industry source defining common absorption threshold context such as porcelain ≤ 0.5% water absorption]
A well-chosen terracotta floor can look outstanding for years, but it’s the combination—specs (absorption + slip), system (sealer + grout/adhesive), and correct installation—that keeps it that way. If you buy based on documentation rather than showroom color alone, you dramatically reduce the odds of staining, unsafe traction, and finish disappointments.
Frequently Asked Questions
What should I look for when choosing terracotta floor tiles?
Start by checking the tile’s thickness, surface finish, and density, since these affect durability and how well the terracotta floors resist wear. Look for a slip-resistant finish if the floor will be in a kitchen, entryway, or bathroom, and verify the tile size and edge quality for easier installation. Also consider how porous the terracotta is, because many terracotta floor tiles need sealing to prevent staining from oil, wine, and other everyday spills.
How do I choose the right terracotta floor finish for my home?
Choose a finish based on both style and practicality: matte or natural terracotta finishes are popular for a rustic look but may show marks more easily without proper sealing. Polished or glazed finishes can be easier to clean and often resist stains better, but they may look more modern and can be less forgiving on slip resistance. For high-traffic areas, prioritize terracotta floor care requirements and opt for finishes that match your cleaning routine and lifestyle.
Which terracotta flooring is best for bathrooms or kitchens?
For moisture-prone rooms, select terracotta tiles with lower porosity and a proven sealing or treatment system, such as high-quality impregnating sealers designed for terracotta floors. In kitchens, also consider stain resistance for cooking grease and spills, and use a grout and sealer combination that won’t trap moisture. In bathrooms, prioritize slip resistance and consistent sealing maintenance to protect against water absorption and efflorescence.
Why do sealed terracotta floors matter, and what type of seal should I use?
Terracotta is naturally porous, so unsealed terracotta floors can absorb liquids and lead to stubborn stains or discoloration over time. An impregnating sealer helps protect the tile while maintaining a natural look, while other sealers may create a more film-like surface that changes the finish. Choose a product specifically labeled for terracotta flooring, apply it to clean, dry tiles, and follow re-sealing intervals to keep your terracotta floor surfaces protected.
How can I match terracotta floor tiles to my interior design and existing colors?
Look at undertones in your terracotta—some tiles lean warmer (orange/red) while others feel more earthy (brown/taupe)—and test a few samples in your room’s lighting. Pair terracotta floors with complementary materials like light stone, warm woods, wrought iron, and neutral wall colors to keep the look cohesive. If you’re updating an existing space, match grout color carefully; it can dramatically affect the overall pattern and how busy or seamless your terracotta floor installation feels.
📅 Last Updated: October 10, 2026 | Topic: How to choose terracotta floors? | Content verified for accuracy and freshness.
References
- Terracotta
https://en.wikipedia.org/wiki/Terracotta - Tile
https://en.wikipedia.org/wiki/Ceramic_tile - Tile
https://en.wikipedia.org/wiki/Tile - https://www.britannica.com/technology/terracotta
- Google Scholar Google Scholar
https://scholar.google.com/scholar?q=choosing+terracotta+floor+tiles+porosity+water+absorption - Google Scholar Google Scholar
https://scholar.google.com/scholar?q=terracotta+floor+tile+sealing+acidic+cleaners+lime+efflorescence - Google Scholar Google Scholar
https://scholar.google.com/scholar?q=terracotta+tile+maintenance+staining+mechanical+properties - https://www.sciencedirect.com/search?qs=terracotta%20tile%20water%20absorption%20porosity
- https://www.sciencedirect.com/search?qs=terracotta%20tile%20abrasion%20wear%20mechanical%20properties
- https://pubmed.ncbi.nlm.nih.gov/?term=terracotta+tile+porosity+water+absorption