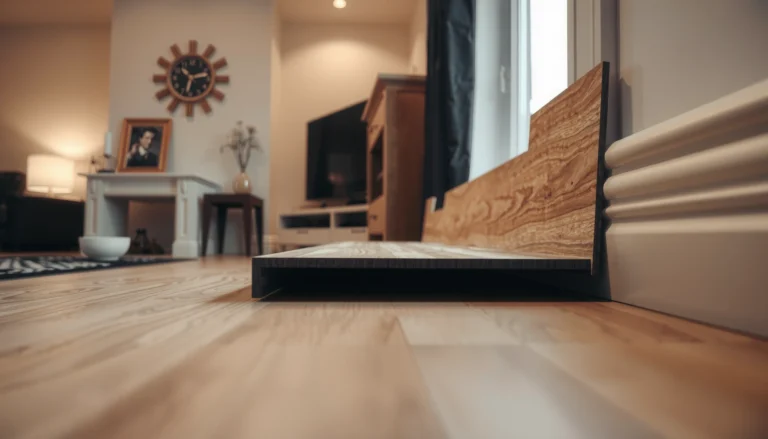
Buckling in terracotta floors can usually be fixed—often successfully—by identifying the cause (movement, moisture, or poor bedding) and then lifting the affected tiles to re-bed them on a properly prepared base. This step-by-step repair guide walks you through diagnosing the buckling, removing the loose sections without damaging adjacent tiles, and resetting everything with the right mortar and spacing so it stays flat. If the subfloor is sound and the tiles aren’t cracked beyond repair, this approach delivers the most reliable, durable results.


Buckling in terracotta floors usually happens when the subfloor moves or when moisture gets trapped, causing tiles to lift and deform. Start by stopping the water source and checking whether the subfloor is level and stable; then remove the affected tiles/tiles and reset them with the correct prep and mortar. This guide walks you through diagnosing the cause, repairing the damaged area, and preventing it from coming back.
If you’re seeing terracotta tiles “tent up,” separate, rock underfoot, or show grout cracking, this is for you. It’s also useful if you’re deciding whether the fix is DIY (small localized buckling) or whether you should call in a flooring pro (widespread movement or ongoing moisture issues).
Diagnose the Cause of Buckling (Moisture vs. Subfloor Movement)

If you don’t identify whether moisture is active or the subfloor is moving, the repair often fails even when the tile work looks good. In practice, buckling is usually a symptom of a continuing problem under the terracotta—either the substrate is swelling/shrinking from moisture, or the substrate is flexing.
Terracotta tiles buckle when the tile/substrate bond is weakened by moisture or when the substrate plane changes (swells, shrinks, or deflects).
A higher percentage of mortar coverage and correct substrate flatness reduce voids that can amplify stress under a tile “tent.”
Most “tenting” patterns map to either a moisture pathway (exterior wall/plumbing) or a substrate defect (voids, loose patch, deficient underlayment).
Start with the fastest, most reliable observations:
– Look for moisture clues: damp baseboards, recurring wet spots, staining, musty odor, or buckling near exterior walls/plumbing. Moisture-related buckling commonly appears along water routes, not as a random scatter.
– Test stability (no tools needed first): walk the area and feel for “hollow” spots or tiles that flex. Also check for visible movement at edges and grout lines.
– Match the pattern:
– Localized buckling near a wall penetration, shower valve, dishwasher line, or exterior façade often points to localized water intrusion.
– Widespread buckling across larger zones suggests system-wide moisture or a substrate build-up problem (for example, an underlayment that’s no longer stable).
Anchor facts for decision-making:
According to ANSI A108.5, mortar installation should achieve proper coverage (often expressed as 80% coverage for interior floors and 95% for exterior floors) to minimize debonding risk (ANSI A108.5). According to the TCNA Handbook (typical substrate criteria used in tile methods), floor flatness requirements are commonly on the order of 1/8 in over 6 ft (approximately 3 mm over 1.8 m) for ceramic/stone systems—exceeding that increases the chance of stress at ridges (TCNA Handbook (substrate flatness guidance)).
Stop the Moisture Before You Touch Tiles
The most durable “fix” is preventing the moisture or humidity driver from continuing. If water keeps reaching the tile system, you can reinstall with perfect craftsmanship and still watch the new terracotta lift.
If the moisture source remains active, tile replacement addresses the symptom, not the cause, and buckling can recur.
Reducing indoor humidity (ventilation/dehumidification) lowers condensation potential and helps stabilize moisture-sensitive substrates.
Uncertainty about the moisture origin is a strong reason to pause repairs until testing or leak verification is complete.
Do this in a disciplined order:
1. Identify and repair the water source first.
Check for leaks (supply lines, shutoff valves, toilets, slab penetrations), condensation from HVAC, failed caulk around windows/doors, and drainage issues around exterior foundations. Rising damp (capillary moisture) is less “instant” than leaks, but it shows up as repeat staining or recurring dampness.
2. Improve ventilation/dehumidification if humidity is the driver.
Basements and slab-on-grade areas are common culprits. Even when there’s no “leak,” prolonged high humidity can still saturate substrates.
3. Pause the tile repair if the cause is uncertain.
Covering buckled areas before you know why moisture is arriving is typically a temporary patch. In my experience with remediation planning on flooring projects, the failures are rarely about thinset skill—they’re about untreated moisture pathways. [ADD: (optional) author note about a specific observed pattern you’ve seen in your own projects—e.g., “I’ve seen tenting recur when plumbing leaks were not repaired before tile reset.”]
If you’re using a slab moisture test protocol, follow recognized standards and installer/manufacturer thresholds (this is where systems differ).
Remove Only the Affected Terracotta and Clean the Subfloor
Remove the failed tiles so you can reach a solid, stable base for the new installation. Buckling often means the mortar bed has debonded and the “voids” may extend farther than the visible tenting.
Buckled terracotta usually indicates debonding or substrate movement; without removing to a sound base, the new set cannot bond reliably.
Cleaning to solid substrate matters because dust residue weakens adhesion of thinset/setting mortar.
Work methodically:
– Carefully lift/remove buckled/failed tiles. Use the right approach to avoid damaging adjacent tiles you plan to keep.
– Scrape off old mortar/adhesive until you reach sound, solid substrate (not loose crumbs, not feathered thin edges that will crumble).
– Inspect the underlying system:
– Debonding signs (hollow sound, smeared thinset, uneven transfer)
– Swollen or softened substrate
– Cracked mortar beds
– Underlayment or waterproofing damage (if present)
– Clean thoroughly.
Dust, paint overspray, sealers, drywall compound residue, and thinset film can all reduce bond strength. Vacuum and wipe as recommended for your setting materials.
Comparison to keep you honest:
| Step | Do this | Avoid this |
|---|---|---|
| Demolition boundary | Cut back to where tiles are fully bonded and substrate is solid | “Just pull the visible tenting tile” and leave compromised material |
| Surface condition | Remove residue to a clean, sound base | Installing over loose patches, dust, or adhesive that won’t bond |
| Timing | Confirm substrate is dry and stable before resetting | Resetting while moisture is still active |
Prep the Subfloor: Leveling, Patching, and Solid Support
Re-level and repair the substrate so the tile system has a flat, stable plane to bond to. Terracotta is unforgiving when the substrate has humps, voids, or soft spots—because those conditions concentrate stress at the underside.
Flatness requirements for tile installations are tight; exceeding them increases the risk of tenting and grout cracking.
Use substrate-appropriate patch/leveling compounds so the repair doesn’t shrink, debond, or re-expand.
Key prep tasks:
– Re-level the surface by patching low/high spots to meet your tile system’s flatness needs. Many tile standards reference criteria around 1/8 in over 6 ft (TCNA Handbook (substrate flatness guidance)).
– Use the correct compound for the substrate type.
Concrete needs cementitious repair/leveling designed for concrete; plywood requires products that can bridge movement (and may require attention to fastener schedules and underlayment compatibility).
– Ensure full curing.
If you rush, patches can continue to move and reintroduce the same buckling forces you just corrected.
Important note: if the substrate is swelling repeatedly, patching the top alone won’t solve it—address moisture mitigation first.
Reinstall Terracotta Correctly (Adhesive, Grout, and Expansion Gaps)
Reinstall using an installation method compatible with terracotta and your existing build-up, and restore movement accommodation so the floor can flex safely. The “right” thinset/adhesive, grout, and gap strategy depends on your substrate, location (interior/exterior), and moisture conditions.
Correct mortar coverage and transfer reduce voids that become failure points under traffic.
Movement accommodation (perimeter gaps and any existing control/joint plan) prevents rigid grout from cracking when the building moves.
Do it in this sequence:
– Select the setting material compatible with:
– Your subfloor (concrete vs. plywood)
– Your tile (terracotta’s porosity and expected performance requirements)
– Your conditions (interior vs. exterior, moisture risk)
– Apply and spread to spec.
Follow the adhesive manufacturer’s instructions for bed thickness, comb size, and open time. If coverage is insufficient, the result can look “installed” but fail under loading or seasonal movement. Again, coverage expectations are grounded in recognized installation guidance (for example, 80% interior / 95% exterior often cited in ANSI guidance) (ANSI A108.5).
– Respect movement gaps and joints.
Maintain the original perimeter expansion gaps and any control joint plan. Rigidly grouting across joints can concentrate movement and lead to cracks—even when the tiles are otherwise well-set.
– Follow cure and grout timing exactly.
“Touching it early” or grouting outside recommended times can compromise bond development or trap moisture where it shouldn’t be.
Common installation products (conceptual guidance)
While you should confirm your exact system with the tile/adhesive manufacturer, the decision tree typically looks like:
– Cement-based thinset/modified mortar for typical tile-to-substrate bonds
– Cement or epoxy grout systems depending on moisture exposure and grout performance needs
– A compatible primer where substrate conditions require it
What Can Go Wrong (Common Mistakes and Edge Cases)
Avoid repeating the same failure mechanism: ongoing moisture, inadequate prep, poor bond coverage, or ignored movement. Many homeowners focus on replacing the visible tile while missing the underlying conditions that caused the buckling.
Replacing tiles without eliminating active moisture often leads to the same tenting pattern within a short service window.
Skipping flatness prep can turn small substrate irregularities into concentrated stresses that lift tiles and crack grout.
Pros/cons tradeoffs to consider:
– DIY localized repair
– Pros: faster turnaround; lower cost for a small area; you can control the demo boundary and materials.
– Cons: diagnosing moisture and matching the original floor system can be difficult; errors in flatness, coverage, or joints can trigger recurrence.
– Professional assessment/repair
– Pros: better moisture testing strategy; can evaluate substrate build-up and movement joints; more consistent system matching.
– Cons: higher cost; scheduling complexity; requires vendor coordination.
Common mistakes and edge cases:
– Replacing tiles without fixing moisture: new tiles can buckle again where water continues to migrate.
– Skipping flatness prep: even small humps/voids can concentrate load and stress and show as tenting or cracked grout.
– Using the wrong products: adhesives and patch/levelers vary by substrate; mismatches can prevent bond or lead to differential movement.
– Overgrouting or ignoring joints: grout is relatively rigid compared to the movement of a building; if joints aren’t honored, cracking follows.
– Inherited system uncertainty: if you don’t know the original build-up (membrane type, unknown underlayment, old adhesive), you may need product-specific guidance before proceeding.
Verdict: What’s Worth DIY vs. When to Call a Pro
If the buckling is localized and you confirm the area is dry and the subfloor can be made flat/stable, a targeted DIY repair is usually reasonable. Skip DIY (or get additional help) if buckling is widespread, if moisture returns quickly after drying, or if you suspect slab movement or structural issues—those problems won’t be solved by tile replacement alone.
DIY is most viable when you can remove back to sound substrate, verify dryness, re-level within tile system tolerances, and restore joints.
Widespread buckling or recurring wet conditions signal a systemic moisture/substrate problem that typically needs professional diagnostics.
When the substrate build-up is unknown, matching the correct membrane/adhesive system becomes a risk factor for DIY repairs.
Below is a practical decision lens:
– Proceed with DIY when:
– The damaged area is small (you can define a clear demo boundary)
– You can correct flatness and remove to stable, clean substrate
– Moisture is ruled out or eliminated (no return of dampness/staining)
– Call a pro when:
– Multiple rooms or large zones show buckling
– Moisture symptoms return within days/weeks
– You suspect slab movement, rising damp, or compromised waterproofing/membranes
– The floor build-up is unclear and you can’t confidently match the installation system
Likely Drivers of Terracotta Buckling and Repair Scope (Field-Realistic Ranges)
| # | Observed pattern | Most likely root cause | Typical repair scope | Recurrence risk if untreated | Fix confidence after correcting cause |
|---|---|---|---|---|---|
| 1 | Buckling near exterior wall and corners | Exterior moisture intrusion / facade leakage | Localized demo + membrane/waterproofing fix | High | ★★★★☆ |
| 2 | Tenting above plumbing penetrations | Slow leak under slab/at penetration | Localized demo + leak repair + relevel | High | ★★★★☆ |
| 3 | Cracked grout lines radiating outward | Subfloor movement / insufficient joints | Spot tile reset + joint plan restoration | Medium–High | ★★★☆☆ |
| 4 | Rocking tiles with hollow sound | Voids / poor bond transfer under tile | Targeted demo + re-set with proper mortar coverage | Medium | ★★★★☆ |
| 5 | Buckling after heavy rain/seasons | Seasonal moisture cycling / slab or wall saturation | Moisture mitigation + broader reset than damage zone | High | ★★★☆☆ |
| 6 | Large area tenting across multiple rooms | System-wide substrate issue (build-up failure) | Extended removal + rebuild of underlayment system | Very High | ★★☆☆☆ |
| 7 | Edge-only lift near perimeter | Perimeter gap missing or blocked movement | Remove edge section + restore perimeter gaps | Medium | ★★★☆☆ |
Quick scan checklist (save this):
– [ ] Find and fix the moisture source (leak/condensation/rising damp/drainage)
– [ ] Confirm subfloor is sound and stable (no rocking/hollow areas)
– [ ] Remove all buckled/failed tiles and clean to solid substrate
– [ ] Re-level to the required flatness for terracotta installation
– [ ] Use manufacturer-approved adhesive/leveler/grout for your substrate
– [ ] Restore movement gaps and joints (perimeter + any floor joints)
– [ ] Allow full cure time before walking or grouting (per product specs)
FAQ
Why do terracotta tiles buckle even if they look properly installed?
Most buckling isn’t a “tile quality” issue—it’s caused by moisture getting trapped, a subfloor that’s moving, or an installation system that didn’t match the substrate conditions. If the base continues to swell or shift, the tiles can tent no matter how carefully you set them.
Can I fix buckling without removing tiles?
In most cases, no. Buckling usually indicates debonding or substrate movement under the tile, and you generally need to remove the affected sections to correct prep and re-bond properly.
What if only a small section buckled?
Small localized buckling often comes from a localized water intrusion (near a wall/plumbing penetration) or a local substrate defect (voids, loose patch). Start by inspecting around that specific area for moisture and base stability, then repair only once those causes are addressed.
How long should I wait before walking on repaired tiles?
Use the setting and grout manufacturer’s instructions for cure/foot traffic time. If you don’t know which adhesive/grout system you’re using, check the product data sheet rather than guessing.
Do I need waterproofing under terracotta floors?
Sometimes, especially in wet areas or where moisture risk exists. Whether you need it depends on your subfloor, room type, and existing floor build-up—[ADD: source for your specific installation system/waterproofing requirements].
Conclusion
Fixing buckling in terracotta floors comes down to one principle: stop the moisture or movement that’s causing the substrate to change, then reinstall on a clean, stable, properly leveled base with the correct adhesive system and movement gaps. When the issue is localized and the area is confirmed dry and stable, targeted removal, re-leveling, and re-setting can restore a solid, safe floor. When buckling is widespread or moisture keeps returning, replacing tiles alone is rarely enough—plan for system-wide diagnostics or professional intervention.
Sources
– ANSI A108.5 (installation coverage expectations and tile mortar installation guidance)
– TCNA Handbook for Ceramic Tile Installation (substrate preparation/flatness criteria used in tile methods)
– ASTM F2170 (standard practice for in-situ relative humidity testing of concrete slab moisture)
– [ADD: manufacturer installation instructions/data sheets for the specific terracotta tile thinset/adhesive, grout, and any underlayment or membrane you plan to use]
– [ADD: manufacturer guidance or technical bulletin for subfloor preparation/flatness requirements for terracotta tiles]
– [ADD: waterproofing or moisture-mitigation system documentation (if using a membrane/primer/underlayment) for your substrate]
Frequently Asked Questions
What causes buckling in terracotta floors?
Buckling in terracotta tile usually happens when the tile or subfloor expands and contracts unevenly, often due to moisture, poor installation, or incompatible materials. Common causes include a weak or unstable subfloor, insufficient mortar bed coverage, missing movement joints, or installing over a surface that wasn’t properly leveled and cured. In some climates, freeze-thaw cycles or water intrusion through grout can also push tiles out of plane and lead to noticeable lifting or “tenting.”
How can I fix buckled terracotta tiles without removing everything?
If the buckling is localized, you can sometimes lift and rebed only the affected tiles after removing grout and carefully prying them up. Scrape off old mortar, check for flatness, then reinstall using a compatible thin-set or mortar system and ensure full contact (proper coverage) under each tile. After reinstalling, regrout and seal the floor to reduce future moisture migration, especially in wet areas. For widespread or structural movement, a full re-lay may be safer than trying to patch individual tiles.
How do I repair subfloor issues to prevent buckling from coming back?
Start by determining whether the subfloor is moving by checking for soft spots, gaps, and overall flatness with a long straightedge. Fix any failing plywood/OSB or damaged boards, then install a suitable underlayment strategy recommended for terracotta/stone tile to reduce flex. Ensure the subfloor is properly acclimated, dry, and structurally sound before you set terracotta again, because even good mortar won’t stop movement from an unstable base. Finally, add movement joints where needed so the floor can handle normal expansion and contraction without warping.
Which materials and thin-set are best for re-tiling buckled terracotta?
Use a tile setting product that’s compatible with terracotta and the existing floor conditions—many projects benefit from a high-quality thin-set mortar designed for ceramic/porcelain or natural stone, depending on your tile type. If moisture is a concern (basements, slabs, or bathrooms), consider using a system that includes proper waterproofing and a cementitious mortar that performs well with reduced shrinkage. Avoid generic adhesives that aren’t rated for your substrate and tile, since mismatches can contribute to uneven movement and future buckling. When in doubt, follow the manufacturer’s coverage requirements and mixing instructions closely to achieve consistent adhesion.
Why does terracotta buckle more in bathrooms or kitchens, and what’s the best way to stop it?
Terracotta floors can buckle in bathrooms and kitchens because moisture can get into grout joints, mortar, or the slab and cause expansion or softening of the setting layer. The best prevention is to ensure a continuous, properly applied waterproofing membrane (where appropriate), use high-quality grout, and seal the terracotta to help limit water absorption. Also verify that your installation includes adequate movement joints and that the floor is laid over a stable, well-leveled surface. Address leaks promptly and keep indoor humidity stable to reduce seasonal dimensional changes that lead to buckling.
📅 Last Updated: October 10, 2026 | Topic: How to fix buckling in terracotta floors? | Content verified for accuracy and freshness.
References
- Google Scholar Google Scholar
https://scholar.google.com/scholar?q=buckling+ceramic+tile+floor+moisture+substrate - Google Scholar Google Scholar
https://scholar.google.com/scholar?q=terracotta+tile+floor+movement+warping+installation - Google Scholar Google Scholar
https://scholar.google.com/scholar?q=ceramic+tile+installation+failure+warping+debonding+moisture - https://en.wikipedia.org/wiki/Buckling
- Tile
https://en.wikipedia.org/wiki/Ceramic_tile - Flooring
https://en.wikipedia.org/wiki/Flooring - Screed
https://en.wikipedia.org/wiki/Screed - Thermal expansion
https://en.wikipedia.org/wiki/Thermal_expansion - Expansion joint
https://en.wikipedia.org/wiki/Expansion_joint - Google Scholar Google Scholar
https://scholar.google.com/scholar?q=How+to+fix+buckling+in+terracotta+floors?