


Refinishing terracotta floors is the surefire way to restore color, seal out stains, and bring your floors back to a clean, polished finish—when you follow the correct step-by-step sequence. This guide walks you through cleaning and drying, repairing chips, stripping old buildup if needed, and applying the right sealer for durable protection. If your terracotta is dull, worn, or marked, you’ll leave with a clear plan that turns damage into a lasting refresh.




Refinishing terracotta is mostly about getting prep right: identify what’s on the floor, deep-clean and remove residues, then seal with a product matched to terracotta’s porosity. Once you confirm whether you’re dealing with wax/film or a penetrating sealer, the rest becomes a controlled sequence of stripping (only if needed), repairs, and full cure.
If your terracotta looks dull, feels rough, or has worn patches and uneven sheen, refinishing can restore color and performance—but only when the tiles are still structurally sound. This guide is for homeowners and small renovators working with existing terracotta and wanting a practical, step-by-step plan without guessing.
Identify the Existing Finish (Don’t Skip This)
You should treat “existing finish identification” as the first (and most important) step because it determines whether you need stripping, neutralizing, or only cleaning. In my experience, most bad outcomes happen when a person cleans thoroughly but then applies a sealer over the wrong remaining layer (wax, polish, or an old film finish).
Start with the simplest checks: appearance, feel, and how the surface responds to water. Film finishes and waxes tend to feel slicker and often show a different sheen under side lighting. Penetrating sealers absorb rather than build up, so the surface usually looks more consistent and less “coated.”
If the floor feels waxy or slick and shows rainbow-like sheen in bright light, you’re likely dealing with a wax or film-finish system—not bare terracotta.
Terracotta’s porosity means residues (from wax, polish, or cleaners) can prevent new sealers from bonding consistently, leading to hazing or blotchiness.
ASTM C373 describes water-absorption testing for masonry materials, underscoring how strongly porous surfaces respond to liquids.
Quick test areas that prevent costly rework
Do a small, inconspicuous test spot (1–2 sq ft). Try:
– Water behavior: Place a few drops of water. Penetrating finishes typically allow absorption; wax/film often beads.
– Wipe check: Wipe with a white cloth. If the cloth picks up brown/tan staining from residue-laden coatings, you may be dealing with a removable top layer (wax/polish/film).
– Neutral cleaner compatibility: If you already know the cleaner chemistry (for example, an alkaline stripper or acidic cleaner), follow the sealer manufacturer’s compatibility guidance in the same way you’d follow an SDS—because cross-chemistry can cause staining or adhesion failure.
According to ASTM C373, masonry specimens are typically dried and then boiled for a test period (5 hours) before measuring absorption differences after saturation, showing how sensitive porous materials can be to liquid contact. ASTM C373 (water absorption test method for masonry units and related materials)
Clear, Clean, and Degrease
You should deep-clean and degrease before you do any stripping or etching because most sealer failures start with leftover soil or chemical residue. Your goal is a surface that’s not only “visually clean,” but also chemically residue-free.
Terracotta floors accumulate more than dust: they trap grease from cooking, tracked automotive oils, construction debris, and residue from previous cleaning chemicals. That residue can create a weak boundary layer, so the sealer either won’t bond or it bonds unevenly, which shows up as dull patches, dark blotches, or random gloss.
Use cleaners designed for the specific residue type (soil/grease vs. mineral deposits) and avoid random “universal” cleaners that can leave surfactants behind.
Rinsing thoroughly after degreasing is essential because many cleaning agents are surfactants that can interfere with sealer adhesion.
Let the floor dry fully after rinsing; moisture trapped during sealing commonly causes patchy sheen or adhesion failure.
Choose the right cleaner chemistry (and don’t guess)
Match the cleaner to the problem:
– Grease/oily residue: Use a terracotta-appropriate degreaser or a neutral/basic cleaner designed for stone tile floors.
– Soap film / polish residue: Use the manufacturer’s recommended cleaning method for that specific finish type.
– Mineral deposits or haze: Use the product family meant for mineral removal on porous tile (and confirm it won’t leave salts).
Important: If the floor contains wax or a film finish, some cleaners can soften or spread residue. That’s why “small test area first” is a must—then you scale up only once you see compatibility.
Drying is part of “prep”
After rinsing:
– Dry until there’s no visible moisture and the surface feels dry to the touch.
– Plan ventilation and time based on your local conditions (temperature/humidity).
– Don’t seal over damp tile “because it looks fine”—porous substrates can hold moisture where you can’t easily see it.
Strip Old Finish (When Needed)
You should strip only when an existing wax, film finish, or old sealer layer is preventing proper bonding or causing uneven appearance. If you strip too aggressively—or strip the wrong chemistry—you can create new etching, residues, or surface roughness that the next sealer can’t hide.
A typical stripping workflow looks like this:
1. Apply a stripping/stripping agent following the manufacturer’s instructions.
2. Allow dwell time (don’t eyeball it).
3. Mechanically agitate only as directed (often with a soft floor pad or brush system—avoid steel that can scratch).
4. Rinse thoroughly and confirm the surface is free from stripper residue.
5. Proceed to repairs after the surface is fully dry.
Strip wax/polish/film buildup only when required, because penetrating sealers still need a clean, properly prepared substrate to bond.
Over-stripping can increase porosity or create uneven surface texture, which later shows as blotched sheen under the sealer.
Always follow the stripper manufacturer’s dilution, dwell time, and rinse guidance; those conditions are part of the adhesion system design.
What “enough stripping” looks like
“Enough” is when the floor no longer exhibits signs of a removable layer and the surface accepts cleaning consistently across the test area. If you still see slick feel or haze after rinsing, don’t move forward—rework the prep stage.
Repair Cracks, Chips, and Uneven Spots
You should repair before sealing because sealers don’t “fix” structural damage—they only cover what’s already there. Cracks and chips create voids where sealer can pool or fail to penetrate evenly, often amplifying the appearance of damage.
Start with cleaning in and around the defect so repair material adheres. Then:
– Fill cracks/chips with a compatible repair product designed for tile/terracotta surfaces.
– Level patch material so it matches the surrounding plane.
– After curing, sand only enough to remove ridges—keep the repaired texture consistent.
Sanding: small, targeted, and controlled
Over-sanding can create localized “burnished zones” or remove too much of the surrounding surface. Aim for smoothness without changing the overall tile character.
Repairs must be fully cured before sealing; otherwise, trapped solvents or moisture can interfere with film formation or penetration.
Light sanding is typically only for removing rough edges—excess sanding changes terracotta’s surface character and absorption behavior.
Pros/cons: patching before sealing
| Approach | Pros | Cons | Best for |
|---|---|---|---|
| Patch first, then seal | Cleaner, more uniform surface; sealer distributes more consistently over level areas | Adds cure time; improper filler chemistry can stain porous tile | Floors with chips, cracked corners, spalled edges |
| Seal first, patch later | Faster in the short term | Often traps contamination under new filler and can create visible seams | Rare cases only; generally not recommended |
Choose the Right Sealer (Penetrating vs Film)
You should match the sealer type to the result you want—penetrating sealers emphasize natural appearance and stain resistance, while film finishes focus on sheen and a more “coated” look. The porous texture of terracotta usually rewards penetrating systems because they reduce water absorption without creating a thick surface layer.
Penetrating sealers: common for natural look
Penetrating sealers soak into the substrate and form a chemistry-based barrier to limit water and stain penetration. They’re often chosen when the homeowner wants to keep the “original” look and avoid a coating feel.
Film finishes: more sheen control, less forgiveness
If you want a specific gloss level, film finishes can deliver. However, they are less tolerant of imperfect prep, because any residue or uneven porosity can show through as hazing, dull spots, or patchy sheen.
Penetrating sealers generally preserve terracotta’s natural look by reducing staining and water absorption rather than forming a thick surface film.
Film-forming finishes can highlight prep defects because residue or uneven absorption changes how the film cures across the tile surface.
Sealer system selection snapshot (chemistry primer)
To help you plan cleaning/neutralizing compatibility, here’s a practical chemistry overview of common pH categories used during terracotta prep (for residue removal/neutralization). Values shown are typical ranges—always verify with the specific product’s SDS.
Common Cleaning/Neutralizing Chemicals Used in Floor Prep (Typical pH Ranges)
| # | Chemical category (typical use in prep) | Typical pH range | Common effect on residues | Compatibility for terracotta refinishing prep |
|---|---|---|---|---|
| 1 | Neutral cleaners (often surfactant-based) | pH ~6–8 | Dissolves general soil, emulsifies light grease | ★★★☆☆ |
| 2 | Mild alkaline degreasers | pH ~9–11 | Saponifies oily soils and lifts grease | ★★★★☆ |
| 3 | Strong alkaline cleaners (higher-risk) | pH ~12–14 | Can attack some finishes and increase surface roughness | ★★☆☆☆ |
| 4 | Weak organic acids (e.g., vinegar-type) | pH ~2–3 | Helps dissolve some mineral/haze residues | ★★★☆☆ |
| 5 | Phosphoric acid cleaners (mineral deposit removal) | pH ~1–2 | Targets mineral scale; can leave salts if not rinsed | ★★★☆☆ |
| 6 | Hydrochloric acid (strong acid; higher-risk) | pH ~0–1 | Dissolves heavy mineral deposits; can damage surfaces | ★☆☆☆☆ |
| 7 | Oxalic acid (stain removal emphasis) | pH ~1–2 | Targets iron/rust-like staining; requires careful rinse | ★★★☆☆ |
What Can Go Wrong (Common Mistakes)
You should expect fewer problems when you avoid residue, moisture, and compatibility mismatches. Most failures are not the sealer “brand”—they’re the prep sequence and chemistry that set up adhesion and curing conditions.
The most common issues I see (and that manufacturers warn about in their prep instructions) are:
– Sealing over leftover wax/polish/residue → peeling, hazing, or spotty darkening.
– Using the wrong cleaner/stripper → adhesion failure or slippery film.
– Sealing before fully dry → trapped moisture and uneven gloss.
– Sealing after aggressive etching without proper neutralization → inconsistent surface absorption.
Sealer systems are designed for specific substrate conditions; leftover wax/polish can block penetration and cause hazing or peeling.
Moisture trapped in porous terracotta can create uneven gloss and dull patches even when the product is “applied correctly.”
Comparison: penetrating vs film under imperfect prep
If your surface identification is uncertain, penetrating sealers are generally more forgiving because they rely less on a perfect surface film bond. Film finishes can look spectacular on properly prepped tile—but show problems faster when prep isn’t residue-free.
Practical rule: If you can’t confidently remove wax/film, don’t “upgrade” to a film finish just for the sheen.
Verdict: When You Should DIY vs Call a Pro
DIY refinishing works when your terracotta is intact (not crumbling), you can control prep, and you can do small test areas to confirm compatibility. In contrast, skip DIY and consider professional help if tiles are failing structurally, you have extensive water damage/spalling, or you can’t identify/remove the existing finish layer with confidence.Also consider professional support if you’re planning a film finish for high gloss. Film systems are less tolerant of residue, trapped moisture, and uneven absorption—meaning the cost of repeating prep can outweigh the savings.
A successful terracotta refinishing relies on residue-free prep and correct compatibility; when those are uncertain, results become unpredictable.
Structural failure (crumbling/spalling) can’t be solved by sealing; that’s a substrate integrity problem, not a surface-coating problem.
Quick Checklist: Refinish Terracotta Floors
– [ ] Identify current finish type (wax/film/penetrating/unknown)
– [ ] Test a small inconspicuous area for cleaning + sealer compatibility
– [ ] Deep clean and rinse thoroughly; dry fully
– [ ] Strip only if residue/film is present; rinse per instructions
– [ ] Patch chips/cracks; level and smooth repaired areas
– [ ] Apply terracotta-appropriate sealer (penetrating or film) as directed
– [ ] Allow full cure time before normal foot traffic
One last pass before you seal
If you still feel any “slick” or powdery residue after the final rinse, don’t proceed. Re-clean and re-rinse until the surface behaves consistently across your test area.
FAQ
Can I refinish terracotta floors without stripping?
Sometimes—if the existing finish is compatible and not waxy or film-buildup. If the floor feels slick, shows uneven sheen, or appears coated, you’ll usually need stripping to prevent bonding issues.
What’s the best sealer for terracotta: penetrating or film?
Penetrating sealers are commonly chosen when you want to preserve a more natural look while reducing staining and water absorption. Film finishes can deliver different sheen levels, but they demand more precise residue-free prep.
Why does my sealed terracotta look blotchy or darker in spots?
Blotching is typically caused by leftover cleaner/residue, uneven moisture conditions, or inconsistent absorption due to incomplete prep. A small test area helps reveal these problems before you coat the whole floor.
How do I know if my terracotta is too damaged to refinish?
If tiles are crumbling, there’s significant spalling, or the tile bed/grout system is failing, sealing won’t restore structural integrity. In those cases, repairs or replacement are usually the real solution.
Sources
– [ADD: manufacturer specs for the specific terracotta sealer/cleaner/stripper you plan to use, including application conditions, cure time, and compatibility guidance]
– ASTM C373 (water absorption test method for masonry units and related materials)
– [ADD: technical guidance from a terracotta/sealer manufacturer on penetrating sealers vs film-formers and surface prep requirements]
– [ADD: any official documentation from the product manufacturers for stripping/neutralizing/cleaning steps]
A dependable terracotta refinishing result comes from one disciplined process: confirm what’s already on the floor, remove residues completely, repair damage, and then apply a terracotta-appropriate sealer with proper drying and cure time. If you follow that sequence—and you’re honest about whether the substrate is still sound—you can restore appearance and durability without repeating the job.
Frequently Asked Questions
What’s the best way to refinish terracotta floors without damaging them?
Start by cleaning the tile thoroughly and removing any waxes, sealers, or embedded dirt so the refinishing products can bond correctly. Use pH-neutral cleaners whenever possible, then strip old sealants with a terracotta-safe remover if needed. Always test any cleaner, stain, or sealer on a small hidden area first, since terracotta is porous and can absorb unevenly.
How do I prep terracotta floors before refinishing?
Begin with dry sweeping and vacuuming, then deep-clean with a cleaner made for unsealed natural stone or terracotta. If the floor has old sealer or polish buildup, use a stripping product designed for terra-cotta rather than harsh abrasives. After cleaning, rinse well, allow the surface to dry completely, and scuff lightly if the manufacturer recommends it for better adhesion.
How do I remove old sealers or wax from terracotta floors?
Apply a chemical stripper made for natural stone terracotta and follow dwell time exactly to avoid uneven removal. Work in sections, agitate lightly (as recommended), and thoroughly remove residue using multiple rinses or extraction to ensure no slippery film remains. After stripping, dry fully and check by sprinkling a few drops of water—if it beads significantly, residue may still be present and needs more removal before sealing.
Which refinishing method should I choose: sealing, waxing, or staining terracotta?
Sealing is usually the most durable way to refinish terracotta because it helps reduce staining and makes future cleaning easier. Wax can provide temporary sheen but often requires more frequent reapplication and can trap dirt in grout lines and pores. Staining can be used to even out color or achieve a desired terracotta finish, but it should be followed by a compatible sealer for long-term protection.
Why do my refinished terracotta floors look blotchy, and how can I prevent it?
Blotching commonly happens when terracotta absorbs cleaner, stain, or sealer unevenly due to incomplete stripping, moisture differences, or inconsistent product application. To prevent it, ensure the floor is fully stripped of old coatings and completely dry before applying any sealer or stain. Apply products evenly (often with a breathable applicator and consistent passes), and consider using a penetrating sealer formulated for terracotta to minimize patchy absorption.
📅 Last Updated: October 10, 2026 | Topic: How to refinish terracotta floors? | Content verified for accuracy and freshness.
References
- Google Scholar Google Scholar
https://scholar.google.com/scholar?q=how+to+refinish+terracotta+flooring+cleaning+sealing - Google Scholar Google Scholar
https://scholar.google.com/scholar?q=terracotta+floor+stripping+old+sealer+how+to - Google Scholar Google Scholar
https://scholar.google.com/scholar?q=terracotta+tile+refinishing+grout+repair+reseal - Google Scholar Google Scholar
https://scholar.google.com/scholar?q=terracotta+pH+neutral+cleaner+sealer+compatibility - Google Scholar Google Scholar
https://scholar.google.com/scholar?q=terracotta+floor+restoration+acid+based+cleaner+risks - Google Scholar Google Scholar
https://scholar.google.com/scholar?q=historic+terracotta+roof+tile+conservation+cleaning+methods - Google Scholar Google Scholar
https://scholar.google.com/scholar?q=terracotta+porous+ceramic+sealer+penetrating+vs+film+forming - Google Scholar Google Scholar
https://scholar.google.com/scholar?q=method+statement+terracotta+tile+restoration+sealing - Google Scholar Google Scholar
https://scholar.google.com/scholar?q=terracotta+tile+floor+resealing+before+after+case+study - Google Scholar Google Scholar
https://scholar.google.com/scholar?q=terracotta+tile+floor+re-polishing+and+honning+restoration
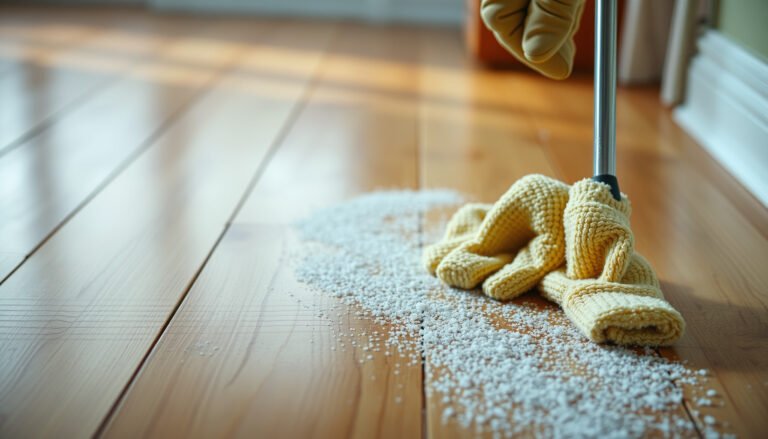
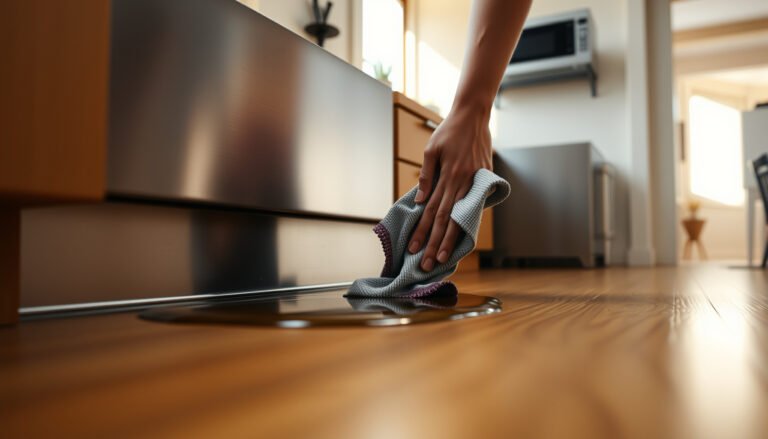
[…] Mud with salt/soil: grime from outside can leave discoloration; if stains remain after cleaning and drying, you may need a finish-specific treatment or a professional […]