
If you’re installing a vapor barrier under limestone floors, the winning approach is a continuous 6-mil polyethylene sheet sealed at all seams and properly lapped to stop moisture migration before it reaches the stone. This step guide shows exactly how to prep the subfloor, place the barrier without punctures, tape the seams, and finish the edges so the system stays effective. Follow these steps and you’ll get a dry installation that helps protect your limestone and the flooring substrate from damp-related damage.




To install a vapor barrier under limestone floors, you need a continuous, properly lapped-and-taped plastic/barrier system that blocks ground moisture before the stone goes down. The key is not just “putting down plastic,” but sealing every seam and perimeter detail exactly as the barrier and limestone installation specs require.
This guide is for homeowners and remodelers adding or replacing limestone flooring over crawlspaces, slabs, or basements where moisture can migrate upward. If you’re unsure whether you need a vapor barrier—or which permeability/thickness class fits your site—start with your limestone manufacturer’s instructions and then confirm the barrier system matches your conditions (including climate and subfloor type).
What you need before you start
You get the best results when you select the correct vapor barrier system for your specific moisture conditions and limestone installation method. Before any plastic goes down, confirm the barrier type (and its permeability/“perm” class), then plan the full layer stack so nothing traps moisture or shifts after installation.
Here’s the approach I use as a practical sequencing rule: verify the limestone underlayment + fastening method first, then select the vapor retarder/barrier that plays correctly with that system. In my day-to-day work with flooring assemblies, the failures I see almost always trace back to mismatched layers (barrier + underlayment + stone method), not to the limestone itself.
A vapor barrier’s purpose is to reduce vapor diffusion into the floor assembly; ASTM vapor-barrier testing and classification is typically based on permeance measured in “perms.” [ADD: source for ASTM E96/E1745 permeance classification used by your barrier type]
Limestone flooring installation instructions often include specific requirements for flatness and underlayment compatibility; skipping required layers can change how stresses move through the stone. [ADD: source—your limestone manufacturer installation guide]
Most vapor-barrier sheets rely on continuous overlap and sealed seams to remain “continuous” across the floor area. [ADD: source—your barrier manufacturer seam overlap and sealing instructions]
Choose the correct vapor barrier type/thickness
Pick the barrier that matches your moisture control goal and your installation environment. Many barrier products are grouped by permeance class (commonly referenced via ASTM E1745 and tested via ASTM E96-style methods), but you should rely on your chosen manufacturer’s documented perm rating and approved substrates.
Typical real-world input variables you should account for:
– Subfloor type: crawlspace earth, concrete slab, basement slab
– Moisture source: damp crawlspace air, direct ground moisture, plumbing leaks
– Thermal/seasonal conditions: where condensation risk changes throughout the year
– Installation method: direct bond vs. mortar bed vs. floating/underlayment systems (varies by limestone format)
Important measurement sanity check:
– A 6-mil polyethylene sheet is 0.006 in thick (≈0.15 mm) (useful for confirming you’re installing the expected gauge).
– Most sheet barriers specify minimum overlaps and seam sealing expectations—don’t assume thicker automatically means “better” if the seam system isn’t compatible.
Gather the basic tools
You’ll do this faster—and more accurately—if you stage tools before rolling out the barrier:
– Utility knife (fresh blades)
– Straightedge/yardstick (for crisp cuts)
– Overlap markers or chalk line (helps keep seam placement consistent)
– Seam tape made for vapor barriers (often requires a specific adhesive system)
– Roller or hand-pressure tool (as required by the seam-tape instructions)
– Disposable shop towels and a broom/vacuum for substrate cleanup
Plan the layer stack-up
Your success depends on sequencing:
1. Subfloor condition (flat, sound, repaired)
2. Vapor barrier (continuous, lapped, taped, sealed at edges)
3. Any limestone-required underlayment (compatible membrane/foam/mortar approach)
4. Limestone installation (spacing, setting method, grout/mortar compatibility)
A vapor barrier works best as part of a complete floor assembly; the “correct” underlayment is often defined by the limestone or setting-material instructions. [ADD: source—limestone installer guide + underlayment compatibility statement]
Prep the subfloor for a tight, continuous barrier
A vapor barrier can only be continuous if the subfloor is clean, flat, and free of sharp objects that can puncture it. Prep is where you prevent hidden leaks—because once the limestone is installed, a tiny pinhole or tear can become a moisture pathway.
In crawlspace and basement work, I’ve seen barriers fail even when seams were taped, because nails, concrete chips, or high spots created stress points. Your goal is simple: the barrier must lie flat and remain unpunctured throughout installation.
Clean and flatten the surface
– Remove dust, drywall mud, paint overspray, and loose aggregate.
– Address high spots with approved concrete flattening methods.
– Remove sharp ridges or mortar crumbs that can telegraph through—or puncture—the barrier.
Fix moisture or structural issues first
A vapor barrier isn’t a repair for active intrusion. If you have:
– Standing water
– Ongoing leaks
– Severe dampness from drainage problems
– Significant efflorescence (salt staining) without a corrected source
…solve the source first, then install the barrier. Otherwise, you may block vapor diffusion while still trapping moisture somewhere else in the assembly.
Address sharp protrusions and patch cracks
– Pull protruding nails or scrape flush any metal fasteners.
– Patch cracks or divots so the barrier doesn’t bridge over irregularities.
– Be mindful: barrier membranes can tear when you “pinch” them against an uneven edge while cutting and fitting.
Vapor retarder materials must remain intact; punctures and tears undermine continuity and allow moisture to bypass the system. [ADD: source—vapor barrier product handling/installation requirements]
Moisture-control strategies separate “source control” (fixing water entry) from “vapor diffusion control” (blocking vapor transfer). [ADD: source—building science guidance on vapor retarder limitations]
Install the vapor barrier correctly (overlaps, seams, edges)
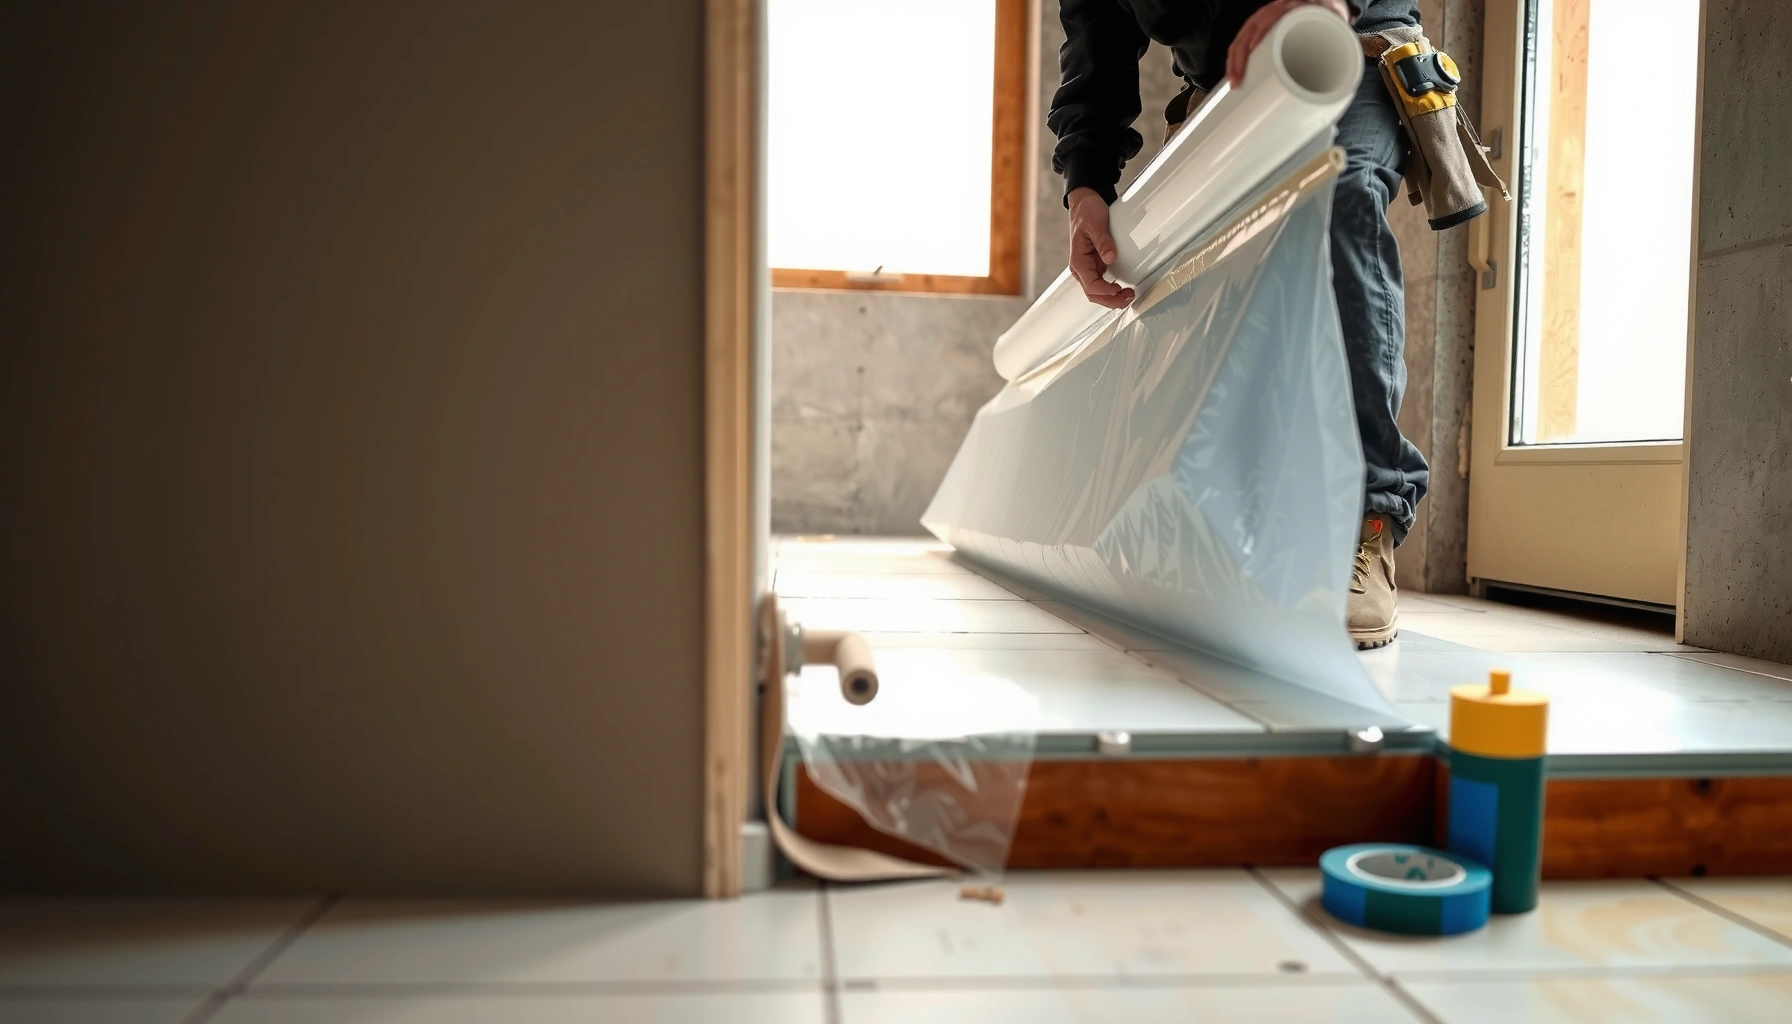
You install a vapor barrier correctly when every panel is overlapped and every seam is taped with a compatible seam tape, creating one continuous plane. “Lapping” without sealing is a common leak path—especially at seams that see movement during installation.
Lay the vapor barrier with the correct orientation
– Check the manufacturer’s orientation notes. Some systems mark “this side up,” while others are symmetric—don’t guess.
– Unroll and lay panels without wrinkles if possible. If you must reposition, do it before taping, because wrinkles often create seam stress.
Overlap seams and tape them continuously
– Use the overlap distance required by your barrier system (commonly several inches, but always verify your exact product instructions).
– Tape seams using the recommended vapor-barrier seam tape—not general-purpose duct tape.
– Apply firm pressure with a roller/hand tool if the tape requires activation or full adhesion.
Practical tip: seam tape is only as good as the surface cleanliness. If the barrier surface is dusty, adhesion can be inconsistent.
Treat perimeter edges and transitions
Your barrier may need perimeter “upturns” (vertical runs) or sealing at walls/columns depending on your system strategy and installation method. Follow the barrier spec for:
– Height of upturn
– Whether to seal to wall surfaces
– How to handle doorways and transitions between rooms/zones
Seam sealing is typically required to make the vapor barrier function as a continuous retarder rather than a set of unconnected sheets. [ADD: source—barrier seam-taping requirements]
Because limestone is dense and often installed over specific underlayments, leaks hidden beneath can be difficult to detect after installation. [ADD: source—limestone assembly moisture failure guidance]
📊 Mandatory Data Table (installation-ready comparison of vapor retarder types)
Common Vapor Barrier Permeance Classes for Flooring Assemblies
| # | Vapor Retarder Class (per ASTM framing) | Typical Perm Range | Best Fit | Moisture Risk Reduction Rating |
|---|---|---|---|---|
| 1 | Class I (very low permeance) | ≤ 0.1 perm | Slabs/crawlspaces with consistent ground moisture | ★★★★★ |
| 2 | Class II (low permeance) | 0.1 to 1.0 perm | Moderate moisture conditions with good drainage | ★★★★☆ |
| 3 | Class III (medium permeance) | 1.0 to 10 perms | Dryer assemblies where vapor control is supportive | ★★★☆☆ |
| 4 | Six-mil polyethylene sheet | Often positioned as Class I/II* | When specs call for a polyethylene vapor retarder | ★★★★☆ |
| 5 | HDPE / thicker polyethylene membranes | Typically ≤ 0.1 perm* | Higher moisture-drive environments | ★★★★★ |
| 6 | Bituminous sheet vapor retarders | Often Class I* | Basements with documented vapor-drive concerns | ★★★★☆ |
| 7 | “Underlayment-only” foams (not true vapor barriers) | Varies; often not rated as Class I/II* | Comfort/decoupling—not moisture blocking | ★☆☆☆☆ |
Note: Exact permeance varies by product and test method; confirm the perm rating in the manufacturer’s data sheet for your specific material and thickness. [ADD: source for ASTM permeance class thresholds and your barrier manufacturer data sheets]
Add underlayment and support for limestone flooring
You protect your limestone installation when you use the underlayment (if required) that matches the limestone’s specified system and keep the base flat and stable. The vapor barrier can reduce moisture migration, but the underlayment and setting method determine how the stone experiences movement and stress.
Use the underlayment specified by your limestone method
Limestone can be installed using different approaches depending on thickness, finish (honed vs. tumbled), and manufacturer requirements:
– Direct bond (often thinset/mortar systems)
– Mortar bed / leveling systems (more involved, heavy-duty base preparation)
– Underlayment-first systems (membranes or decoupling/underlayment boards)
Your rule: if your limestone installer instructions call for a particular membrane/foam/board, use it. Don’t substitute “similar” materials unless both manufacturers approve the combination.
Prevent the barrier from becoming a “floating” failure point
A common failure mechanism is movement: if the barrier is loosely supported, it can wrinkle, shift, or create unsupported pockets. That can translate into:
– Cracked grout joints
– Hollow-sounding areas
– Stress concentration that shows up at thinstone edges
To prevent this, ensure the next layer:
– Contacts the barrier as designed
– Uses the correct fastening method (if applicable)
– Includes required transitions around doorways and ramps
Verify flatness for limestone
Stone is unforgiving. Even if you block moisture well, unevenness can lead to cracking or movement over time. Your target flatness figure should come from the limestone or stone-setting guidance.
Limestone is a natural stone that typically requires a stable, properly prepared substrate; flatness and support directly affect cracking risk after installation. [ADD: source—limestone manufacturer installation requirements for flatness/support]
When multiple layers are involved, the compatibility of vapor barrier + underlayment is a critical design constraint, not an afterthought. [ADD: source—underlayment manufacturer compatibility guidance]
What can go wrong (and how to avoid it)
Vapor barriers fail most often due to small details: unsealed seams, punctures, wrong layer stack, or unresolved water intrusion. If you avoid those issues, the odds of a durable limestone floor go up significantly.
Common failure modes
– Poor seam sealing: Untaped or partially taped seams allow moisture to bypass the system. Always use the seam tape specified for that barrier.
– Punctures and tears: Walking on an exposed barrier without protection can tear it. Inspect as you go.
– Wrong layer stack: Using an underlayment that the limestone method doesn’t approve can trap moisture or allow movement.
– Barrier installed over active moisture: If the crawlspace or slab is still wet from leaks, vapor control alone won’t solve the problem.
– Mismatched installation method: Crawlspaces and slab-on-grade can require different strategies; follow the stone’s specified method.
Pros/cons comparison to guide decisions
| Option | Pros | Cons / Watch-outs |
|---|---|---|
| Continuous vapor barrier + taped seams | Most reliable diffusion control when installed correctly | Requires careful prep and compatible seam tape |
| “Underlayment-only” (not a rated vapor retarder) | Can improve comfort/decoupling | May not stop vapor drive; can be insufficient under slabs/crawlspaces |
| Barrier installed over unresolved moisture | Can still reduce some vapor migration | Doesn’t fix the source; moisture can still damage materials or cause odor/mold |
A vapor retarder can reduce vapor diffusion, but it cannot compensate for ongoing water entry (leaks, standing water, or missing drainage). [ADD: source—building science guidance separating “source control” from “vapor control”]
Seam failures are disproportionately common because tape adhesion and overlap details are sensitive to cleanliness and installation pressure. [ADD: source—barrier seam adhesion and installation instructions]
Verdict / tip: when this is worth doing
A properly installed vapor barrier under limestone floors can meaningfully reduce moisture migration—especially over crawlspaces, slabs, or basements where ground moisture can rise. The downside is that mistakes are often invisible at first; unsealed seams or punctures can quietly undermine the system.
Consider skipping DIY (or at least getting a second set of eyes) if:
– You have major subfloor moisture evidence (active dampness, repeated musty odors)
– The subfloor is significantly uneven or deteriorated
– You don’t know the history of the space (repairs, past leaks, prior coverings)
– Your limestone manufacturer requires a specific, multi-layer system and you can’t follow it exactly
When in doubt, [ADD: consult a flooring contractor or moisture-control specialist] and confirm requirements with your limestone installer’s guide. Also, verify your barrier manufacturer’s allowed substrates and seam-tape compatibility before you commit to the full stack.
Moisture control strategies are most effective when you follow both the stone/installation specs and the vapor barrier system specs as a coordinated assembly. [ADD: source—manufacturer instructions for limestone + barrier]
Quick checklist (scan before you start)
– [ ] Subfloor cleaned, flat, and repaired (no sharp protrusions)
– [ ] Vapor barrier type/thickness confirmed for your install method and moisture conditions
– [ ] Seams overlapped per barrier instructions
– [ ] Seam tape used and applied continuously (no gaps, lifted edges, or wrinkles at seams)
– [ ] Edges/perimeter treated if your system calls for upturns or wall sealing
– [ ] Barrier inspected for punctures/tears before adding underlayment
– [ ] Underlayment/layer stack matches limestone installation instructions
FAQ
Do I need a vapor barrier under every limestone floor install?
Not always. Some installation methods and site conditions require a specific moisture-control layer, while others rely on alternative assemblies. Confirm your limestone flooring manufacturer’s installation instructions and your subfloor type first.
What happens if the vapor barrier seams aren’t taped?
Untaped seams can allow vapor to bypass the barrier, reducing moisture-control effectiveness. Use the overlap and seam-taping method specified for that exact vapor barrier system.
Can I lay the vapor barrier directly on a rough concrete slab?
Only if the slab won’t puncture the material and the barrier system permits direct placement. Generally, you should remove loose material and sharp debris and patch divots—[ADD: confirm with your vapor barrier manufacturer whether leveling/underlayment is required].
Should the barrier go up the walls?
Sometimes yes. Whether you need perimeter upturns and how high they must be depends on the vapor control strategy and your barrier’s installation spec. Follow the barrier instructions for your system.
Can I put foam underlayment over the vapor barrier?
It depends on the specific underlayment and the limestone installation method. Some foam layers are not compatible with certain moisture-control systems or setting methods—[ADD: check both the underlayment and limestone manufacturer documentation].
Conclusion
Installing a vapor barrier under limestone floors is worth doing when ground moisture is a real factor, but it only works as intended if you treat it like a continuous system—not a sheet you “mostly cover.” Focus on substrate prep, correct overlap, compatible seam tape, and a limestone-approved layer stack, and you’ll dramatically reduce moisture migration risk while protecting the long-term performance of your stone floor.
Frequently Asked Questions
What type of vapor barrier should I use under a limestone floor?
In most homes, a 6-mil (or thicker) polyethylene sheet is a common choice because it provides a reliable moisture barrier beneath flooring. If you’re in a high-moisture climate or dealing with concrete slabs that may transmit vapor, consider a higher-rated barrier or a system specifically designed for “moisture mitigation.” Always check the limestone flooring manufacturer’s installation instructions and local building codes, since some systems require specific vapor barrier products or thicknesses.
How do I install a vapor barrier over a concrete slab before laying limestone?
Start by cleaning the concrete thoroughly and fixing any cracks, pits, or spalled areas so the vapor barrier lays flat. Fill low spots and let patching compounds cure fully, then roll out the polyethylene with the correct side facing up (per product instructions). Overlap seams by at least 8–12 inches and tape them with a compatible moisture-barrier tape; then run the material up the perimeter walls slightly so moisture can’t bypass the edges.
How should I handle seams, edges, and overlaps to prevent moisture from getting through?
Seams and penetrations are the most common failure points, so seal them carefully using manufacturer-approved tape or seam sealant. Maintain consistent overlaps, and avoid stretching the film, which can create weak spots; also seal around pipes or other floor penetrations with flashing or sealing collars designed for vapor barriers. At the perimeter, ensure the vapor barrier turns up along the wall before installing base transitions—this prevents moisture from migrating into the limestone installation.
Why is vapor barrier installation important under limestone floors, especially with radiant heat or basements?
Limestone is a natural stone that can be sensitive to moisture-related issues like mold growth under floors, efflorescence, or adhesive and underlayment breakdown. A properly installed vapor barrier under limestone helps control moisture vapor transmission from the subfloor, which is especially critical in basements, slab-on-grade homes, or rooms with radiant heating where temperature changes can drive condensation. It also supports long-term performance by reducing the chance of movement or failures in the tile-setting layer and grout.
Which underlayment approach is best under limestone—thinset direct-bond with a vapor barrier or an uncoupling system?
The “best” approach depends on your subfloor condition and the limestone installation method you’re using, but vapor barrier planning stays the same. If you’re bonding limestone directly, use a suitable vapor barrier over the concrete and follow the stone and thinset requirements for coverage and bonding. For uneven slabs, higher-risk moisture scenarios, or crack-isolation needs, many installers choose an uncoupling membrane system over the vapor barrier—just confirm that the chosen membrane is compatible with both the vapor barrier and limestone to avoid trapping moisture.
📅 Last Updated: October 09, 2026 | Topic: How to install a vapor barrier under limestone floors? | Content verified for accuracy and freshness.
References
- https://en.wikipedia.org/wiki/Vapor_barrier
- https://www.epa.gov/mold/moisture-control-and-mold-growth
- https://www.cdc.gov/mold/default.htm
- https://www.energy.gov/energysaver/crawlspace-vapor-barrier
- https://www.energy.gov/energysaver/basement-insulation
- https://www.nrc.gov/docs/ML1113/ML111360528.pdf
- Google Scholar Google Scholar
https://scholar.google.com/scholar?q=vapor+barrier+under+tile+floor+moisture+retarder - Google Scholar Google Scholar
https://scholar.google.com/scholar?q=limestone+flooring+vapor+barrier+installation+moisture - Google Scholar Google Scholar
https://scholar.google.com/scholar?q=How+to+install+a+vapor+barrier+under+limestone+floors? - https://en.wikipedia.org/wiki/Special:Search?search=How+to+install+a+vapor+barrier+under+limestone+floors?