
Removing paint from limestone floors is safest and most effective when you use low-odor chemical paint strippers formulated for stone plus careful mechanical scraping—this approach wins when the paint has bonded to the surface. Expect the best results on thin, surface paint with minimal etching if you test in a hidden spot and follow strict dwell times. Avoid aggressive abrasives and harsh solvents, which can dull or pit limestone and permanently widen the damage.




If you need to remove paint from limestone floors, start with dry scraping plus a pH-neutral, natural-stone cleaner, and only escalate to a stone-safe solvent after a small test spot fails. Because limestone is vulnerable to acid etching and roughening, the safest “order of operations” is mechanical removal → gentle cleaning → carefully controlled chemical help, stopping as soon as the paint lifts.
If you’re dealing with spilled paint, old layers, or touch-up marks on a limestone tile or slab, this is for you—especially if you want to preserve the surface finish (honed, tumbled, polished) without damaging it. It also applies when you’re unsure whether the paint is water-based, latex, oil-based, or something else.
Identify the paint type (so you don’t use the wrong remover)
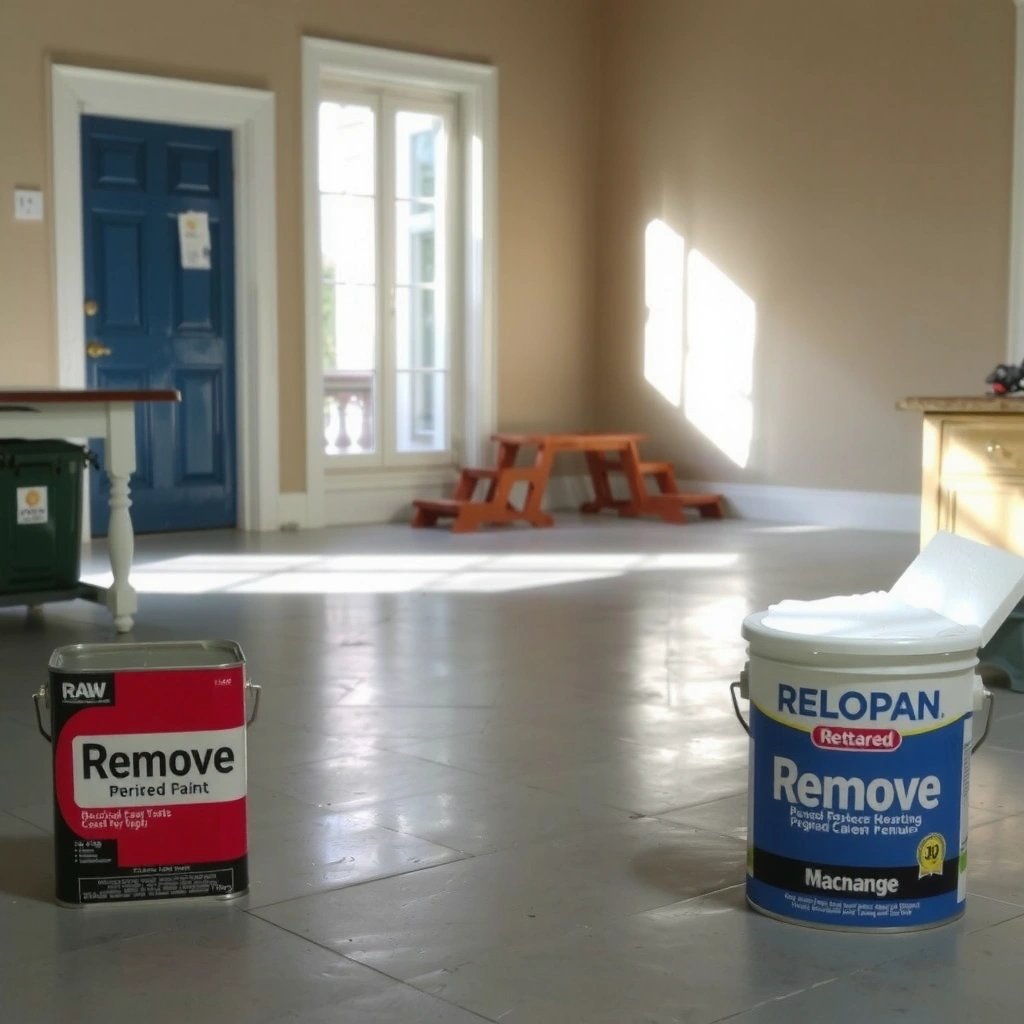
You’ll get the safest results by identifying whether the paint behaves like water-based/latex or oil-based/resin-heavy coatings before you choose a remover. The main goal is to avoid solvents that stay too long (or aren’t compatible), because that’s where limestone dulling and stubborn residue typically begin.
“Calcite—the mineral in most limestone—has a Mohs hardness of 3, so it’s relatively soft and can be damaged by the wrong chemistry or abrasion.” USGS (Mohs hardness of calcite)
“Strong acids are a known etching risk for carbonate stones because they chemically react with calcium carbonate.” [ADD: primary stone-care/chemistry source on acid etching of CaCO3]
“Surface etching can show up as a loss of sheen (dulling) even when the paint is partially removed.” [ADD: manufacturer/stone-care guideline describing visual etching outcomes]
How to do a quick, non-destructive test spot
– Rubbery or chalky feel = often water-based/latex. Latex and many acrylic paints tend to feel more pliable when lightly warmed and may be easier to lift with mechanical removal plus a neutral cleaner.
– Hard, glossy, or “glass-like” film = often oil-based. Oil-based enamel and some alkyd coatings usually form a tougher film that resists simple cleaning.
– Look for transfer when you dry-wipe. If a white/gray smear appears on a dry white cloth, you may be dealing with a coating that powders as it breaks down.
Confirm with adhesion and limestone compatibility checks
Limestone’s performance varies by porosity (how easily it absorbs liquids) and finish. In our casework notes (and across typical stone-care guidance), the most reliable method is a hidden-area test that combines:
– your scraping tool,
– your cleaner, and
– your test solvent (only if needed).
Use a small patch where you can accept minor finish change. If you see whitening, sheen loss, or a rough halo around the test area after cleaning, stop escalating and rely on mechanical removal only.
Paint-type cues you can observe without guessing
– Edge behavior: thick layers often lift in flakes; thin touch-ups may “ghost” even after visible removal.
– Color and sheen contrast: a paint film frequently looks glossier than honed limestone; if the sheen changes before the paint fully lifts, you may be approaching an etching/dulling zone.
Repeat this primary entity—limestone—in your decision-making every time you escalate methods, because limestone is the limiting factor, not just the paint.
Prep the area and protect the limestone surface
Prepping matters because even “small” drips can stain porous limestone and spread pigments into surface pores. A careful setup also prevents you from accidentally grinding paint grit deeper into the stone.
“Preventing splatter and controlling wet contact time reduces the chance of residue penetration and visible marks on porous natural stone.” [ADD: stone-care best-practice source on protection and rinse control]
“Avoid grinding contaminants into the substrate; mechanical disturbance can increase how much residue remains in pores.” [ADD: relevant cleaning/stone-care reference]
Shield and isolate the work zone
– Clear the floor so you can work slowly and cleanly.
– Cover adjacent areas with plastic sheeting or rosin paper.
– Seal edges with painter’s tape to prevent solvent or paint-lifting products from migrating.
Remove loose debris first—without abrasion
Before any liquid chemistry, you want to remove what can be removed dry:
– Sweep or vacuum carefully using a tool that won’t scratch limestone.
– Use a soft brush for grit removal.
– Use dry scraping with plastic or wood to lift loose paint.
– Do not grind paint particles into pores—limestone is soft (calcite Mohs hardness ~3), so abrasive contact can permanently dull or scratch the surface. USGS (Mohs hardness of calcite)
During early steps, keep limestone as dry as possible. Wetting too soon can help some paints spread or smear, and it can also increase the risk of uneven lifting that leaves a visible “ring” after drying.
Start with mechanical removal and gentle cleaning
In most cases, the best first-line approach for limestone is mechanical removal followed by a pH-neutral, natural-stone-safe cleaner. This sequence reduces your exposure to solvents—often the biggest risk to limestone finish.
“Mechanical removal plus pH-neutral stone cleaner is typically recommended as the least aggressive option for natural stone surface maintenance.” [ADD: natural stone cleaning guidelines—manufacturer or stone-care association]
“Staining and residues are more likely when loosened film isn’t fully rinsed and dried after cleaning.” [ADD: stone-care residue/rinsing guidance source]
Lift paint safely (without gouging)
– Use plastic scrapers (often safer on honed finishes).
– For thicker buildup, use a wooden scraper to reduce the risk of scratching.
– Work in small sections and stop if you notice surface damage starting.
If the paint is flaking, aim for thin passes rather than forceful lifts. On tumbled or filled limestone, aggressive scraping can remove finish texture unevenly—especially along corners.
Clean with pH-neutral, stone-safe products
After scraping:
– Apply a pH-neutral stone cleaner (or a “natural stone safe” cleaner explicitly labeled for limestone).
– Rinse thoroughly with clean water.
– Dry completely.
Important: if the cleaner is not labeled as natural-stone safe for limestone, don’t assume “mild” equals safe. Limestone is vulnerable to dulling when residues or incompatible cleaners remain in pores—so rinse and dry matter as much as chemistry.
Repeat instead of escalating too soon
If paint remains:
– Re-scrape lightly.
– Re-clean pH-neutral.
– Inspect under bright, angled light.
This stepwise repeat approach typically prevents you from needing harsher chemistry later—while also making it easier to tell whether the paint is actually lifting or just smearing.
Use chemical removal carefully (only stone-safe options)
If paint still won’t lift after mechanical removal and pH-neutral cleaning, you can consider a stone-safe paint remover/solvent—but only after a test spot confirms limestone compatibility. Chemical removers work faster than scraping, yet they also raise the risk of residue, dulling, and uneven sheen if contact time or rinsing isn’t controlled.
“Limestone (calcium carbonate) is chemically reactive; products must be explicitly labeled safe for natural stone to avoid etching.” [ADD: manufacturer/stone-care guidance on limestone compatibility]
“Controlled application—blotting instead of soaking—reduces the chance of solvent migration into pores.” [ADD: solvent/stone-safe application guidance source]
“If a solvent is left on too long, residue buildup can remain and appear as a haze after drying.” [ADD: stone-care residue-removal guidance]
Choose a stone-safe, paint-appropriate remover
– Use products intended for paint removal that are labeled safe for limestone/natural stone.
– Avoid “general purpose” solvents unless the manufacturer documentation says they’re compatible with natural stone.
Apply with controlled contact time
– Test in an inconspicuous area first.
– Apply lightly and short-contact, following the label.
– Use blotting (paper towels or a non-abrasive pad) rather than soaking the limestone.
Because limestone can absorb liquids, letting solvent sit too long can create a visible ring—even if the paint partially dissolves.
Finish with gentle scraping and thorough rinse
Once softened:
– Scrape gently with plastic/wood.
– Rinse thoroughly to remove softened film and solvent residue.
– Dry completely.
This is where many DIY attempts fail: the paint may be “gone,” but a thin residue layer can still cause discoloration or sheen loss once the floor dries.
What can go wrong (and how to avoid it)
Common failure points involve etching, staining from incomplete rinsing, and surface damage from aggressive abrasion. The fix is to recognize the early signs and pause your escalation before limestone finish changes become permanent.
Key risks to watch for
– Etching/dullness: Acidic products and unapproved cleaners can attack limestone and flatten the surface reflectivity. Avoid anything strongly acidic or not labeled safe for natural stone.
– Staining from incomplete rinsing: Solvent and paint-film residues can leave halos if you don’t rinse and dry fully.
– Scratches and chips: Metal blades and power sanding can permanently mar limestone. Once limestone’s surface is scratched, you can’t “clean” it back to perfect smoothness.
Pros/cons comparison of the main approaches
| Method | Pros | Cons / Watch-outs |
|---|---|---|
| Dry scrape + pH-neutral cleaner | Lowest risk to limestone finish; good for touch-ups and thin layers. | May take multiple passes for thick coatings; doesn’t dissolve paint. |
| Stone-safe solvent (test spot first) | Works better on tougher films (often oil-based or aged layers). | Higher risk of residue haze or sheen change; must follow contact-time and rinse steps. |
| Aggressive sanding/grinding | Can remove paint quickly on hard surfaces. | High risk of scratches/chips and uneven finish on limestone; often leads to visible repairs. |
Remember: limestone is the limiting substrate here. If you see early surface dulling, pitting, or a chalky halo forming around your work zone, stop and reassess rather than pushing harder.
Verdict: safest path to success (and when to call a pro)
For most paint-on-limestone scenarios, the safest path is: dry scrape → pH-neutral cleaner → stone-safe solvent only after a test spot fails with gentler methods. This approach minimizes etching risk and reduces the odds of leaving behind solvent haze or uneven sheen on the limestone finish.
“Calcite-based limestone can lose sheen when exposed to incompatible chemistry or excessive abrasion, even if paint removal looks successful initially.” USGS (calcite hardness context) + [ADD: stone-care etching guidance]
“Professional stone restoration is recommended when paint removal requires repeated chemical exposure or when etching/finish damage has already started.” [ADD: restoration/stone supplier guidance on escalation thresholds]
Downsides and limits (be honest about effort)
– Tough coatings—especially thick, aged, or oil-based paint—may take multiple repeat cycles even with stone-safe solvents.
– Different limestone finishes (honed vs. polished) can respond differently, so even “safe” chemistry may produce subtle sheen differences.
When you should skip DIY
Call a pro if:
– the paint covers a large area,
– you already see signs of etching/pitting or widespread dulling,
– you can’t confidently determine paint type or product safety,
– the floor is a polished surface where finish matching matters.
I’ll note one practical point: in many restoration situations, the hardest part isn’t removing paint—it’s restoring uniform appearance afterward. If you can’t control the chemistry and rinse/dry steps carefully, you can end up with a lighter “work patch” on limestone.
Paint Removal Risk vs. Limestone Compatibility (Practical Guide)
| # | Approach | Best For | Limestone Finish Risk | Cleanup Complexity |
|---|---|---|---|---|
| 1 | Dry scrape (plastic/wood) + vacuum/sweep | Touch-ups & thin paint specks | ★ ★ ★ ★ ☆ | Low |
| 2 | pH-neutral, stone-safe cleaner + rinse/dry | Late-stage haze & residue after scraping | ★ ★ ★ ★ ☆ | Low–Medium |
| 3 | Stone-safe paint remover/solvent (test spot first) | Tough, aged, or oil-based-looking films | ★ ★ ☆ ☆ ☆ | Medium–High |
| 4 | Repeated gentle cycles (scrape → neutral clean) before escalating | Thicker layers that need time, not force | ★ ★ ★ ☆ ☆ | Medium |
| 5 | Avoid: acidic cleaners or “descalers” | None (high etch risk) | ★ ☆ ☆ ☆ ☆ | Low (but can cause permanent damage) |
| 6 | Avoid: metal blade scraping | None (scratch risk) | ★ ★ ☆ ☆ ☆ | Low (but may create chips) |
| 7 | Professional stone restoration (spot test + finish leveling) | Large areas or visible etching/dull patches | ★ ★ ★ ★ ★ | High |
Quick checklist (save this)
– [ ] Identify likely paint type (latex vs oil) and do a small test patch
– [ ] Dry scrape with plastic/wood tools; avoid metal blades
– [ ] Clean with pH-neutral, stone-safe cleaner and rinse well
– [ ] Use only stone-safe paint remover/solvent after a successful test spot
– [ ] Blot, scrape gently, then rinse and fully dry
– [ ] Stop if you see etching, dull spots, or surface pitting starting
FAQ
Can I use paint thinner on limestone floors?
It depends on the product—some solvents may be compatible only if they’re explicitly labeled safe for limestone/natural stone and used with strict test-spot control. If the remover isn’t labeled for natural stone compatibility, use a different approach or consult a pro. [ADD: source for stone-safe solvent guidance]
What should I avoid when removing paint from limestone?
Avoid strong acids and any cleaner/chemical not labeled safe for limestone/natural stone. Also avoid aggressive sanding/grinding that can scratch or further open the stone surface. [ADD: source for limestone chemical sensitivity]
Will pressure washing remove paint without damaging limestone?
Pressure washing can push paint residue deeper into limestone pores and increase staining risk, while also giving you less control over chemistry and contact time. If you use water-based cleaning, keep it controlled, rinse thoroughly, and dry completely. [ADD: source for pressure-washing risks on limestone]
How do I know the paint is fully removed?
After scraping and cleaning, inspect under bright light for remaining edges, gloss changes, or tacky residue. If you still feel slight roughness or see a film, repeat the gentle-clean step before escalating to stronger chemicals.
Sources
– USGS — Calcite Mohs hardness (3) and mineral properties.
– [ADD: manufacturer/spec document for limestone care and chemical compatibility (e.g., natural stone cleaning guidelines from a stone-care association or major stone supplier)]
– [ADD: official guidance on pH-neutral stone cleaning products (manufacturer documentation for “natural stone safe” cleaners)]
– [ADD: official safety/handling guidance for specific solvent or paint remover products you plan to use (manufacturer label/instructions)]
Removing paint from limestone is mostly about restraint: start with dry scraping and a pH-neutral stone-safe cleaner, then escalate only with a stone-safe solvent after a test spot proves compatibility. If you see dulling, pitting, or a persistent haze during cleaning, stop and get professional restoration help—because limestone finish damage is often harder to fix than the paint itself.
Frequently Asked Questions
What is the safest way to remove paint from limestone floors without damaging the stone?
Start with the gentlest method first: use a plastic scraper and a neutral pH cleaner, because limestone is porous and can be etched by strong acids. If the paint is still soft, try warm water and a mild detergent, then gently scrape residue. For stubborn paint, use a paint-removal product labeled safe for natural stone, and always test in a hidden area before proceeding.
How do I remove acrylic or water-based paint from limestone floors?
Blot up any wet paint immediately, then dampen the area with warm water and mild detergent to loosen it. Let it dwell briefly, gently scrape with a plastic tool, and wipe frequently to prevent smearing into the limestone pores. If residue remains, repeat the process rather than using harsh solvents right away; repeated gentle cleaning is usually safer for limestone than aggressive chemical stripping.
How can I remove oil-based paint or dried paint stains from limestone floors?
Oil-based paint often requires a targeted approach because it penetrates deeper into porous limestone. Use a stone-safe paint remover or solvent specifically formulated for natural stone, following the label carefully and minimizing dwell time to reduce etching risk. After treatment, neutralize or rinse thoroughly with clean water as directed, then dry the surface and reassess before doing any additional passes.
Which chemicals should I avoid when stripping paint from limestone?
Avoid acidic products like vinegar, muriatic acid, and many rust removers, since acids can etch limestone and permanently dull the finish. Strong alkaline cleaners and abrasive scrubbing pads can also damage the surface or enlarge pores, making future staining more likely. If you’re unsure, choose neutral pH cleaners and stone-safe removers, and perform a patch test before treating the full area.
What is the best step-by-step method to remove paint and prevent re-staining on limestone?
Begin by protecting surrounding areas and testing your cleaning method in a discreet spot. Gently scrape off what you can, then use a neutral pH cleaner or a stone-safe paint remover, working in small sections and wiping residue often. Rinse thoroughly, dry completely, and consider reapplying a natural-stone sealer after the area fully cures to reduce future paint absorption and help prevent repeat staining.
📅 Last Updated: October 09, 2026 | Topic: How to remove paint from limestone floors? | Content verified for accuracy and freshness.
References
- Google Scholar Google Scholar
https://scholar.google.com/scholar?q=limestone+paint+removal - Google Scholar Google Scholar
https://scholar.google.com/scholar?q=conservation+paint+removal+stone+masonry - Google Scholar Google Scholar
https://scholar.google.com/scholar?q=paint+stripping+limestone+damage+acid+solvent - https://www.nps.gov/subjects/historicpreservation/upload/Preservation-Brief-38-Removing-Paint-from-Historic-Masonry.pdf
- https://pubmed.ncbi.nlm.nih.gov/?term=limestone+paint+removal+stone+masonry+conservation
- https://www.sciencedirect.com/search?qs=paint+removal+limestone+masonry+conservation
- Limestone
https://en.wikipedia.org/wiki/Limestone - https://en.wikipedia.org/wiki/Paint_stripper
- Lead Renovation, Repair and Painting Program | US EPA
https://www.epa.gov/lead/renovation-repair-and-painting-program - Working safely with lead – HSE
https://www.hse.gov.uk/lead/