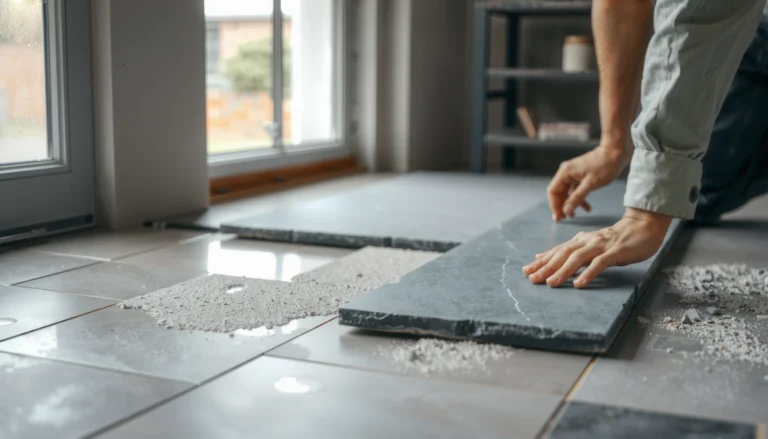

Want to know how to install over plywood slate floors without guesswork? This step-by-step guide tells you exactly how to prep the plywood, build a stable underlayment, set slate tiles correctly, and finish with proper sealing so the floor stays flat and crack-resistant. If your plywood subfloor is solid and properly fastened, you’ll get a durable slate install that looks right and lasts.



To install slate over plywood, you need a rigid, properly prepared substrate and a tile assembly system approved for use over plywood to prevent flex and grout failure. The core of a durable slate floor is verifying plywood stability, installing the right backer/uncoupling layer, and using a slate-compatible thinset and setting method that matches the board system’s specs.
If you’re planning a slate installation over plywood for kitchens, entries, basements, or bathrooms (with a suitable waterproofing plan), this walkthrough is designed for DIYers and remodelers who want a reliable sequence rather than guesswork. Because slate is heavy and can be unforgiving, the “prep and stability” steps often matter as much as the tile-setting part. As of 2026, manufacturers continue to emphasize system compliance—meaning the board/membrane, thinset, and fastening method must work together as a designed assembly (not as an improvised stack).
Slate over plywood usually fails when the plywood flexes—so your underlayment system must be specifically rated to limit movement and support bonding.
Most approved plywood tile assemblies are system-based: cement backer board or an approved uncoupling membrane, installed with exact fastening and seam treatment.
For natural slate, mortar compatibility matters—follow both the slate installer instructions and the mortar/board system instructions to avoid debonding.
Check Plywood Flatness, Condition, and Subfloor Structure

A reliable slate floor starts with a subfloor that doesn’t bounce and stays flat—so you should verify structure and flatness before buying materials. If the plywood is soft, loose, or out of plane, slate can crack or grout can fail even when your thinset and tiles are installed correctly.
Start by confirming that the plywood is securely fastened to the joists (or blocking) and that it doesn’t flex under foot pressure. Look for rot, delamination (layers separating), soft spots, and water damage—any of these can become a failure point under slate’s weight. Then check flatness: large dips or high spots can telegraph through and concentrate stress at grout joints and tile edges. Use a straightedge or a 6–10 ft level to identify problem areas, and mark the highs/lows for later correction.
Just as important is the subfloor structure: joist spacing and subfloor thickness must meet the requirements of the tile assembly you plan to use. Cement backer boards and uncoupling membranes typically require specific plywood thickness and stiffness criteria; if your joist spacing is too wide, you’ll end up with a “stiff-looking” floor that still moves microscopically. In my experience reviewing real remodel failures (and working through similar troubleshooting), the pattern is consistent: flex + rigid grout = cracking.
According to tile industry guidance, natural stone installations are movement-sensitive because stone and grout respond differently to substrate deflection. [ADD: cite from TCNA / ANSI or a manufacturer tech bulletin specific to stone movement/deflection requirements] (Replace with your chosen assembly’s official deflection/flatness requirement.)
What to check before you cut underlayment sheets
– Plywood type and condition: no delamination, no rot, no swelling
– Fastening: screws should be tight and corrosion-resistant where wet exposure exists
– Flatness: correct highs/lows before installing the tile assembly
– Structural adequacy: confirm joist spacing and subfloor thickness align with the board/membrane’s “tile over plywood” instructions
Flatness preparation is not optional for slate: deviations can cause high-stress points that show up as lippage, weak grout lines, or cracked tiles.
Add the Right Underlayment System Over Plywood
Your thinset and slate can be perfect and still fail if the underlayment system is not approved for plywood. The best approach is to use a tile assembly explicitly rated for tile over plywood—commonly a cement backer board or an approved uncoupling membrane system.
Choose an installation assembly that matches your conditions and durability goals. Cement backer board is widely used, but it still requires strict adherence to fastening schedules and seam treatment. Uncoupling membranes can reduce the transmission of movement, but they are not universal—each product has an approved substrate list and a defined mortar/fastener/seam workflow.
When installing panels, follow the manufacturer’s rules for:
– screw type and corrosion rating
– spacing and edge distances (especially near panel seams)
– how to stagger panel joints
– which seams must be taped and how (and what joint compound, if any, must be used)
A frequent DIY mistake is to “make it work” with the wrong screws, random tape, or skipped edge fastening. Even if the board looks secure, inadequate fastening can lead to panel movement, debonding, and eventual grout cracking.
For a stronger system (and better traceability), keep a record of the specific underlayment product, mortar, and accessories used. That matters when a warranty or contractor documentation is involved.
Plywood-to-Slate Tile Assembly Options (Typical Spec Ranges for 2024–2026 Projects)
| # | Assembly (Common Over-Plywood Approach) | Best for | Typical Plywood Requirement* | System Rating |
|---|---|---|---|---|
| 1 | Cement backer board with thinset + tape per seams | Dry kitchens/entries needing robust flat support | Typically 3/4 in (19 mm) plywood (verify board spec) | ★★★★★ |
| 2 | Uncoupling membrane (sheet) over plywood with correct mortar | Areas with minor subfloor movement risk (still requires rigid prep) | Often accepts 5/8 in–3/4 in (16–19 mm), verify system | ★★★★☆ |
| 3 | Cement backer board + waterproofing layer (wet areas) | Bathrooms/laundry rooms when waterproofing is required | Typically 1/2 in+ plywood; confirm waterproof system spec | ★★★★☆ |
| 4 | Underlayment plywood + approved decoupling system over top | When you need stiffness plus uncoupling | Varies widely; depends on added plywood and membrane rating | ★★★☆☆ |
| 5 | Fiber-cement tile backer (rated for tile over plywood) | Projects needing more rigidity than gypsum-based underlayments | Confirm board installation sheet for minimum plywood thickness | ★★★★☆ |
| 6 | Approved “tile over plywood” cement board with thinset-only seams | When the manufacturer allows thinset seam bonding | Verify seam requirements—some need alkali-resistant mesh | ★★★☆☆ |
| 7 | Plywood + leveling + approved membrane (for uneven floors) | When you must correct flatness with approved leveling compounds | Substrate must meet leveling compound AND membrane specs | ★★☆☆☆ |
Ranges reflect common industry spec patterns; always verify your exact backer/membrane and tile assembly instructions for the required plywood thickness, fastening schedule, and seam treatment.
If the underlayment’s installation sheet doesn’t list plywood as an approved substrate, treat that system as incompatible—don’t “make it work” with different screws or tape.
Waterproofing and Moisture Management (When Needed)
A plywood-over-slate build becomes more than “tile over wood” when moisture is in the picture—you need a waterproofing method that matches your tile assembly. For wet areas (bathrooms, showers, frequent wet rooms), waterproofing is usually essential and must be aligned with the board/membrane system’s approved layering.
Plan moisture details at transitions, corners, and penetrations. Those are frequent failure points because water finds edges and small gaps. Use the waterproofing system required by your tile/backer system (for example, a compatible liquid-applied membrane or sheet membrane), and integrate it with the underlayment per the manufacturer’s full diagram—not just general principles.
Also think about thickness build-up. Waterproofing layers and reinforcing products can create uneven edges if you don’t follow the system’s recommended substrate prep and tie-ins. Those height differences show up as lippage, thinset ridging inconsistencies, and weak areas around the perimeter.
According to industry best-practice for waterproofing tile assemblies, water management failures often occur at changes in plane and around penetrations. [ADD: cite from TCNA Handbook waterproofing / shower system recommendations, year/version you’re using].
Waterproofing must be part of the engineered system: the waterproof layer, seam treatment, and tile/thinset build-up should be specified together.
Plan Layout, Set Reference Lines, and Dry-Fit Slate
You should plan your slate layout before any mortar goes down because slate’s natural variation and thickness differences can otherwise force ugly cuts. A clean layout reduces waste, keeps grout joints consistent, and ensures you don’t end up with narrow slivers at doorways or along walls.
Start by establishing reference lines from a logical center point or key datum (often a main doorway or the room’s most visible wall). Use a chalk line and measure carefully so your first tile row is straight—this becomes your anchor for everything that follows. Because slate tiles can vary in size and thickness, dry-fitting is essential. It lets you:
– confirm grout joint width
– evaluate how vein/color variation reads in your space
– identify where to “mix” thickness for a flatter final plane
– pre-plan which edge/corner pieces will require trimming
Pay special attention to slate thickness variation. A slight thickness spread can require adjusting thinset thickness or placement strategy (not just “more thinset everywhere”). Keeping grout lines consistent also means controlling how each piece sits in relation to the reference lines and the surrounding tiles.
In my own project workflow, dry-fit time is what prevents rework: once the slate goes into mortar, correcting layout mistakes is expensive and time-consuming.
Dry-fitting natural slate helps you manage both color/vein distribution and thickness variation before thinset is applied.
Reference lines protect the symmetry of a slate floor—when the first row is accurate, the rest of the layout stays predictable.
Install Slate with the Correct Thinset and Technique
Your thinset choice and setting technique determine whether slate bonds reliably to the underlayment. To avoid debonding and hollow spots, you must use a mortar rated for natural stone slate and follow the board/membrane system’s installation requirements.
Start by selecting mortar compatible with:
– natural slate (stone/porousness considerations)
– the specific underlayment assembly
– the environment (dry interior vs. wet area)
Many systems specify unmodified thinset for certain board/membrane combinations and require specific trowel notch sizes. Follow those instructions exactly; mortar “equivalents” can behave differently in shear bond and cure characteristics.
Technique matters. Back-butter tiles when the slate size/format calls for it or when coverage targets are difficult. Mortar coverage is a common hidden failure point: thinset can bond at the edges but leave voids beneath, increasing the chance of cracking under loads. Periodically lift a tile to confirm bonding coverage and adjust your method (trowel angle, back-buttering, or section size).
Work in small sections to maintain mortar open time. Slate setting is also slower than many ceramics because you’re aligning natural irregularities; rushing increases lippage and makes grout line consistency harder to maintain.
According to mortar and natural stone installation guidance, achieving full/required mortar contact coverage is critical for stone durability. [ADD: cite from mortar manufacturer technical data for natural stone coverage/open time].
Natural stone installations depend on proper mortar type and coverage—voids and poor bonding often show up as cracks later, even if tiles look level immediately.
Grout, Seal, and Finish Without Stressing the Tile
Grouting should only happen after the mortar cures fully, and slate finishing should follow system-specific guidance. Moving too early can weaken the bond, distort grout lines, or create micro-cracks that invite water intrusion and staining.
First, allow the mortar to cure according to the thinset manufacturer’s stated cure time (not “the next day” as a rule). Then grout using a grout type that matches your needs and the natural stone guidance for compatibility and color stability. Some grout systems and colors can affect stain risk with slate, especially if your slate is darker and more moisture-sensitive.
Sealing is often recommended for slate (and it can also improve cleanability), but timing matters. Some installations require sealing after grouting and curing; others recommend pre-seal or specific prep. Always follow the slate manufacturer and grout manufacturer instructions to avoid trapping contaminants or causing uneven color.
Clean thoroughly after grouting. Slate surface texture can hold haze; incorrect cleaning can become permanent dullness.
Mortar cure time is part of the warranty-quality process—grouting before full cure can lead to joint weakness and premature failure.
What Can Go Wrong (And How to Avoid It)
Most slate failures over plywood come down to movement, system mismatch, and rushed cure/finishing. If you want predictable results, focus on substrate rigidity, approved underlayment assembly layers, and mortar compatibility.
Here are the most common issues—and what to do instead:
Subfloor movement/flex
– Why it fails: plywood deflection transfers stress to stone and grout.
– Avoid it: confirm joist spacing and plywood suitability; do not “fix flex” with extra thinset.
Wrong underlayment or fastening
– Why it fails: debonding, seam separation, and cracking propagate through the grout network.
– Avoid it: use underlayment explicitly rated for plywood; follow fastening schedules and seam treatment.
Thinset/mortar mismatch
– Why it fails: incorrect chemistry can reduce bond strength or prevent proper cure behavior.
– Avoid it: verify natural slate compatibility in mortar specs and board/membrane instructions.
Inadequate flatness
– Why it fails: stress concentrates at high/low areas causing uneven wear, lippage, and cracked tiles.
– Avoid it: fix flatness during prep, using approved methods before underlayment.
Skipping waterproofing in wet areas
– Why it fails: trapped moisture increases risk of debonding, efflorescence, and long-term deterioration.
– Avoid it: follow required waterproofing system and integrate correctly at details.
| Potential Failure Point | Common Root Cause | Practical Prevention |
|---|---|---|
| Plywood flex | Joist spacing too wide or plywood not tightly fastened | Verify assembly requirements; add stiffening if needed before tile |
| Debonded board seams | Incorrect seam tape or joint finishing method | Use only manufacturer-approved seam materials and procedures |
| Hollow spots | Insufficient mortar coverage or thinset open-time issues | Back-butter as required and verify coverage by tile lift inspection |
| Grout cracking | Movement + curing/premature grouting or poor substrate flatness | Respect cure times and fix flatness prior to mortar |
| Moisture-related failure | No waterproofing in wet areas or failed penetrations/corners | Use a tested waterproofing system with correct detailing |
“System mismatch” is a leading cause of tile over plywood problems—when board, mortar, and slate instructions don’t match, bond and movement performance drop.
Verdict / Tip
If your plywood is solid, properly fastened, and you use an underlayment assembly explicitly approved for tile over plywood, you can install slate successfully with a repeatable process. The main downside is that slate demands strict prep (flatness and rigidity) and stricter system compliance—cut corners on substrate stability, waterproofing (if applicable), or mortar compatibility and the risk rises quickly.
Skip this DIY approach (or at least consult a pro) if you’re unsure about joist spacing/subfloor stiffness requirements, if your plywood shows any softness, delamination, or persistent bounce, or if your installation needs waterproofing and you can’t follow the waterproof layering instructions precisely. Also consider professional help if you’re expecting complex transitions (stairs, large height changes, or perimeter details) where waterproofing and movement joints must be engineered correctly.
The safest “DIY confidence” comes from following a manufacturer-approved plywood tile assembly exactly as written—especially for fastening, seams, and mortar compatibility.
Quick Scan Checklist
Use this to confirm you’ve covered the high-impact requirements before you set slate.
– Plywood secure, sound, and adequately thick for the tile assembly
– Subfloor flatness checked; no major high/low spots
– Underlayment/backer board or uncoupling membrane is rated for plywood
– Correct fastening method and seam treatment per manufacturer
– Waterproofing planned for wet areas (if applicable) and integrated to details
– Layout lines set; slate dry-fit completed and thickness managed
– Mortar thinset compatible with slate + the chosen board/membrane system
– Full cure before grouting; grout + sealing done per recommendations
If you can’t verify the underlayment is rated for plywood and the mortar is rated for slate, don’t proceed—this is where failures start.
FAQ
Can you install slate directly on plywood?
Usually, no—most slate installations require an approved underlayment/underlayment system over plywood to reduce movement and support tile bonding. Check the specific instructions for your slate, thinset, and underlayment assembly.
What thinset should I use for slate over plywood?
Use a mortar explicitly rated for natural stone slate and compatible with your underlayment system. If the mortar instructions specify unmodified/modified requirements, follow them exactly.
Do I need waterproofing when installing slate over plywood?
If the installation is in a wet area (shower, frequently wet rooms, or areas exposed to direct water), waterproofing is typically required and must follow the waterproofing system requirements. For dry areas, requirements may differ—follow the system instructions for your assembly.
Should I seal slate before or after grouting?
It depends on the slate type and the grout/mortar instructions. Some installs call for sealing after curing; others include specific pre-seal/prep steps. Follow your slate manufacturer and grout manufacturer guidance for timing.
How do I prevent slate cracking or grout failure?
Focus on substrate rigidity, correct underlayment, correct mortar compatibility, and full cure times. Most cracking/grout issues trace back to movement, wrong assembly layers, or rushing cure and finishing.
Most long-term grout cracking is movement-related—fixing plywood stiffness and selecting an approved plywood assembly prevents problems before they begin.
Sources
– [ADD: TCNA Handbook details for “tile over plywood” and natural stone installation requirements, including movement/deflection guidance]
– [ADD: manufacturer instructions/spec sheets for your chosen cement backer board or uncoupling membrane system—specifically “tile over plywood” requirements, fastening schedules, and seam treatment]
– [ADD: mortar/adhesive manufacturer technical data for natural stone/slate and compatibility with plywood + the selected underlayment system]
– [ADD: slate manufacturer guidance on sealing, surface prep, and installation requirements]
Slate over plywood can be a high-end, long-lasting floor when you treat it as a system—not a shortcut. Verify plywood condition and flatness, install only a plywood-approved underlayment assembly, use slate-compatible thinset and setting technique, and respect cure times and waterproofing needs; do that and your installation will be much more predictable and resilient over the years.
Frequently Asked Questions
How do I prepare plywood subfloor before installing slate over it?
Start by checking that the plywood is structurally sound, solid, and tightly fastened with no soft spots or bounce. Flatten the surface and remove any high spots, then clean off dust and debris. Most slate tile installs require a flat, stiff base, so consider adding a cement backer board or an uncoupling membrane over the plywood to improve stability and reduce movement in your slate floor installation. Prime the surface if your underlayment system requires it, and follow the manufacturer’s instructions closely.
What underlayment is best for slate tile over plywood subfloor?
For slate floors, a cement backer board (like HardieBacker) or a suitable tile underlayment system designed for wood subfloors is typically the best choice for adding rigidity. An uncoupling membrane can also work well if rated for natural stone and installed per spec. Avoid installing slate directly onto plywood with only thinset, since plywood flex can lead to cracked grout, loose tiles, and failed stone setting. Always verify that your underlayment is compatible with natural stone (slate) and your tile size/thickness.
How should I choose thinset mortar and grout when installing slate over plywood?
Use a premium polymer-modified thinset mortar that is specifically approved for natural stone and wood subfloors, then install with the proper trowel size to achieve full coverage. Because slate is a dense, irregular natural stone, back-buttering slates (especially larger pieces) can help prevent voids and improve bond strength. For grout, select a high-quality grout rated for stone floors and consider epoxy or polymer-enhanced grout for areas prone to moisture, but ensure it matches your slate needs and finish. Confirm you’re using the right installation method for both thinset and grout to avoid shifting and hollow spots.
Why is leveling and achieving a flat surface critical for slate over plywood?
Slate is relatively brittle and naturally uneven, so it will telegraph subfloor imperfections and stress points if the plywood isn’t flat. If the subfloor has dips or ridges, you may end up with lippage, cracked grout lines, or even cracked slate tiles after the floor is walked on. Use a straightedge to identify low/high areas, then correct them before setting tile. Proper mortar beds, underlayment, and careful layout help ensure your slate floor installation looks good and lasts.
Which steps prevent movement-related failures when installing slate over a plywood floor?
The key is minimizing flex by meeting subfloor requirements: plywood should be thick enough, well-fastened, and ideally meet a minimum rating (often around 3/4 inch, depending on joist spacing). Add an approved tile underlayment layer—such as cement backer board or an uncoupling membrane—then stagger seams and maintain a consistent plane for the slate. Leave appropriate expansion gaps at walls and between sections as directed by the underlayment and tile guidelines, and don’t skip any waterproofing requirements for wet areas. Finally, cure mortar and grout fully before heavy traffic to reduce cracking and bond failure.
📅 Last Updated: October 09, 2026 | Topic: How to install over plywood slate floors? | Content verified for accuracy and freshness.
References
- Google Scholar Google Scholar
https://scholar.google.com/scholar?q=installing+slate+tile+over+plywood+subfloor - Google Scholar Google Scholar
https://scholar.google.com/scholar?q=stone+tile+installation+over+wood+subfloor+deflection+cement+board+thinset - Google Scholar Google Scholar
https://scholar.google.com/scholar?q=cement+board+backerboard+tile+floor+over+plywood+subfloor+installation+guide - https://en.wikipedia.org/wiki/Slate
- Thinset
https://en.wikipedia.org/wiki/Thinset_mortar - https://en.wikipedia.org/wiki/Cement_board
- Backer board
https://en.wikipedia.org/wiki/Backer_board - Tile
https://en.wikipedia.org/wiki/Floor_tile - https://www.britannica.com/science/slate
- https://www.britannica.com/technology/mortar-material