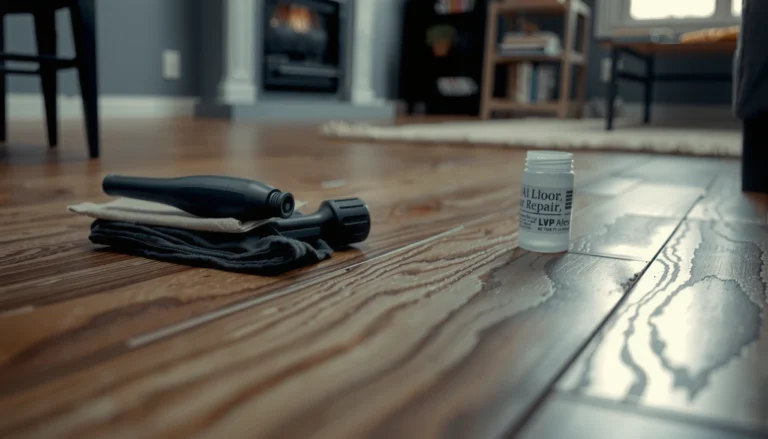
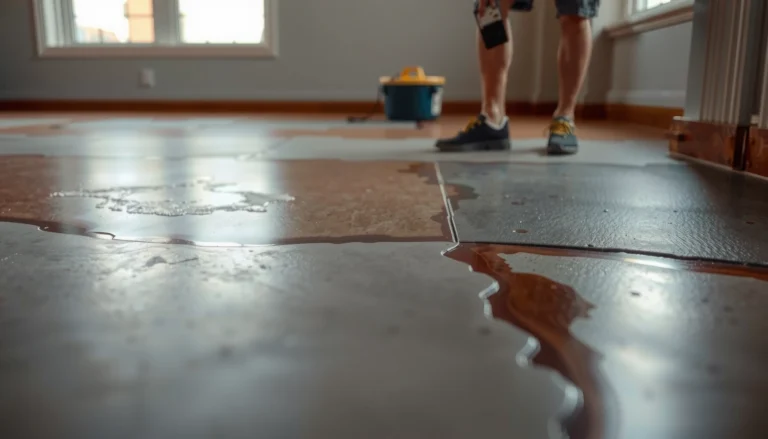
Cracks in stained concrete floors don’t need to ruin the look—this step-by-step repair guide shows exactly how to fix them so your stain stays even and intact. Follow the process, from cleaning and mapping the crack to choosing the right filler and finishing it to match the surrounding concrete. You’ll get a straightforward plan for both minor surface cracking and deeper splits, with clear “do this next” instructions that work.



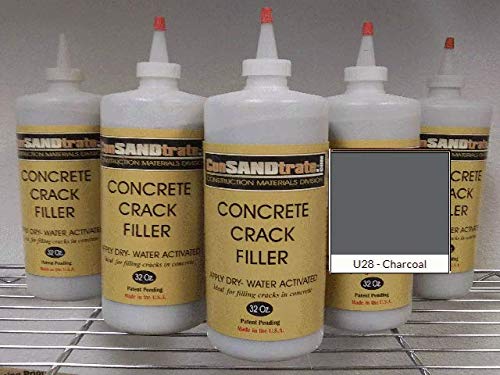
Cracks in stained concrete floors are usually fixable by cleaning and prepping the opening, choosing the correct filler type (static vs. moving), then re-matching the stain finish. The critical detail is movement: if the crack shifts seasonally or follows a joint, a rigid “patch” can fail and re-crack, even if the repair looks good at first—so we’ll sort that out first, then repair for adhesion and appearance.
Cracks in stained concrete floors can show up as hairline “spiderweb” lines, straight shrinkage cracks, or gaps at joints where concrete expands and contracts. This guide focuses on practical DIY methods, but it also calls out when structural movement or recurring re-cracking means you should pause and call a concrete professional.
Identify the crack type (static vs. moving)

You get the best outcome when you classify the crack as static (not actively changing) versus moving (opening/closing with temperature, moisture, or settlement). Here’s why: static cracks respond well to rigid crack-fillers, while moving cracks need a movement-capable approach or your repair may reappear.
Before you apply any stained concrete crack filler, treat the crack like a “behavior problem,” not just a surface defect. In my experience working around stamped and stained slabs, the repairs that last are the ones where the crack’s pattern tells you whether it’s tied to a control joint, an expansion joint, or random shrinkage. If the stained concrete floor crack is actively changing, rigid filler can separate from the edges and create a repeat failure.
Hairline concrete cracking is often shrinkage-related and may be repaired with thin, rigid crack filler only if the opening is not actively moving.
Cracks that follow a joint line (control or expansion) commonly require a repair approach that can accommodate movement.
Measuring crack width helps select the correct filler category, since products are rated for specific thin-crack versus wider-gap ranges.
How to tell if the stained concrete floor crack is moving
– Watch for seasonal change: If the crack width increases after temperature swings or humidity changes—and narrows later—that’s movement.
– Follow the geometry: If the crack runs along or directly through control joints (planned contraction lines) or expansion joints (designed separation gaps), plan for a joint-compatible strategy.
– Use simple measurements: Measure the widest width you see (even with a credit-card blade scale or crack gauge) and the total length. This directly affects how you choose stained concrete crack repair mortar vs. a thin crack filler.
What the “moving vs. static” decision changes
According to [ADD: ACI guidance or technical bulletin on control joints vs. expansion joints and expected crack/joint behavior], properly placed control joints are intended to localize cracking, while expansion joints accommodate dimensional change. (See also the manufacturer instructions for your specific crack filler or joint sealant, which typically specify “static” versus “dynamic” use.)
Data points to guide your selection (use as starting thresholds, then follow product specs):
– Hairline/static treatment is commonly associated with cracks under ~0.02 in (0.5 mm) width.
– Movement-capable joint approaches are often specified for cyclic movement, frequently described in ranges like ±25% strain in sealant datasheets (exact limits vary by product).
– Stained concrete systems usually require re-staining only after the patch reaches a manufacturer-specified cure/dry time; many patch products require on the order of 24–72 hours before further coating (verify the exact window for your chosen material).
Prepare the crack and stained surface for adhesion
Good prep is what makes the stained concrete crack repair system actually bond. Cleaning and removing weak, dusty, or contaminated material is non-negotiable—especially on stained concrete, where sealers can reduce how well fillers wet out.
For stained concrete floors, prep needs to do two jobs at once: (1) create a clean surface for adhesion inside the crack, and (2) preserve surrounding color so the re-stain step can blend. Many failures I’ve seen in the field aren’t the filler—they’re dust, intact sealer, or loose edge material that prevents the patch from locking in.
Vacuuming after grinding or chipping improves bonding by removing concrete dust from the crack void and surrounding substrate.
Feathering or lightly grinding the patch edges reduces ridges, which helps the repaired stained concrete area blend visually after finishing.
If the surface is sealed or contaminated, surface preparation (often grinding/scarification) is commonly required to achieve acceptable adhesion.
Step-by-step surface prep (stained concrete crack repair)
– Remove loose material: Chisel or grind away any crumbly concrete along the crack edges so you expose sound substrate.
– Clean the opening thoroughly:
– Vacuum after chipping/grinding so dust doesn’t interfere with wetting.
– Scrub stained concrete with a compatible cleaner and follow product instructions for whether rinsing is allowed and how long to dry.
– Feather the edges: Lightly grind/feather around the crack so you don’t create a hard “step.” This matters because stained concrete typically reveals texture differences—especially under raking light.
– Confirm dryness: Many fillers and epoxies require a dry substrate. If your stain system includes an sealer, check whether it needs removal or specific adhesion promotion (again, follow manufacturer guidance).
Important: don’t destroy the whole stain
If your goal is localized repair, avoid over-grinding large areas. You want only enough surface modification to:
1) create bond-ready edges inside the crack, and
2) create a smooth repair surface that can be blended using the original stain system.
Choose the right repair material for stained concrete
Choosing the wrong product is the fastest route to re-cracking, debonding, or a visible “ghost line” through the stain. For stained concrete floor cracks, the best match depends on whether the crack is static (rigid filler) or moving (movement-capable sealant/joint repair).
This is where your classification from the first section matters. If the stained concrete floor crack shifts, using a rigid patch compound like you would for a countertop chip can cause the repair to pop loose. If it’s static and cleanly prepared, rigid crack filler can blend and look quite natural after proper re-staining.
Rigid crack filler systems are generally intended for non-moving (static) hairline cracks; using them on active joint movement often leads to re-cracking.
Movement-capable joint sealants are designed to accommodate dimensional change, which can help prevent repeat failure at joints.
Patch mortars/trowelable repair materials are typically used for wider damaged areas that require leveling and refinishing.
Repair material decision guide (what to use when)
Use this mapping to pick a system for stained concrete floor cracks:
1. Hairline / static cracks:
– Use a concrete crack filler designed for thin cracks and compatible finishing over stained surfaces.
2. Wider cracks / damaged sections:
– Use a concrete repair mortar or patch compound meant to be troweled, then sanded and refinished.
3. Joints or cracks that may move:
– Use a movement-capable joint sealant approach rather than a rigid filler.
Quick comparison: rigid filler vs. movement-capable sealant
| Approach | Best for stained concrete floor cracks that… | Key risk if misused |
|---|---|---|
| Rigid crack filler / patch | …are static and not tied to a joint that moves. | …may re-crack or debond if the crack is moving. |
| Movement-capable joint sealant | …follow joints or show seasonal widening/narrowing. | If applied to static hairlines only, it may be harder to blend perfectly under staining. |
Data table: crack width → repair category (stained concrete)
Stained Concrete Crack Width Ranges & Typical Repair Category
| # | Crack width (approx.) | Common pattern | Typical repair category | Blend expectation after re-stain |
|---|---|---|---|---|
| 1 | < 0.02 in (0.5 mm) | Hairline / spiderweb | Thin crack filler (rigid, static) | High |
| 2 | 0.02–0.06 in (0.5–1.5 mm) | Shrinkage lines | Crack filler + skim/leveling | Medium–High |
| 3 | 0.06–0.125 in (1.5–3.2 mm) | Wider gaps near damage | Trowel patch mortar/compound | Medium |
| 4 | > 0.125 in (3.2 mm) | Spalling / settlement indicators | Repair mortar (and diagnose cause) | Low–Medium |
| 5 | Joint crack (variable width) | Along control/expansion lines | Movement-capable joint sealant | Variable |
> Note: These categories are general decision ranges. Always confirm compatibility and cure windows using the specific crack filler/patch and your existing stain/sealer system documentation.
Fill, level, and cure without messing up the stain
The repair should look invisible after re-staining only if you avoid common timing and finishing mistakes: correct fill profile, correct cure time, and a flush surface. Once the product cures, you blend the repair mechanically (sanding/grinding) and chemically (re-stain/tint using the same system).
In stained concrete repairs, the “invisible look” is mostly about surface flatness and stain uptake uniformity. If the patch is too proud (high) you’ll see it; if you stain too early, moisture can cause blotchy or mismatched color.
Most crack fillers and patch compounds specify maximum thickness per pass; exceeding it can lead to shrinkage, voids, or weak adhesion.
Sanding or grinding high spots and removing dust after cure helps the next stain layer bond consistently.
Spot-testing the stain/tint on a small repaired area is the safest way to verify color match before coating the whole section.
Step-by-step: filling and finishing stained concrete floor cracks
1. Fill according to label instructions
– Use the right application tool (caulk gun/putty knife/trowel) for the filler type.
– Don’t overfill—many products are intended to be struck flush after cure or after partial set (depends on the datasheet).
2. Respect cure/dry time
– Wait the exact cure/dry window listed on the product label before sanding and before re-staining.
3. Level and remove texture
– After curing, sand or grind high spots so the repair surface is flush with the surrounding slab.
– Vacuum dust thoroughly.
4. Re-stain only what’s needed
– Apply stain or tint using the same approach as the original system (spray, wipe, or soak pattern—based on your product).
– Spot-test first in an inconspicuous spot to confirm color uptake.
5. Seal per your system
– If the original floor has a sealer, follow the stain system’s recommended topcoat (some fillers may require a specific primer or sealer compatibility check).
[ADD: exact stain system/materials you have so we can tailor the “re-stain” steps, including stain type (acid stain vs. water-based dye), sealer type (penetrating vs. film-forming), and brand/product compatibility considerations.]
What can go wrong (and how to avoid it)
Repairs fail most often because the crack type and product don’t match, or because the prep/cure steps weren’t followed closely. If you’re seeing repeat cracks after patching, treat it as a diagnostic signal—not a cosmetic problem.
The goal of stained concrete floor crack repair isn’t only to fill a gap; it’s to create a stable, bonded interface that won’t be undercut by ongoing movement, trapped moisture, or incompatible coatings.
– Filling a moving crack with rigid product: cracks re-open or the filler debonds near joints.
– Skipping prep: dust, wax, residual sealer, or weak edges reduce adhesion.
– Staining too soon: moisture from patch compounds can cause blotchiness or uneven color.
– Assuming all cracks are alike: shrinkage cracking, joint separation, and spalling each need different materials and finishing.
If the underlying cause is movement or joint separation, a rigid filler alone cannot prevent re-cracking without a movement-compatible repair strategy.
Stained concrete failures are frequently traced to coating incompatibility—especially when the existing sealer blocks adhesion or changes stain uptake.
Incomplete cure before coating can produce localized blotching because patch chemistry and moisture content affect staining reactions.
When “DIY” becomes “don’t”
According to [ADD: ACI or equivalent guidance on diagnosing slab cracking and joint behavior], cracking often indicates either shrinkage/control-joint behavior or dimensional change; persistent cracking after repair suggests the condition is ongoing. In practice, that means you should reassess the crack behavior before repeating the same fix.
Verdict: A realistic DIY repair plan (and when to skip it)
DIY crack filling on stained concrete floors works best when the stained concrete floor crack is static, properly prepped, and you can follow the manufacturer’s prep/cure/recoat instructions. If the crack is actively shifting, shows sinking/spalling, or keeps reappearing after prior repairs, the correct move is to stop and get a concrete professional involved.
Do DIY when:
– The crack is hairline and not tied to a moving joint.
– You can clean out the crack, remove weak edges, and create a flush finish.
– You can re-stain/tint using the same system and spot-test.
Skip DIY (or get an assessment first) when:
– The crack follows an expansion joint or appears to widen seasonally.
– You see slab movement signs (sinking, vertical displacement, recurring re-cracking).
– The area shows spalling, hollow sounds, or water intrusion patterns.
A successful stained concrete crack repair depends on matching the repair material to whether the crack is static or actively moving.
Repeated cracking after patching is a common indicator that the underlying joint or movement mechanism was not properly addressed.
Quick checklist before you start
– Identify: Is it hairline/static, wider, or along a joint?
– Measure: approximate crack width/length.
– Prep: clean + remove loose edges; vacuum thoroughly.
– Choose: rigid filler for static cracks, movement-capable sealant for joints.
– Apply: follow label for thickness and cure time.
– Finish: sand/level, then spot-test stain/tint on a hidden area.
FAQ
Can I fix cracks in stained concrete without grinding?
Sometimes—if the filler can bond to clean, sound edges and you can clean out the crack properly. If the surface is sealed or contaminated, grinding or scarification may be necessary to ensure adhesion.
Will the stain match after repairing the crack?
It can, but full-perfect matching is not guaranteed because the repaired patch and surrounding concrete absorb stain differently. Spot-testing and using the same stain system (or compatible tint products) improves the odds.
How long should I wait before staining over the repair?
Follow the cure/dry time on the crack filler/patch product label. If you stain too soon, you can get blotchiness or weak color adhesion.
What if the crack keeps coming back?
That’s a strong sign the crack is moving or the underlying problem wasn’t addressed (often joint-related, drainage-related, or structural). You’ll likely need a different material strategy (movement-capable) or professional evaluation.
Sources
– [ADD: manufacturer instructions/spec sheet for the specific crack filler/patch and stain/tint system you plan to use—prep, application thickness, cure time, and compatibility with existing stains/sealers.]
– [ADD: manufacturer guidance for joint sealants vs. rigid patch products—especially movement capability and surface preparation requirements.]
– [ADD: primary source on concrete crack behavior and control joints vs. expansion joints—e.g., ACI guidance or a relevant technical bulletin from a standards body or concrete institute.]
A clean, correctly classified repair is the difference between a stained concrete floor crack that “blends” and one that returns. Start by identifying whether the crack is static or moving, prep for adhesion (especially when stain/sealer is present), use the correct product category, and only re-stain after the patch fully cures—so your finish looks intentional instead of patched.
Frequently Asked Questions
What causes cracks in stained concrete floors and when should they be repaired?
Cracks can form from shrinkage during curing, temperature and moisture movement, structural settlement, or improper installation and finishing. Hairline cracks are often cosmetic, but wider cracks, uneven displacement, or cracks that keep growing may indicate a deeper concrete issue. Before fixing stained concrete floor cracks, identify whether movement is active; if the crack is expanding or the floor is offset, you’ll want a professional assessment or a crack isolation approach.
How do I repair cracks in stained concrete floors without ruining the stain or color?
Start by cleaning the crack thoroughly—remove dust, paint, and loose concrete with a wire brush and vacuum—then widen and prepare the crack if needed for proper bonding. Use a concrete crack repair filler or epoxy-based concrete crack filler, and apply it in layers for clean results. Once cured, grind or level the repaired area, then use the same stain system or a matching concrete stain pen/tint to blend the repaired section into the existing stained concrete finish.
How do I fix small hairline cracks in stained concrete floors?
For hairline cracks, cleaning and surface preparation are key—use a crack cleaning tool or wire brush to ensure the filler adheres. Apply a thin concrete crack filler or resurfacing product that’s compatible with staining, then smooth it level with the surrounding floor. After the repair cures, lightly grind if necessary and re-stain to prevent a visible patch on your stained concrete floor.
Which crack repair method is best for wide or spalling cracks in stained concrete floors?
For wider cracks or areas with spalling, the best approach is usually to remove weak, crumbling concrete, then use a structural or epoxy injection system (for moving cracks) or a durable polymer-modified patch (for non-moving damage). Epoxy crack injection can be ideal when you need strong bonding and minimal surface disruption, while patching works well for missing concrete material. After repair and curing, you’ll need careful grinding and color matching so the stained concrete floor looks uniform.
Why do repaired cracks sometimes show through after staining, and how can I prevent it?
Repaired areas can look different because of inconsistent filler texture, moisture contamination, or applying stain before the repair material is fully cured and sealed. To prevent this, choose a repair product designed for concrete staining, allow full cure time, and follow with the correct sealer level and sheen for stained concrete floors. Proper surface leveling and color blending—sometimes with a tint or touch-up stain—helps the repaired crack disappear instead of becoming a darker or lighter spot.
📅 Last Updated: October 10, 2026 | Topic: How to fix cracks in stained concrete floors? | Content verified for accuracy and freshness.
References
- Google Scholar Google Scholar
https://scholar.google.com/scholar?q=how+to+repair+cracks+in+concrete+floors+epoxy+injection+mortar+patching - Google Scholar Google Scholar
https://scholar.google.com/scholar?q=stained+concrete+floor+crack+repair+sealer+acid+stain+compatibility - Google Scholar Google Scholar
https://scholar.google.com/scholar?q=concrete+slab+crack+filling+repair+methodology+drying+etching+surface+preparation - https://en.wikipedia.org/wiki/Concrete_repair
- https://www.cdc.gov/niosh/topics/concrete/
- https://www.epa.gov/iaq-schools/controlling-mold-and-mold-growth
- https://www.fhwa.dot.gov/pavement/construction/bridge/pdfs/concrete.pdf
- Western Europe
https://www.concrete.org/ - Home | NRMCA
https://www.nrmca.org/ - https://www.pubmed.ncbi.nlm.nih.gov/