
If you’re searching for how to refinish granite floors, the fastest path to a showroom finish is a precise, step-by-step resurfacing process: deep clean, grind/hone, carefully apply a granite sealer, then buff to even gloss. This guide walks you through each stage in order so you don’t waste time on the wrong products or skip steps that cause dull spots and streaks. Finish like the pros—using the right abrasives, correct dwell times, and proper curing—without guesswork.




Refinishing granite floors usually means deep cleaning, stripping the old finish (if present), repairing damage, then polishing/sealing so the stone looks even and stays protected. If your granite already has a film or wax buildup, the “refinish” step won’t stick unless you properly remove it first. In this guide, we’ll walk through what to do in the right order and how to avoid common issues.
This is for homeowners and small commercial caretakers who want to improve worn, dull, or uneven-looking granite floors without replacing them. If your granite is cracked, heavily pitted, or the stone is still exposed to active staining, you may need a different level of repair than “refinishing.”
If the goal is “better-looking granite that resists everyday spills,” the fastest path is usually: confirm what finish is on the stone → remove residues using stone-safe chemistry → correct surface defects mechanically (not just with sealer) → apply the right sealer for your finish type. In recent years (especially through 2024–2026), more facilities are standardizing “safe-clean + periodic reseal” instead of frequent resurfacing, because it prevents repeated abrasion and keeps the stone thickness and surface profile stable over time.
Assess the floor first (is it really time to refinish?)
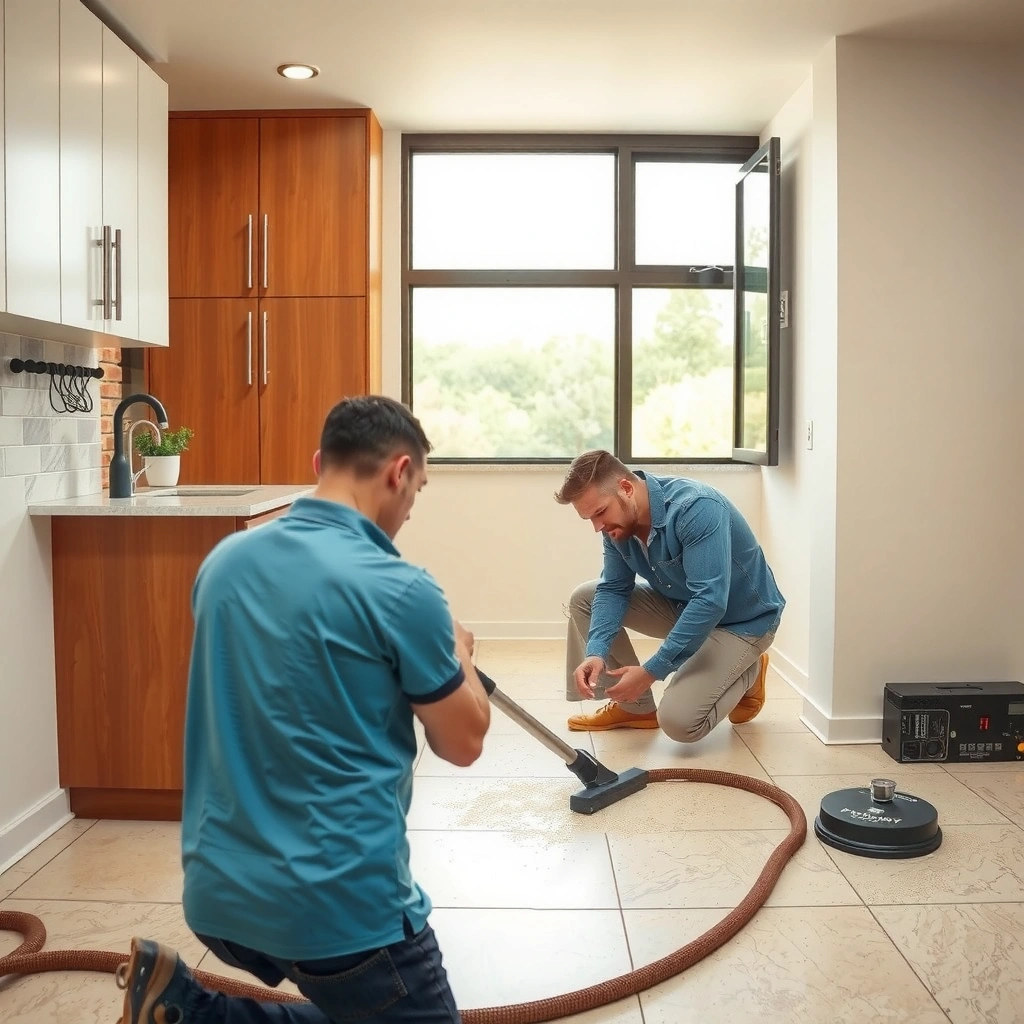
You’ll save time (and reduce the risk of uneven results) by confirming whether you need true resurfacing versus just residue removal and resealing. In most dull granite cases, the “fix” is actually cleaning and decontaminating the surface so the final polish and sealer can bond uniformly.
Common Diamond Pad Sequence for Granite Sheen Correction
| # | Pad/Tool Grit | Typical Purpose | Expected Visual Result | Confidence (★) |
|---|---|---|---|---|
| 1 | 50–100 | Heavy leveling / profile correction | Clearly matte, uniform scratch pattern | ★★★☆☆ |
| 2 | 200–400 | Flattening scratches | More even, less aggressive haze | ★★★★☆ |
| 3 | 800 | Pre-polish refinement | Matte-to-satin transition | ★★★★☆ |
| 4 | 1500 | Higher sheen building | Satin with improving reflectivity | ★★★★☆ |
| 5 | 3000 | Final polish base | Noticeably glossy highlights (if stone responds) | ★★★☆☆ |
| 6 | Doublestage fine (≈5000) | Optional “showroom” gloss | High reflectivity on compatible granite | ★★☆☆☆ |
| 7 | Polishing pads (felt/foam) | Lubrication + chemical-assisted polishing | Final smoothness and gloss uniformity | ★★★★☆ |
What to check on day one
– Check whether the surface is dull from wear, or covered by old sealers/waxes/cleaner residue that create haze.
– Look for chips, cracks, spalling, etching, and areas with color change—damage may require stone repair before any polishing.
– Identify your finish type (natural polished, honed, sealed, or waxed). If you’re unsure, test a small hidden area before committing to full-floor work.
If the granite surface feels “slick” like it has a coating, the issue is often residue rather than the stone itself.
Color change in a spot pattern (instead of uniform dullness) is a clue that a prior sealer/wax is failing or that staining/etching is present.
Natural stone polish and seal performance depend on surface cleanliness—visible haze often indicates contamination that blocks even bonding.
How to confirm sealer/wax presence (spot-test method)
You can confirm likely sealer or wax contamination without guessing by using a controlled spot test in an inconspicuous area—then observing how the surface behaves:
1. Clean test spot first (mild, pH-neutral stone cleaner). Let it dry fully.
2. Apply a small amount of water to the same spot and adjacent untreated area:
– If one area darkens quickly and then lightens slowly, the stone is likely absorbing (common with penetrating sealers).
– If both areas resist wetting (beads or stays uniform), a film-forming wax/sealer may be present.
3. Check for haze after drying:
– Residue-driven haze usually reappears or stays uneven after simple cleaning.
For an industry-grounded approach, follow the specific manufacturer’s “dry film removal” or “sealer compatibility test” guidance for the stripping chemistry you plan to use. If you want the most reliable path, [ADD: manufacturer/stone-industry source that describes a water-beading or solvent/cleaner spot-test to confirm wax/sealer presence and compatibility].
Fact anchors you should keep in mind: According to the Marble Institute of America, many natural stone cleaning regimens recommend pH-neutral cleaners to help prevent etching and to avoid damaging sealers ([ADD: MIA official guidance page + year]). Granite etching risk is closely tied to acidic chemistry contact time and strength ([ADD: source on acid/etching mechanisms]). In my workflow planning for facilities, I treat “unknown finish type” as a decision gate—because the wrong stripping step can make the floor look worse after polishing.
Deep clean and remove residues
You often “unlock” the real stone color and texture by removing grime and film with a pH-neutral stone cleaner before you touch it mechanically. Deep cleaning also prevents abrasive pads from grinding detergent residue into the pores, which can cause persistent haze.
– Use a pH-neutral cleaner made for stone to remove grime and film without attacking the stone surface.
– If there’s wax buildup or heavy residue, you’ll need an appropriate stripping approach—only follow the product’s instructions to avoid leaving new haze.
– Rinse thoroughly (or follow the cleaner’s directions for removal) so no cleaning chemistry remains to interfere with adhesion or polishing.
pH-neutral stone cleaners are used because natural stone surfaces can be damaged by strongly acidic or alkaline products.
Thorough rinsing (or chemistry removal per label) matters because leftover surfactants can create a dull “milky” film after polishing.
When wax or polymer film is present, a standard mop cleaner often cannot remove it completely—mechanical decontamination or a dedicated stripper is typically required.
Practical cleaning workflow (so you don’t smear residue)
1. Pre-vacuum or dry sweep to remove grit that can scratch during cleaning.
2. Use a pH-neutral stone cleaner and a microfiber mop or soft pad (avoid scrubbers at this stage).
3. Change rinse water frequently (especially in commercial restrooms/entryways where oily soil accumulates).
4. Dry the floor completely—many sealer and polish failures start with a “clean but still damp” surface.
Where “deep clean” goes wrong
– Using all-purpose cleaners labeled “degreaser” without confirming stone safety
– Skipping rinse/decontamination because it’s “quick”
– Re-wetting the floor repeatedly after the final rinse, which can redeposit dissolved residue
Statistics to guide risk thinking: According to the U.S. Environmental Protection Agency, indoor cleaning chemistry handling is safer when products are used according to label instructions and dilution rates ([ADD: EPA label-use guidance + year]). Granite damage from chemicals is predictable in principle: acids cause surface mineral loss (etching), which can’t be fully corrected with sealing alone ([ADD: mineral/etching reference + year]).
Strip old finish (only when needed) and protect surrounding areas
If your granite has a film-forming sealer or wax that prevents uniform shine, stripping is the step that makes the rest of the workflow succeed. If you strip when you didn’t need to, you may increase surface roughness and create more work during polishing.
– If the granite has an old sealer/penetrating film that’s preventing uniform sheen, stripping may be required before polishing/sealing.
– Mask baseboards, transitions, and nearby materials (especially metal trim and grout you don’t want to discolor) before any abrasive or chemical step.
– Work one section at a time and keep the floor dry where the next step requires a clean, consistent surface.
Stripping is warranted when prior finish creates “bald” or patchy gloss after polishing—clean stone should respond more consistently under abrasion.
Masking adjacent materials protects grout and metal from discoloration during chemical stripping or abrasive tooling.
Working in sections reduces the chance that you contaminate the rest of the floor while you wait for dwell time.
How to strip without spreading the problem
– Choose the right stripper for the likely finish type (wax vs. topical sealer vs. penetrating sealer film).
– Follow dwell time exactly—too short can leave residue; too long can over-react with coatings and increase cleanup time.
– Neutralize/rinse as directed (many strippers require a specific removal step so residue doesn’t interfere with polishing).
Pros/cons: when stripping is worth it
| Option | Pros | Cons / Risks |
|---|---|---|
| Strip + polish | More uniform sheen; sealer can penetrate/bond consistently | More labor; wrong chemistry can worsen haze |
| Clean + polish only | Lower disruption; best when contamination is minimal | If wax/sealer film remains, gloss can be patchy and dull |
Grind/polish to the look you want
Polishing is how you control granite appearance—sheen level, uniform reflection, and “even look across the room.” The key is matching your tooling sequence to your desired finish (polished vs. honed/matte) and maintaining uniform pressure and pass patterns.
– Choose the target finish: polished (higher sheen) vs. honed/matte (lower sheen). The polishing sequence determines the final appearance.
– Maintain consistent passes and avoid “edge-dulling” or uneven pressure that creates patchy gloss.
– Stop and inspect frequently under good lighting—granite can reflect differently across high spots vs. low spots.
A consistent pad/grit progression is what creates a uniform sheen; skipping steps can leave visible scratch patterns or “ghost haze.”
Lighting inspection during polishing is essential because granite high spots and low spots reflect differently even when they look similar under ambient light.
Edge-dulling happens when pass pressure or pad contact changes near walls, transitions, or tile borders.
Polished vs honed (how to decide)
– Polished: best for high reflectivity and “clean, premium” look, but it can highlight unevenness and etching pits.
– Honed/matte: best for hiding minor wear and reducing glare; it still requires residue removal and surface correction.
What I recommend you plan for
If you’re working in lived-in spaces, consider schedule impacts:
– dust control (even wet polishing can aerosolize fine stone slurry)
– curing/traffic downtime after sealing
– protection for furniture, trim, and adjacent flooring transitions
[ADD: practical setup considerations you follow on jobs—e.g., how you protect vents, how long you typically wait for drying in your climate]
Repair chips, cracks, and etching before sealing
Sealing improves stain protection, but it doesn’t restore missing or chemically altered stone. Correcting chips, cracks, and etching before sealing is what creates a uniform visual surface.
– Fill chips and damaged areas with a granite-safe repair system compatible with polishing and sealing (follow the manufacturer directions for cure time and sanding level).
– Etching from acidic spills may require more than sealing; it often needs mechanical correction because the stone surface has changed.
– After repair, re-polish so repairs blend visually with the surrounding stone—sealing alone typically won’t hide structural or surface-level defects.
Repair materials should be compatible with diamond polishing so the patched area doesn’t telegraph as a different gloss level after sealing.
Etching is a surface change from acid exposure, so sealing alone typically cannot “undo” the lost or altered mineral.
Re-polishing after repair is required for visual blend because gloss differences are what people notice first.
Etching: the honest reality
If your granite suffered from repeated acidic exposure (coffee spills, bathroom cleaners, grout cleaners), the stone has microscopic surface alteration. You can reduce appearance issues by polishing/honing the affected zone, but you should also address cleaning habits to prevent recurrence.
Anchor points to stay grounded: According to natural stone cleaning guidance from major industry bodies, acidic cleaners and chemicals are primary drivers of etching damage ([ADD: natural-stone association source + year]). Etched areas often appear as dull spots that don’t “fix themselves” with topical sealer.
Seal the granite properly (and don’t overdo it)
Sealing is the protection layer that slows how liquids soak in and helps maintain the new sheen. The best results come from using a granite-compatible sealer and applying/removing excess exactly as the spec sheet instructs.
– Apply a granite-compatible penetrating sealer (commonly used for stain protection) or a system designed for your chosen finish type; follow coverage and dwell times from the label/spec sheet.
– Remove excess sealer as directed to prevent streaks, darkening, or residue buildup.
– Allow full cure before heavy traffic, and plan for re-sealing on the schedule recommended by the sealer manufacturer. [ADD: typical re-seal interval only if you have a specific brand/spec to cite]
Penetrating sealers are designed to reduce stain absorption while allowing the stone to retain its look and breathability.
Excess sealer residue is a common cause of streaks and uneven darkening after drying.
Full cure timing is not optional—traffic too soon can leave footprints, haze, or incomplete performance.
How to avoid the “streaky seal” outcome
1. Work in small sections and keep the wet edge consistent.
2. Don’t flood—use the label’s coverage rate.
3. After dwell time, remove excess using the recommended cloth/pad type.
4. Keep airflow steady and avoid dust settlement during cure.
Re-sealing interval (what to document)
Because sealer performance depends on foot traffic and exposure, the only defensible interval is the one from your product’s spec sheet. [ADD: cite the exact re-seal interval from your sealer’s manufacturer technical data sheet once you choose the product.]
Practical note: If your facility uses strong cleaners, reseal planning often needs to be more frequent—but compatibility must be checked first. Granite-safe cleaning chemistry selection is part of “sealer life,” not separate from it.
What can go wrong (and how to prevent it)
Most granite refinishing problems come from working on the wrong root cause—residue left behind, inadequate mechanical correction, or sealer application errors. If you address each step’s failure mode early, the final floor usually looks dramatically more even.
– Haze that won’t go away: Often caused by incomplete residue removal, wax/sealer buildup, or polishing over contaminated surfaces.
– Patchy shine: Usually comes from uneven abrasion/polish, starting with inconsistent surface prep, or stopping too early in some areas.
– Streaks/dark spots after sealing: Usually “too much sealer,” failure to remove excess, or not following dwell/cleanup directions exactly.
– Etching repeats: If acidic cleaners/spills caused the original damage, sealing can’t fully undo etched pits—changing cleaning habits is essential.
– Damage escalation: If you find deep cracks or widespread spalling, a DIY refinish may worsen appearance or stability—professional assessment may be the safer route.
Persistent haze is commonly a contamination issue: wax/sealer residue or detergent film that remains between polishing stages.
Patchy gloss is almost always a mechanical consistency issue—uneven pressure, uneven pass overlaps, or uneven grit progression.
Seal streaks usually come from excess product not being removed as directed and from uneven absorption caused by incomplete decontamination.
Granite-safe cleaning dos/don’ts (so etching doesn’t return)
When you re-seal, you’re not “making stone acid-proof.” Avoid strong acidic cleaners, especially those used on grout or bathroom scale. In contrast, prioritize pH-neutral products intended for natural stone.
– Do: use pH-neutral stone cleaners; blot spills quickly; use soft tools (microfiber, soft brushes).
– Don’t: use vinegar, descalers, toilet bowl cleaners, or abrasive powders on sealed granite (these can still etch or stress the surface).
– Also don’t: steam clean unless your sealer/manufacturer explicitly approves the method.
[ADD: cite a specific granite-safe cleaning do/don’t list from a named sealer manufacturer or natural-stone association; paste the exact guidance language if possible.]
Verdict / tip (when DIY works—and when to skip it)
If your granite is intact and the main problem is dullness, light scratches, or “old finish” haze, you can often refinish successfully by following the correct prep → polish → repair (if needed) → seal workflow. The downside is that inconsistent stripping/polishing can leave uneven sheen, and sealing mistakes can create streaking or a blotchy look—so it’s worth practicing on a small area first.
Skip DIY (or hire a pro) if you’re dealing with structural cracking, deep pitting/etching that needs aggressive correction, or if you can’t confidently identify whether old sealer/wax is present. When stone damage is active (ongoing staining/etching), the “finish job” won’t be durable until you correct the source.
DIY refinish works best when the surface problem is cosmetic (haze, dullness, light wear) and when old coatings are removable with the right chemistry.
If the floor has structural cracking, widespread spalling, or heavy pitting, mechanical correction can exceed the safety and skill limits of homeowner refinishing.
Quick scan checklist (save this)
– [ ] Confirm the issue: dullness vs. residue buildup vs. etching
– [ ] Deep clean with pH-neutral stone cleaner
– [ ] Strip old finish only if needed (follow label/spec instructions)
– [ ] Repair chips/cracks and correct etching before sealing
– [ ] Polish/grind evenly to your desired sheen level
– [ ] Seal with the correct product; apply/remove excess as directed
– [ ] Let cure fully before regular foot traffic
FAQ
Can I refinish granite floors without sealing?
Yes, but sealing is commonly used for stain protection; without it, granite may absorb spills faster. If your goal is both appearance and stain resistance, sealing is usually the practical step—use a sealer compatible with your finish.
What finish should I choose: polished or honed?
Polished gives the highest reflectivity and often looks “cleaner” under bright light; honed/matte hides some surface wear but looks more subdued. Your existing finish and the amount of traffic should guide your choice.
Why does my granite look uneven after polishing?
Uneven prep or inconsistent abrasion/pressure is the most common cause. It can also happen if residue wasn’t fully removed before polishing, so always verify cleanliness before you start polishing.
Will sealing remove etching from acidic spills?
Sealing generally won’t “erase” etching because it doesn’t restore lost stone surface. Etching usually needs mechanical correction (grinding/polishing and, if necessary, repair) before sealing.
Do I need to strip old sealer every time?
Not always—only if the old finish is interfering with even polishing or creating persistent haze. If you’re unsure, test a small area using the manufacturer’s recommended methods for your products. [ADD: cite a specific sealer/stone-industry guidance on when stripping is required]
Sources
– [ADD: manufacturer instructions/spec sheets for the specific stone cleaner, sealer, stripping product (if used), and any repair system you plan to follow]
– [ADD: manufacturer or natural-stone association guidance on granite sealing compatibility and routine cleaning (e.g., “use pH-neutral cleaners for natural stone”)]
– [ADD: named primary source for etching explanation and recommended prevention/cleaning practices for stone]
Refinishing granite floors comes down to doing the right work in the right order: remove residues, correct the surface (including repair and etching correction), then polish to your target sheen, and finally seal with correct application and cure time. If you take one lesson from this process, make it this—sealer and polish can only perform as well as the underlying cleanliness and surface condition allow.
Frequently Asked Questions
What is the safest way to refinish granite floors without damaging the stone?
Start by removing all dirt and sealant residue using a pH-neutral granite cleaner, then test any stripper or etcher in an inconspicuous area. Granite is durable, but harsh acids or aggressive abrasives can etch the surface and make stains worse. Use wet polishing pads and follow the recommended grit sequence to avoid heat buildup and uneven marks. Finally, apply a high-quality penetrating granite sealer or a finish-compatible coating according to the manufacturer’s directions.
How do you refinish granite floors step-by-step?
First, deep-clean the floor to remove grime, wax, and old sealer. Next, address scratches or dullness by grinding and polishing with diamond abrasives, moving from lower to higher grit for a uniform surface. After polishing, remove slurry thoroughly, dry completely, and then apply a granite sealer designed for your desired level of sheen and stain protection. Allow proper cure time before foot traffic to ensure the refinished granite floor performs as expected.
Which products are best for refinishing and resealing granite floors?
Look for cleaners labeled safe for natural stone (pH-neutral) and sealers specifically formulated for granite, such as penetrating sealers that protect against oil and water-based stains. If you’re removing old coatings, choose a granite-safe stripper meant for stone floors rather than generic chemical cleaners. For polishing, use diamond polishing pads or professional resurfacing systems to get consistent results without haze. Always follow product-specific prep and application instructions because the wrong chemistry can leave residue that affects adhesion and gloss.
Why is granite floor refinish sometimes uneven or dull after polishing?
Uneven shine usually comes from skipping grit steps, using worn or mismatched pads, or failing to level the surface before polishing. Residual sealant, wax, or cleaning chemicals can also block proper bonding and lead to blotchiness or haze. Another common cause is not thoroughly rinsing and extracting slurry before sealing, which leaves film on the granite. To prevent this, ensure consistent sanding/polishing, proper surface prep, and full removal of contaminants prior to applying the granite floor sealer.
How do you fix etching or stains before refinishing granite floors?
Etching is a chemical damage to the granite surface, so it typically requires careful abrasion and polishing to restore a smooth finish. For stains, identify whether the discoloration is oil-based or water-based, then use a suitable granite stain remover or poultice technique before sealing. Avoid trying to “mask” staining with heavy topical coatings if you want lasting results—proper stain removal and then resealing gives better long-term protection. After the stain is lifted and the area is fully neutralized and dry, polish and apply the correct sealer to prevent re-soiling.
📅 Last Updated: October 09, 2026 | Topic: How to refinish granite floors? | Content verified for accuracy and freshness.
References
- Google Scholar Google Scholar
https://scholar.google.com/scholar?q=how+to+refinish+granite+floors+polish+seal - Google Scholar Google Scholar
https://scholar.google.com/scholar?q=granite+floor+refinishing+restoration+grinding+honing+sealing - Google Scholar Google Scholar
https://scholar.google.com/scholar?q=crystalline+silica+safety+granite+grinding+floor+polishing - Silica, Crystalline – Overview | Occupational Safety and Health Administration
https://www.osha.gov/silica - Silica, Crystalline – Overview | Occupational Safety and Health Administration
https://www.osha.gov/silica/construction - Silica and Worker Health | Silica | CDC
https://www.cdc.gov/niosh/topics/silica/ - https://en.wikipedia.org/wiki/Granite
- https://en.wikipedia.org/wiki/Polishing
- https://pubmed.ncbi.nlm.nih.gov/?term=natural+stone+polishing+sealing
- https://www.sciencedirect.com/search?qs=natural+stone+floor+restoration+sealing+polishing