
Want a step-by-step way to install ceramic tile floors with clean lines and fewer mistakes? This guide walks you through every critical phase—from prepping the subfloor and choosing the right thinset to laying tiles, spacing grout lines, cutting edges, and sealing the finished floor—so you know exactly what to do and when to do it. Follow it closely and you’ll get a durable, professional-looking ceramic tile installation without guesswork.
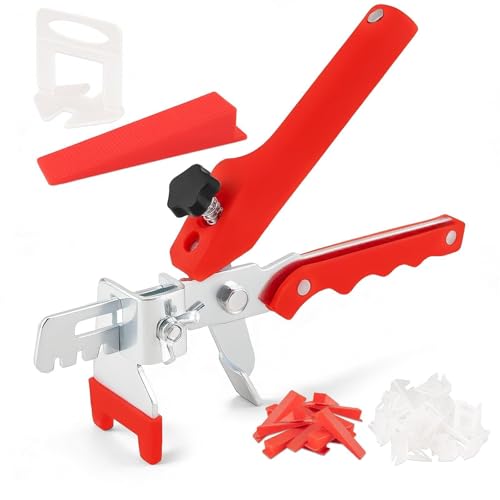

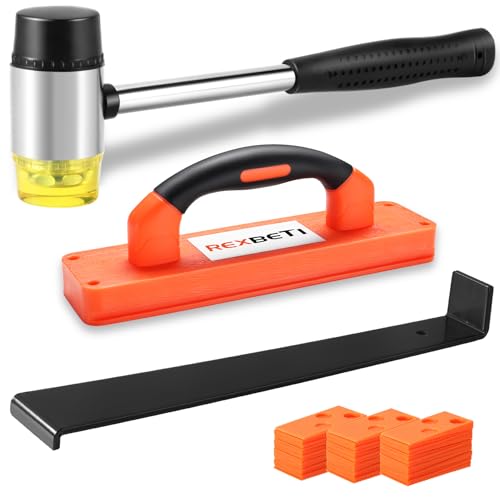

Installing ceramic tile floors comes down to four things: prep the subfloor flat, choose the right thinset and tile layout, set tiles with proper spacing, and grout/seal correctly. If you get the subfloor and layout right, the rest is mostly careful measuring, consistent spacing, and cleaning thinset from joints before it cures. This guide walks you through the full process from prep to final grout and finishing.
If you’re planning a DIY tile floor in a kitchen, entryway, bathroom, or other room with ceramic tile, this is for you—especially if you want a clear sequence instead of guessing at the order of steps. It’s also useful if you’re hiring a helper/contractor and want to know what “good” prep and installation look like.
Gather tools and materials before you start

Getting ready correctly saves hours later because tile installation is unforgiving once thinset starts to cure. Before you open a bag of mortar, confirm the tile type and build your tool list around the cuts and substrates in your specific room.
– Confirm your tile type (ceramic vs. porcelain) and whether you’re doing standard floor tiles or a wet-area layout.
– Plan your consumables: thinset/mortar, grout, spacers, backer/underlayment if needed, plus edge transitions (reducers, trims, or caulk lines).
– Have the basics on hand: notched trowel, tile cutter or wet saw (depending on tile and cuts), level/square, mixing tools, margin trowel, grout float, and sponges.
Using the manufacturer’s specified trowel notch size is critical because it directly affects mortar bed thickness and bond coverage for ceramic tile.
Tile floors depend on a flat, stable substrate; ANSI flatness guidance is typically expressed as “no more than 1/4 inch in 10 feet” for many tile installations.
Grout systems and caulking are different materials: grout should fill joints, while movement joints and changes of plane should be caulked.
Tools that matter most (from what I see fail on site):
– Notched trowel + margin trowel: The margin trowel lets you “key in” mortar and fill low spots before you comb it.
– Level/straightedge: A 6–10 ft straightedge catches lippage early—long before your eye notices it.
– Grout float + sponges (plural): You clean in cycles; having more than one sponge reduces re-scrubbing thin grout haze into the tile.
– Mixing equipment: A drill with a proper mixing paddle and a clean bucket prevent lumps that weaken bond.
– Cutting tools: Wet saw for accuracy (especially for door jambs and patterned layouts). A score-and-snap cutter can work for some smaller tiles, but plan for more breaks and re-cuts.
Quick materials sanity check (ceramic tile-specific)
Ceramic tile is often used indoors, but it still has requirements for flatness, mortar type, and joint spacing. If you’re installing over a wood subfloor, make sure the tile system is rated for that substrate type (many systems require an approved backer and proper subfloor deflection control).
For ceramic tile over wood, tile systems commonly reference framing/subfloor deflection limits around L/360 (industry guidance varies by system and overbuild).
Prep the subfloor for a flat, solid base
A great ceramic tile floor starts here: if the substrate isn’t flat and stable, no amount of “good laying” will save the finished surface. Your goal is a solid bond plane with no movement and minimal variation before thinset ever touches tile.
– Tile fails most often when the subfloor is not flat or not stable—check for high/low spots and loose boards/squeaks before you set anything.
– Remove old flooring residue and debris, then clean thoroughly so thinset can bond properly.
– Address needed fixes (patching, leveling compounds, subfloor repairs) so you start with a uniform plane. If you’re unsure what “flat enough” means for your setup, follow the mortar/tile manufacturer’s installation requirements. [ADD: exact tolerance from your thinset/mortar spec sheet]
Flatness is a measurable requirement: tile manufacturers and industry standards often use guidance such as “1/4 inch in 10 feet” as a practical threshold for many installations.
Thinset bonds best to clean, properly prepared surfaces; dust, paint overspray, or curing compounds can significantly reduce bond strength.
How to check flatness (so you don’t guess)
1. Fix movement first: tighten subfloor fasteners, replace rotted wood, and eliminate squeaks. Tile systems do not forgive movement.
2. Measure high/low spots:
– Use a straightedge and feeler gauges or chalk to mark high points.
– Mark low spots so you know where to patch or level.
3. Remove contaminants: vacuum thoroughly; scrape off drywall compound ridges, adhesive “strings,” and paint blobs.
Deflection matters (especially over wood)
If your subfloor is wood framing, your tile system may require underlayment/backer and a minimum subfloor stiffness. Industry guidance for ceramic tile is commonly tied to L/360 framing deflection criteria (system-specific variations exist). If you’re unsure, follow your mortar/backer/underlayment specs.
Many tile system guidelines rely on framing deflection criteria expressed as “L/360” for ceramic tile to reduce cracking risk over time.
Common subfloor prep mistakes to avoid
– Patching only visible dips: If you don’t correct the full plane, you’ll “flatten” with uneven mortar beds—leading to lippage and thinset performance problems.
– Skim-coating over loose material: Thinset is not a substitute for structural repair.
– Assuming old underlayment is stable: Even if it looks intact, an unstable or poorly bonded layer can telegraph through.
Plan the layout and dry-fit the tile lines
A clean layout prevents the most visible DIY problem: tiny “sliver” tiles at the room edges. You should dry-fit and establish center lines so your cuts look intentional and your joints stay consistent.
– Start by finding the room’s center lines (and/or the main focal point) and doing a dry layout to avoid ending up with very narrow cuts at the walls.
– Decide where you’ll hide awkward edges (often under thresholds or behind doors) and map your cut locations on paper or with painter’s tape.
– Use spacers during your dry-fit so the final look reflects real grout joint width.
Finding center lines and starting from a dry layout helps avoid narrow edge tiles that can look uneven and increase the number of difficult cuts.
Dry-fitting with spacers is essential because grout joint width affects alignment and total row dimensions.
A practical layout method (that keeps lines square)
1. Pick your reference wall(s): Usually the longest straight wall or the wall aligned with the main entry sightline.
2. Find the center:
– Measure width, divide by two.
– Snap a line (chalk/pencil) that represents the center of the room.
3. Dry-lay a row both directions:
– Include tile width plus spacer width.
– Keep track of how much you’ll end up with at the ends.
4. Adjust to avoid slivers:
– Shift the layout slightly so you end with reasonable cut widths (common best practice is to avoid edge cuts narrower than your comfort level—often around 1/2 the full tile width, but your tile format matters).
Pattern and threshold strategy
If your room has thresholds, islands, or built-ins, plan where you’ll “break” the layout. Under doors, transitions tend to look cleaner when cut edges align neatly.
> [ADD: if you’re using a specific pattern (herringbone, diagonal, staggered), add the exact layout rule you’ll follow and why it affects joint alignment]
Set the tiles with correct thinset and spacing
Proper thinset application is what makes the floor perform long-term—spacing and alignment are what make it look right. The “system” is: correct mortar + correct trowel + correct coverage + timely placement before mortar skins over.
– Mix thinset to the manufacturer’s directions and apply it with the correct notched trowel size for your tile/thickness. [ADD: trowel notch size from your thinset spec]
– Spread thinset in manageable sections and comb it in consistent ridges; only set as much area as you can work before the mortar skins over (follow your thinset’s open-time guidance).
– Place tiles using spacers and keep them aligned; check level and lippage frequently, especially at transitions and near walls.
Mortar open time is finite; if the thinset skins over before tile placement, bond performance can drop—follow the product’s open-time guidance.
Comb ridges consistently with the specified notch so the mortar bed thickness meets the installation system’s coverage requirements.
Thinset selection in one glance (use with your product specs)
The table below shows typical thinset trowel sizes and what coverage you can generally expect for common floor tile applications. Always verify the exact coverage, open time, and trowel notch on your chosen mortar’s installation sheet.
Typical Thinset Trowel Choices for Ceramic Floor Tile
| # | Trowel notch (square) | Typical setting area per 50 lb bag* | Best fit for tile size* | Coverage confidence |
|---|---|---|---|---|
| 1 | 1/4" x 1/4" | ~35–45 sq ft | Smaller formats (roughly ≤ 6") | High ★★★★☆ |
| 2 | 3/8" x 3/8" | ~25–35 sq ft | Medium formats (often 12"–16") | High ★★★★☆ |
| 3 | 1/2" x 1/2" | ~18–25 sq ft | Larger tiles (often 16"–24") | Very high ★★★★★ |
| 4 | 1/4" x 1/4" + back-butter* | ~35–45 sq ft (plus extra labor) | When mortar coverage must improve | High ★★★★☆ |
| 5 | Larger notches (e.g., 3/4"+) | ~10–15 sq ft | Very large tiles / deep keying needs | System-dependent ★★★★☆ |
| 6 | Triangular 1/4" equivalents | ~35–45 sq ft | When specified by mortar | Medium-High ★★★★☆ |
| 7 | Too-small notch for tile size | ~Misleading coverage (risk) | Avoid for larger tiles | Risk ★★☆☆☆ |
Typical values based on common installation practices; exact coverage and trowel requirements vary by mortar and substrate. Use the specific mortar and tile manufacturer’s installation instructions for final numbers.
Common installation checks while setting
– Use a straightedge/level to catch uneven rows early.
– Remove thinset from joints as you go so grout can fully fill the spacing.
– Confirm tile is not rocking—press and adjust immediately while the mortar is still workable.
If you want fewer surprises, do spot checks: lift a tile occasionally to confirm mortar transfer coverage. (If you see mostly ridges without good contact, adjust technique or trowel size.)
Lifting and inspecting a tile mid-installation is a practical way to verify thinset transfer and coverage before you’re committed to a full floor.
Grout, clean joints, and finish edges
After thinset cure, grout becomes the durability layer that also shapes the visual rhythm of your floor. Correct cleanup and the right caulk strategy protect both appearance and performance.
– Allow the thinset to cure fully before grouting (use the manufacturer’s cure timeframe, not “it feels dry”).
– Mix grout as directed and pack joints with a grout float; keep the float at the right angle to avoid pulling grout out.
– Clean excess grout promptly with a damp sponge, rinse often, and avoid grinding grout into the tile surface.
Sealing and transitions
– Some grouts benefit from sealing depending on grout type and manufacturer guidance. [ADD: whether your grout requires sealing, from the grout datasheet]
– Use caulk at movement joints/changes of plane (not grout), such as where tile meets dissimilar materials or corners that allow movement—follow manufacturer instructions for joint types.
Thinset cure time controls grout performance; grout too early can trap moisture and weaken the joint or cause discoloration.
Movement joints are not the same as grout joints—caulk maintains flexibility while grout is designed to be rigid within the tile plane.
How I recommend cleaning joints (for less haze)
– Use two-bucket sponge technique: one bucket for rinse water, one for fresh water/clean sponge.
– Wipe gently and consistently; don’t over-scrub.
– Avoid “grout grinding” on glazed surfaces—if haze happens, let it set, then follow the grout manufacturer’s haze-removal method.
Pros/cons of grout approach (high-level)
- Unsanded grout (typically smaller joints)
- Pros: smoother finish for hairline joints; easier cleanup in tight spaces.
Cons: may be unsuitable for wider joints. - Sanded grout (typically wider joints)
- Pros: stronger joint for many floor applications; good for common grout joint widths.
Cons: requires careful sponge technique to avoid haze. - Epoxy grout (special cases)
- Pros: chemical resistance and stain performance in demanding environments.
Cons: more complex mixing/cleanup; follow manufacturer safety steps.
What can go wrong (and how to avoid it)
Even with careful planning, tile projects can go sideways when the “system requirements” get skipped. Most failures trace back to flatness, coverage, timing, or mixing/cleanup discipline.
– Subfloor not flat: Tiles can crack or grout lines can become uneven. The fix is prep-leveling/repairs before setting.
– Wrong thinset or trowel size: Too little coverage can cause tile to fail; too much can make it hard to achieve flatness. Use the mortar and trowel requirements from the specific product instructions. [ADD: exact mortar + trowel guidance from your selected products]
– Grout haze or missing joints: Overworking grout or cleaning too late can leave haze; pulling grout out during cleanup can leave voids—stick to the manufacturer’s cleanup timing and technique.
– No movement joints: Grout isn’t meant to handle structural movement. Skip caulk where you should caulk, and you risk cracking.
A typical root cause of cracked tile is substrate movement or insufficient flatness before setting—repair the base before you add mortar.
Using the wrong mortar system (or the wrong trowel notch) can prevent proper coverage, which is why manufacturers require specific tools and application methods.
Additional edge cases to plan for
– Diagonal rooms and off-square walls: Dry-fit and decide how you’ll handle squareness—don’t assume walls are true.
– Radiant heating systems: Follow the heating manufacturer and tile system requirements for warm-up schedules.
– Wet areas: Ceramic tile is not automatically waterproof; waterproofing membranes and correctly detailed corners/drains are what protect the structure.
Verdict / quick tip before you commit
Ceramic tile flooring is very doable as a DIY project if your subfloor is solid and flat, you can measure/layout carefully, and you’re comfortable taking your time with spacing, cutting, and cleaning. The biggest downside is that mistakes early on (flatness, thinset coverage, layout choices) are hard—and sometimes expensive—to correct after the mortar cures. If your floor is significantly out of level, you have a complicated room geometry, or you’re installing in a highly moisture-sensitive area without the proper waterproofing system, consider pausing and getting product- and system-specific guidance from your tile/mortar/backer manufacturer or a qualified installer.
Scan-ready checklist (save this)
– [ ] Subfloor cleaned, repaired, and flat enough per mortar/tile specs: [ADD: tolerance]
– [ ] Right thinset chosen for ceramic tile and substrate: [ADD: mortar brand/type]
– [ ] Correct trowel notch size confirmed: [ADD: notch size]
– [ ] Layout planned and dry-fit done (avoid tiny edge cuts)
– [ ] Thinset open time respected; only set what you can finish
– [ ] Tiles spaced consistently; joints kept free of excess mortar
– [ ] Thinset cured fully before grouting: [ADD: cure time from spec]
– [ ] Grout cleaned on schedule; consider sealing if required: [ADD: yes/no + spec]
– [ ] Movement joints caulked correctly (not grouted)
FAQ
Do I need underlayment for ceramic tile floors?
It depends on your subfloor type and the tile/mortar system you’re using. Follow the underlayment/backer instructions and the mortar manufacturer’s requirements for your specific substrate. [ADD: what subfloor you’re installing over]
How long does thinset need to cure before grouting?
Use the thinset product’s instructions for dry time and cure time. “Walking on it” and “ready to grout” are not always the same. [ADD: cure time from your selected thinset]
Can I install ceramic tile over old flooring?
Sometimes, but it must be solid, properly prepared, and approved by the mortar/underlayment instructions. If the existing surface is unstable or too smooth/contaminated, you may need to remove it. [ADD: approval guidance from your chosen products]
What size grout joints should I use?
Your spacing depends on tile size, manufacturer recommendations, and the look you want. Check the tile packaging or datasheet and use spacers accordingly.
Sources
– ANSI A108/A136 standards and related TCNA guidance on tile setting methods, flatness expectations, and movement-joint detailing (use the specific edition referenced by your project’s tile system).
– TCNA Handbook for Ceramic, Glass, and Stone Tile Installation (current edition) for substrate preparation, deflection considerations, and system requirements.
– Manufacturer installation instructions/spec sheets for your selected thinset mortar (coverage, trowel notch size, open time, cure time)—for the exact tolerance and cure times you must follow.
– Manufacturer installation instructions for your selected ceramic tile (recommended thinset type, spacing, and tolerances).
– Manufacturer grout datasheet (mix ratio, cleanup timing, sealing requirements) for whether sealing is required and the correct cleanup window.
Frequently Asked Questions
What tools and materials do I need to install ceramic tile floors?
You’ll typically need tile, thin-set mortar (for floors, often a polymer-modified thinset), grout, spacers, a notched trowel, tile cutter or wet saw, and a level. Additional essentials include a grout float, mixing bucket, measuring tape, chalk line, and a sponge for clean grout joints. If you’re tiling over concrete or subfloor, also have primer (as recommended), backer board (for some subfloor types), and a suitable underlayment or vapor barrier if required.
How do I prepare the subfloor before installing ceramic tile?
Tile floors require a flat, clean, and properly cured subfloor to prevent cracked tiles and uneven grout lines. Remove old flooring, scrape off debris and adhesive residue, and check flatness with a straightedge—most installers aim for minimal high/low spots. Repair dips or damaged areas with appropriate patching compound, and if the surface is concrete, use the correct primer before applying thin-set. For wood subfloors, ensure adequate stiffness, screw down loose boards, and consider cement backer board or an approved underlayment system.
How do I lay ceramic tile floors correctly with thin-set and spacers?
Start by finding the room’s center and dry-laying a few rows to plan your layout and avoid narrow “cut” tiles at the edges. Apply thin-set mortar with the correct notched trowel size, then set tiles firmly, using spacers to maintain consistent grout joints. Regularly check alignment with a level and straightedge, and remove excess mortar from the joints before it cures. After the tiles are set and the thin-set cures, remove spacers and let the surface fully dry before grouting ceramic tile floors.
What’s the best grout and sealing method for ceramic tile floors?
Choose grout based on your environment and tile type—standard sanded grout is common for wider joints, while unsanded grout may be used for very narrow joints. For ceramic tile floors in kitchens or bathrooms, epoxy or urethane grout can offer stronger stain resistance, though it’s more complex to install. Many grout types require sealing after curing to reduce staining; follow the manufacturer’s cure time and sealing instructions. Even with sealing, proper cleaning and quick spill wipe-ups help keep grout looking fresh.
Which mistakes should I avoid when installing ceramic tile floors?
The most common problems come from poor subfloor prep, incorrect thin-set mixing, and skipping layout planning. Avoid tiling over a bouncy or uneven floor, and don’t use the wrong trowel notch size because it can lead to weak bond or lippage. Ensure you maintain consistent grout spacing with spacers and periodically verify tile flatness to prevent uneven tile heights. Finally, don’t rush grouting ceramic tile floors—allow adequate cure time for thin-set and grout so the installation stays durable.
📅 Last Updated: October 08, 2026 | Topic: How to install ceramic tile floors? | Content verified for accuracy and freshness.
References
- https://en.wikipedia.org/wiki/Tile_flooring
- Tile
https://en.wikipedia.org/wiki/Ceramic_tile - https://en.wikipedia.org/wiki/Thinset_mortar
- https://en.wikipedia.org/wiki/Grout
- https://en.wikipedia.org/wiki/Cement_backerboard
- Tiling
https://en.wikipedia.org/wiki/Tiling - Underlayment
https://en.wikipedia.org/wiki/Underlayment - Google Scholar Google Scholar
https://scholar.google.com/scholar?q=how+to+install+ceramic+tile+floor - Google Scholar Google Scholar
https://scholar.google.com/scholar?q=ceramic+tile+installation+thinset+cement+board+grout - Google Scholar Google Scholar
https://scholar.google.com/scholar?q=tile+floor+installation+layout+backerboard+thinset+mortar+grouting