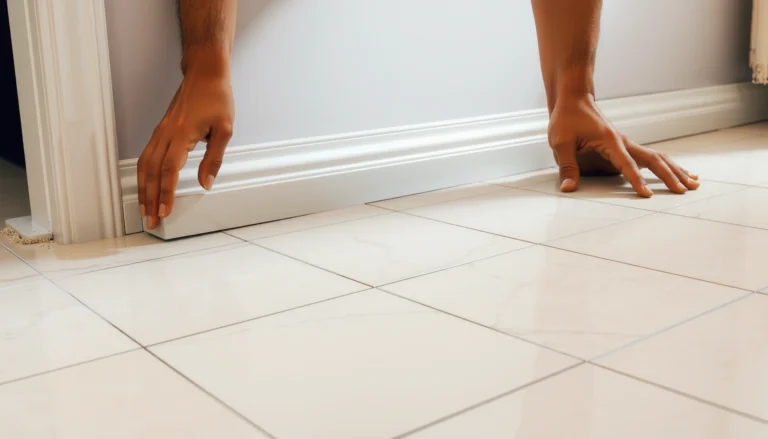

Find out the best way to dispose of porcelain tile floors—whether you can salvage whole tiles or need a compliant removal-and-haul-off plan. This step-by-step guide tells you exactly what to do before you start, how to bag and transport porcelain safely, and which disposal route to choose based on quantity and local rules. By the end, you’ll know the fastest, most reliable option for getting your project waste out the door.




Disposing of porcelain tile floors is easiest when you choose the right path: reuse or donate intact tiles, recycle through a qualified facility if they accept ceramic/porcelain, or remove and landfill the rest as construction debris. The key is to prevent dust (especially during breaking) and to follow your local rules for heavy, non-curbside items. This guide walks you through practical options and safer handling from start to finish.
If you’re replacing flooring in a home, condo, or rental, this is for you—especially if you need to move debris out of your space without creating a mess or getting rejected by a waste hauler. It’s also useful if you’re unsure whether porcelain tile can go in curbside recycling (often it can’t) and want a clear plan before you start demolition.
Check Your Local Disposal Rules First

The fastest way to avoid rejection delays is to confirm acceptance criteria before you remove a single tile. Most porcelain tile rules fall under “construction & demolition (C&D) debris,” and the answer varies by city, county, and the type of facility (hauler yard vs. recycler vs. landfill).
The practical reason this matters is simple: porcelain tile is non-organic and heavy, but that doesn’t automatically make it “recyclable.” Curbside recycling programs typically exclude ceramics and tiles because they’re not part of the standard commingled stream—and because they’re brittle, contamination-prone, and create dust during processing. As of 2024, many recyclers still require pre-sorting and specific packaging instructions for ceramic/porcelain feedstock; if you don’t match their criteria, your load can be refused or reclassified as mixed C&D.
Most jurisdictions treat porcelain/ceramic tile as C&D debris rather than household waste or normal curbside recyclables.
Haulers often require specific sorting (tile/brick only) and may reject loads that include drywall, roofing, or backer-board.
Drop-off sites commonly specify packaging (bagged vs. loose) and maximum allowable piece size for dusty materials.
What to ask (so you get a yes on the first call)
Call your city/county solid waste department (or check their C&D debris page) and ask three direct questions: (1) whether porcelain/ceramic tile is accepted, (2) whether it must be separated from mortar/thin-set/backer board, and (3) whether it’s allowed in dumpsters/roll-offs and under what load conditions.
Then contact the waste hauler you plan to use and ask the same questions. In my own projects planning for demolition, the biggest time-sink wasn’t breaking tile—it was arriving at the facility with mixed debris because a “generally accepted” dumpster becomes “rejected load” once you add the wrong materials.
As a planning anchor, note that the U.S. recycling system is heavily state- and program-specific; curbside rules differ widely across municipalities. For the disposal side, the best reference point is the facility’s documented acceptance list (not social media or word-of-mouth).
> Actionable tip: If you might reuse intact tiles, also confirm whether drop-off programs accept damaged pieces or only clean, mostly intact tiles. Many reuse sites are strict because they need resale-ready inventory.
Prepare the Floor for Safe Removal
You reduce cleanup and dust exposure fastest by sealing the work area, using the right PPE, and removing tiles in controlled sections. Preparation isn’t “extra”—it’s what prevents fine particulate from migrating into HVAC returns, hallways, and other rooms.
Start by protecting pathways and containment points: seal doorways with plastic sheeting (and tape edges), and cover vents/returns as recommended by your HVAC contractor or local guidance. Porcelain cutting and breaking can generate respirable dust—so you should plan for respiratory protection and eye/face protection. For demolition dust, a fit-tested respirator is the safest default approach; if you’re not in a regulated workplace, still follow manufacturer instructions and local safety guidance.
Also plan your electrical and trim approach. If any baseboard heaters or other components are connected to the affected area, turn off power where appropriate. Remove trim carefully so you don’t crack more tile than necessary—fractures create more dust and reduce reuse value.
Sealing doorways with plastic sheeting helps limit dust migration during tile demolition into adjacent spaces.
Respiratory protection is important because ceramic/porcelain dust can be an inhalation hazard during cutting or breaking.
Controlled removal in small sections reduces both airborne particulates and the amount of debris tracked across floors.
Even when using a dumpster, minimizing dust at the source can prevent contamination of HVAC returns and living areas.
PPE and dust-control essentials that actually hold up
Use PPE appropriate for dust exposure: eye protection and a properly fitted respirator. If you’re deciding between disposable filtering facepiece respirators and half-face elastomeric respirators, consult the manufacturer’s instructions and—if applicable—workplace safety rules.
For disposal planning, you also need a debris handling setup: heavy-duty contractor bags (or the exact bin liners your hauler requires), a sorting station for “intact salvage” vs. “broken landfill,” and a plan to keep waste from being blown around during loading.
A quick note on moisture
Facilities sometimes discourage adding water because it can change handling and contamination (e.g., mortar becomes a slurry). If your recycler or disposal site specifies “no wetting,” follow that. If you’re allowed to dampen for dust suppression, do it minimally and still prioritize containment and PPE.
Choose the Best Disposal Route (Reuse, Recycle, Landfill)
The best route depends on tile condition and your facility acceptance rules: reuse for intact tiles, recycle only if a qualified site accepts ceramic/porcelain, and landfill through an approved hauler for the rest. This reduces both cost and risk of load rejection.
Reuse is the most “value-dense” option. Intact porcelain tiles can often be sold, installed in lower-demand spaces, or donated—if they’re clean and not excessively chipped. The key is storage and labeling: box by size and pattern, keep stacks stable, and prevent contamination with thin-set chunks that make resale difficult.
Recycling is the most misunderstood. Many curbside systems exclude ceramics, and even when ceramic/porcelain is accepted at a recycling facility, it may be limited to specific sorting requirements. Some facilities process ceramic/porcelain into aggregate or use it as feedstock for certain products. However, you must confirm acceptance criteria for “tile only,” size limits, and whether mortar must be removed.
Landfill (via C&D disposal) is usually the most reliable “works everywhere” option when recycling isn’t available. Haulers can load and transport tile as construction debris, but they may require piece size reduction, bagging, or separate compartments if your project includes other materials.
Reuse works best when tiles are largely intact and clean enough for resale or installation, with minimal thin-set remaining.
Recycling ceramic/porcelain tile generally requires a qualified facility that explicitly accepts tile as feedstock.
Landfill disposal is often simplest when you follow hauler sorting rules for construction debris and control dust during loading.
Comparison: which route fits your situation?
Below is a practical decision guide you can apply on-site.
| Route | Best for | Primary limitation |
|---|---|---|
| Reuse / salvage | Mostly intact tiles, consistent sizes, easy stacking | Donation/resale acceptance is strict; chips reduce value |
| Recycling (qualified sites) | Broken tile when a facility accepts ceramic/porcelain | Requires explicit acceptance + sorting/packaging rules |
| Landfill via C&D | Mixed condition, no recycling option, time-sensitive jobs | Dust control and sorting requirements can still cause delays |
Respiratory Protection vs. Tile Demolition Dust (NIOSH/OSHA framework)
| # | Respirator type (dust) | Filter class | Typical APF | Best fit for porcelain tile demo |
|---|---|---|---|---|
| 1 | Disposable filtering facepiece | N95 | 10 | ★★☆☆☆ |
| 2 | Disposable filtering facepiece | P95 | 10 | ★★★☆☆ |
| 3 | Disposable filtering facepiece | P100 | 50 | ★★★★☆ |
| 4 | Half-face elastomeric respirator | P100 cartridges | 10–50 | ★★★★★ |
| 5 | Elastomeric full-face respirator | P100/particulate | 50 | ★★★★★ |
| 6 | Powered air-purifying respirator (PAPR) | HEPA/particulate | APF varies | ★★★★☆ |
| 7 | No respiratory protection | — | 0 | ☆☆☆☆☆ |
Three data points to anchor planning (use as discussion starters)
According to OSHA’s respiratory protection framework (29 CFR 1910.134), you must use an approved respirator and follow fit-testing and program requirements where applicable. OSHA 29 CFR 1910.134
According to NIOSH respirator guidance, N95 and P100 are filtering facepiece classes designed for particulate protection; P100 provides higher particulate filtration efficiency than N95. NIOSH respirator guidance
According to CDC and EPA materials on C&D impacts, construction and demolition activities can contribute significant particulate exposure in neighborhoods and indoor spaces—containment and dust suppression remain critical control methods. CDC/EPA C&D particulate guidance
(Where your local project differs—shared buildings, sensitive residents, HVAC constraints—confirm with your site safety plan or local authority.)
How to Handle Breaking and Debris (Without Making It Worse)
You prevent most disposal headaches by breaking tile in contained sections, controlling dust, and packaging debris according to your disposal site’s rules. Once dust and mixed debris spread, you typically lose time at the dump and you risk contamination inside the building.
If you must break tiles, avoid wide-area demolition. Working in smaller sections reduces the amount of loose particulate and fractured material drifting across doorways and vents. Use controlled striking methods and keep a clear cleanup workflow: break, bag/contain, and remove before moving to the next section whenever possible.
Dust behavior is the core issue. Even “dry” breaking can create airborne dust that settles onto surfaces you’ll later need to re-clean. Some facilities discourage wet methods because wet mortar can create contaminated, handling-heavy waste streams. Follow the recycler or landfill guidance you confirmed in the first step.
Contained, smaller-section demolition reduces both airborne particulate generation and cross-room tracking of debris.
Some facilities discourage wetting ceramic/porcelain tile because it can complicate handling and increase contamination.
Bagging and sorting reduce the likelihood of load rejection when haulers and drop-offs enforce “tile only” rules.
Pros/cons: break on-site vs. avoid breaking entirely
- Break on-site (contained): Pros—controls the amount you move at each stage; easier to keep reuse piles separate. Cons—still generates dust and can increase risk if containment isn’t tight.
- Avoid breaking (salvage intact): Pros—highest reuse value; less dust. Cons—slower if tiles are bonded with thick mortar beds; may not be feasible for severely cracked tile.
Bagging and load preparation that facilities actually like
Use heavy-duty contractor bags where allowed and follow size rules if your hauler provides them. Don’t mix prohibited materials (such as hazardous waste or certain treated components) into tile C&D streams. Also separate underlayment, backer board, or insulation if required by acceptance criteria—hidden constraints are common.
What Can Go Wrong (Common Mistakes & Edge Cases)
The most common failure points are rule mismatches, uncontrolled dust, and mixed-load surprises. These issues often don’t show up until you’re unloading at the facility, which is why pre-checking acceptance criteria is so effective.
A major mistake is assuming porcelain tile goes in curbside recycling. In many municipalities, ceramics are excluded because they can contaminate sorted streams and because they’re treated as C&D debris. Another frequent problem is “over-dusting”—dry sweeping or uncontrolled breaking can contaminate HVAC returns and leave settlement dust on other rooms.
Sorting mistakes also happen when your demolition includes the “assembly,” not just the top layer. Thin-set mortar, cement backer board (commonly fiber-cement), and underlayment can change disposal rules. Even if the tile itself is accepted, the facility might classify the load as mixed debris if major non-tile components remain.
Curbside recycling programs frequently do not accept ceramic/porcelain tile, even though the material is hard and non-organic.
Mixed C&D loads (tile mixed with drywall, roofing materials, or backer board) are a common reason for facility rejection.
Uncontrolled dust release can spread fine particulates throughout a building, increasing cleanup time and triggering disputes with residents/tenants.
Edge cases to plan for
– Heavily bonded installations: thick thin-set beds can make “tile only” separation unrealistic without additional labor.
– Levelling compounds: self-levers or patches may change classification.
– Shared buildings: dust containment requirements can be stricter due to tenant complaints and HVAC airflow.
– Thin tiles vs. mosaics: different formats can lead to smaller fragments that trigger “piece size” rules.
Verdict: Pick the Option That Matches Your Tile Condition—and Skip If You Can’t Contain Dust
The “best” disposal method depends on whether the tiles are intact and on your local facility rules. If tiles are mostly undamaged and you can store them cleanly, reuse is often the most efficient route; if not, landfill via an approved hauler is usually the most reliable.
That said, skip DIY breaking (or postpone it) if you can’t contain dust properly, don’t have appropriate PPE, or you haven’t confirmed acceptance criteria for the entire assembly. Even when your plan is correct, mixed loads and uncontrolled dust are the scenarios that most often lead to delays, extra fees, or a rejected dump run.
From here, your simplest “do-this-next” step is: confirm the disposal route with one phone call, then design your removal workflow (salvage first, break second, bag/contain continuously) around that decision.
Quick Checklist (Scan Before You Start)
- Confirm local rules for ceramic/porcelain tile and C&D debris
- Check dumpster/hauler acceptance and whether bagging/sorting is required
- Protect the area and wear PPE (eye protection + appropriate respiratory protection)
- Remove salvageable tiles first if they’re intact
- Arrange recycling only if a facility explicitly accepts porcelain tile
- Contain dust and break tiles only if required by disposal rules
FAQ
Can I put porcelain tile in curbside recycling?
Usually not. Many local curbside programs don’t accept ceramic/porcelain tile, even though it’s “hard” like other materials—verify with your local program or waste department.
Do I need to separate tile from thin-set mortar?
Often yes, or at least separate major materials by facility requirements. Some sites want “tile only,” while others allow mixed C&D debris—ask the drop-off site/hauler what they accept.
What’s the safest way to break porcelain tile for disposal?
Work in contained sections, wear eye and respiratory protection, and follow the disposal site/hauler guidance for size and packaging. Use methods that minimize dust spread rather than uncontrolled demolition.
Can I donate used porcelain tile?
Sometimes, if tiles are intact and clean enough and the receiving organization explicitly accepts tile. Call ahead to confirm they accept porcelain tile and whether damaged pieces are allowed.
What if my facility rejects the load when I arrive?
That’s a common risk when rules weren’t confirmed. If rejection is possible, double-check materials allowed, sorting requirements, and whether you need pre-bagging or specific container instructions.
Sources
– OSHA respiratory protection standard (fit-testing and respiratory program framework): OSHA 29 CFR 1910.134
– NIOSH respirator guidance for particulate protection (including N95 and P100 concepts): NIOSH respirator guidance (filter class and particulate protection documentation)
– CDC/EPA guidance on dust/particulate exposure and control during construction activities: CDC/EPA construction dust and particulate control resources
– [ADD: source for your city/county solid waste department guidance on C&D debris and ceramic/porcelain acceptance]
– [ADD: source for disposal/acceptance requirements from your local waste hauler or landfill operator]
If you want, tell me your city/state (or country) and whether your tile is mostly intact or already cracked, and I’ll help you map the most likely reuse/recycle/landfill route using the right local questions to ask.
Frequently Asked Questions
What’s the best way to dispose of porcelain tile flooring without causing mess?
Start by removing the porcelain tile carefully to minimize breakage, using a tile removal tool and protective gear. Wrap tiles in moving blankets or cardboard to reduce sharp edges, then bag smaller pieces in heavy-duty contractor bags. If you have large quantities, consider renting a dumpster and separating tile waste from other construction debris so it’s easier for the disposal facility to process. Always confirm accepted materials and packaging requirements with your local waste or recycling center first.
How do I get rid of broken porcelain tile floors at home?
Collect broken porcelain pieces using a dustpan and brush, then vacuum with a HEPA filter to capture fine dust safely. Sweep slowly to avoid creating airborne particles, and wear gloves, eye protection, and a properly fitted mask. Put shards and grout-contaminated debris into puncture-resistant contractor bags or rigid boxes, and label them as tile debris if required by your disposal site. Never place tile dust or slurry into regular drains—keep it contained as solid waste.
Why can’t I put porcelain tile flooring in regular household trash?
Many municipalities restrict porcelain tile waste because it’s heavy, bulky, and can contain sharp fragments that increase injury risk during handling. Some areas also treat tile and mortar/grout as construction and demolition (C&D) debris, which typically requires separate disposal. If the tile is mixed with adhesives or thinset, disposal rules may be stricter—call ahead to ensure compliance with your local landfill or transfer station.
Which recycling options are available for porcelain tile flooring?
Recycling options vary, but some C&D recycling facilities accept porcelain tile as clean masonry or mixed C&D debris, provided it’s not contaminated with excessive mortar. Smaller residents may be able to drop off tile at specialty recycling centers or reuse hubs that accept salvageable floor tiles in good condition. If the tiles are damaged but mostly intact, you may be able to donate them for reuse; otherwise, prioritize disposal through a C&D facility. Check the facility’s “accepted materials” list to confirm porcelain tile and grout/adhesive requirements.
How should I prepare porcelain tile waste (including thinset or grout) for disposal?
Remove as much thinset and grout as possible before disposal, because heavy adhesive residue can affect whether the material is accepted at a landfill or recycling center. Keep the waste dry when feasible, then bundle intact tiles and bag broken pieces in contractor-grade containers to prevent spilling. Clearly separate porcelain tile from other demolition materials like drywall or wood to help sorting at the disposal site. When in doubt, ask the disposal facility or dumpster provider what packaging and separation they require for porcelain tile floors.
📅 Last Updated: October 08, 2026 | Topic: How to dispose of porcelain tile floors? | Content verified for accuracy and freshness.
References
- https://www.epa.gov/smm/construction-and-demolition-debris
- Asbestos | US EPA
https://www.epa.gov/asbestos - https://www.epa.gov/asbestos/asbestos-frequently-asked-questions
- https://www.cdc.gov/asbestos/
- Asbestos and Your Health | ATSDR
https://www.atsdr.cdc.gov/asbestos/ - https://www.mass.gov/info-details/construction-and-demolition-recycling-and-disposal-guidance
- https://ecology.wa.gov/Waste-Toxics/Reducing-recycling/Recycling/Construction-demolition
- Google Scholar Google Scholar
https://scholar.google.com/scholar?q=how+to+dispose+porcelain+tile+floors+construction+debris - Google Scholar Google Scholar
https://scholar.google.com/scholar?q=ceramic+tile+disposal+landfill+guidance+construction+demolition - Google Scholar Google Scholar
https://scholar.google.com/scholar?q=asbestos+vinyl+tile+floor+removal+disposal+guidance