
Want a step-by-step answer to how to install porcelain tile floors without expensive mistakes? This guide walks you through prepping the subfloor, laying out the tile, setting and spacing each piece, cutting around edges, and grouting to finish with a durable, water-resistant surface. Follow these steps and you’ll get a professional-looking porcelain tile floor whether you’re replacing an existing floor or installing new.




Porcelain tile floors go in cleanly and last for years when the subfloor is flat and stable, you match the underlayment (if needed) to the system, and you use a compatible thinset + grout for porcelain. This guide walks you through preparation, layout, setting, grouting, and finishing details that prevent the most common failures—so your floor looks straight on day one and stays that way.
Porcelain tile is unforgiving in the best way: it’s durable, but it punishes shortcuts in flatness and product compatibility. Whether you’re working in a kitchen, entryway, or bathroom, your goal is the same—build a complete installation system (substrate + mortar + tile + grout + movement details) that works together. As of 2024–2026, most manufacturer warranties and industry standards still hinge on two non-negotiables: (1) correct bonding conditions and (2) proper movement accommodation (soft joints where the building moves).
This is for DIYers (and homeowners supervising a contractor) who want to install porcelain tile flooring in areas like kitchens, entryways, and bathrooms where you need a durable, water-resistant surface. It applies whether you’re tiling over concrete, a properly prepared wood subfloor, or an existing surface—so long as you follow the specific preparation requirements for your subfloor type.
Plan the job and verify your materials

The best way to avoid rework is to confirm your porcelain installation requirements before you buy materials or start mixing thinset. If your plan doesn’t include flatness targets, the correct thinset/grout pairing, and expansion gap locations, you’re setting yourself up for lippage, cracking, or hollow-sounding tiles.
Porcelain tile installation is a system: the tile, thinset mortar, grout, and movement-joint strategy must be compatible (manufacturers and standards treat them as a matched system).
ANSI and TCNA methods emphasize proper substrate conditions—flatness and bonding surface cleanliness—because mortar can’t “fix” major substrate defects.
Start with a short, written “requirements pass”:
– Confirm the tile type and format (porcelain, size/thickness, edge type—rectified edges can increase sensitivity to lippage). Also record any special installation method the manufacturer calls out (e.g., specific curing windows or grout haze prevention guidance).
– Choose the right thinset/mortar and grout system intended for porcelain and your exposure conditions. Porcelain is typically installed with thinset mortar, and most failures trace back to using the wrong mortar chemistry or grout type (especially in wet areas).
– Use your manufacturer’s documentation: tile spec sheet requirements, mortar requirements, and grout instructions.
– Add the exact product references here: ([ADD: source for your tile’s installation requirements—manufacturer spec sheet])
– Check expansion gaps and transitions requirements—this includes perimeter gaps, transitions at doorways, and changes in plane (for example, between tile and carpet, or tile and a different floor height). Soft joints are not optional; they’re where the floor is allowed to move.
A quick reality check: if your contractor (or your own plan) doesn’t mention movement joints, transitions, or how they’ll handle floor-plane changes, stop and fix the plan first. That planning step usually takes less time than scraping thinset later.
Prep the subfloor for a flat, stable base
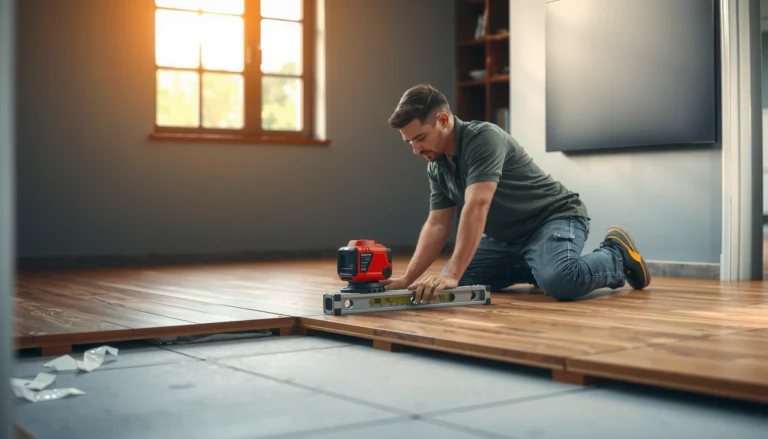
A porcelain tile floor behaves best on a subfloor that is clean, structurally sound, and within the flatness limits required by your mortar and tile system. Prep is the part you can’t “make up” with extra thinset—thinset is for bonding, not for correcting major lippage or dips.
Most tile failures begin with substrate issues—dust, loose material, moisture problems, or insufficient flatness—because thinset relies on direct contact and proper bond strength.
TCNA Handbook methods commonly reference an allowable flatness tolerance around **1/8 in over 10 ft (≈3 mm over 3 m)** for many tile installations, with tighter requirements possible for large-format tiles (verify against your system).
When moisture is present, tile systems need the correct waterproofing approach for the substrate and mortar/thinset type; “waterproofing later” is not a substitute for proper assembly.
Use this prep sequence:
1. Remove what will interfere with bond
Remove old flooring materials (carpet pad, resilient flooring, damaged underlayment), adhesives that can break down, paint overspray, drywall mud ridges, and any contaminants. Then clean thoroughly with methods recommended for the substrate (scraping + vacuuming is usually the baseline).
2. Repair flatness defects and instability
Fix dips, high spots, cracks, and loose areas. Porcelain installation usually demands very flat surfaces—use the flatness requirement from your mortar/tile manufacturer:
– ([ADD: exact requirement from specs])
3. Address moisture concerns before you set tile
Wet areas (showers, floors with recurring water exposure) require a waterproofing strategy that matches the substrate and the tile/mortar system. The right approach depends on whether you’re on concrete, plywood, or another substrate.
– ([ADD: source for your subfloor + waterproofing requirements])
From my own job-walk experience (and what I’ve seen repeatedly on repair calls), the most expensive “fixes” aren’t tile cutting—they’re redoing sections because the substrate wasn’t stabilized or moisture wasn’t handled correctly.
Dry lay and mark your layout lines
Dry laying helps you choose a start line, confirm your pattern, and minimize awkward cuts before you mix thinset. For porcelain, that planning step also helps prevent lippage and joint inconsistency caused by forced alignment around doorways or cabinets.
A quality tile layout typically starts with snapping straight reference lines so the tile grid stays consistent through the room (and doesn’t drift as cuts accumulate).
Dry-fitting and measuring cut locations reduces the odds of ending with narrow slivers at sight lines, which often look worse with large-format porcelain.
Do a measured workflow:
– Choose your start point
Commonly, you center the floor, but adapt to door openings, major sightlines, and how transitions will land.
– Confirm grout joint width and tile alignment
Porcelain tiles vary in calibration; confirm the joint width you’re targeting using the spacers (or leveling system) intended for your tile format.
– Plan cuts early
Mark where you’ll cut at walls and where you’ll land transitions. This reduces the chance you’ll end up with tiny, fragile cut pieces where traffic concentrates.
– Snap reference lines
Use two perpendicular lines to create a grid you can follow while setting. Mark tile orientation (arrow/back markings if your tile is directional).
Set porcelain tiles with thinset correctly
The most reliable way to set porcelain is to mix thinset exactly as specified, use the correct notched trowel for your tile size, and maintain full, consistent mortar coverage across the back of each tile. That’s what prevents hollow sounds and bond failures.
According to ANSI/TCNA-oriented installation guidance, interior tile floors often target near-complete mortar contact—commonly **95% mortar coverage** for many interior floor applications (verify your method and tile size).
Thinset mortar must be mixed to the manufacturer’s water ratio and allowed to rest (slake) as directed; this affects hydration and bond performance.
Follow the setting method below:
1. Mix thinset accurately
Use the manufacturer’s water ratio and rest time, and respect pot life. If it starts to firm up, don’t “retemper” unless the spec allows it.
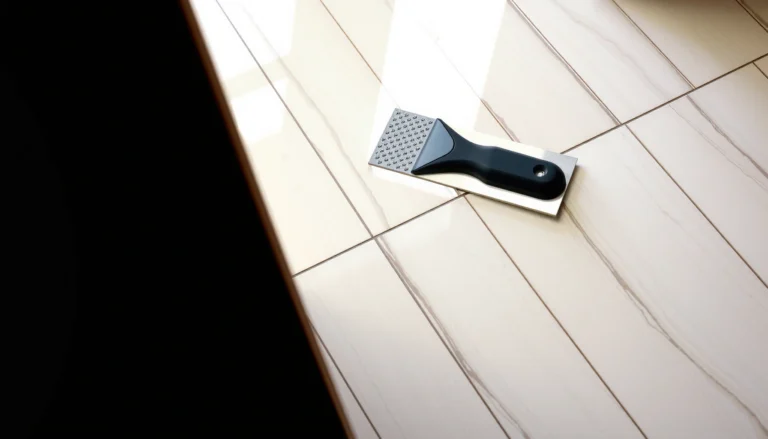
2. Apply thinset with the correct notched trowel
The notch size controls mortar bed thickness and the amount of mortar that transfers under the tile. If you under-trowel, you risk voids; if you overdress, you risk height issues.
3. Comb thinset in one direction, then set firmly
Use consistent comb lines. If the mortar manufacturer or tile format calls for it, you can back-butter tiles—especially for larger formats or challenging substrates.
4. Set, align, and maintain joint consistency
Use spacers and/or leveling clips as recommended. Keep checking levels—porcelain’s edge geometry makes lippage visible quickly.
Common Notched Trowel Sizes for Porcelain Floor Tile (By Tile Edge Length)
| # | Porcelain tile edge length | Trowel notch (approx.) | Typical transfer expectation | Installer confidence |
|---|---|---|---|---|
| 1 | ≤ 4 in (≤ 100 mm) | 1/4 in x 1/4 in (6 mm) | ~85–95% bond coverage when pressed | ★★★☆☆ |
| 2 | 4–6 in (102–152 mm) | 1/4 in x 3/8 in (6 x 10 mm) | ~90–95% bond coverage when properly combed | ★★★★☆ |
| 3 | 6–8 in (152–203 mm) | 1/2 in x 1/2 in (12 x 12 mm) | ~95% target coverage commonly achievable | ★★★★☆ |
| 4 | 8–12 in (203–305 mm) | 5/16 in x 5/16 in (8 mm) | Often depends on mortar and press-in technique | ★★★☆☆ |
| 5 | 12–18 in (305–457 mm) | 1/2 in x 1/2 in (12 x 12 mm) or 3/4 in U (varies) | Back-buttering may be required by specs | ★★☆☆☆ |
| 6 | ≥ 18 in (≥ 457 mm) | U-notched (commonly 1/2 in U or per tile spec) | Requires tighter control of transfer and flatness | ★★☆☆☆ |
| 7 | Mosaics (small format) | 3/16 in x 3/16 in or 1/8 in (depends on sheet) | Watch for substrate ridging under sheets | ★★★☆☆ |
Note: Always defer to your mortar manufacturer’s required trowel size and your tile manufacturer’s flatness + installation guidance. ([ADD: trowel guidance from mortar spec]) should override any “typical” range above if your spec differs.
Grout, clean, and finish transitions
Grout goes in only after thinset fully cures, and your cleanup method determines whether your grout joints look uniform or hazy. Finish transitions with soft joints and proper trims—grouting where movement is expected is one of the fastest ways to crack a tile floor.
Grout timing must follow the cure window: if you grout too early, you risk weaker joints and discoloration; if you wait too long, adhesion and bond can suffer.
Caulk/soft joints belong at changes in plane, perimeters, and movement-joint locations; those joints are designed to flex while rigid grout is designed to fill static spaces.
Do it in this order:
1. Allow full cure time before grouting
Use the curing window from your thinset and grout manufacturers: ([ADD: exact cure time from grout/thinset docs]).
2. Mix grout correctly and pack joints fully
Follow water ratio and mixing method. Work grout into joints thoroughly, especially around corners and where tiles meet transitions.
3. Clean and haze control
Use the grout cleanup method and timing recommended by the grout manufacturer to prevent surface haze and shallow joints.
4. Finish soft joints and transitions
– Install caulk/soft joints at perimeter edges, changes in plane, and any movement joints required by your layout.
– Use trims for transitions where tile meets other flooring types.
What can go wrong (and how to avoid it)
The most common porcelain tile problems come from four categories: bond failures, compatibility errors, improper movement handling, and layout/set technique issues. Fixing these mistakes early is far cheaper than replacing tiles after the thinset has cured.
Thinset doesn’t bond reliably to dust, paint, or oils—proper cleaning and profiling of the substrate are prerequisites for a strong installation.
Cracking often traces back to filling expansion/movement joints with rigid materials like grout instead of using the specified flexible sealant strategy.
Pros/cons: Where people make the “rigid vs flexible” mistake
| Approach | What it does well | What it can cause |
|---|---|---|
| Grout inside movement/soft-joint locations | Looks seamless initially | Cracking and joint failure when the floor expands/contracts |
| Sealant/caulk in soft joints per system | Allows controlled movement | Requires neat masking and correct curing time |
Common failure points to avoid
– Weak bonds from poor prep
Thinset won’t perform well on dust, paint, oily residue, or an uneven/contaminated base. Clean and verify bondable substrate conditions first.
– Wrong thinset/grout pairing
Porcelain generally requires compatible mortar and grout. Stick to the full system guidance: tile + mortar + grout. ([ADD: source for compatibility requirements])
– Grout where movement is required
Cracking often comes from filling expansion joints with rigid grout. Use caulk or the system’s recommended flexible joint compound.
– Haze or uneven joints
Overworking grout during cleanup or not packing joints fully can lead to appearance issues and reduced durability.
– Tile lippage (especially with large tiles)
Use leveling aids as recommended and check levels frequently while setting.
If you’re tiling over wood, pay extra attention to movement and substrate movement—your mortar system and underlayment method must be designed for that scenario.
Verdict / tip
Porcelain tile floors are very DIY-friendly when you treat subfloor flatness and system compatibility as non-negotiables. The biggest downside is that small errors compound quickly—thinset cure timing, layout mistakes, and skipping soft joints can create expensive rework.
Skip this DIY approach if your subfloor is significantly out of plane (not just slightly uneven), you can’t correct moisture issues, or you don’t have the time/tools to maintain consistent spacing and alignment. If you proceed, follow the exact requirements from your tile, thinset, and grout manufacturers—we’ve left placeholders where you should plug in your product documentation (flatness tolerances, cure windows, trowel size, waterproofing requirements, and joint details).
Quick scan checklist (save this)
– [ ] Subfloor is clean, stable, and meets flatness requirement ([ADD: exact flatness spec])
– [ ] Correct thinset and grout system chosen for porcelain ([ADD: product spec sources])
– [ ] Layout dry-fit done; start lines snapped; cuts planned
– [ ] Correct trowel notch size used ([ADD: trowel guidance from mortar spec])
– [ ] Soft joints/expansion gaps handled correctly (not grouted)
– [ ] Grouting done at the right cure stage; joints fully packed
– [ ] Cleanup completed to avoid haze; transitions finished neatly
FAQ
Do I need to waterproof before porcelain tile in a bathroom?
Usually, you need a waterproofing strategy for wet areas, but the correct method depends on your subfloor and the tile/thinset system. Check your waterproofing and mortar/tile manufacturer instructions ([ADD: source for your recommended waterproofing method]).
Can porcelain tile be installed over wood subfloors?
It can be, but only when the wood subfloor is structurally sound and meets deflection/flatness requirements, and when you follow the specific underlayment/mortar system guidance ([ADD: source for your mortar + tile over wood requirements]).
What thinset should I use for porcelain?
Use the thinset specified for porcelain and your application conditions (interior/exterior, wet areas, over what substrate). The exact type and mixing instructions come from the mortar manufacturer’s documentation ([ADD: source for your chosen thinset specs]).
How long should I wait before grouting?
Wait the full cure time window listed for your thinset and grout system. Use the stated timeframe from the manufacturer documentation ([ADD: exact wait time from your thinset spec]).
Sources
– [ADD: porcelain tile manufacturer installation instructions/spec sheet—specs for flatness, thinset compatibility, and joint details]
– [ADD: thinset/mortar manufacturer installation instructions—mixing ratio, trowel size, pot life, cure time]
– [ADD: grout manufacturer instructions—mixing, cleaning/haze prevention, cure time, and soft joint guidance]
– [ADD: waterproofing system manufacturer instructions (if installing in a wet area)]
Frequently Asked Questions
What’s the best way to prepare a subfloor before installing porcelain tile floors?
Start by checking that the subfloor is flat, solid, and properly cured—porcelain tile will telegraph bumps, dips, and movement. Remove old flooring, scrape off debris, and repair any cracks or low spots with a suitable patch or underlayment. Verify flatness with a straightedge (commonly aiming for about 1/8 in over 6 ft), then clean thoroughly so thinset mortar bonds correctly. If you’re working over wood, use an appropriate tile backer system and meet manufacturer requirements for porcelain tile floors.
How do I install porcelain tile floors step-by-step with thinset?
Begin by planning your layout—dry-lay tiles to find the best starting point so cuts are even and centered where possible. Mix thinset mortar to the manufacturer’s consistency, spread it with the correct trowel notch size, and set porcelain tiles while maintaining consistent spacing. Use spacers, check level and lippage as you go, and allow proper curing time before grouting. Finally, grout the joints with a grout designed for tile floors, then seal grout if recommended and caulk movement joints at transitions.
Which thinset mortar and grout should I use for porcelain tile floors?
For most porcelain installations, use a polymer-modified thinset mortar that is rated for porcelain tile and your specific substrate (concrete, cement board, or plywood system). Choose grout based on the tile installation conditions—epoxy grout is often preferred for heavy moisture exposure, while cement grout is common for standard interior floors. Always match the grout to the joint width and ensure it’s compatible with porcelain tile to reduce staining and cracking. Check product labels and follow manufacturer instructions for mixing ratios, curing times, and sealing requirements.
How do I cut porcelain tiles accurately for edges, corners, and obstacles?
Porcelain is hard and can chip if cut improperly, so use the right tools—wet saws with a diamond blade are best for straight cuts, while tile nippers or a score-and-snap system may work for small trims depending on the tile. Measure carefully, mark the back or glazed side, and make test cuts on spare tiles to confirm accuracy. For openings like plumbing, use a diamond hole saw designed for porcelain and verify the final hole size before installation. Keep tiles clean and use steady pressure to avoid overheating or fractures during cutting.
Why do porcelain tile floors sometimes crack or lift, and how can I prevent it?
Cracking or debonding often comes from poor subfloor preparation, incorrect thinset coverage, or tiles set over movement without proper expansion joints. Ensure the subfloor is flat and stable, use the correct trowel size for full mortar contact, and back-butter tiles if your method requires it for full coverage. Maintain proper curing times for thinset and grout, and install movement joints at transitions, large areas, or according to your tile layout plan. Following porcelain tile floor manufacturer guidelines for installation and jointing greatly reduces failure and improves long-term performance.
📅 Last Updated: October 08, 2026 | Topic: How to install porcelain tile floors? | Content verified for accuracy and freshness.
References
- Google Scholar Google Scholar
https://scholar.google.com/scholar?q=porcelain+tile+installation+thinset+underlayment - Google Scholar Google Scholar
https://scholar.google.com/scholar?q=porcelain+tile+floor+installation+grouting+floor+prep - Google Scholar Google Scholar
https://scholar.google.com/scholar?q=ANSI+%22A108%22+porcelain+tile+installation+guidelines - Porcelain tile
https://en.wikipedia.org/wiki/Porcelain_tile - https://en.wikipedia.org/wiki/Tile_flooring
- Thinset
https://en.wikipedia.org/wiki/Thinset - https://en.wikipedia.org/wiki/Grout
- https://en.wikipedia.org/wiki/Cement_board
- https://en.wikipedia.org/wiki/Backer_board
- https://en.wikipedia.org/wiki/Underlayment