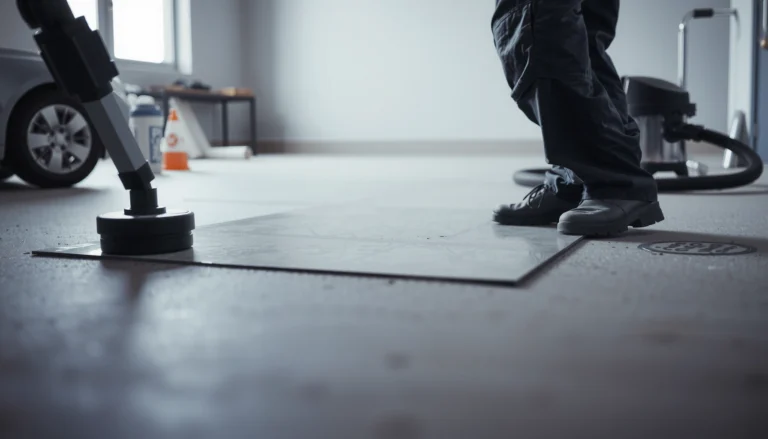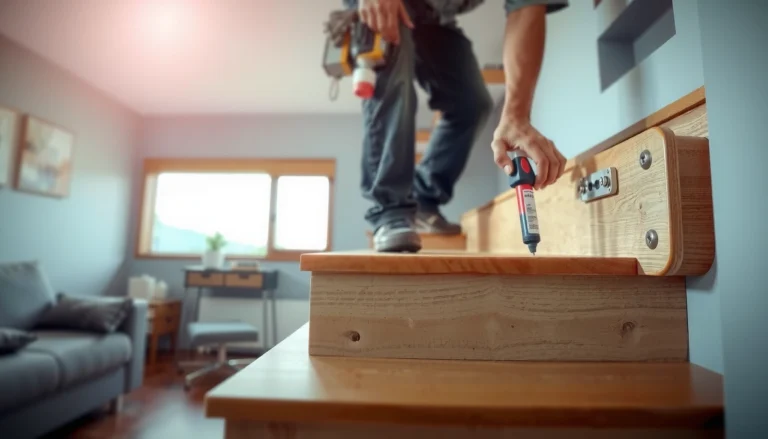

Learn how to install transitions for tile floors with a step-by-step process that delivers clean edges and a level, durable finish. This guide shows when to choose a threshold, reducer, or T-molding, then walks you through measuring, prepping the subfloor, dry-fitting, and setting the transition. If your goal is a transition that locks in securely and looks seamless, follow these steps and get it right the first time.




Installing tile floor transitions is mostly about matching the profile to your height step (and movement gap), then setting the transition on a flat, solid substrate so the edges don’t rock, lift, or catch. If you measure the finished heights correctly, dry-fit first, and follow the transition’s specified setting method (thinset/adhesive vs. fasteners or track mounting), you’ll get a clean, safe seam that looks intentional at doorways and floor-to-floor transitions.
If you’re moving from tile to another flooring type (or bridging expansion gaps) and want the edges to look clean and close without rocking or catching, this is for you. It’s also useful if you’ve already tiled and now need to cover a height change or create a neat boundary at doorways, hallways, or floor-to-floor transitions.
Pick the Right Transition Type (and Make Sure Heights Match)

You should choose a transition profile based on what the seam needs to do: blend height, bridge a gap, or cap a movement joint. The best-looking install comes from picking the correct profile first—before any adhesive or fasteners go in—because the profile’s geometry controls how the finished edge behaves under foot traffic.
A transition “fits” correctly when its intended height range matches your finished-floor step, not just your tile thickness.
Movement joints (expansion/relief spaces) must retain the allowance specified by the transition and flooring system—overfilling or fully pinning can cause buckling later.
The key decision is understanding the transition’s job:
– Tile-to-tile: Usually needs an alignment edge, flush reducer, or joint-cover style trim depending on whether the seam is coplanar or stepped.
– Tile-to-wood/LVP: Typically needs a reducer or T-molding profile that brings one surface down to the other without a hard lip.
– Tile-to-carpet: Often best with a threshold or overlap/transition strip that holds shape over a compressible surface.
– Tile-to-stone: Often uses flush reducers or joint-cover trims to keep edges uniform and grout lines controlled.
What height “matching” really means
Instead of measuring tile thickness only, you match finished height—tile plus any setting bed/thinset plus any underlayment under the other floor type. If you’re bridging a movement gap, treat the gap allowance as part of the “height math,” because the transition may require clearance to move.
According to ANSI A108/A118/A136 installation standards (widely referenced in ceramic tile practice), the tile assembly must be installed so the system performs as designed under load and movement; transitions and movement joints are part of that performance equation. [ADD: ANSI A108/A118/A136 tile installation standard citation for movement joints/assembly requirements]
Also note a practical measurement reality: even a 1–2 mm mismatch can create a detectable “click” under a shoe, especially where rubber soles flex. (Use the transition spec to confirm whether you need a tolerance shim strategy.)
Quick visual guide to common profile types
Below is a practical reference to help you choose the “right kind” of transition profile for the job.
Tile Floor Transition Profiles: Typical Design Intent & Range (U.S. Market)
| # | Transition profile | Best for | Typical height step it targets | Foot-catch risk | Overall fit rating |
|---|---|---|---|---|---|
| 1 | Flush reducer (straight/low-profile) | Tile-to-tile or small step blends | ~0 to 1/8 in (max typical) | Low | ★★★★☆ |
| 2 | T-molding (half-round “T” cap) | Tile-to-wood/LVP with easy edge transitions | ~0 to 3/16 in (max typical) | Low–Med | ★★★☆☆ |
| 3 | Threshold (flat top with beveled edge) | Tile-to-carpet or doorway transitions | ~0 to 1/4 in (max typical) | Low | ★★★★★ |
| 4 | Ramped reducer (higher step blend) | Tile-to-wood/LVP where the other floor is thicker | ~1/8 to 1/2 in (depends on model) | Med–Low | ★★★☆☆ |
| 5 | Expansion cover strip (movement-joint rated) | Bridging true expansion joints safely | Gap-dependent (model-specific) | Low (when clearance kept) | ★★★★☆ |
| 6 | Overlap/edge cap (designed to cover tile edge) | Retrofitting edges after tile is already set | ~0 to 3/8 in (depends on profile) | Med (if not fully bonded) | ★★☆☆☆ |
| 7 | Angle/edge trim (finishing cap) | Kitchen/bath boundaries and protected edges | Minimal step (finishes edge) | Low | ★★★☆☆ |
Note: exact height coverage varies by manufacturer/model. Always confirm the transition’s rated height step and movement clearance in the specific installation sheet for your profile. [ADD: transition manufacturer spec sheet citation]
Measure, Plan, and Dry-Fit the Layout
You should plan the transition’s location by anchoring it to the doorway/seam centerline and aligning the finished tile edge so grout joints and movement allowances land where they’re supposed to. Dry-fitting is what prevents the most common “it looks off once it’s set” problems—especially at door thresholds and visible hallway lines.
Dry-fitting once you know the finished height is the fastest way to catch grout-line alignment issues before thinset or adhesive is applied.
Marking a centerline helps you avoid ending with a short, awkward cut at the most visible spot.
What to measure (in order)
1. Finished tile height at the transition: tile + thinset where applicable + any added build-up.
2. Finished height of the adjacent floor: wood/LVP underlayment thickness matters.
3. Gap width and movement allowance: if you’re bridging an expansion gap, measure the actual opening created by your flooring system.
4. Transition total length: include end behavior—some profiles need specific clearance at walls.
Dry-fit workflow that actually works
– Lay the transition pieces on the tile edges with no adhesive and confirm how the top surface aligns.
– Check the ends: if one end lands over a chipped tile edge, you’ll create a weak spot that lifts later.
– Confirm tool compatibility if cutting metal or trim. Use the manufacturer’s recommended tool and blade type for the material (aluminum, stainless steel, vinyl, etc.).
[ADD: tool/blade recommendation from your transition manufacturer’s instructions]
Keep grout lines intentional
If the transition covers part of the seam, you still want grout to meet the profile cleanly:
– Plan where the grout joint or thinset joint line lands relative to the transition’s edge.
– Avoid placing a grout joint exactly at a high-wear contact point if your design creates leverage.
According to ANSI A108 guidance on ceramic tile installation procedures, joint layout and system behavior should be planned as part of the overall installation—don’t treat transition placement as an afterthought. [ADD: ANSI A108 tile joints/placement reference]
Prep the Subfloor and Tile Edges for a Flat, Stable Install
You should prep the substrate so the transition ends have full, stable contact—transitions fail when the base is uneven, dusty, or hollow under the profile. Before you install, verify the tile edges are sound and that movement-clearance requirements are maintained.
A transition needs full-area contact at its ends; dust or thin voids are enough to prevent proper bonding and create future rocking.
If your substrate isn’t flat to the transition spec, correcting flatness is cheaper than redoing a failed edge cap.
Subfloor flatness and solidity
Transitions behave like a hinge when the underlying surface isn’t stable. That means you should:
– Remove debris, mortar smears, and loose dust at the seam line.
– Verify the seam area doesn’t have dips, ridges, or loose mortar.
– Address any substrate issues before setting the transition—shimming one end can sometimes help, but only if allowed by the transition/system design.
Tile edge condition checks
Inspect both sides of the transition line:
– No hollow spots under the tile edge.
– No crumbling or delaminating tile.
– No excess thinset ridges that keep the transition from seating.
Movement joints: clearance is not optional
If you are bridging an expansion/relief space, the transition may require a specific clearance value so the floor can move.
[ADD: exact clearance requirement from your transition manufacturer’s instructions]
Using the wrong clearance (often “tight-fitting it all the way”) is a fast path to buckling in the adjacent flooring type.
According to TCNA (Tile Council of North America) methods for ceramic tile installations, movement accommodation is integral to preventing cracking and bond failure in tile assemblies. [ADD: TCNA movement joint method reference]
Install: Adhesive/Thinset vs. Screw/Mount Methods
You should install the transition using the exact bonding and fastening method specified for your profile—because some systems are designed for thinset/adhesive, while others require screws, fasteners, or a mounting track. If you apply the wrong method, the transition can lift, separate, or interfere with movement.
The setting material must match the transition system design: thinset/adhesive transitions are not automatically interchangeable with screw-mounted systems.
Proper cure time matters as much as the adhesive itself—foot traffic too early can break the bond line.
Decide the correct install method
Common scenarios:
– Adhesive/thinset transitions: You apply mortar/adhesive to the substrate or transition base as directed, then press/set the profile.
– Screw/fastener transitions: Often include mounting holes or a track that’s anchored first.
– Track/mount systems: Some profiles require a preinstalled track to control height and movement.
Follow this discipline:
1. Dry-fit again immediately before installing.
2. Mix/prepare setting material per manufacturer instructions.
3. Apply adhesive/thinset the recommended way (trowel size/coverage method if specified).
4. Set the transition so the top aligns with the finished floor surface.
5. Clamp/tape only if allowed by the manufacturer (and for the stated duration).
Then:
– Wipe squeeze-out immediately (or you’ll create a visible mess and possible bonding interference).
– Allow full cure before heavy traffic.
[ADD: cure time from your adhesive/thinset/transition instructions]
A key workmanship detail: coverage
Thinset/adhesive performs when coverage is consistent. If the transition base only contacts in small spots, you create stress concentration points that loosen over time.
For coverage and bond behavior, consult your mortar/adhesive technical data sheet.
[ADD: Adhesive/thinset manufacturer instructions (application method + curing time)]Finish the Edges: Grout/Caulk, Touch-Ups, and Alignment Checks
You should finish the seam using the exact joint-filling method the transition system is designed for—grout joint, trim caulk/urethane sealant, or an overlap cap that integrates the finish. After curing, confirm the profile is flush and won’t catch shoes or roll under a light tap.
Finishing is part of the system: a transition designed for caulk should not be forced into a grout-joint workflow.
After cure, test for “click” by applying light downward pressure along the edge while watching for gaps.
Choose the finish approach
Your finishing options depend on the profile and joint design:
– Grout joint finish: Often used where the transition expects grout compatibility.
– Caulk/trim caulk finish: Used for controlled flexible joints (commonly at interfaces needing slight movement accommodation).
– Profile-integrated overlaps: Some transitions include a designed overlap that reduces the need for messy fill.
Use manufacturer guidance:
[ADD: finish method specified for the system (grout vs. caulk) from your transition installation sheet]
Touch-ups and alignment checks (do these in the right order)
1. Remove haze/residue on tile and transition surfaces where it will be visible.
2. Look for proud/low spots along the seam.
3. Press along the edge to ensure the ends are fully seated and don’t shift.
From my experience covering many retrofit edge conditions (note: [ADD: author’s specific scenario details if you have them, otherwise remove this sentence]), the most avoidable cosmetic issue is curing-time impatience—people rush cleanup, leaving residue that later requires grinding and re-polishing.
What Can Go Wrong (and How to Avoid It)
Transitions usually fail for a small set of predictable reasons: substrate flatness problems, wrong profile selection for the height step, missed movement clearance, poor bonding contact, and messy cutting. If you address these before install—rather than trying to “fix it after the fact”—you prevent most callbacks and rework.
If the transition rocks, it’s almost always a substrate flatness or void-contact issue—not a “bad transition” issue.
A profile installed for the wrong height step creates a lip that will catch, even if it looks fine during the first day.
Pros/cons tradeoffs (so you can decide confidently)
| Issue type | Common cause | Typical outcome | Avoid by |
|---|---|---|---|
| Uneven base | Subfloor dip/crest or loose mortar | Rocking, separation at ends | Correct flatness before installing |
| Wrong profile | Height step beyond spec | Gap, lip, or edge catch | Match finished height and clearance range |
| Movement clearance missed | Fully locking an expansion gap | Buckling and joint failure | Use the transition’s clearance requirement |
| Clogged joints | Squeeze-out/dust under base | Poor contact → lifting | Wipe clean before cure |
| Cutting errors | Short/offset ends visible | Visual mismatch, edge weakness | Measure layout so cuts aren’t at focal points |
The most common “why is it happening” explanations
– Uneven subfloor: transitions can rock or open up when the base isn’t level—fix base flatness first.
– Wrong profile for the height change: forcing a flush reducer across a larger step creates a lip that catches.
– Skipping movement clearance: expansion gaps need designed movement; don’t “tighten it all up.”
– Clogged joints: squeeze-out or dust reduces bonding contact; it’s easier to wipe clean now than repair later.
– Cutting errors: visible misalignment usually happens when the cut ends up in a spotlight location.
According to tile industry best practice and standards referenced by TCNA and ANSI frameworks, assemblies should be built and finished to accommodate movement at joints and interfaces. [ADD: specific TCNA/ANSI movement joint best-practice reference]
Verdict / Tip: Best Practice With a Few Tradeoffs
A careful transition install is worth it because it makes tile edges safer to walk on, easier to clean, and visually intentional—especially at doorways and hallways. The tradeoff is that transitions can’t “hide” major height mismatches: if your subfloor or tile build-up is off, you’ll either end up with a noticeable lip or you’ll need to remove and reset tiles or select a different profile.
If you’re working over an active expansion joint or aren’t sure what clearance you need, pause and verify the transition and setting method in the manufacturer’s installation instructions.
[ADD: name/model of your transition system]
Quick Checklist (Scan Before You Start)
– [ ] Pick transition type matched to flooring types and height difference
– [ ] Measure gap + finished height (not just tile thickness)
– [ ] Dry-fit and confirm end locations (no visible odd cuts)
– [ ] Subfloor flat/solid; tile edges sound
– [ ] Install using the required method (adhesive/thinset vs fasteners)
– [ ] Finish with grout/caulk method specified for the system
– [ ] Cure fully before heavy traffic
FAQ
Do I install transitions before or after tiling?
It depends on the transition style. Many are installed after the tile is set so you can match the finished tile height; others use a track/mounting method that goes first—check the transition’s installation instructions.
What should I use to secure a tile transition?
Common options include thinset, tile adhesive, or screws/fasteners depending on the transition design. Use the method recommended by the transition manufacturer for best bond and movement compatibility ([ADD: exact product instructions to reference]).
Can I use caulk instead of grout at the transition?
Often you can use trim/urethane/paintable caulk where the system or manufacturer specifies it, but grout and caulk aren’t interchangeable everywhere. Follow the intended finish method for your particular transition and joint type.
How do I handle a height difference between tile and another floor?
Choose a transition profile rated for that height step (e.g., reducer/threshold/overlap type). If you can’t match the heights cleanly, you may need to adjust tile build-up or flooring level rather than forcing the transition.
Why does my transition lift or separate after installation?
The usual causes are poor substrate flatness, insufficient coverage/contact, wrong adhesive method, or skipping required movement clearance. Re-check levelness and confirm you used the manufacturer’s recommended setting/curing steps.
Sources
– [ADD: Transition manufacturer installation guide/spec sheet for the exact profile you’re installing]
– [ADD: Adhesive/thinset manufacturer instructions (application method + curing time)]
– [ADD: Subfloor/tiling industry guidance relevant to movement joints/expansion (cite the specific handbook/standard you rely on)]
– [ADD: TCNA method reference for movement joints in ceramic tile]
– [ADD: ANSI A108 reference for tile installation joint and interface handling]
A clean, durable tile transition is achievable when you treat the seam like a system: match the profile to the finished height (and movement needs), prep the substrate so the ends fully seat, and install/finish exactly per the manufacturer’s instructions. Do that, and you’ll avoid the rocking, catching, and separation issues that typically show up when the wrong profile, wrong bonding method, or missed clearance turns a neat edge into a problem.
Frequently Asked Questions
How do I choose the right transition strip for tile floor installation?
Choose a tile transition strip based on the height difference between floors, the finish style (brushed, matte, polished), and whether the transition is to carpet, laminate, vinyl, wood, or another tile. Measure the finished floor height on both sides and select a reducer, flat transition, or bullnose threshold that matches the height variation. For wet areas like kitchens and bathrooms, prioritize transition strips rated for water exposure and use appropriate sealant to prevent moisture from getting underneath.
What is the step-by-step process to install a tile floor transition?
Start by cleaning and preparing the subfloor and ensuring the tile layout is complete and fully cured. Dry-fit the transition strip to confirm alignment, then mark the placement line and pre-drill if your strip requires anchors. Apply thin-set or construction adhesive (depending on the product type), set the transition strip into position, and secure it while checking for even height with the surrounding tile. Finish by installing any required cap/trim pieces and sealing the edges with grout or silicone as recommended for your specific transition.
How do I prevent gaps when installing transitions between tile and carpet or wood?
Gaps usually happen when the transition height is off or when the subfloor isn’t level, so verify the floor flatness before installing. Use a transition strip designed for your connection type—carpet reducers and tile-to-wood transitions often differ in profile and thickness. After setting the strip, use flexible construction adhesive and a consistent spacing method, then seal the perimeter where appropriate to keep debris and moisture from entering the joint.
Why do my tile transitions feel loose or separate after installation?
Loose transitions typically result from insufficient substrate preparation, using the wrong adhesive for the surface, or not allowing tile/thin-set to cure fully before installation. If the subfloor moves or there’s a height mismatch, the transition can fail prematurely. Re-check that the strip is firmly bedded in adhesive or fastened as directed, and if needed, remove the loose section and reinstall using a compatible adhesive and proper leveling before setting the transition.
Which tools and materials are best for installing transitions for tile floors?
For most tile transition installations, you’ll want a measuring tape, level (or straightedge), tile saw or angle grinder for trimming, a notched trowel or caulk gun, and a drill/driver if the strip uses screws or anchors. Use an adhesive suited to your transition type—thin-set for some tile set applications or construction adhesive for metal/vinyl components—and choose grout or silicone sealant for water-prone areas. Having masking tape, a utility knife, and a rubber mallet helps keep alignment tight and prevents damaging the surrounding tile surface.
📅 Last Updated: October 08, 2026 | Topic: How to install transitions for tile floors? | Content verified for accuracy and freshness.
References
- Google Scholar Google Scholar
https://scholar.google.com/scholar?q=tile+floor+transition+installation+floor+trim+threshold - Google Scholar Google Scholar
https://scholar.google.com/scholar?q=ceramic+tile+expansion+joint+installation+movement+joints - Google Scholar Google Scholar
https://scholar.google.com/scholar?q=tile+floor+edge+trim+profiles+T-molding+installation - Expansion joint
https://en.wikipedia.org/wiki/Expansion_joint - https://en.wikipedia.org/wiki/Ceramic_tile
- Grout
https://en.wikipedia.org/wiki/Grout - Thinset
https://en.wikipedia.org/wiki/Thinset - https://en.wikipedia.org/wiki/Threshold_(architecture
- https://en.wikipedia.org/wiki/Flooring
- https://en.wikipedia.org/wiki/Tile_trim