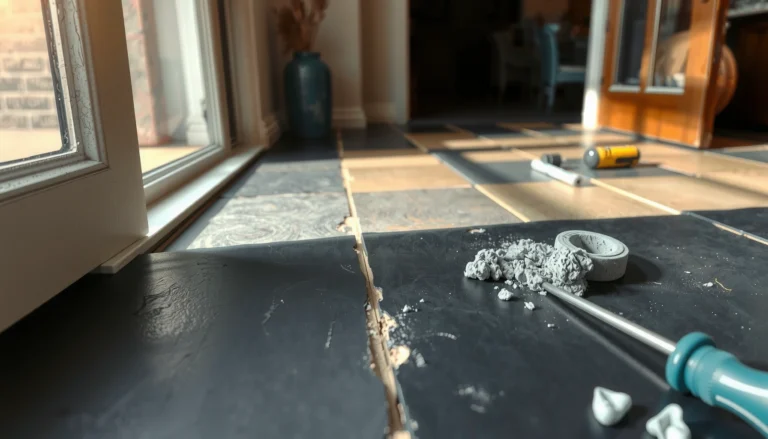

This step-by-step guide shows exactly how to fix buckling in tile floors, with the fastest path to a flat, stable surface. You’ll learn how to identify the cause, remove the damaged tiles, reset the underlayment correctly, and reinstall grout and tiles so the problem doesn’t return. If your tile is lifting, rocking, or buckling, this is the direct repair method that works when the substrate or setting bed has failed.



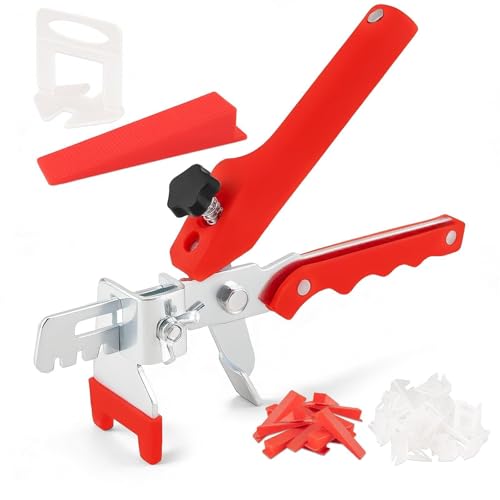
Buckling in tile floors is usually a sign that the tile system is moving underneath—most commonly because moisture has destabilized the substrate, the floor build-up isn’t strong/compatible, or the installation lacks the required flatness and movement-joint planning. The reliable repair approach is to remove the buckled tiles, identify and stop the movement (especially moisture), rebuild the supporting layers correctly, and then reinstall the tile using the manufacturer-approved system.
If your tiles look wavy, cracked, or they “lift” at seams, this is for you—especially if the buckling started after a leak, a humid season, or a bathroom/kitchen plumbing change. If the floor feels soft or the problem keeps expanding, read the “What can go wrong” section carefully before you start demolition.
Identify the cause of buckling (moisture vs movement vs substrate failure)

You fix tile buckling by first determining what’s driving the movement—because the “right” repair changes depending on whether the substrate is wet, structurally unstable, or incorrectly built. In most cases, the buckling is not a cosmetic issue; it’s a symptom of bond failure, substrate deformation, or active water intrusion.
“Buckling” is typically driven by movement or loss of dimensional stability in the substrate, not by the tile material itself.
Tile failures often correlate with moisture pathways—especially when water reaches concrete pours, mortar beds, or plywood subfloors.
Installation standards emphasize substrate preparation (flatness, cleanliness, and stability) before tile is set.
On floors over wood framing, industry guidance requires limiting deflection to prevent tile cracking and debonding.
Start with pattern recognition. Buckling that appears after a leak, spill, or seasonal humidity spike often points toward moisture in the concrete or plywood, causing swelling/softening and loss of bond. Buckling that spreads across a whole room (even without a recent leak) can indicate an installation/substrate issue—like tiling over a surface that’s too flexible, uneven, or failing.
From there, do three fast diagnostic checks:
Look for patterns
– Recent wet event → moisture suspicion: Buckling after plumbing work, a toilet/shower issue, or visible dampness strongly suggests water is entering the system and migrating through mortar or underlayment.
– Whole-area deformation → substrate/system suspicion: If multiple tiles buckle in the same direction across the room, the problem is often floor movement (framing/deflection) or inadequate underlayment/flattening.
Check for loose tiles
– Press nearby tiles: if they shift slightly, sound hollow, or rock, the bond is compromised.
– Inspect grout: cracked grout lines across tile “islands” often track movement and debonding.
Inspect nearby clues
– Discolored substrate (dark concrete spots, staining at edges) can indicate moisture.
– Damp underlayment or dampness trapped under the tile is a common root cause.
– Rusted fasteners (over wood) suggest repeated wetting.
Concrete slab vs plywood subfloor—what to look for
– Concrete slab: Look for a “stair-step” spread around cracks, discoloration, efflorescence (white mineral deposits), or dampness at saw cuts and expansion joints. Moisture may be coming from below the slab, through plumbing penetrations, or from exterior/roof/wall leaks.
– Plywood subfloor: Look for soft spots, swelling at seams, screws that no longer feel tight, delamination of layers, or underlayment/membrane that appears blistered or wavy.
According to the TCNA Handbook and common industry guidance for tile over wood framing, floors should meet strict deflection limits such as L/360 (and L/720 for some ceramic/stone conditions), which helps prevent tile debonding from normal live loads (TCNA Handbook (current edition), “Deflection Criteria” guidance). In practice, when buckling worsens over time, active moisture plus structural movement often interact—so treat moisture as part of the “movement” problem, not a side issue.
Styled reference table: common buckling drivers & best first checks
Most Common Tile Buckling Causes and What to Verify First
| # | Likely Cause | Typical Trigger | Most Telltale Clues | First Verification | Diagnostic Strength |
|---|---|---|---|---|---|
| 1 | Moisture from plumbing leak | After wet event | Soft/loose subfloor, darker spots | Confirm leak path + dry timeline | ★★★★☆ |
| 2 | Moisture trapped under system | Humidity season | Damp underlayment, musty odor | Check moisture at removed sections | ★★★★☆ |
| 3 | Insufficient bond coverage | Wrong trowel/method | Hollow tiles, thin thinset ridges | Inspect transfer pattern during demo | ★★★☆☆ |
| 4 | Over flexible/unsupported substrate | Recurring floor bounce | Buckling tracks joist span direction | Check framing rigidity/deflection | ★★★★★ |
| 5 | Underlayment/thinset incompatibility | System mismatch | Debonding at membrane interface | Verify thinset + membrane ratings | ★★★☆☆ |
| 6 | Substrate not flat enough | Uneven base | High/low “telegraphing,” cracks | Straightedge check & correction plan | ★★★★☆ |
| 7 | Movement joints missing/incorrect | Across large areas | Cracking at transitions, lift near walls | Plan joints per system rules | ★★★☆☆ |
Remove damaged tile and assess what’s underneath
You can’t fix buckling without removing the tiles that have already moved, because the supporting layer is likely compromised. After demolition, your job is to confirm that what you’re about to rebuild on is solid, flat enough, and dry enough to support a new tile system.
Tile repair should rebuild to sound, stable substrate—not “patch over” a failing zone.
Scraping back to check substrate firmness is the fastest way to distinguish bond failure from structural/substrate deformation.
Flatness is required by installation methods; you can’t reliably correct severe high/low spots with grout or thinset alone.
Remove the buckled tiles
– Cut out the buckled tiles and remove enough surrounding material to reach solid, stable substrate.
– Avoid feathering a thinset “bridge” over areas that still flex, sound hollow, or show moisture staining.
Scrape off old mortar and inspect transfer
– Scrape to expose the substrate so you can evaluate whether the base is firm, flat, and dry enough to rebuild.
– Look for signs of old bond failure:
– thinset that crumbles or smears,
– mortar beds that delaminate,
– underlayment/membrane that detached or lifted.
Measure flatness before you rebuild
Use a straightedge across joists/subfloor directions and perpendicular directions, because buckling often reflects directional movement. Many reputable standards frame “maximum deviation” as a flatness requirement (often stated as 1/8 in over 6 ft-type targets), but your tile, underlayment, and membrane manufacturer may specify different tolerances.
– Follow the manufacturer guidance for your selected system and write it down now.
– If you don’t have the install specs, take measurements and [ADD: exact flatness tolerance for your tile/underlayment system from the datasheet or installation instructions].
According to ANSI A108/A118 installation practices and the TCNA Handbook, acceptable substrate prep is a core prerequisite for tile durability (ANSI A108/A118 series; TCNA Handbook, substrate preparation sections). Flatness isn’t cosmetic—it affects contact coverage, stress distribution, and how well the thinset can transfer load.
Fix moisture problems before you rebuild
If moisture is the root cause, the new tile system will fail again if you don’t stop the water source and dry the substrate. Before you install cement board, underlayment, membranes, or new setting materials, verify that moisture intrusion is corrected and that the substrate is dry enough.
Stopping the water source is required before re-installing tile, because trapped moisture can continue to deform substrates and break bond.
Substrate dryness is a prerequisite for thinset and underlayment performance; damp bases increase the risk of debonding and warping.
Deteriorated subfloor materials must be replaced, not covered, when water damage has compromised structural integrity.
Address the source first
Moisture suspected doesn’t mean “apply a waterproofing coat and hope.” Identify whether the leak is:
– an active plumbing failure (supply lines, shutoff valves, toilet flange area, shower pan),
– failed sealant/waterproofing at transitions,
– condensation from inadequate ventilation,
– exterior water intrusion through walls or floor edges.
Let the substrate fully dry
– Drying is not just “no visible wetness.” Let concrete and plywood reach stable conditions before rebuilding.
– If you have a moisture meter and know how to use it safely, use it—but still rely on the manufacturer’s installation requirements for dryness.
Replace water-damaged subfloor material (when applicable)
– If you find deteriorated plywood (soft layers, delamination, flaking fasteners), replace it.
– If you’re on a concrete slab, investigate whether moisture is coming from below, through penetrations, or from adjacent exterior conditions.
If the moisture source is behind walls or under floor penetrations and you can’t access it reliably, stop and [ADD: source for identifying hidden leaks—recommend a qualified plumber/building envelope professional]. This is one of the places where “DIY patching” frequently turns into repeated teardown.
Rebuild the substrate correctly (underlayment + thinset + expansion planning)
Once moisture is controlled and the substrate is sound, rebuild using a compatible, manufacturer-approved tile system. Most long-term buckling repairs succeed or fail based on two details: correct layer compatibility and correct movement planning.
Mixing underlayment/membrane products with non-rated thinsets can create bond problems and premature failure.
A tile system needs both proper support (flatness and rigidity) and proper movement accommodations (isolation/expansion joints).
Fill depressions and remove ridges before tiling; correcting substrate shape is part of the installation system, not a best-effort suggestion.
Use the right system for your substrate
Your build-up should match your floor type:
– Concrete slab: Typically requires addressing moisture barriers/waterproofing strategy as the system calls for, and using the correct mortar and membrane compatibility for tile.
– Plywood subfloor: Requires a structurally adequate substrate plus the correct underlayment/cement board and fastening pattern per the board and tile system instructions.
Recreate proper support and transitions
– Flatten high/low spots to meet your system flatness tolerance.
– Ensure you aren’t tiling over flexible/unsupported areas (including gaps, voids, or deteriorated framing).
Plan for movement (don’t caulk over movement)
Tile must isolate changes of plane (walls, posts, cabinetry boundaries, doorways if the system requires it) using appropriate joints. In most systems, you don’t “solve” movement with sealant alone—you provide movement accommodation where the tile will otherwise crack or lift.
– Identify the layout size and required joint locations.
– Confirm with your membrane/setting system instructions.
– [ADD: your installation’s maximum allowable tile field size and joint spacing from your chosen system.]
Movement-joint guidance varies by system, tile type, and the presence of membranes. For example, typical standards and handbooks emphasize proper isolation joints and interior movement joints in tile floors (TCNA Handbook movement/expansion joint recommendations; ANSI/industry movement joint guidance).
Reinstall tile to prevent repeat buckling
Reinstalling the tile is where you convert your investigation into a durable repair. If you rebuild correctly but reinstall poorly—by skipping full coverage, rushing cure times, or failing to seal wet areas—the floor can buckle again.
Proper thinset coverage and bond transfer are critical because voids can amplify stress and encourage future debonding.
Thinset cure time depends on the mortar type and jobsite conditions; grouting too early can reduce bond strength.
Use grout and sealing approaches appropriate to wet areas (showers, tub surrounds, kitchens) versus dry areas.
Re-set with correct thinset coverage
– Use the correct trowel size and technique required by your thinset and tile manufacturer.
– Aim for full coverage where required—especially in areas that showed hollow sound or debonding.
Follow cure timing precisely
– Don’t rush from setting to grouting to heavy traffic.
– Follow your thinset setting mortar manual for cure times and working conditions.
– [ADD: thinset brand/model and the exact cure time required before grouting and before light/heavy traffic.]
Grout and seal with system timing
– Wet rooms generally demand a waterproofing approach and grout/seal strategy appropriate to that environment.
– Follow cure and seal instructions so water doesn’t get in early and attack the system.
[ADD: grout product, sealer product (if used), and their cure/seal timing from the label/datasheet.]
What can go wrong (common mistakes and limits)
Even when you follow the steps, some situations create failure risk—especially if the cause isn’t fully identified or if the floor is still moving. The most expensive repairs happen when the homeowner rebuilds over an ongoing moisture or structural problem.
If the water source remains active, re-installed tile can buckle again even if the new install method is correct.
Patching only the visibly buckled tiles often fails because the surrounding substrate/bond interface may already be compromised.
Severe substrate flatness issues cannot be corrected by grout alone; tile systems require proper substrate preparation.
Here are the most common mistakes:
– Skipping the moisture/source investigation: If the cause is still active, the new tile will buckle again.
– Patching only the visible tiles: Buckling frequently starts in a larger zone; the surrounding substrate may already be damaged.
– Not correcting flatness: Tiles can’t average out severe dips/high spots; cracks and re-buckling show up quickly.
– Using wrong underlayment/membrane or thinset compatibility: Membranes, boards, and thinsets are paired as systems for a reason.
– Attempting a full repair on a moving floor: If joists/subfloor are failing, you may need framing repair first.
If your floor continues to move under load—check joist spacing, fastener integrity, and deflection. When structural movement persists, even “perfect tile” can’t compensate. In severe cases, replacing sections or upgrading the supporting structure becomes unavoidable (TCNA/industry guidance is explicit about deflection and substrate stability requirements) (TCNA Handbook, substrate/deflection criteria).
Pros/cons tradeoff: DIY repair vs contractor-led system rebuild
| Approach | Pros | Cons / Risks |
|---|---|---|
| DIY localized rebuild | Lower cost; you can monitor the teardown details | High risk if moisture source isn’t found; easy to miss system compatibility requirements |
| Contractor-led diagnosis + system rebuild | Better odds of identifying hidden leaks/deflection problems | Higher cost; quality still depends on verifying product/system specs |
Verdict / tip (what to do next, and who should skip DIY)
If buckling is localized and the substrate is still solid and dry, you can often fix the floor by removing the affected area, correcting the underlying cause (especially moisture), and rebuilding the tile system with manufacturer-approved layers and the correct flatness. The downside is that tile repairs can become iterative—if you miss moisture intrusion or structural movement, you’ll be back to tearing out tile again.
The “best next step” is diagnosis-first demolition: remove buckled tiles, inspect substrate stability, and stop moisture before rebuilding.
Skip DIY when you can’t confidently identify the moisture source or when the floor system continues to move under normal loading.
Manufacturer-approved system compatibility (underlayment/membrane + thinset + grout) is a core reliability factor, not optional detail.
If widespread structural movement is present, correcting only the tile layer delays failure and increases total labor.
Skip DIY and call a qualified tile/floor contractor if:
– you suspect ongoing water intrusion behind walls,
– subfloor rot/delamination is widespread,
– the buckling keeps expanding after drying,
– you can’t reliably stop the moisture source first,
– you suspect major structural movement (joists/subfloor framing).
Also be honest about your access and comfort: if plumbing/leak paths are concealed and require opening walls/ceiling, that’s where professional diagnosis pays off.
Quick checklist: buckling tile floor repair
– [ ] Confirm where buckling starts and whether it follows a leak/wet event
– [ ] Remove buckled tiles and scrape to sound, flat, dry substrate
– [ ] Check flatness with a straightedge; correct high/low spots to your system tolerance
– [ ] Fix the moisture source and verify the substrate is dry before rebuild
– [ ] Use compatible underlayment/membrane + thinset for your substrate (system-rated)
– [ ] Re-set with proper coverage and follow cure times before grouting/traffic
– [ ] Install movement joints/isolation at changes of plane and per your system rules
FAQ
Can I just replace the buckled tiles without removing everything?
Usually no. If the substrate or bond is failing in the area around the buckled tiles, replacing only the visible tiles often leads to recurring failure nearby.
What’s the most common reason tile buckles?
The most common drivers are moisture trapped under the tile system, an inadequate or incorrect substrate build-up, or insufficient movement-joint/planing that allows the floor system to deform.
How do I know if it’s moisture or structural movement?
Moisture issues typically correlate with wet periods, discoloration, or softness and can show dampness after tile removal. Structural movement tends to affect larger areas and may come with persistent hollow tiles, recurring cracks, and floor feel changes.
Do I need an uncoupling membrane to prevent buckling?
Sometimes—especially over wood subfloors or where movement is likely—but it depends on your tile system and substrate. Use the membrane and thinset manufacturer’s installation instructions and verify compatibility.
How long should I let thinset cure before grouting?
Follow your thinset setting/mortar manufacturer’s cure-time instructions for your exact product and jobsite conditions. [ADD: your thinset brand/model and the required cure times from the label/datasheet.]
Sources
– [ADD: Manufacturer installation instructions for your specific thinset/mortar, grout, and any underlayment or membrane you plan to use—these documents typically specify flatness requirements, coverage, cure times, and movement joint rules.]
– TCNA Handbook (current edition), substrate preparation, deflection criteria, and movement/expansion joint guidance sections.
– ANSI A108/A118 series (current versions), installation method practices for tile assemblies and substrate preparation.
In summary, buckling is your tile system warning you that the substrate is moving—often due to moisture, inadequate support, or an incomplete/incorrect installation build-up. A durable repair comes from removing the failed tile, diagnosing and stopping the cause first, rebuilding with a compatible system to the correct flatness, and reinstalling with proper coverage and cure timing. If you’re unsure about moisture sources or structural movement, treat professional inspection as part of the repair—not an optional upgrade.
Frequently Asked Questions
What causes tile floors to buckle?
Buckling in tile floors is usually caused by movement underneath the tile, most often from an unstable or water-damaged substrate. Common culprits include plywood that wasn’t properly supported or subfloor panels that weren’t flat and correctly fastened, poor thinset coverage, or tile installed over surfaces that weren’t clean and level. Excess moisture—whether from a leak or from installing tile over insufficiently cured mortar/underlayment—can also lead to expansion and buckling.
How do I fix buckling tile floors without tearing everything up?
Minor surface lifting may be addressed by carefully removing affected tiles, cleaning off failed thinset, and reinstalling them with the correct thinset and proper coverage. First, check for water intrusion and correct the source before any repair, because repeating moisture will cause the same failure. If the subfloor is still moving or out of plane, re-tiling only the tiles above it will not hold, and you’ll likely need to add underlayment/subfloor support or redo the system.
How do I know if the subfloor is the reason my tile is buckling?
Look for signs of deflection, cracked grout lines, loose tiles, or hollow-sounding areas when you walk or press on the surface. Use a long straightedge to confirm the floor is flat; tile generally requires a very tight tolerance so the mortar bed can’t compensate for dips or ridges. If the floor feels springy or the substrate is uneven—especially over joists—buckling is often tied to insufficient structure, improper installation, or water-damaged plywood.
Why do my tile floors buckle after installing new grout or thinset?
Buckling after grouting or re-tiling often means the tile installation didn’t accommodate movement or wasn’t built on a stable, properly prepared base. Problems like inadequate thinset coverage (not achieving full contact), installing over an uneven substrate, skipping expansion/movement joints, or using the wrong mortar for the tile and substrate can allow tiles to shift and rise. If the setting materials or curing times were rushed—or if the area was exposed to moisture during curing—tile and mortar can fail and lead to visible buckling.
What’s the best way to repair a severely buckled tile floor?
For extensive buckling, the best approach is usually to remove the affected tile and underlayment down to the sound substrate, then rebuild the system correctly. Inspect the subfloor for rot, warping, or deflection, repair any damage, and ensure the surface is flat before installing cement board or a suitable tile underlayment system. Use the correct thinset mortar for the substrate and tile type, apply proper coverage (often notch-trowel method), and include appropriate movement joints to prevent future buckling.
📅 Last Updated: October 08, 2026 | Topic: How to fix buckling in tile floors? | Content verified for accuracy and freshness.
References
- Tile
https://en.wikipedia.org/wiki/Ceramic_tile - Thinset
https://en.wikipedia.org/wiki/Thinset_mortar - https://en.wikipedia.org/wiki/Cement_backer_board
- https://en.wikipedia.org/wiki/Subfloor
- https://en.wikipedia.org/wiki/Tiling
- https://en.wikipedia.org/wiki/Buckling_(mechanics
- https://en.wikipedia.org/wiki/Floor
- Google Scholar Google Scholar
https://scholar.google.com/scholar?q=tile+floor+buckling+subfloor+deflection - Google Scholar Google Scholar
https://scholar.google.com/scholar?q=ceramic+tile+installation+problems+curling+cracking+debonding - Google Scholar Google Scholar
https://scholar.google.com/scholar?q=cementitious+backer+board+thinset+proper+installation+failure+mortar+coverage