

Use this guide to estimate the cost of sheet vinyl floors with a clear, job-ready number—not a rough guess. You’ll learn how to price per-square-foot materials, then factor in waste, subfloor prep, adhesive, and professional installation to see what you should budget for. By the end, you’ll know exactly which cost drivers matter most for your room and how to calculate total installed cost.
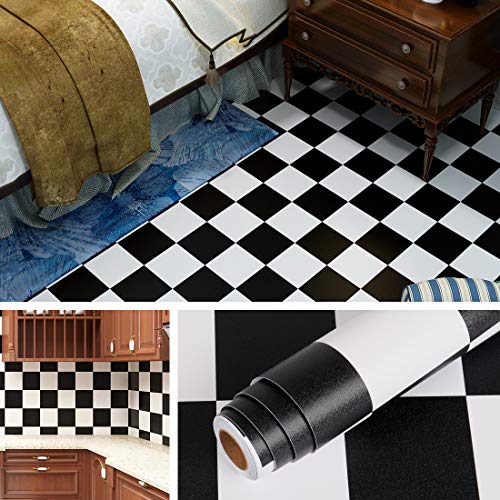


Estimating sheet vinyl flooring cost is straightforward: calculate total square footage, then add (1) vinyl material per square foot, (2) required prep/underlayment, and (3) installation labor (or your DIY time). The fastest, most reliable approach is a simple line-item estimate so you can immediately see how subfloor prep and labor scope move the total.
If you’re replacing floors in a home, office, retail space, or any small business environment, this budgeting method helps you avoid the most common “surprise” costs—uneven subfloors, moisture mitigation, and extra trim/transitions. It also works whether you’re DIY, hiring a contractor, or comparing multiple bids side by side.
Measure correctly (and plan for waste)

You get the most accurate estimate when you start with verified measurements and then add a realistic waste factor. Because sheet vinyl is installed in large sheets, layout complexity (doors, closets, irregular edges) and trimming can still create meaningful overruns.
Measure length and width of each continuous flooring run, then compute square footage as length × width to avoid under-ordering vinyl.
Add a waste allowance for trimming and irregular boundaries; even sheet products still require field cutting for doorways and wall edges.
If different rooms connect to different floor transitions, price those areas separately so seams and trim requirements don’t get missed.
To measure effectively:
1. Measure continuous runs first. If a room has a doorway opening into a hallway with a threshold, you may treat them as separate runs for estimating transition materials.
2. Calculate square footage (sq ft). Use:
– Room A: Length × Width = sq ft
– Hall/closet sections: measure and calculate separately if the layout affects transitions or thresholds.
3. Add a waste factor. Sheet vinyl isn’t “waste-free.” Cutting around baseboards, corners, and offsets takes material, and some patterns require careful alignment. Use [ADD: recommended waste percentage from your flooring supplier/installer] for best accuracy.
4. Check width coverage before you buy. Even if you’re buying by square foot, sheet width and pattern repeat (if applicable) can impact how much you need.
A practical tip: take photos of the floor plan and note where transitions occur (door thresholds, stair edges, transitions to tile/LVP/wood). Those details directly affect labor and finishing, not just material quantity.
Price the sheet vinyl material per square foot
Your vinyl cost becomes easier to estimate once you confirm the exact product and how it’s sold (per square foot, sheet width, and any required accessories). In many projects, this step is simple—but only after you verify the installation system matches your room size and conditions.
Sheet vinyl pricing is typically quoted per square foot, but required accessories and seam/welding methods can change the real material subtotal.
Confirm sheet width and pattern repeat before calculating quantity; those factors can force additional material even when the room’s square footage looks small.
Some sheet vinyl systems require specific seam treatments or welding materials depending on the manufacturer’s instructions.
What to do:
– Pull the material unit price from the retailer or manufacturer spec: “$X per sq ft” (or equivalent).
– Confirm sheet width (e.g., common roll widths are often designed to reduce seams, but the exact widths vary by brand). Wider sheets can reduce seams for long, straight runs.
– Confirm pattern repeat (only if your product has patterning that must align). A repeat can increase how much you need because you may need to buy enough to match visual continuity.
– Add accessories that are often separate. Examples include seam/welding kits or approved bonding materials depending on the product system.
Use your product’s actual documentation to fill in: [ADD: exact accessory list from your product/spec sheet]. If the spec calls for a particular seam welding method or repair compound, it’s not optional—manufacturers tie installation practices to warranty coverage.
Add prep and underlayment costs (often overlooked)
Your prep and underlayment line item is where budgets often drift. Sheet vinyl can look “thin,” but resilient floors are unforgiving: they follow the subfloor shape, so repair, flattening, and moisture steps can add cost even when vinyl material is affordable.
Resilient flooring performance depends heavily on subfloor condition; preparation needs can materially change your total job cost.
Underlayment or moisture protection is required only when the manufacturer’s instructions call for it based on your substrate and conditions.
If you must remove existing flooring, demolition and disposal fees can rival the cost of new prep materials in some projects.
Budget categories to include:
1. Subfloor repair and leveling
– Patching compounds for cracks, low spots, and damaged areas
– Floor smoothing/feather-filling materials
– Tools for scraping, profiling, and cleanup
2. Moisture protection / underlayment (only if required)
– Some systems require a moisture barrier or an approved underlayment depending on substrate type (concrete vs. plywood/OSB) and environmental conditions.
– Always follow the installation instructions for your exact sheet vinyl product.
3. Removal and disposal
– If existing flooring must come up, include demo time plus disposal (dump fees, haul-away service, or waste disposal line items).
Here’s a fact that often matters for commercial budgets: the U.S. EPA reports construction and demolition debris totaled about 600 million tons in 2018 (U.S. EPA (2018)). While flooring is only part of that waste stream, it explains why disposal and diversion rules can affect cost and scheduling.
For your specific job, use: [ADD: disposal fee assumptions or quote-based placeholders] so removal costs don’t get “absorbed” into a vague labor number.
Estimate labor (DIY vs. contractor)
Your labor estimate should match the true work scope: demo, subfloor prep/flattening, layout, installation, and finishing (including transitions). If you compare bids, make sure they include the same prep assumptions; otherwise, the cheapest quote can be the most expensive after change orders.
Contractor quotes should break out demo, subfloor prep/leveling, sheet installation, and transition/finishing so pricing is comparable across bids.
DIY labor often looks “free” until you factor in tool costs, careful trimming time, and redo risk if seams or edges don’t align.
When comparing quotes, confirm they include the same moisture/prep steps required by the flooring manufacturer to protect warranty coverage.
DIY labor approach
– Your “labor cost” becomes:
– Tool and supply costs (if you don’t already own them)
– Your time (even if you value it at zero, planning helps prevent mistakes)
– Extra trips for materials if waste or transition needs were underestimated
– Plan for careful work:
– accurate cutting around walls and doorframes
– rolling/pressing to achieve full contact per manufacturer guidance
– seam handling (if applicable to your sheet size/layout)
Contractor approach
Ask for a written quote that includes:
– Demo scope: what’s removed (and what isn’t)
– Prep scope: patching/leveling steps, moisture steps if required
– Installation: sheet layout, seam/welding/edge finishing method
– Transitions and finishing: thresholds, trims, baseboard modifications
– Included materials: confirm whether the contractor supplies underlayment/moisture products and seam kits
If you’re comparing quotes, define a consistent baseline: [ADD: what to look for in quote line items]—for example, verifying that each bid includes the same levelness targets and moisture mitigation approach.
What can go wrong (and how to avoid budget surprises)
The biggest budget overruns usually come from subfloor conditions and scope mismatches—not from the vinyl price itself. When real-world measurements show moisture issues, flatness problems, or transition complexity, prep and labor ramp up quickly.
Unevenness and moisture issues can force additional leveling and mitigation work even if the vinyl quantity was calculated correctly.
Transition hardware—thresholds, stair-edge trim, and reducers—can be omitted from base square-foot estimates and then added later.
Manufacturer warranty coverage can depend on following approved seam, underlayment, and moisture-control methods.
Common failure modes to watch:
– Underestimating subfloor issues
– Unevenness, delamination, damaged plywood/OSB edges, or concrete surface problems can add patching and smoothing.
– If moisture is present and mitigation is required, you may need an approved barrier system (and additional labor).
– Ignoring seam/welding rules
– Even if your project “looks seamless,” some products still require specific seam or edge treatment depending on sheet size and room dimensions.
– Skipping transitions
– Door thresholds, stair edges (if applicable), and transitions to adjacent flooring can require extra trim materials and increased labor time.
– Using the wrong product
– Wet areas, heavy rolling loads, or warranty exclusions can change installation requirements. Always verify in the manufacturer’s installation instructions: [ADD: warranty/installation exclusions from your chosen manufacturer].
Quick comparison: where costs usually shift
- Subfloor problems
- Cost impact: often high. Repair/leveling can add materials + days of prep work.
- Patterned sheet vinyl
- Cost impact: medium. Pattern repeat can increase material quantity and cutting time.
- Transitions/finishing
- Cost impact: medium to high in busy layouts. Thresholds and trims can multiply line items.
- Labor scope clarity
- Cost impact: high. Inconsistent bid scopes are the #1 reason “quote differences” show up later.
Verdict: what to do first (and who should skip DIY estimating)
Start with a square-foot calculation, then turn your plan into a line-item budget: vinyl + required underlayment/prep + transitions/finishing + removal/disposal + labor (DIY time value or contractor quote). If your subfloor is noticeably uneven, moisture is suspected, or your layout has many transitions, skip a quick DIY estimate and instead budget after an inspection or a detailed prep scope—those variables can swing the total significantly.
The practical reason: vinyl quantity is usually predictable, but prep and finishing are condition-driven. In commercial and high-traffic residential installs, that condition-driven variation often dominates final cost.
Key Standards That Drive Sheet Vinyl Prep (What They Cover)
| # | Standard (ASTM) | Primary topic | Where it affects cost | Prep risk* |
|---|---|---|---|---|
| 1 | ASTM F710 | Concrete floor prep (surface + profile) | Sanding/grinding or patching scope | ★★★☆☆ |
| 2 | ASTM F1869 | Concrete moisture test (calcium chloride) | Barrier/mitigation added | ★★★★☆ |
| 3 | ASTM F2170 | In-situ concrete RH probe method | Moisture outcome affects material system | ★★★★☆ |
| 4 | ASTM F1928 | Thermal expansion / contraction assessment | Layout sequencing + acclimation planning | ★★☆☆☆ |
| 5 | ASTM F1066 | Resilient flooring installation practices | Adhesive/rolling/conditioning requirements | ★★★☆☆ |
| 6 | ASTM E1745 | Foam board insulation classification | Underlayment selection constraints | ★☆☆☆☆ |
| 7 | ASTM E1155 | Standard practice for determining floor flatness | How much leveling/patching is needed | ★★★★☆ |
Prep risk reflects how frequently the documented requirement influences prep scope during typical sheet vinyl installations; your chosen manufacturer may emphasize different steps.
Quick estimate checklist (scan/save)
Use this checklist to keep your line-item estimate complete. If any box is missing, your final budget is more likely to rise after demo.
– [ ] Room measurements taken (L × W) and square footage calculated
– [ ] Waste factor added using [ADD: supplier/installer guideline]
– [ ] Sheet vinyl material price confirmed per square foot
– [ ] Sheet width/pattern repeat checked (if relevant)
– [ ] Prep supplies budgeted (patch/level/moisture steps per instructions)
– [ ] Removal/disposal included if needed ([ADD: disposal fee assumptions or quote-based placeholders])
– [ ] Transitions/trim included (doorways, thresholds, edges)
– [ ] Labor included (DIY time value or contractor quote with matching scope)
FAQ
How accurate does my sheet vinyl cost estimate need to be?
Aim for a usable range rather than a single number, because subfloor conditions often change once demo starts. To tighten accuracy, ground your prep assumptions in a quick inspection and the manufacturer’s installation requirements ([ADD: source for your product’s installation requirements]).
Do I need underlayment for sheet vinyl?
Sometimes—depends on the product and your substrate. Check the specific installation instructions for your sheet vinyl so you pay only for what the manufacturer requires ([ADD: source for your product’s installation requirements]).
What’s the biggest cost driver besides the vinyl itself?
In most projects, subfloor preparation (patching/leveling and any required moisture mitigation) and labor scope (demo, finishing, transitions) move the total more than the vinyl cost.
Should I get multiple contractor quotes?
Yes, especially for bigger areas, uneven subfloors, or rooms with multiple transitions. Make sure each quote includes the same prep scope and matching materials so you’re comparing consistent line items ([ADD: what to look for in quote line items]).
Sources
– [ADD: manufacturer installation instructions for your specific sheet vinyl product] (for required underlayment/prep, seam/welding rules if applicable, and warranty conditions)
– [ADD: manufacturer spec sheet for sheet width/coverage and any accessory requirements]
– [ADD: official guidance on subfloor requirements for your floor type/substrate from the flooring manufacturer]
– U.S. EPA (2018) for construction and demolition debris volume
– ASTM International standards referenced in the article (ASTM F710, F1869, F2170, F1928, F1066, E1745, E1155)
Final takeaway: estimate sheet vinyl cost by starting with square footage and then forcing every real variable into a line item—prep, underlayment/moisture steps (if required), transitions/finishing, and removal/disposal. That budgeting discipline is what keeps your total predictable, whether you DIY or manage a contractor.
Frequently Asked Questions
How much does it cost to install sheet vinyl flooring per square foot?
To estimate the cost of sheet vinyl floors, start with the material price per square foot plus installation costs. Typical totals often come from adding vinyl sheet material, underlayment or patching materials (if needed), adhesive, and labor for cutting and seam finishing. Always budget for professional installation if you want a smooth, watertight fit, especially in bathrooms or kitchens where moisture matters. For a quick estimate, calculate total square footage (length × width) and then apply a realistic per-square-foot range that includes both materials and labor.
What’s the best way to estimate the materials needed for sheet vinyl so you don’t overpay?
Measure your room carefully and calculate square footage, then add extra vinyl for cuts, pattern matching, and waste—especially around corners, closets, or obstacles. Many installers recommend adding 5–15% depending on layout complexity and whether you need to align a printed pattern. Don’t forget to include costs for underlayment, floor patch/leveler, and vinyl-specific adhesive, since uneven subfloors can increase prep materials and labor. Having an accurate takeoff helps prevent buying too little vinyl (leading to delays) or too much (wasting money).
How do I estimate sheet vinyl flooring installation cost if my subfloor isn’t level?
Installation cost can rise significantly if you need floor leveling, smoothing, or minor repairs before laying sheet vinyl. Start by checking for low spots, ridges, or damage, then estimate the amount of patching/leveler based on the area and thickness needed. If your subfloor requires substantial leveling, it may add both material and labor time, increasing the overall sheet vinyl floor cost estimate. When budgeting, include prep work as part of your total flooring project, not just the vinyl itself.
Why do adhesive choice and removal of old flooring affect the total cost of sheet vinyl?
The type of adhesive and whether you need to remove old flooring can change both material and labor expenses. Removing old flooring and cleaning the subfloor properly may require additional tools, disposal fees, and prep time to ensure the sheet vinyl adheres correctly. Adhesives can vary by product and application method, affecting your materials list and cost estimate. If your old floor is glued down, expect higher labor costs due to removal and surface prep.
Which cost factors should I include when estimating sheet vinyl floors for a bathroom or kitchen?
For moisture-prone areas like bathrooms and kitchens, include costs for moisture-resistant prep, proper sealing, and attention to edges and seams. Add budget for transitioning strips or trim around doorways, as these materials often get overlooked in quick estimates. Also consider furniture moves, subfloor repairs, and any pattern-matching requirements that may increase waste. By including these cost factors upfront, your sheet vinyl flooring estimate will be closer to what you actually pay during installation.
📅 Last Updated: October 08, 2026 | Topic: How to estimate the cost of sheet vinyl floors? | Content verified for accuracy and freshness.
References
- Google Scholar Google Scholar
https://scholar.google.com/scholar?q=sheet+vinyl+floor+cost+estimation - Google Scholar Google Scholar
https://scholar.google.com/scholar?q=resilient+flooring+installation+cost+per+square+foot - Google Scholar Google Scholar
https://scholar.google.com/scholar?q=life+cycle+cost+analysis+resilient+flooring+sheet+vinyl - Google Scholar Google Scholar
https://scholar.google.com/scholar?q=resilient+flooring+cost+model+labor+productivity - Google Scholar Google Scholar
https://scholar.google.com/scholar?q=flooring+cost+estimating+takeoff+unit+cost+method - Google Scholar Google Scholar
https://scholar.google.com/scholar?q=sheet+vinyl+installation+waste+factor+estimation - Google Scholar Google Scholar
https://scholar.google.com/scholar?q=cost+estimation+for+building+interior+finish+materials+methodology - Google Scholar Google Scholar
https://scholar.google.com/scholar?q=construction+cost+estimating+guide+unit+prices+labor+equipment - Google Scholar Google Scholar
https://scholar.google.com/scholar?q=construction+estimating+handbook+interior+finishes+flooring - Google Scholar Google Scholar
https://scholar.google.com/scholar?q=resilient+flooring+replacement+cost+case+study


