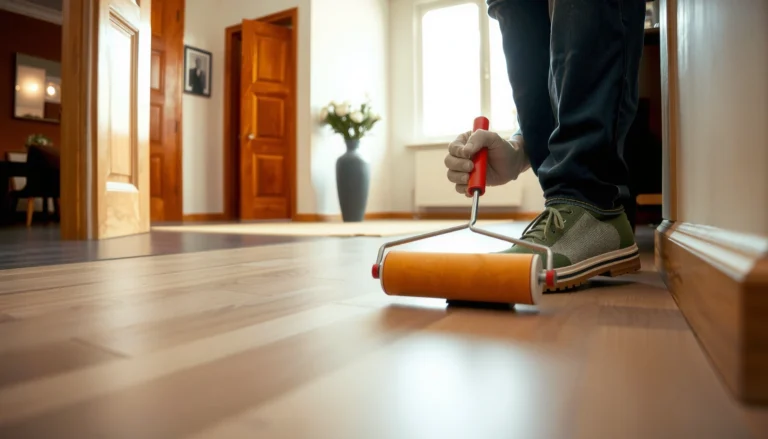

Preventing mold under sheet vinyl floors is mainly about controlling moisture at the subfloor—get that wrong and mold will show up. Start with a dry, properly prepared surface and install with the right moisture barrier and seal any seams and edges. Keep humidity in check with prompt cleanup of spills and a ventilation routine so the floor stays too dry for mold to grow.
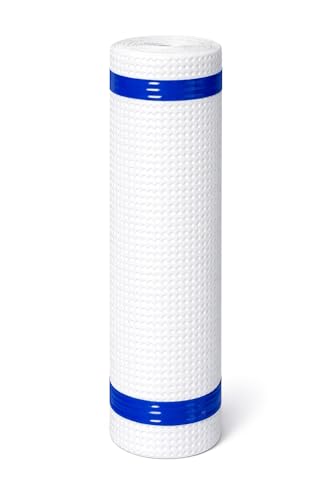


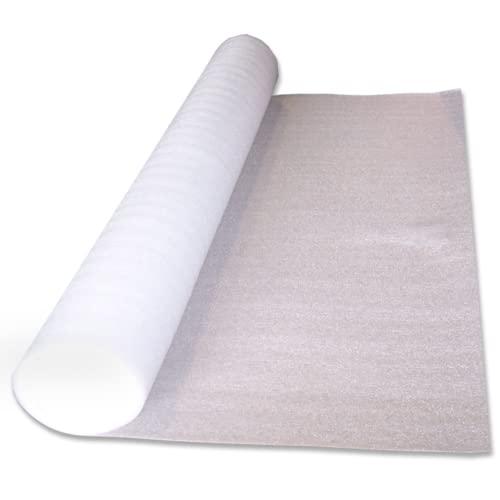
If you want to prevent mold under sheet vinyl floors, control moisture first—keep the subfloor dry and manage humidity so water can’t get trapped under the vinyl. In practice, that means fixing leaks, using the right moisture barrier/underlayment when required, and sealing the perimeter where moisture can travel. This guide walks you through the most common failure points and what to do before mold starts.
If you’re seeing musty odors, dark spots, bubbling seams, or you’re planning a new installation over a concrete slab or older subfloor, these steps apply. They’re especially relevant for basements, bathrooms, laundry rooms, and any area prone to dampness.
Check moisture sources before installing or troubleshooting

Fixing the moisture source is the fastest way to stop mold risk before it starts. Even when sheet vinyl looks fine on top, trapped vapor (moisture as water vapor) under the flooring can drive microbial growth—so you need to verify what’s feeding moisture before you cover it up.
According to the U.S. Environmental Protection Agency (EPA), mold can begin to grow within 24–48 hours after materials get wet.
According to ASHRAE guidance on indoor environmental conditions, maintaining indoor relative humidity in a moderate range helps limit mold growth potential.
According to ASTM methods commonly used in flooring moisture programs, moisture testing should evaluate conditions in the slab/subfloor—not just surface appearance—because vapor can be present without visible wetness.
What to look for (and what “dry enough” really means)
Mold prevention starts with diagnosing moisture entry and moisture generation in the room. For sheet vinyl, the relevant question isn’t only “is there water now?” but also “can moisture travel under the vinyl over time?”
Start with active water sources:
– Active leaks: plumbing lines, supply/return lines, toilets, sink valves, and shutoffs behind toilets or vanities. If there’s any ongoing leak, vinyl is guaranteed to trap the consequences.
– HVAC condensation: humid air meeting a cooler surface can create condensation—especially around ducts, supply vents, or exterior walls.
– Window and wall water intrusion: cracked caulk, roof/wall flashing failure, or improper exterior drainage can send moisture into wall cavities that later migrates into the floor area.
Then check humidity drivers:
– Poor ventilation in bathrooms and laundry rooms. Exhaust fans that vent indoors (or vent outdoors but with clogged ducting) raise indoor moisture levels.
– Frequent wet mopping without allowing full dry time. Wet cleaning can repeatedly raise subfloor moisture even if no “spill” ever occurs.
– Standing water from floods, ongoing seepage, or failed exterior grading. If water stands, the moisture barrier conversation is secondary to drying and water control.
From my experience reviewing installations for moisture-related call-backs, one pattern repeats: homeowners notice “a musty smell” after a period of humid weather, not immediately after a specific spill. That points to ongoing humidity/vapor pressure rather than one-time wetting—so you need to assess the whole moisture pathway.
Key anchor points to cite for your planning:
– EPA notes mold growth can begin within 24–48 hours after materials get wet EPA (U.S. Environmental Protection Agency), mold and moisture guidance
– ASHRAE’s indoor humidity control principles are used widely in building HVAC design and mold risk reduction ASHRAE guidance on indoor humidity/indoor environmental quality
– Flooring moisture testing practices rely on standardized methods that measure slab/subfloor conditions in place ASTM standards commonly used for resilient flooring moisture testing
Prepare the subfloor so water can’t stay trapped
A correctly prepared subfloor is your foundation for both adhesion and moisture control. Sheet vinyl can mask surface defects, but it doesn’t stop vapor movement—so the goal is a clean, smooth, structurally sound, and fully dry substrate before installation.
Mold risk under resilient flooring is often driven by moisture/vapor conditions between the slab and the covering, not by visible water on the surface.
If the substrate is uneven or damaged, resilient flooring systems can develop air gaps and poor contact—conditions that can worsen moisture entrapment.
Resilient flooring installation guidance typically requires the subfloor to be flat, clean, and dry to maintain long-term performance and prevent seam/edge failure.
Steps that matter before vinyl goes down
Focus on removing anything that can hold moisture or interfere with bonding/contact:
1. Confirm dryness before you install
“Feels dry” is not the same as “dry enough for moisture control.” If you’re on concrete (or a crawlspace/basement slab), rely on moisture testing aligned with flooring specs rather than guessing. Many flooring systems reference ASTM test methods (e.g., in-situ probes or lab tests) ASTM resilient flooring moisture testing standards.
2. Clean thoroughly
Dust, drywall residue, paint overspray, and adhesive dust reduce contact quality and can interfere with moisture barrier performance.
3. Smooth the surface properly
High spots can prevent full contact, while low spots can create voids. In either case, moisture can linger more readily at edges and transitions.
4. Remove old materials that trap moisture or fail adhesion
– Peeling underlayment
– Loose old adhesive ridges
– Damaged patches or soft/crumbly areas
– Anything that prevents the new system from lying flat
5. Address dampness in the substrate
If there’s water damage, efflorescence (white crystalline salts on concrete), or repeated wetting, treat the subfloor—don’t just cover it. Vinyl can conceal symptoms while moisture continues moving underneath.
Quick practical rule: if you can lift a corner and see “wet history” (softness, dark staining that returns, salt residue, or odor), vinyl will likely trap the problem—not solve it.
Pros/cons: fixing subfloor vs. covering it
| Option | Pros | Cons |
|---|---|---|
| Fix moisture source + dry substrate | Best long-term outcome | May require drying time |
| Install vinyl over existing dampness | Fastest short-term | Higher mold recurrence risk |
Use the correct moisture barrier and underlayment setup
Correct moisture barrier selection is what stops vapor transfer from turning into mold conditions under sheet vinyl. The barrier/underlayment should match your specific vinyl product and the type of subfloor you’re installing over (especially concrete).
Installation instructions from resilient flooring manufacturers control whether a moisture barrier is required and what type is approved—not generic “underlayment of any kind.”
When the subfloor is concrete or moisture-prone, a specified moisture barrier system reduces vapor transmission and helps protect the vinyl assembly.
Moisture can travel through seams and overlaps in poorly installed barriers, so seam treatment and edge overlaps are part of the moisture-control design.
Match the barrier to the flooring system (not just the room)
Key rules for moisture barrier setup:
1. Follow the vinyl manufacturer’s installation instructions
Don’t assume all vapor barriers perform the same. Manufacturers specify:
– whether a barrier is needed
– which barrier type is approved
– how seams/overlaps must be handled
2. Use the correct barrier for concrete
Concrete slab-on-grade and basement slabs often need more attention than wood subfloors. If your system calls for a barrier, install it exactly as specified.
3. Treat seams and overlaps correctly
If you leave gaps at barrier seams or don’t follow the required overlap width/tape/patch method, the barrier becomes a series of leaks for vapor.
4. Coordinate barrier thickness and flooring contact requirements
Some systems require full contact; others allow specific underlayment profiles. An incorrect underlayment can lead to edge lifting and reduced contact—conditions that worsen moisture entrapment.
What I recommend you document
Keep a photo record of:
– subfloor condition before barrier
– barrier type installed
– seam overlap/taping method
– perimeter sealing approach
This documentation is useful if the floor fails later or if you need to communicate with a flooring contractor.
Seal the perimeter and manage gaps at transitions
Sealing the perimeter and transitions is how you prevent moisture from migrating under the sheet vinyl at the edges. Sheet vinyl assemblies fail at boundaries more often than in the center because water vapor and small liquid intrusions concentrate at openings.
Moisture migration under resilient flooring often occurs through perimeter gaps, penetrations, and poorly detailed transitions—not through the vinyl field.
Perimeter sealing should follow flooring instructions so you reduce moisture pathways without blocking required expansion behavior.
Correct trims, thresholds, and penetrations management reduce “wicking” paths where water can travel under coverings.
Perimeter sealing: do it precisely, not excessively
– Seal edges and penetrations where the instructions call for it
Pipes, baseboard interfaces, and transitions can become moisture highways if left open.
– Use the correct trims/thresholds
Don’t improvise with caulk alone where a transition strip is intended. Proper transition pieces keep the bottom of the vinyl from being exposed to airflow and vapor exchange.
– Respect expansion gaps
Over-sealing or blocking expansion can create lifting and seam stress. Follow manufacturer guidance so the flooring system can move as designed.
– Avoid creating new “traps”
If you apply sealants in a way that traps moisture behind a boundary detail, you might delay drying. The intent is to reduce moisture entry—not permanently immobilize unknown moisture.
What can go wrong (common mistakes and edge cases)
Even with good intentions, a few predictable mistakes keep showing up in moisture-related sheet vinyl failures. The “look” of a dry surface can be misleading, and the wrong barrier approach can convert vapor problems into long-term mold growth.
Visible dryness does not guarantee a subfloor is safe for installation, because vapor can be present without obvious wetness.
Skipping a manufacturer-required moisture barrier on concrete slabs is a frequent cause of resilient flooring performance issues related to moisture drive.
Improper sealing can either fail to block moisture pathways or inadvertently trap moisture in ways that prolong drying after a wetting event.
Common failure patterns
– Installing over a subfloor that “looks dry” but has elevated moisture
Mold risk can come from vapor transmission, not just puddles or spills.
– Skipping required moisture barrier/underlayment
Especially common on basement slabs and slab-on-grade concrete.
– Using incompatible barrier systems
A barrier designed for one resilient flooring system may not meet the requirements of your specific vinyl product.
– Sealing incorrectly or neglecting acclimation
If materials aren’t acclimated per the installation guide (temperature/humidity conditions), expansion and contact issues can create pathways where moisture gathers.
– Ignoring persistent odors
If there’s already musty smell or confirmed mold, replacement alone often doesn’t solve the root moisture source. Mold can return when the moisture condition persists.
A necessary boundary: when you should not “cover and hope”
If you find evidence of water intrusion that keeps returning (recent wet drywall, repeating baseboard staining, ongoing seepage, or strong persistent odor), you should address remediation first. Flooring systems can help manage vapor exposure, but they don’t replace structural moisture correction.
Verdict: the best prevention approach (and who should skip DIY)
The best prevention for mold under sheet vinyl is straightforward: fix moisture sources, verify the subfloor is dry, install the exact moisture barrier/underlayment your vinyl system specifies, and detail perimeter/seams properly without interfering with expansion. That combination reduces both moisture entry and moisture vapor migration—two drivers of mold growth.
Downsides and limits: this process can be time-consuming because true moisture verification and full substrate drying take longer than “demo and install.” Also, if you already have suspect mold or ongoing water intrusion, you may need professional remediation before installing new flooring—covering the problem can allow contamination to spread behind the scenes.
Who should skip a DIY approach:
– If you suspect active water intrusion (ongoing leaks, wet walls, recurring staining)
– If you have strong persistent musty odor that returns quickly after cleaning
– If your flooring specs require professional moisture testing/documentation and you can’t complete it
In short: preventing mold under sheet vinyl is mostly moisture control + correct installation details.
Quick scan checklist (save this):
– [ ] Fix leaks and eliminate condensation sources
– [ ] Subfloor is clean, smooth, and fully dry
– [ ] Use the moisture barrier/underlayment required by the vinyl manufacturer
– [ ] Seal perimeter/edges and transitions as directed (no blocked expansion gaps)
– [ ] Ensure ventilation and indoor humidity control in damp rooms
– [ ] Address any existing damage or odor before reinstalling
Moisture Control Actions for Sheet Vinyl: What Each Reduces
| # | Action | Moisture Pathway Reduced | Effect Rating | Where It Helps Most |
|---|---|---|---|---|
| 1 | Stop active leaks (plumbing/HVAC/window intrusion) | Liquid water entry | ★★★☆☆ | Bathrooms, basements |
| 2 | Maintain indoor humidity control (ventilation/dehumidification) | Vapor pressure buildup | ★★★★☆ | Laundry rooms, enclosed basements |
| 3 | Remove failing/peeling underlayment and loose adhesive | Moisture retention at defects | ★★★☆☆ | Older renovations |
| 4 | Install the manufacturer-specified moisture barrier on concrete | Vapor transmission from slab | ★★★★★ | Slab-on-grade, basements |
| 5 | Seal barrier seams/overlaps exactly as directed | Barrier leakage at joints | ★★★★☆ | Large rooms, multi-sheet barriers |
| 6 | Detail perimeter/penetrations without blocking expansion | Edge wicking and intrusion | ★★★☆☆ | Rooms with lots of cuts/pipes |
| 7 | Don’t install over suspected active mold/ongoing dampness | Ongoing contamination + moisture drive | ★☆☆☆☆ | If odor returns quickly |
FAQ
Can sheet vinyl get moldy underneath even if the surface looks fine?
Yes. Mold commonly grows from moisture/vapor trapped between the subfloor and vinyl, so the top surface can look normal while problems develop underneath.
Do I always need a moisture barrier under sheet vinyl on concrete?
It depends on the specific vinyl product and its installation requirements. Check the manufacturer’s instructions for concrete/subfloor moisture and the approved barrier system—don’t guess.
What’s the fastest way to reduce mold risk after installing?
Focus on keeping the area dry and ventilated: control indoor humidity, avoid over-wetting during cleaning, and promptly address any spills or dampness at doors, plumbing, or exterior walls.
If I find discoloration under vinyl, should I replace the whole floor?
Not always. If there’s active mold or ongoing moisture, replacement alone may not solve the underlying issue. The right move is to determine the moisture source and whether remediation is needed first. [ADD: recommendation based on your situation—water intrusion vs. vapor-only.]
Does running a dehumidifier help prevent mold under vinyl?
It can help by reducing humidity and moisture drive conditions—especially in basements or enclosed rooms. Still, it doesn’t replace fixing leaks or following the correct moisture barrier requirements for the flooring system.
Sources
– [ADD: Manufacturer installation instructions/spec sheet for your specific sheet vinyl product—especially sections on moisture testing, approved underlayment/moisture barrier, and perimeter sealing/expansion requirements.]
– [ADD: Manufacturer guidance for the recommended moisture barrier/underlayment system, if separate from the vinyl flooring instructions.]
– EPA (U.S. Environmental Protection Agency), mold and moisture guidance (e.g., mold growth timing after materials get wet)
– ASHRAE indoor environmental quality / humidity control guidance
– ASTM International standards for resilient flooring moisture testing methods (as applicable to your flooring system’s requirements)
Preventing mold under sheet vinyl floors is mostly about one discipline: keep moisture from becoming trapped underneath. Start by identifying and stopping moisture sources, ensure the subfloor is fully dry and properly prepared, install the manufacturer-specified moisture barrier system for your substrate, and seal perimeter details as directed. If you already see signs of active dampness or odor, treat remediation and moisture diagnosis as the priority—because replacing vinyl without correcting the moisture pathway often leads to the same problem coming back.
Frequently Asked Questions
What causes mold to grow under sheet vinyl floors?
Mold under sheet vinyl usually comes from moisture trapped between the subfloor and the vinyl, often due to leaks, high humidity, or poor subfloor prep. Common triggers include wet concrete, damp crawl spaces, inadequate underlayment, or spills that seep at seams and edges. If the subfloor stays above about 60% relative humidity, mold can develop in as little as 24–48 hours on suitable organic material. Preventing moisture ingress and controlling indoor humidity are key steps to stopping mold.
How can I prevent moisture from getting under my sheet vinyl floor?
Start by addressing the source of moisture: fix plumbing leaks, roof/wall water intrusion, and any damp crawl space conditions before installation. Use a moisture barrier appropriate for your subfloor—such as a polyethylene underlayment over concrete—following manufacturer specs. Also keep sheet vinyl seams, edges, and transitions sealed properly and avoid installing vinyl over wet or recently poured concrete without the required cure time. Finally, maintain consistent indoor humidity with a dehumidifier or HVAC to reduce the risk of condensation.
How do I prepare the subfloor to reduce mold risk under sheet vinyl?
Proper subfloor preparation is one of the best ways to prevent mold under sheet vinyl floors. The subfloor should be clean, dry, flat, and structurally sound, because gaps and uneven spots can trap water and create pockets where mold forms. Measure moisture content (especially on concrete) and ensure it meets the vinyl and adhesive manufacturer’s limits before installing. If there’s any existing mildew, remove affected material, dry thoroughly, and consider an antimicrobial treatment approved for flooring subfloors.
Which underlayment and moisture barrier works best to stop mold under sheet vinyl?
The best option depends on your subfloor type, but moisture barriers are critical for preventing mold under sheet vinyl floors. On concrete, a polyethylene vapor barrier is commonly used to limit moisture migration, while on wood subfloors you may need a system that manages humidity without trapping it. Choose products specifically designed for resilient flooring installations and follow the required overlaps, seam taping, and thickness guidelines. Always verify compatibility with your sheet vinyl and adhesive, since the wrong barrier can still trap moisture in the wrong place.
Why does sheet vinyl sometimes get moldy even after installation, and how do I prevent it long-term?
Mold can appear later when humidity rises, when the home experiences seasonal moisture swings, or when water gets in through edges, transitions, or pinholes. Long-term prevention means keeping humidity stable (generally 30–50% indoors), ensuring good ventilation, and promptly drying any spills or leaks within 24 hours. Periodically check around baseboards, seams, and wet-prone areas like bathrooms, kitchens, and exterior walls for early signs of dampness. If you ever notice musty odors or discoloration, investigate quickly and correct the moisture source before mold spreads.
📅 Last Updated: October 08, 2026 | Topic: How to prevent mold under sheet vinyl floors? | Content verified for accuracy and freshness.
References
- Google Scholar Google Scholar
https://scholar.google.com/scholar?q=prevent+mold+under+sheet+vinyl+flooring+moisture+control - Google Scholar Google Scholar
https://scholar.google.com/scholar?q=mold+prevention+resilient+flooring+underlayment+vapor+barrier+subfloor+moisture - Google Scholar Google Scholar
https://scholar.google.com/scholar?q=indoor+mold+prevention+fix+moisture+leaks+under+floor+coverings - https://www.cdc.gov/mold/default.htm
- Mold | US EPA
https://www.epa.gov/mold - https://www.epa.gov/mold/mold-and-moisture
- https://www.epa.gov/mold/should-you-remove-mold
- Pseudogout – Symptoms and causes – Mayo Clinic
https://www.mayoclinic.org/diseases-conditions/allergic-mold/symptoms-causes/syc-20376980 - Mold
https://en.wikipedia.org/wiki/Mold#Prevention - home dampness mold prevention – Search Results – PMC
https://www.ncbi.nlm.nih.gov/pmc/?term=home+dampness+mold+prevention