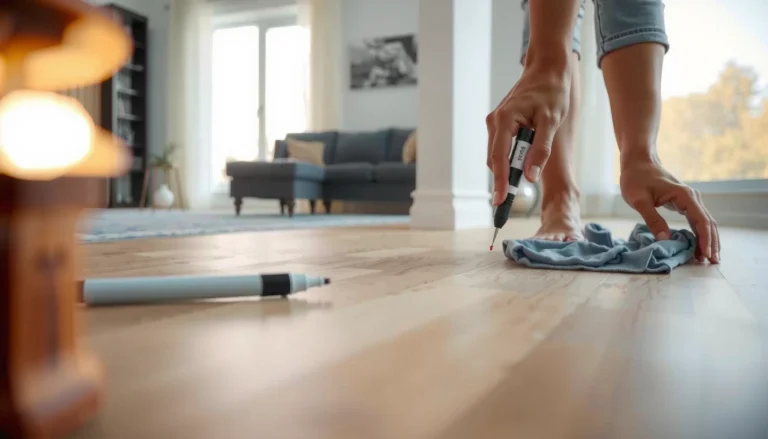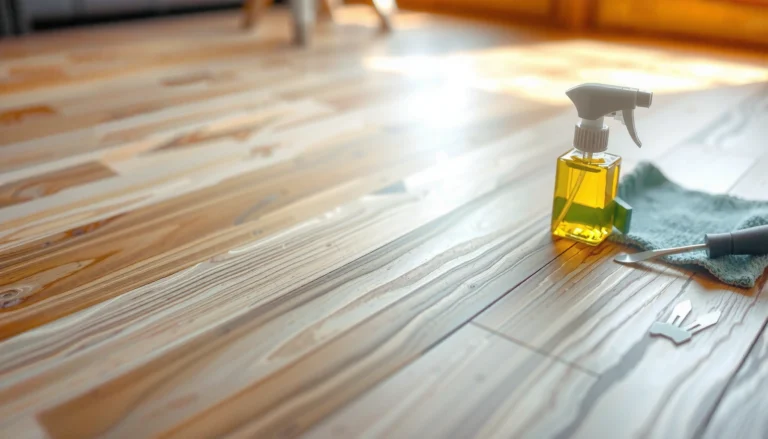

Fix lifting on sheet vinyl floors by re-seating the loose area and restoring full adhesion with the right vinyl floor adhesive—this is the fastest, most reliable repair when the sheet has started to pull away. You’ll confirm the cause, prep the lifted vinyl properly, then press and weight it to stop the edges from curling back up. Follow the steps and you’ll get a flatter, stronger floor without replacing the whole sheet.



If your sheet vinyl floor is lifting, the fix is usually to re-attach the loose area correctly and then remove the cause (moisture, poor subfloor prep, or trapped movement). Start by flattening the vinyl, cleaning the gap, and using the right vinyl flooring adhesive (or seam adhesive) rather than a random glue. Below, we’ll walk through the safest order of operations so the edges lay flat and stay that way.
This applies when you see bubbles, curled edges, or sections peeling up—especially along seams, corners, or after a recent temperature/humidity change. If the vinyl is actively tearing, the subfloor is wet, or the lifting keeps returning, you may need deeper repairs before re-gluing.
First: Identify why it’s lifting
Sheet vinyl lifting is rarely “just a loose edge”—it’s typically a symptom of seam/adhesive failure, moisture, or movement in the subfloor system. The fastest safe path is to locate the pattern of failure first, then choose the repair that matches the cause.
Sheet vinyl edges lift most often near seams and corners where bond lines are thin and stress concentrates.
If lifting started after a leak or a spill that sat, moisture testing and root-cause investigation should come before re-gluing.
When the entire sheet is buckling or repeatedly re-lifting, trapped movement or subfloor flatness problems usually require more than re-adhesion.
For resilient flooring, installation and re-installation methods are governed by standards like ASTM F710 (underlayment and preparation practices).
What to look for (and what it usually means)
– Lift near seams/edges: This commonly points to seam adhesive not being applied correctly, inadequate clean-up of old residue, or a bond line that never fully wetted the vinyl back.
– Widespread lifting or repeating bubbles: This more often suggests moisture vapor, subfloor movement, or a temperature/humidity change that caused expansion/contraction.
– Soft spots or gaps: Press the subfloor around the lifted area (carefully, with a flat palm or by feel). Soft/crumbly surfaces indicate failed substrate or moisture—re-adhesion won’t permanently solve it.
– Timeline matters: Note whether lifting appeared after water exposure, plumbing issues, or a seasonal swing. Sheet vinyl floors are sensitive to moisture conditions and subfloor stability.
Stat anchors for moisture decisions: According to ASTM F1869, many resilient flooring and adhesive systems set an upper limit of ≤ 5 lb (moisture vapor emission) per 1,000 sq. ft. in 24 hours for installation readiness (ASTM F1869). According to ASTM F2170, resilient flooring adhesives commonly require concrete relative humidity to be at or below a manufacturer-specified value often around 75% RH (ASTM F2170). If your moisture results exceed the adhesive/manufacturer tolerances, re-gluing is likely to fail.
Flatten the vinyl and prep the subfloor
Flattening the lifting sheet correctly and prepping the bonding surfaces is what makes sheet vinyl adhesive work as designed. If you skip cleaning or flattening, you often end up with a “temporary fix” that releases again.
Adhesives bond best when both surfaces are clean, dry, and free of dust, paint overspray, wax, or loose residue.
Flattening lifted sheet vinyl prevents the adhesive bond from curing under tension, which can reopen edges.
Resilient flooring preparation practices are emphasized in ASTM F710, including the need for a smooth, stable, and properly prepared substrate.
Step-by-step prep (with care to avoid new damage)
1. Flatten the lifted section gradually
– Use controlled weight (for example, a flat board and a few evenly distributed weights).
– Avoid creasing or stretching the sheet—sheet vinyl can “remember” a fold and never fully lay flat again.
2. Clean the gap completely
– Remove dust, debris, and any old adhesive residue in the lifting channel.
– If residue remains, adhesion can fail at the interface even when you use the “right” adhesive.
3. Confirm the subfloor is dry and sound
– If you smell dampness, see discoloration, or the subfloor feels soft, stop and investigate moisture/structural issues first.
4. Check flatness where the vinyl releases
– If the subfloor is uneven (a ridge, hump, or patch), the vinyl will keep pulling away as it relaxes.
– Where you don’t have manufacturer tolerances, [ADD: exact flatness tolerance from your vinyl manufacturer or adhesive TDS] should guide whether to skim/level.
From my experience advising homeowners through vinyl repairs, the biggest “why it keeps lifting” factor I see is incomplete gap cleaning plus re-adhesion without resolving moisture or substrate irregularities. Sheet vinyl adhesive works best when the vinyl back and substrate are truly ready to bond—not just “looks clean.”
Re-adhere the lifting section correctly
Re-adhere the loose sheet vinyl using the correct adhesive system for your product, then hold it flat while the bond cures. The adhesive choice matters as much as the prep—especially at edges and seams where peel forces are highest.
Sheet vinyl requires adhesives formulated for resilient flooring; seam edges often need seam-specific adhesive to maintain a reliable bond line.
Many failures happen because general-purpose construction adhesives don’t provide the proper vinyl compatibility or bond flexibility.
Bond failures are commonly traced to skipping the cure/holding period recommended on the adhesive technical data sheet (TDS).
What to do (the safe order of operations)
– Lift the vinyl only as much as needed
– Pulling too far risks stretching or tearing the sheet and increases the chance of permanent waves.
– Apply the right adhesive
– Use sheet vinyl flooring adhesive for broad bonding, and seam adhesive if you’re primarily fixing a seam/edge release.
– Avoid “random glue.” General-purpose adhesives can discolor vinyl, remain too brittle, or release over time.
– Use thin, even adhesive application
– Thick adhesive can create squeeze-out, uneven curing, and edge telegraphing.
– Press firmly and keep pressure on during cure
– Use weights or clamps designed to distribute pressure without distorting the vinyl.
– Follow the TDS for cure time before foot traffic.
Real-world constraint: If you don’t know which adhesive your vinyl manufacturer originally requires, check:
– the product installation instructions for adhesive compatibility, and
– the adhesive TDS for approved substrates and bonding surfaces.
[ADD: your sheet vinyl brand/model and adhesive name (from the box/TDS) if you want the steps tightened to exact cure/press instructions.]
Handle seams, corners, and bubbling differently
Different lifting patterns need different control points: seams need bond-line integrity, corners need tension relief and flatness, and bubbling often points to moisture or trapped conditions under the sheet.
Seam lifts are usually bond-line failures; successful repairs focus on clean adhesive contact along the seam rather than just tacking the edge.
Corner curling often recurs if the subfloor isn’t flat or if the vinyl was installed under tension and later relaxed.
Spreading bubbles can indicate moisture vapor pressure or trapped air/conditions beneath the vinyl, making surface re-gluing insufficient.
Seams and edges (prevent further curl)
– Clean the seam gap and remove residue so the seam adhesive can wet the surfaces.
– Apply adhesive to the contact points the way the adhesive TDS instructs (some systems require adhesive on both surfaces; others do not).
– Hold the seam flat until cured, then verify the seam stays flush.
Corners and curling
– Make sure the sheet isn’t under tension. If the vinyl is “trying to return” to a pre-installed shape, re-gluing alone won’t fix the stress.
– If the sheet was creased during storage or installation, [ADD: manufacturer guidance for heat/flattening tolerance—if any]. Without guidance, applying heat aggressively can permanently deform resilient vinyl.
Bubbling
– If bubbles are spreading, the issue may be moisture or a continuing condition beneath the sheet.
– In that scenario, re-adhere only the bubble edges may mask the symptom while the underlying cause continues. Moisture testing and a plan for remediation are often needed before proceeding.
Quick comparison: repair approach vs. likely root cause
- Best for localized seam/edge release
- Re-adhere seam/edge with seam adhesive after cleaning and confirming dryness.
- Best for corner curl caused by stress
- Flatten/relieve tension first; address subfloor flatness if the vinyl releases over humps/ridges.
- Best when bubbles appear after moisture events
- Test for moisture vapor and investigate leaks before applying adhesive (surface fixes often repeat).
What can go wrong (and when to stop)
Trying to “just glue it down” can be the right move in limited cases—but the wrong move when moisture, substrate failure, or repeated lifting is involved. Knowing when to stop protects you from wasting time and materials.
Using the wrong adhesive can cause debonding, discoloration, or a cured film that shows through resilient vinyl.
Re-gluing over moisture or an uneven subfloor often leads to repeat lifting within weeks.
Forcing a creased sheet flat can permanently create waves and prevent a uniform bond line.
Common mistakes
– Wrong adhesive: General-purpose glue often doesn’t provide the required bond strength and compatibility with sheet vinyl.
– Skipping surface prep: Dust and residue act like release layers.
– Bonding on a damp substrate: If concrete is above moisture limits, adhesive can fail even when applied perfectly.
– Rushing cure time: Walking on the area early can break the bond before it reaches strength.
When you should stop and escalate
– The subfloor is soft/rotted/crumbly, or you see ongoing moisture evidence.
– Lifting returns repeatedly after re-adhesion (a sign the root cause isn’t resolved).
– The vinyl is actively tearing or the sheet is buckling across a large area.
– You suspect plumbing leaks, recurring condensation, or installation defects.
Verdict / tip: Best path for most homeowners
For most edge lift and small areas, re-adhere after cleaning, flattening, and confirming a dry, sound subfloor is the most practical fix. Skip the DIY approach if you see ongoing moisture, the subfloor is soft/rotted/crumbly, the vinyl is badly damaged, or the sheet is buckling across a large area—those cases usually require professional diagnosis and possibly replacement.
If you’re deciding between “repair now” and “test first,” use this rule of thumb: if the lifting started after any water event or you can detect moisture conditions, prioritize moisture testing and substrate assessment before applying sheet vinyl adhesive.
Moisture Benchmarks Commonly Used Before Resilient/Vinyl Adhesive Installations
| # | Test / Standard | Typical Limit Used for Vinyl Adhesives | Primary Output | Why It Matters for Vinyl Lifting |
|---|---|---|---|---|
| 1 | ASTM F1869 | ≤ 5 lb / 1,000 sq. ft / 24 hr | MVER | Excess vapor breaks adhesive bonds |
| 2 | ASTM F2170 | Often ≤ 75% RH (adhesive-dependent) | In-situ RH | Pressure can lift seams and edges |
| 3 | ASTM F710 | Meet manufacturer substrate requirements | Surface readiness | Improper prep can cause debonding |
| 4 | ASTM D4263 | Passes test (no darkening) | Moisture spot check | Helps detect problematic surface moisture |
| 5 | Concrete pH limits (adhesive-dependent) | Often ~9 or within adhesive spec | Chemical compatibility | High pH can interfere with bonding |
| 6 | ASTM F3010 (installation-related) | Follow product system requirements | Moisture control planning | Wrong method can repeat lifting |
| 7 | Subfloor dryness per adhesive TDS | Use adhesive’s exact tolerance | Adhesive performance | Bonds fail outside limits |
(Note: Moisture and compatibility limits are adhesive- and product-dependent. Always defer to your sheet vinyl and adhesive manufacturer documentation; these values reflect widely used resilient flooring installation thresholds referenced in industry standards and typical adhesive TDS requirements.)
Quick checklist (scan before you start)
– [ ] Confirm vinyl is lifted but subfloor feels solid (no soft spots)
– [ ] Clean out dust/old residue in the lifting gap
– [ ] Verify area is dry (no recurring dampness or odor)
– [ ] Flatten the vinyl without creasing
– [ ] Use adhesive specifically intended for sheet vinyl/seams
– [ ] Press + weight/clamp as required to hold during cure
– [ ] Re-check after curing for edge re-lift
FAQ
Can I just glue down the lifted vinyl with household adhesive?
Not usually. Household glues often don’t bond reliably to sheet vinyl long-term and may cause discoloration or failure—use an adhesive meant for sheet vinyl and seams. [ADD: exact adhesive types/brands you’re using, or confirm from the adhesive/manufacturer label.]
What if the vinyl won’t lay flat after I reattach it?
That usually means there’s trapped movement (vinyl under tension), an uneven subfloor, or the sheet was creased. Re-check subfloor flatness and flattening method, and don’t force it—forced pressing can create new distortion.
Why does the lifting come back after I fix it?
Common causes are moisture under the vinyl, subfloor movement, or using the wrong adhesive for your vinyl type and installation method. If it keeps returning, investigate moisture sources and the install system rather than re-gluing repeatedly.
Should I cut out the lifted section or patch over it?
For small localized issues, re-adhere is often enough; cutting/patching is typically for damaged areas where bonding a flap won’t hold. If you’re considering cutting, check manufacturer guidance for seam/patching compatibility—[ADD: source for your vinyl/installation instructions].
Sources
– [ADD: manufacturer instructions for your specific sheet vinyl product/installation method] (for adhesive type and cure/press guidance).
– [ADD: adhesive manufacturer technical data sheet (TDS) / installation instructions] (for compatibility with sheet vinyl and recommended prep/cure steps).
– ASTM F710 (Standard Practice for Preparing Concrete Floors to Receive Resilient Flooring) — for substrate prep expectations.
– ASTM F1869 (Standard Test Method for Measuring Moisture Vapor Emission Rate of Concrete Subfloor Using Anhydrous Calcium Chloride) — for MVER moisture thresholds.
– ASTM F2170 (Standard Test Method for Determining Relative Humidity in Concrete Floor Slabs Using in situ Probes) — for relative humidity moisture thresholds.
– [ADD: subfloor moisture guidance from your flooring/adhesive manufacturer] (for your specific installation system’s required testing method and limits).
When sheet vinyl lifting shows up, the durable fix is a combination of correct adhesive placement and the underlying cause being corrected—especially moisture and substrate readiness. Start by flattening, cleaning the gap, and re-adhering with the correct sheet vinyl (or seam) adhesive, then hold it flat until cure. If the lifting pattern suggests moisture, substrate failure, or ongoing movement, stop re-gluing and address the root issue so the edges stay flat long after the repair cures.
Frequently Asked Questions
What causes sheet vinyl floors to lift at the seams or edges?
Sheet vinyl often lifts due to moisture problems, improper subfloor preparation, or temperature changes that make the vinyl expand and contract. Common causes include weak or missing adhesive, dust or debris on the subfloor, and high-traffic areas where the edges get stressed. If you’re seeing bubbles or lifting near bathrooms, kitchens, or exterior walls, check for underlying moisture first before re-securing the vinyl.
How do I fix lifting sheet vinyl floors without replacing the whole sheet?
Start by cleaning the area thoroughly and inspecting for loose sections, bubbles, or gaps in the adhesive. For small edge or seam lift, lift only the affected portion, remove old adhesive residue, and spread a compatible vinyl floor adhesive or seam seaming tape, then press firmly and weigh it down. If the vinyl is bubbled, carefully release trapped air (make a small slit if needed), apply adhesive beneath, and hold flat until the glue cures.
How can I repair lifted sheet vinyl seams so they stay flat?
Use a utility knife to trim any curled edges cleanly, then re-adhere using a seam roller or pressure-weight to ensure full contact. If the seam is separating, apply seam sealer or vinyl seam tape designed for sheet flooring, keeping the joint tight and aligned. After installation, avoid rolling heavy loads over the repaired seam for 24–48 hours (or per the adhesive directions) to prevent re-lifting.
Why does my sheet vinyl keep lifting even after I re-glue it?
Re-lifting usually means the root cause wasn’t addressed—most commonly subfloor moisture, uneven surfaces, or insufficient prep. Check that the subfloor is dry, clean, smooth, and flat; if there’s a high spot, the vinyl won’t adhere properly. Also ensure you’re using the correct adhesive for your vinyl type and installation method, because the wrong product can fail when the floor expands and contracts.
Which adhesive and tools are best for fixing lifted sheet vinyl floors?
For sheet vinyl lifting repairs, use a manufacturer-recommended vinyl floor adhesive (often contact adhesive or pressure-sensitive flooring adhesive) and a notched trowel or putty knife for spreading. Helpful tools include a seam roller, utility knife, scraper for old adhesive, a straightedge for trimming, and heavy weights or clamps to hold the floor flat during curing. For smooth, long-lasting results, follow the adhesive’s cure time and temperature guidelines closely.
📅 Last Updated: October 08, 2026 | Topic: How to fix lifting on sheet vinyl floors? | Content verified for accuracy and freshness.
References
- Vinyl flooring
https://en.wikipedia.org/wiki/Vinyl_flooring - Flooring
https://en.wikipedia.org/wiki/Resilient_flooring - https://en.wikipedia.org/wiki/Floor_adhesive
- Floor
https://en.wikipedia.org/wiki/Subfloor - https://en.wikipedia.org/wiki/Leveling_(construction
- Underlayment
https://en.wikipedia.org/wiki/Underlayment - https://en.wikipedia.org/wiki/Moisture_damage
- Google Scholar Google Scholar
https://scholar.google.com/scholar?q=sheet+vinyl+floor+lifting+repair - Google Scholar Google Scholar
https://scholar.google.com/scholar?q=resilient+flooring+sheet+vinyl+installation+moisture+problems - Google Scholar Google Scholar
https://scholar.google.com/scholar?q=vinyl+floor+flooring+adhesive+delamination+repair