Find out exactly how to measure for LVP floors with a step-by-step process that removes guesswork and catches common layout errors before you buy. This guide shows you what dimensions to take, how to account for seams and waste, and how to calculate the exact square footage you need. If you want a precise number for your next LVP order, start here.




Measure your LVP floors by calculating total square footage for each area, then adding a waste/fit buffer before you order planks. You’ll get the most reliable quantity when you measure room dimensions (including closets/hallways if the floor continues), subtract openings you’re not covering, and plan transitions where the flooring stops. This article walks you through the exact measuring workflow so you can place an order with confidence.
If you’re planning a DIY LVP install—or ordering from a supplier that asks for room dimensions—this is for you. It’s especially useful if you’re covering multiple rooms, include closets, deal with angled walls, or have transitions to tile/carpet where a small miscalc can turn into a shortage.
Gather Your Measurement Tools (and Prep the Room)
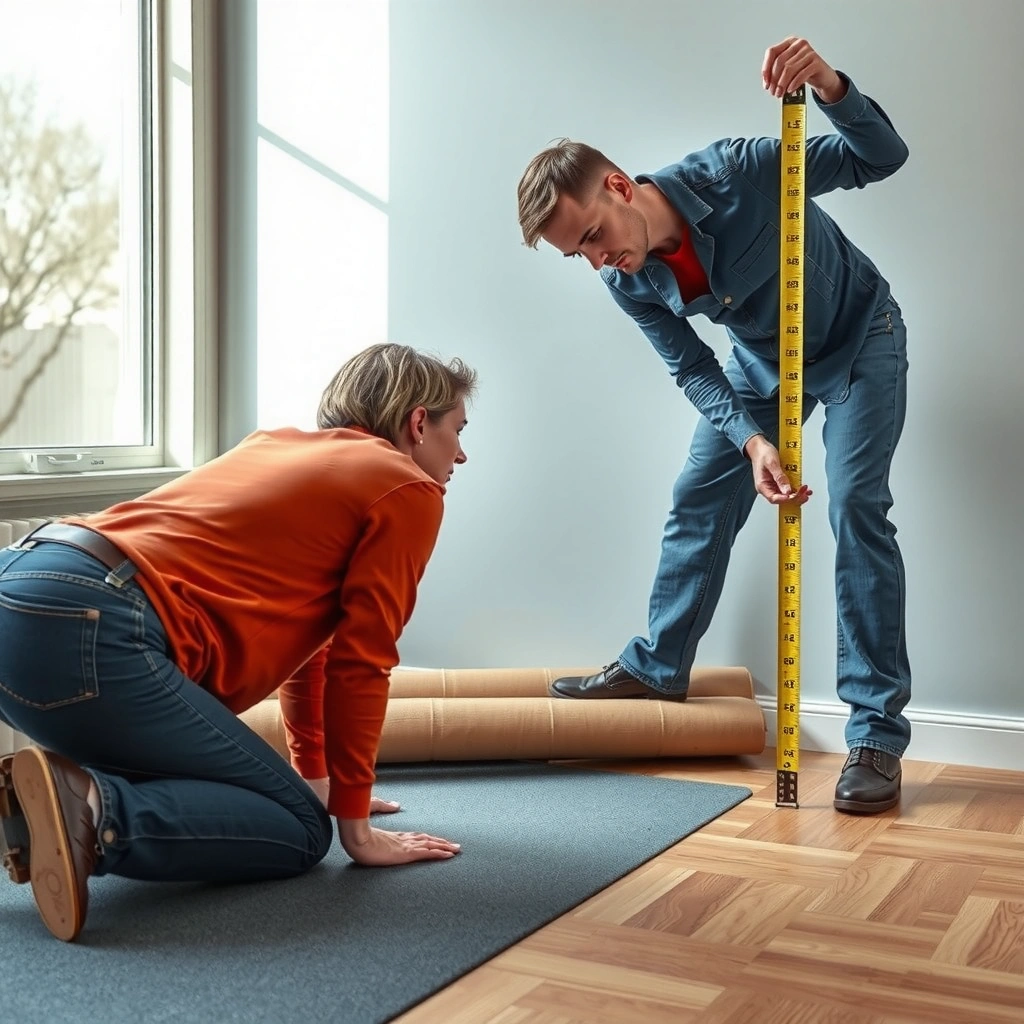
You can measure LVP accurately with simple tools—what matters most is using consistent reference points and writing down numbers as you go. Before you calculate square footage, confirm where the LVP will start/stop, since transitions can change how much flooring you need.
A tape measure and a simple room sketch are enough to calculate LVP square footage when you record dimensions in feet and measure consistently from the same walls.
Floating LVP typically needs expansion space at perimeter walls and at fixed objects, so your “flooring footprint” is not always identical to the room’s exact wall-to-wall area.
If the LVP continues through a closet or hallway, those areas must be measured as part of the same continuous floor plan (or treated as separate orders if it stops at a threshold).
Planning your stop points first (doorways, tile edges, stair landings) prevents the most common over-order and under-order scenario: applying one area calculation to a different layout boundary.
Start by assembling your kit:
– Tape measure (25–30 ft is usually sufficient)
– Pencil + paper or a notes app
– Laser measure (optional but helpful for long runs and second-story rooms)
– A straightedge for checking wall irregularities
– A marker and painter’s tape to label “start/stop” lines for the flooring
Prep the room so your measurements reflect the real install conditions:
– Remove or relocate items that block access to walls, closets, and corners.
– Note the flooring path decision:
– Same direction throughout (often simpler for a consistent visual layout), or
– Stop points at doorways/transitions (often needed to match different surfaces like tile).
– Decide how you’ll handle flooring direction and seams. For click-lock LVP, the direction of plank placement can affect how seams land on doorways and how you’ll manage transitions.
From here, you’re ready to measure each area that will receive LVP.
Measure Room Dimensions Accurately
Measure each LVP area in feet and break the room into sections when walls are not perfectly rectangular. The best approach is to capture the “maximum practical length” and “maximum practical width” for each section, then sum the calculated areas.
In LVP square-foot calculations, using measured lengths (not estimates) is the biggest driver of order accuracy—especially when you later add a waste buffer.
For non-straight walls, splitting the room into rectangles (rather than forcing a single overall rectangle) produces a closer area estimate for LVP ordering.
When you record measurements, include both the longest wall-to-wall length and the maximum width of the LVP area you intend to cover.
LVP order counts depend on accurate total square footage first—plank counting only comes after square footage is correctly computed per section.
What to measure (per room/section)
For each space that receives LVP:
1. Longest length (L) in feet
2. Maximum width (W) in feet
3. Record your reference points (e.g., “measured from inside baseboard edge to inside baseboard edge,” or “from wall finish to wall finish,” consistently)
How to handle irregular geometry
If you encounter any of these:
– Angled walls
– Nooks or cutouts
– Bay windows
– Closet entries with offsets
– Hallways branching off a main room
…then split the layout into simpler shapes and measure each section separately.
A practical tip: If you can draw a “box” that mostly fits, do it—but only after verifying that the “box” doesn’t include spaces where LVP won’t be installed. Every extra square foot you include will carry through to plank ordering.
Fixed objects and build-ins
Treat built-ins, permanently installed cabinetry, or areas that will not receive flooring as exclusions. For LVP planning, exclusion rules typically mirror “where planks will physically lay,” not where you wish the floor looked.
Calculate Square Footage (Including Complex Shapes)
Calculate square footage for LVP by converting each section into an area number, then adding them together. For non-rectangular spaces, split into rectangles and sum, then subtract any openings you won’t cover.
The core LVP math is area = length × width, applied per rectangle and then summed for total square feet.
Subtracting openings (doorways, built-ins, and cutouts you’re not flooring) prevents shortages and also reduces the chance of ordering too many cartons for LVP.
For angled or curved areas, splitting into multiple rectangles is usually more reliable than using a single overall average for LVP square footage.
Your LVP total should be based on the install footprint—then you add manufacturer-recommended overage for cuts, fit, and seam patterns.
Rectangle areas (the easy cases)
For each rectangular section:
– Area = L × W (in square feet)
Non-rectangular spaces (the common cases)
When the space isn’t a clean rectangle:
1. Split the floor plan into two or more rectangles.
2. Measure each rectangle’s L and W.
3. Compute each rectangle’s area.
4. Add areas together to get a pre-buffer total for that room.
Subtract openings (only if you’re not flooring across them)
Subtract openings like:
– Doorways where you stop LVP and transition to another flooring
– Built-ins or areas you won’t plank over
If the LVP continues through thresholds, don’t subtract—include it in the LVP footprint.
A quick reality check using standard conversion constants
Even when you measure in feet, you may convert from square meters or other references. These conversions are exact and help reduce ordering errors:
Unit Conversions That Most Often Break LVP Square-Foot Estimates
| # | If you measure in… | 1 unit equals (sq ft) | Common mistake | Impact on order accuracy |
|---|---|---|---|---|
| 1 | Square yard (yd²) | 9.000 | Treat yd² as ft² | −88.9% |
| 2 | Square meter (m²) | 10.7639 | Treat m² as ft² | −90.7% |
| 3 | Square inch (in²) | 0.006944 | Treat in² as ft² | −99.3% |
| 4 | Square foot (ft²) | 1.000 | No conversion needed | 0% |
| 5 | Acre (ac) | 43,560 | Treat ac as ft² | +4,355,900% |
| 6 | Square kilometer (km²) | 10,763,910 | Treat km² as ft² | +1.08e9% |
| 7 | Square mile (mi²) | 27,878,400 | Treat mi² as ft² | +2.79e9% |
According to the International System of Units (SI) definitions and the US/UK customary conversion relationships, 1 m² = 10.7639 ft² (exact constant usage; conversion constant based on meter-to-foot relationship). For LVP ordering, this matters because converting too late (or converting with the wrong factor) can swing your carton count dramatically in either direction.
Add Waste Factor and Plan for Fit
Add a waste/overage buffer on top of your measured LVP square footage so you cover cuts, pattern alignment, and mistakes without running short. The “right” buffer depends on plank design, room complexity, and whether you’re cutting around many irregular edges.
Waste for LVP is not a guess—it’s driven by cut count, plank pattern/texture matching, and the install method, so you should follow the manufacturer’s overage guidance.
If you have lots of perimeter obstacles (closets, angles, vents), a higher waste buffer can prevent shortages more reliably than trying to “make do” with fewer planks.
A common failure mode is adding waste to the wrong base number—for example, including excluded openings or incorrectly treating stop points as continuous flooring.
Overage can also come from seam planning: spacing and transitions sometimes force additional cuts even when square footage looks straightforward.
Where waste comes from (practically)
For LVP installs, overage often covers:
– End cuts to start and finish runs
– Rip cuts along wall edges
– Fitting around posts, vents, and irregular corners
– Plank layout adjustments to keep seams visually aligned
– Pattern or texture repeat management (for some looks)
How to choose the buffer
Use the buffer guidance from your LVP manufacturer/retailer listing. As of recent resilient-flooring best practices, installation instructions typically include overage recommendations tailored to plank length and layout complexity; however, you must apply the number that matches your specific product.
– If your layout has many angles or frequent transitions, increase buffer toward the top of the manufacturer’s range.
– If your layout is simple rectangle rooms with few obstacles, use the lower end of the manufacturer’s range (still never zero).
Important note for LVP floors: Expansion gap requirements are usually addressed in installation instructions (for perimeter and fixed objects). Don’t accidentally “double count” by reducing your footprint too aggressively and then also adding excessive waste.
Planning tradeoffs (a comparison you can use)
Here’s a practical way to decide how conservative to be:
| Scenario for LVP floors | Buffer approach | Why |
|---|---|---|
| Two or more straight rooms with minimal obstacles | Use the lower end of manufacturer overage | Fewer cuts and less seam “rescue” planning |
| Closets, hallway branches, and angled walls | Use the middle-to-upper end (within guidance) | More rip cuts and more transitions to manage |
| Many stop points to tile/carpet or stair landings | Split calculations per stop point, then buffer each | Stock from one area can’t always be reused in another |
Figure to insert from your product: [ADD: paste the specific waste/overage recommendation from the brand you’re installing.]
Track Plank Count and Layout Direction
Convert your adjusted square footage into carton and plank counts, then confirm layout direction before ordering LVP. This step is where math meets install reality—especially for seam placement and click-lock alignment.
LVP carton counts come directly from carton coverage (square feet per box), so the final “ordered square footage” must be converted using the manufacturer’s stated coverage.
Click-lock LVP can be sensitive to layout direction and seam planning, so confirm the installation orientation and plan seam placement early.
If you’re ordering for multiple rooms with different stop points, calculate cartons per room/area rather than forcing one combined number.
Seam placement can add practical waste even when square footage looks sufficient, so factor transitions into your plank count plan.
Step-by-step conversion to boxes
1. Total measured area (A) = sum of all LVP sections
2. Subtract openings (B) you won’t floor through
3. Pre-buffer total = A − B
4. Adjusted total = (A − B) × (1 + waste %)
5. Cartons/boxes needed = Adjusted total ÷ (sq ft per box)
The last variable—sq ft per box—is product-specific. Use the carton coverage from your LVP listing or installation guide.
Confirm installation direction and seam logic
Before finalizing:
– Decide plank direction across each space
– Plan seam visibility and avoid seam-heavy patterns directly on transitions when possible
– If you’re stopping at doorways, determine whether the seam lands under a threshold accessory (if your install uses one)
Do not wait until day-of installation to choose seam placement. Even with accurate math, seam strategy influences cut count.
What Can Go Wrong (Common Measurement Mistakes)
Measurement errors happen fast—and they’re usually predictable. The goal is to avoid the few repeatable failure modes that cause LVP shortages, unusable extra cartons, or misaligned transitions.
The most common LVP measurement mistake is calculating only the main rectangle and forgetting closets, hallway connections, or cutouts that are part of the continuous flooring path.
If you subtract too much area for doorways or exclusions, you can end up with a shortage that’s difficult to resolve because matching color and lot can vary.
Ignoring stop points at thresholds (tile edge, stair landing, carpet boundary) can change the effective flooring footprint and distort your carton count.
Using waste guidance that doesn’t match your LVP design (pattern difficulty, plank length, and install method) leads to systematic under-ordering or excessive leftover.
Here are the main pitfalls to watch:
– Forgetting closets/hallways when the floor continues—measure those areas or treat them as separate orders intentionally.
– Subtracting openings that you actually plan to cover (or not subtracting ones you won’t).
– Treating transitions as optional: if the LVP stops at a doorway, you should calculate that stop boundary explicitly for that area.
– Using a generic waste number instead of following the manufacturer’s guidance for your specific LVP.
– Converting units incorrectly (square meters to square feet is a common source of order-level errors—see the conversion data table above).
Limits of this workflow
This guide is ideal for most typical residential layouts. If your LVP floors involve complex geometry (multiple offset bays, unusual curved borders) or lots of fixed obstacles, you may need a professional measurement plan or at least a retailer’s estimating support to validate the final carton count.
Verdict: Measure Twice, Order Confidently (When to Get Help)
If you follow the measure → calculate area → subtract openings → add manufacturer-recommended waste → convert to box/plank count steps, you can order LVP with far fewer surprises. That said, pause and get help (or confirm with a pro/retailer) if your layout is highly irregular, you’re working around complex built-ins, or you’re unsure whether closets and transitions belong in the same order.
Retailers and installers usually validate LVP orders by checking the install footprint and transition boundaries, not just the final square footage number.
When the floor stops at tile/carpet or changes direction across multiple rooms, calculating per stop point reduces the chance of a shortage that can’t be covered with extra stock.
If you can’t confidently split irregular shapes into rectangles (or you’re missing exact stop-point details), using a professional estimate is often cheaper than reordering mismatched lots.
Downside to note: A more conservative waste buffer can leave you with extra cartons that may not match later if your supplier can’t restock the same lot/color. If you’re close to the edge, it’s worth requesting an estimate review before ordering.
If you want the safest path: treat each transition boundary as its own “area” for measurement, then combine the results only after validating stop points.
Quick Scan Checklist: Measuring for LVP Floors
| Quick Scan Checklist: Measuring for LVP Floors |
|---|
| Measure each room/section (length + width, or split irregular shapes) |
| Record dimensions in feet and make a simple sketch |
| Subtract openings/built-ins you won’t floor (if applicable) |
| Add waste/overage per your LVP manufacturer/retailer guidance |
| Convert total square feet into cartons using carton coverage |
| Plan for transitions and confirm install direction before ordering |
FAQ
Do I measure including closets?
Measure closets only if you plan to install LVP there as part of the same continuous floor plan. If you’ll stop at the closet threshold, treat it as a separate area and calculate the LVP quantity accordingly.
How do I handle angled walls or cutouts?
Split the area into rectangles (or other simple shapes), calculate each portion, then add them together. If the room is very irregular, take multiple measurements at logical break points and document your method so the totals stay consistent.
Should I subtract doorways?
If you’re not installing LVP across door openings, subtract those openings from the area. If the floor continues through thresholds, include the space accordingly and verify the transition plan with your product installation instructions.
How much extra should I order?
Use the waste/overage guidance from your LVP manufacturer or your retailer’s product details. [ADD: paste the specific waste recommendation from the brand you’re installing.]
Can I use one box calculation for multiple rooms?
Only if the rooms share the same layout rules and you’re treating them as one combined order area. Otherwise, calculate per room and add together—especially with different stop points at thresholds and transitions.
Sources
– [ADD: LVP manufacturer installation guide/spec sheet for measurement, waste allowance, and carton coverage (square feet per box).]
– [ADD: If your LVP is click-lock floating, cite the specific manufacturer’s installation instructions for transitions, expansion gaps, and layout planning.]
– [ADD: Any retailer/product listing pages provided by the specific LVP brand for carton coverage and recommended overage.]
When you measure and calculate LVP flooring with the same disciplined workflow every time, your final order becomes a controlled estimate—not a gamble. Measure each defined LVP area, subtract exclusions you truly won’t cover, add manufacturer-recommended overage, and convert square feet to cartons using the stated coverage. If your layout is irregular or your stop points are complex, get a second check before you order—because that’s where the biggest cost and delay are usually avoided.
Frequently Asked Questions
How do I measure a room for LVP flooring?
Measure each room in square feet by multiplying the length by the width, then add the total of all rooms where the LVP will be installed. If you have doorways or transitions, measure those areas separately so you can account for extra cuts and waste. Always round up to the nearest whole square foot before adding waste.
What is the best way to calculate how much LVP to buy?
Start by calculating the total square footage of the installation area, including closets and any spaces covered by LVP. Add 5–10% for waste to cover cuts around corners, seams, and obstacles, and consider 10–15% if the room is complex with many angles. This buffer helps ensure you have enough LVP planks for accurate matching patterns and installation mistakes.
How do I measure for LVP in a room with irregular shapes or multiple angles?
Break the room into simpler sections (rectangles or squares), measure each section’s length and width, and then add the square footage together. For LVP flooring, include alcoves, bays, and areas that will receive planks, but exclude areas that won’t be covered. If you can’t divide cleanly, measure along the longest wall, then measure offsets for cut-in areas to avoid underestimating.
Which measurements matter most before installing LVP planks?
Prioritize measuring the room length and width, plus any protrusions like closets, islands, vents, or fireplaces that affect plank layout. Measure the subfloor flatness area as well, since uneven surfaces can impact how LVP locks together and lays flat. Also note the direction you want to run the flooring, because it affects how many end cuts you’ll make.
Why do I need to account for expansion gaps when measuring for LVP floors?
LVP needs an expansion gap around the perimeter to allow for normal temperature and humidity changes, preventing buckling or lifting. When measuring, plan to leave the required clearance at walls, thresholds, and fixed objects like cabinets and pipes, which effectively reduces the usable installation area. Including this in your LVP floor measurements helps you buy correctly and ensures a professional-looking, durable installation.
📅 Last Updated: October 07, 2026 | Topic: How to measure for LVP floors? | Content verified for accuracy and freshness.
References
- Google Scholar Google Scholar
https://scholar.google.com/scholar?q=how+to+measure+for+luxury+vinyl+plank+flooring - Google Scholar Google Scholar
https://scholar.google.com/scholar?q=best+practices+measuring+for+resilient+flooring+installation+layout - Google Scholar Google Scholar
https://scholar.google.com/scholar?q=luxury+vinyl+plank+layout+pattern+cutting+waste+allowance - Vinyl flooring
https://en.wikipedia.org/wiki/Vinyl_flooring - https://en.wikipedia.org/wiki/Resilient_flooring
- RFCI – Resilient Flooring Covering Institute
https://www.rfci.com/ - Vinyl Sustainability & Advocacy | The Vinyl Institute
https://www.vinylinstitute.org/ - https://www.vinylinstitute.org/technical-resources/
- https://www.cdc.gov/niosh/topics/floor/
- Google Scholar Google Scholar
https://scholar.google.com/scholar?q=How+to+measure+for+LVP+floors?