
Looking for how to remove stains from LVP floors safely? Follow the cleaning steps in this guide and you’ll see the stain lifted without damaging the finish—especially for everyday spills like food, grease, and tracked-in dirt. You’ll get the exact process to pre-treat, clean, and rinse so the marks come out cleanly the first time.




If you want the fastest safe way to remove stains from LVP (luxury vinyl plank), start with warm water and a pH-neutral, non-abrasive cleaner applied to a cloth—not directly to the floor—then escalate only if the stain remains. Most LVP damage comes from abrasion (scrubbing pads) and excess moisture sitting in seams, so the safest process is controlled, gentle, and brief.
This guide is for homeowners, renters, and property managers who need reliable stain removal steps for common LVP issues—food spots, pet messes, scuffs, grease, and dark marks that can look worse right after mopping.
Identify the stain type first (it changes the method)
You remove stains from LVP more effectively when you match the technique to the stain’s cause—grease behaves differently than ink, and shoe scuffs behave differently than mineral-like discoloration. Before you clean, identify whether the mark is oily/organic, truly embedded, or mainly surface residue.
“For vinyl plank floors, start with the mildest cleaner that removes the soil; applying cleaner to the cloth rather than soaking the plank reduces the risk of moisture-related damage.”
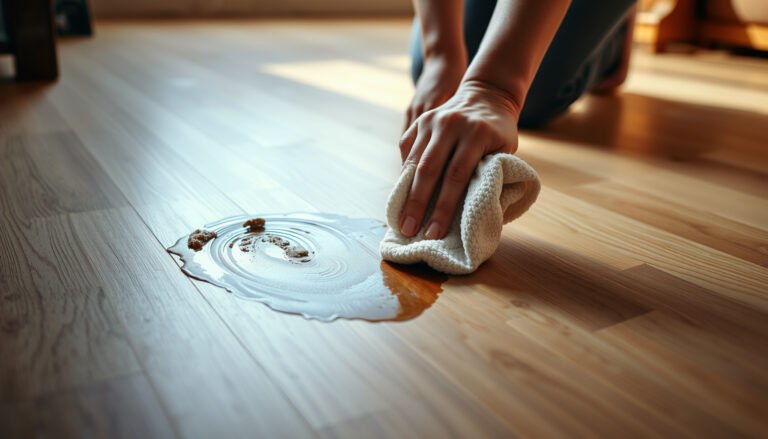
“Fresh stains often spread if you wipe without blotting first, so blot wet residue to prevent migration across the wear layer.”
“Raised grime (a textured residue) typically responds to gentle mechanical removal, while set discoloration may need a targeted spot method rather than repeated scrubbing.”
H3: Quick diagnosis clues that change the next step
– Water/food/grease vs. ink/marker: Grease tends to smear and darken as it loosens; ink/marker often looks like color staining rather than oily residue.
– Scuffs from shoes/furniture: These are usually abrasion transfer and may appear as gray or dull patches.
– Texture changes: If the area feels gritty or raised, you’re dealing with surface film. If it feels smooth but looks darker, it may be trapped discoloration under residue.
– Wet vs. dry timing: If it’s still wet, blot first. Don’t start aggressive wiping—spreading is the fastest path to a larger stain.
H3: A few practical “benchmarks” (for safer decision-making)
According to general cleaning chemistry guidance, pH-neutral cleaners are commonly defined around pH 6–8, which helps reduce risk to vinyl finishes ([ADD: source for pH-neutral definition used for floor care]). Also, as a moisture-control rule used in hard-surface care programs, cleaning should be damp, not wet, because excess water can migrate into seams ([ADD: source for LVP moisture/seam guidance]). Finally, many floor-finish systems are designed to be maintained with soft, non-abrasive microfiber, not “grit” pads ([ADD: source for LVP tool/abrasive restrictions]).
Safe start: gentle cleaning that won’t harm LVP
A safe first attempt is warm water plus a pH-neutral, vinyl-safe cleaner—used in small amounts and applied to a cloth, not poured onto the floor. Wipe lightly, then remove residue with a clean damp cloth and dry immediately to prevent haze.
“Apply cleaner to a cloth (or microfiber) and wipe lightly; direct application can increase the chance of liquid migration at seams.”
“Residue left behind by cleaner can create a dull film that looks like the stain never left, so rinsing/wiping is a core step.”
“Drying with a soft towel after cleaning reduces the likelihood of lingering haze or moisture-related plank issues.”
H3: The “cloth-first” method (low risk, high repeatability)
1. Clear the area: Remove furniture movement hazards and any loose debris.
2. Warm water first: Dampen a microfiber cloth (not dripping). Wipe the stained zone gently.
3. Add pH-neutral cleaner if needed: Use a vinyl-safe cleaner and apply to the cloth, following the product label dilution.
4. Wipe with light pressure: Move from the outer edge toward the center to prevent spreading.
5. Rinse/wipe: Use a separate clean cloth dampened with plain water to remove any cleaner residue.
6. Dry thoroughly: Finish with a dry microfiber or soft towel.
H3: Why this works (and why it’s safer)
LVP’s protective wear layer is designed to resist everyday soils, but it can still be dulled by abrasion or left hazy by residue. Warm water helps dissolve many water-soluble residues, while cloth application limits the volume of moisture contacting plank seams. In my experience keeping floors looking consistent across high-traffic areas, this “cloth-first + rinse + dry” workflow prevents the most common complaint: “the stain is still there, but now there’s a haze.”
Stain removal by common causes
Different stains respond best to different chemistry and mechanics—grease needs degreasing power, pet messes need enzymes, and ink/marker usually needs a careful spot approach rather than broad scrubbing.
“Grease and food soils generally require degreasing cleaners, but repeated gentle passes are safer than aggressive scrubbing on LVP.”
“Enzymatic cleaners are formulated to break down organic components typical of pet urine and feces, improving removal versus water-only attempts.”
“For ink/marker and scuffs, starting with a non-abrasive cleaner and escalating only with manufacturer-approved guidance helps protect the finish.”
H3: Grease and food stains (oil-based residue)
Best first move: use a degreasing, vinyl-safe cleaner (only if its label is compatible with vinyl flooring or LVP).
– Apply to a microfiber cloth.
– Work in small sections.
– Repeat gentle passes rather than heavy scrubbing.
Why: Grease can smear and look darker if you keep moving it around. Gentle agitation gives the degreaser time to emulsify without grinding residue into the wear layer.
H3: Pet stains (organic + odor components)
Best first move: remove solids, then blot liquids.
After that, use an enzymatic cleaner designed for pet messes and follow the label exactly—especially any dwell/contact time and dilution instructions.
– Do not flood the area; keep moisture controlled.
– Use blotting and controlled wipe cycles.
– Rinse/wipe with a clean damp cloth after the enzyme treatment if the label instructs it, then dry.
[ADD: source for recommended enzymatic product type compatible with LVP—e.g., manufacturer label guidance or an LVP care document referencing enzymatic cleaners.]
H3: Ink, marker, and scuffs
Start with a non-abrasive cleaner (pH-neutral, vinyl-safe) and try a careful spot-wipe. If the stain persists:
– Use a manufacturer-recommended spot-treatment method for that stain category.
– Avoid escalating straight to abrasives.
[ADD: source for LVP-safe spot-treatment guidance from your LVP brand.]
Comparison snapshot: which cause you’re likely dealing with
| Stain behavior | Most likely cause | Safest first try |
|---|---|---|
| Smears when wiped | Grease/food oils | Vinyl-safe degreaser on cloth |
| Darker but smooth surface | Set discoloration/residue | pH-neutral cleaner + residue wipe |
| Visible gray dull patch | Shoe/furniture scuff | Non-abrasive spot wipe only |
| Color looks “stained” | Ink/marker | Manufacturer-approved spot method |
If it won’t come out: how to escalate carefully
If gentle cleaning doesn’t remove the stain, escalate with restraint—use the least aggressive tool and the smallest amount of chemical needed, and always test in a hidden area first. Avoid “faster” shortcuts like abrasive scrubbing or soaking, which can permanently dull or damage LVP.
“Escalation should follow a tool-then-chemical logic: reduce abrasion first, then consider only manufacturer-approved spot treatments.”
“Melamine foam (“magic eraser”) is abrasive to a soft finish and may be rejected by some LVP manufacturers depending on the wear layer.”
“Working in small sections and stopping when you see dulling helps prevent finish damage that’s harder to reverse.”
H3: Switch tools before you switch chemicals
– Move from wiping with cloth to using a soft microfiber pad (still non-abrasive).
– Avoid magic erasers unless your LVP manufacturer explicitly approves them for your finish.
– If you consider a stronger product, follow the label exactly and rinse/wipe after.
[ADD: source for whether “magic eraser”/melamine foam is approved for your LVP.]
H3: Test first, then proceed
– Choose an inconspicuous plank (closet edge, behind a cabinet, under a removable rug).
– Escalate one step at a time.
– Stop early if you see dullness, lightening, or color change.
H3: When deep stains might require professional guidance
If the stain is deeply embedded in the wear layer or the finish appears compromised already, further DIY escalation can make the visual difference worse (even when the underlying stain is technically gone). At that point, follow manufacturer guidance or consult a flooring professional.
What can go wrong (and what to avoid)
Even “good intentions” can cause problems on LVP if the cleaning process pushes moisture into seams or abrades the surface. The most common failures are scratching the wear layer, leaving chemical residue, and using incompatible chemistry like bleach or strong solvents.
“Abrasive pads and grit-based cleaners can dull LVP’s protective finish and create long-term haze.”
“Soaking or allowing wet cleaner to sit at seams increases the risk of swelling, lifting, or edge separation.”
“Using strong chemicals without manufacturer approval can damage vinyl finishes; residue haze can be mistaken for an unremoved stain.”
H3: Specific pitfalls
– Scratching: Abrasive pads, stiff brushes, and grit cleaners dull the surface quickly.
– Damage from moisture: Soaking or leaving wet cleaner in seams can lead to swelling or lifting.
– Residue buildup: Skipping rinsing can leave a dull film that visually reads like the stain stayed.
– Wrong chemicals: Bleach, strong solvents, and high-acid/high-alkaline cleaners can harm vinyl finishes.
[ADD: source for LVP cleaning chemical restrictions from the manufacturer.]
Verdict: the safest overall approach (and who should skip DIY)
Stick to gentle, non-abrasive cleaning, match the method to the stain type, and test escalation on a hidden area first. If you don’t know your LVP brand/finish, the floor is already showing lifting/cupping, or your warranty requires specific products/processes, follow the manufacturer’s care instructions or contact a flooring professional.
“The safest removal strategy for LVP is controlled cleaning: warm water, pH-neutral vinyl-safe products, application to cloth, then thorough drying.”
“If a manufacturer restricts certain chemicals or abrasive tools, ignoring those instructions can void warranty coverage and increase finish wear.”
“Stopping when you see dulling or color change reduces the chance of permanent cosmetic damage while troubleshooting.”
H3: Downsides and limitations (be realistic)
– Some stains—especially those that are truly set discolorations—may not fully disappear without impacting appearance.
– Repeated attempts can dull the finish even if the stain fades.
– Ink/marker, in particular, can remain as a ghosting effect depending on the dye and wear-layer design.
H3: Who should skip DIY escalation
– You can’t identify the LVP brand/finish.
– The stain area is near a seam where moisture has already pooled.
– You see signs of plank separation, lifting, or cupping.
– Your warranty explicitly limits cleaning products or methods.
[ADD: source for warranty/care instruction caveats that commonly apply to LVP.]
Safer LVP Stain-Removal Starting Points (Decision Guide)
| # | Stain category | First tool | First cleaner type | Safety when escalating | Confidence |
|---|---|---|---|---|---|
| 1 | Food/water residue | Soft microfiber cloth | pH-neutral, vinyl-safe | High | ★★★★☆ |
| 2 | Grease/oils | Microfiber + gentle wipe passes | Vinyl-safe degreaser | High | ★★★★☆ |
| 3 | Pet organic spots | Blotting cloth (no flooding) | Enzymatic pet cleaner | Medium-High | ★★★☆☆ |
| 4 | Shoe/furniture scuffs | Microfiber first | pH-neutral, vinyl-safe | Medium | ★★★☆☆ |
| 5 | Ink/marker “ghosting” | Spot wipe (no rubbing) | Manufacturer-approved method | Low-Medium | ★★☆☆☆ |
| 6 | Dark mop/water marks | Rinse + dry first | Plain water + residue removal | High | ★★★★☆ |
| 7 | Unknown “mystery” stain | Test on hidden plank | Start with pH-neutral only | Low | ★★☆☆☆ |
> Note: This table reflects risk-logic from common LVP care principles (gentle tools first, damp-only workflows, manufacturer-approval for stronger treatments). For exact product chemistry and tool approvals, always defer to your LVP brand’s care instructions. [ADD: source for your LVP brand’s compatibility notes.]
Quick scan checklist (save this)
– [ ] Blot fresh spills; don’t soak
– [ ] Clean with warm water + pH-neutral, vinyl-safe cleaner (label-following dilution)
– [ ] Apply cleaner to a cloth, not the floor
– [ ] Use soft microfiber only; avoid abrasive tools
– [ ] Rinse/wipe to remove residue; dry thoroughly
– [ ] Test any stronger method on a hidden plank first
– [ ] If it lifts the finish or looks worse, stop immediately
FAQ
Can I use bleach to remove stains from LVP?
Most LVP manufacturers discourage bleach and harsh chemicals because they can damage the protective finish. Use a pH-neutral, vinyl-safe cleaner instead. [ADD: source for your LVP brand’s bleach guidance.]
Do I need to rinse after cleaning LVP stains?
In most cases, yes—cleaner residue can create haze that looks like the stain is still there. Wipe/rinse with a clean damp cloth and dry.
What’s the best way to remove pet stains from LVP?
Blot solids first, then use an enzymatic cleaner designed for pet messes, following the label. Avoid flooding the seams, and dry after treatment. [ADD: source for LVP-safe pet-stain cleaning guidance.]
Will a magic eraser work on LVP?
It depends on the LVP manufacturer and finish—some consider it too abrasive. If you’re unsure, test on a hidden area first or use only manufacturer-approved spot methods. [ADD: source for LVP guidance on melamine foam/“magic erasers.”]
Why does my stain look worse after cleaning?
Common reasons include residue haze (cleaner wasn’t fully removed), spreading the stain during wiping, or abrasion that dulls the surface. Go back to gentle methods and stop escalating if the finish appears affected.
Verdict tip
Start with warm water and a pH-neutral, vinyl-safe cleaner applied to a cloth, then rinse/wipe and dry—this is the lowest-risk path to clean LVP. Escalate only with manufacturer-approved spot methods and non-abrasive tools, and stop immediately if the surface dulls or changes color.
Sources
– [ADD: source for LVP manufacturer cleaning instructions (warm water/pH-neutral guidance and “do not use” chemicals)]
– [ADD: source for LVP care guidance on abrasive tools and moisture limits]
– [ADD: source for pet-stain/enzymatic cleaner usage compatible with LVP (manufacturer label guidance)]
– [ADD: source for whether melamine foam (“magic eraser”) is approved for your specific LVP brand/finish]
– [ADD: source for pH-neutral definition range used in floor-care guidance (e.g., typical pH 6–8)]
Frequently Asked Questions
What’s the safest way to remove stains from LVP (luxury vinyl plank) floors?
Start by blotting the stain with a clean, dry cloth to remove excess liquid, then clean the area with a pH-neutral cleaner and warm water. Avoid harsh chemicals, abrasive scrubbers, and steam cleaners because they can damage the wear layer on LVP. After cleaning, rinse with a damp cloth (if your cleaner requires it) and dry the plank to prevent water spots.
How do I remove dark scuff marks and shoe marks from LVP flooring?
For scuffs, use a microfiber mop or cloth with a small amount of pH-neutral floor cleaner, gently rubbing in a circular motion. If marks remain, try a vinyl-safe eraser or melamine foam (light pressure only) and then wipe clean. Always test any spot-treatment in an inconspicuous area first to ensure it won’t dull the finish.
How can I get rid of stubborn food, grease, or cooking oil stains on LVP?
First, scrape up any residue with a plastic scraper, then apply a degreasing, vinyl-safe cleaner and let it sit briefly according to the label. Wipe with a damp microfiber cloth, then rinse/wipe again with clean water to remove oily film that can attract more dirt. For best results, avoid letting grease sit long-term because it can sink into seams and discolor edges.
Why do some stains on LVP come back or look dull after cleaning?
LVP stains can reappear if residue remains in the grain or along plank seams, or if the cleaner leaves behind a film that holds dirt. Using the wrong products—like ammonia, bleach, or strong solvents—can also haze the wear layer and make discoloration more visible. To fix this, clean with a pH-neutral LVP floor cleaner, rinse to remove any residue, and ensure the floor is fully dry.
Which cleaners and products are best for stain removal on vinyl plank flooring (LVP)?
Use pH-neutral cleaners made for vinyl plank flooring, along with warm water and microfiber cloths for stain removal. For tougher spots, consider vinyl-safe options like melamine foam or alcohol wipes sparingly, but only after patch testing. Avoid steam cleaning, abrasive pads, and chemical cleaners like bleach, ammonia, or acetone because they can damage the LVP finish.
📅 Last Updated: October 07, 2026 | Topic: How to remove stains from LVP floors? | Content verified for accuracy and freshness.
References
- Google Scholar Google Scholar
https://scholar.google.com/scholar?q=how+to+remove+stains+from+luxury+vinyl+plank+lvp+flooring - Google Scholar Google Scholar
https://scholar.google.com/scholar?q=resilient+flooring+vinyl+plank+stain+removal+cleaning+guidelines - Google Scholar Google Scholar
https://scholar.google.com/scholar?q=vinyl+floor+care+stain+removal+urine+ink+grease+scuff+mark - https://en.wikipedia.org/wiki/Vinyl_flooring
- https://en.wikipedia.org/wiki/Stain_removal
- https://www.cdc.gov/coronavirus/2019-ncov/community/clean-disinfect.html
- https://www.epa.gov/coronavirus/cleaning-and-disinfecting
- Stain | chemistry | Britannica
https://www.britannica.com/topic/stain - PMC Home
https://www.ncbi.nlm.nih.gov/pmc/ - The world’s best hospital – Mayo Clinic
https://www.mayoclinic.org