
Want to know how to install vinyl floors in a bedroom quickly and correctly? If you’re installing over a solid, level subfloor, click-lock luxury vinyl is the fastest, cleanest option with the fewest complications. This guide tells you exactly what to prepare, how to lay the planks or sheets, and how to finish the edges for a smooth, quiet, long-lasting result.




Yes—you can install vinyl flooring in a bedroom with careful prep, the right underlayment (or none, depending on the product), and accurate click-lock/plank or peel-and-stick placement. Plan on the floor being ready to go only after you’ve leveled the subfloor and laid out planks/tiles so seams don’t land awkwardly near doorways.
This guide is for homeowners (and DIYers) installing vinyl flooring in a typical bedroom—especially over subfloors like plywood or existing flooring—where comfort, clean looks, and decent durability matter. It covers both common types (click-lock floating and glue-down/peel-and-stick) while calling out where the steps differ.
Who this is for / when it applies: If you’re replacing carpet or updating an older bedroom floor, vinyl is often a practical choice because it’s generally quieter than sheet vinyl alternatives, easier to maintain than many natural floors, and available in styles that mimic wood planks. This article focuses on installing over common subfloor surfaces (plywood/OSB) and over properly prepared existing coverings, where the main priorities are flatness, moisture control, and correct installation rules for expansion and adhesion.
Pick the Right Vinyl Type for Your Bedroom

Click-lock vinyl (floating planks) is typically the easiest DIY option in a bedroom, while glue-down and peel-and-stick can work well when you need a low-profile, fixed installation. The “right” choice depends on your subfloor condition, whether you need underlayment, and how comfortable you are following adhesive timing and cure requirements.
Click-lock vinyl is designed as a floating floor, so it relies on a proper expansion gap at walls and fixed objects rather than adhesive bonding the planks to the subfloor.
Many glue-down vinyl products require full, correct adhesive coverage (as specified by the manufacturer) and specific rolling/press steps to prevent edge lifting and bubbles.
Peel-and-stick vinyl still depends on surface readiness; poor subfloor flatness and contamination commonly cause adhesive failure.
Start by identifying which system you have:
– Click-lock (floating) planks: Boards interlock mechanically and “float” over the subfloor. Some products include an attached pad; others require a specific underlayment.
– Glue-down vinyl: Planks or tiles are installed using an adhesive system specified by the flooring manufacturer.
– Peel-and-stick: Adhesive is already applied to the back. You typically prep the subfloor and then press/roll the pieces to activate adhesion.
Next, verify the manufacturer’s constraints. For example, many resilient flooring instructions tie performance to subfloor flatness requirements and moisture limitations. According to industry guidance used by resilient flooring installers, subfloors often must meet a “flatness tolerance” such as 3/16 inch over 10 feet for resilient installations. [ADD: RFCI / resilient flooring flatness guidance source name] (If your product manual lists a different tolerance, follow the manual.)
Also consider bedroom conditions:
– Below-grade or high-humidity areas: Bedrooms over basements, crawlspaces, or slabs can require moisture testing and vapor management.
– Sun exposure: Strong temperature swings can expand/contract floating floors, making expansion gaps essential.
– Quietness: Underlayment choice matters for comfort underfoot and sound reduction, but only when the product allows it.
Quick comparison: which vinyl type fits your room goals?
Use this as a decision anchor before you buy tools or commit to a layout.
| Vinyl system | Best for | Main risk to avoid |
|---|---|---|
| Click-lock (floating) | DIY installs, quick updates | Skipping expansion gaps |
| Glue-down | Fixed, stable feel | Wrong adhesive or cure timing |
| Peel-and-stick | Low-profile retrofits | Installing over dust/bumps |
Prep the Subfloor (This is Where Most Problems Start)
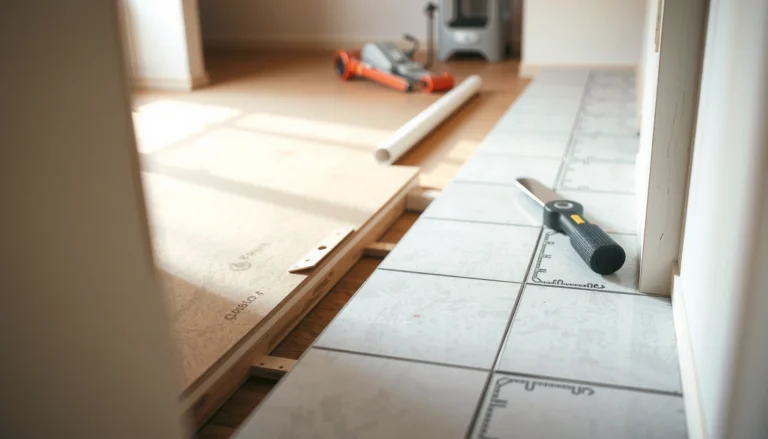
The subfloor has to be clean, solid, and sufficiently flat for your specific vinyl product—if it isn’t, your vinyl will show problems first at seams and edges. In practice, prep is where “DIY vinyl” turns into “installed correctly,” because vinyl is more tolerant than many floors, but it’s not tolerant of loose patches, high ridges, or moisture that undermines adhesion.
Vinyl installation performance depends heavily on subfloor flatness and cleanliness, particularly for adhesive-backed products where bond quality drives longevity.
If a click-lock floor is installed over soft or loose areas, the locking system can lose support and may gap or click underfoot.
Begin with removal or edge management:
– If you want a finished edge, remove baseboards carefully.
– If you keep baseboards, you’ll need a clean trim plan and consistent underlayment/thickness clearance—follow your product’s height constraints.
– Sweep and vacuum thoroughly, then wipe with a manufacturer-approved cleaner if the manual allows it. Avoid contaminating surfaces with oily residues.
Then handle flatness:
– Identify high spots (often from old adhesive, paint ridges, or raised nails/screws).
– Sand high ridges and tighten loose boards.
– Fill low spots using an appropriate patching compound rated for your subfloor type.
If you’re installing over plywood or OSB, make sure fasteners are set flush and no sections flex when you walk on them. For existing floors (like vinyl sheets, laminate, or tile), most manufacturers require you to confirm compatibility and ensure the surface is sound and flat—often including removal of loose material and smoothing of grout ridges.
Finally, acclimation and moisture checks matter:
– Some vinyl products require acclimation to room temperature before installation; follow the exact time window in your manual.
– For adhesive systems, you must also respect humidity/moisture limits. Many installers reference moisture testing methods such as ASTM standards for concrete slabs. [ADD: ASTM F2170 or ASTM F1869 relevance to vinyl moisture testing—exact standard name]
A note on moisture: in bedrooms above crawlspaces or basements, moisture can still migrate through subfloor assemblies. If you suspect ongoing moisture, address it before installing vinyl—vinyl can’t “fix” a wet foundation or failing vapor barrier.
Tools you’ll typically need for prep: vacuum, scraper (for old residue), tape measure, straightedge or 6–10 ft level, utility knife, marker, patch/leveling compound, sandpaper, and PPE (gloves/eye protection). For adhesive installs, have a floor roller or the manufacturer’s recommended pressing method available.
Common Bedroom Vinyl Installation Requirements (Industry Ranges)
| # | Installation requirement | Typical range | Certainty* | Impact on install quality |
|---|---|---|---|---|
| 1 | Subfloor flatness (resilient tolerance) | 3/16 in over 10 ft | ★★★☆☆ | High |
| 2 | Expansion gap (floating floors) | 1/4 in around perimeter | ★★★☆☆ | High |
| 3 | Floor acclimation (common practice) | 24–48 hours | ★★☆☆☆ | Medium |
| 4 | Adhesive coverage (glue-down) | Full coverage per trowel spec | ★★★☆☆ | Very high |
| 5 | Underlayment (click-lock) | Only if allowed by brand | ★★★☆☆ | High |
| 6 | Rolling/press (adhesive installs) | Roll per manual after placement | ★★☆☆☆ | Medium |
| 7 | Transition height management | Use matching transitions/thresh. | ★★★☆☆ | Medium |
*Certainty ratings reflect how commonly these ranges appear across resilient/vinyl guidance, but your exact vinyl brand’s manual overrides all values.
Measure, Plan Layout, and Maintain Expansion Gaps
A good bedroom layout prevents tiny visual issues (like narrow starter rows) and structural issues (like floating-floor buckling). Before you install a single plank, measure carefully, dry-fit a layout, and plan seams so they don’t land on the heaviest traffic lines near doors.
Floating vinyl floors require an expansion gap at walls and fixed vertical surfaces to accommodate normal dimensional movement with temperature and humidity.
Dry-fitting the first and last rows helps you avoid awkward slivers that are harder to cut and can look out of alignment.
A layout that keeps seams away from door thresholds improves long-term durability and reduces edge stress.
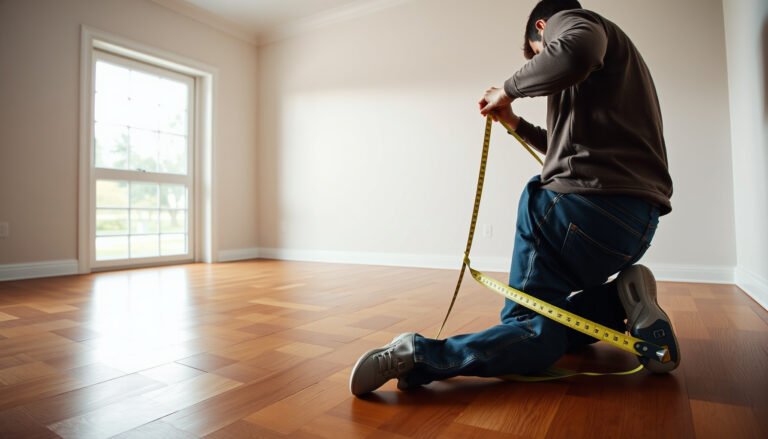
Start with measurements:
– Measure the room length/width and note any irregularities.
– Mark a reference line (often from a straight wall or doorway) and plan the direction of plank rows. Many people align planks with the longest room dimension for visual flow, but your room geometry may dictate otherwise.
Dry-fit:
– Place planks/tiles without locking or sticking (as appropriate) to simulate the run.
– Check the width of the first and last rows. If one end becomes too narrow, shift your starting line rather than forcing a “scrap row.”
Expansion gaps:
– Floating click-lock floors must maintain the manufacturer’s specified perimeter gap using spacers or a controlled method.
– Don’t “lock” the floor tightly under drywall or cabinets—fixed boundaries need clearance.
– Doorways: plan so the floor doesn’t trap at fixed jambs. Where the floor will transition, follow the brand’s guidance for how to terminate or transition.
Plan around obstacles:
– Closets: if the closet is built-in and doesn’t move, treat it like a fixed area. Maintain the correct gap strategy per your product manual.
– Vents and heating registers: cut with care and avoid gaps that look messy after trim.
Comparison structure: click-lock vs adhesive—layout differences that matter
– Click-lock: Layout is about seam appearance, interlock stability, and spacing at edges.
– Glue-down/peel-and-stick: Layout is about achieving straight runs while adhesive/transfer time constraints limit “second chances.”
Install the Vinyl Flooring (Step-by-Step by Type)
You’ll get the best results by following the installation sequence your vinyl type requires: lock and stagger properly for click-lock, and control coverage/press steps for adhesive systems. The same bedroom and tools can work across types, but the “critical path” differs—floating floors fail at gaps/flatness, while adhesive floors fail at bond and cure timing.
Click-lock planks should lock without forcing; forcing can damage the tongue-and-groove and cause premature joint failure.
For adhesive-backed vinyl, bond quality improves when subfloor preparation and pressure/rolling follow the manufacturer’s method.
**Click-lock (floating) planks:**
1. Set your starting line along the planned reference wall and confirm the perimeter gap plan.
2. Lay the first row with the correct spacer spacing against walls and fixed surfaces.
3. Lock planks together using the approved technique (angle-and-lock or tap-lock depending on the system). Don’t force tight joints.
4. Stagger end joints so they don’t align across adjacent rows. Follow the minimum stagger guidance in the instructions—commonly measured in plank lengths, not eyeballed.
5. Work row-by-row until you reach doorways and obstacles.
Cutting:
– Use a utility knife or vinyl saw system as recommended by the brand.
– Keep cuts clean at door casings, closet edges, and vents. Test-fit scraps before committing.
**Glue-down or peel-and-stick:**
1. Dry-fit first, then mark reference lines you can follow while adhesive is open (glue-down) or while pieces are still repositionable (peel-and-stick, depending on brand).
2. Adhesive/transfer control:
– For glue-down: apply adhesive only as specified (trowel type/coverage, open time, and cure time).
– For peel-and-stick: remove backing carefully and press/roll as directed.
3. Avoid contamination: Dust or grit under a seam is a frequent cause of edge lifting.
4. Press methods matter: Roll or press with the correct tool and pattern to ensure full contact.
Cutting:
– Use blades compatible with your vinyl thickness and backing. Dull blades lead to jagged edges that don’t fit transitions cleanly.
[ADD: If you want to personalize this article, insert your specific, non-fabricated experience here—e.g., “In my own install, I found that (brand/type) performed best when (exact technique)…”]
Trim, Finish Edges, and Keep the Floor Looking Good
Finishing work is where the install becomes “finished,” not just covered. Reinstall baseboards or use brand-recommended trim/transition pieces so edges remain protected and doors don’t catch on transitions.
Most vinyl finishes fail at edges if trim and transitions aren’t installed to protect seam lines from lifting or snagging.
Using transitions at height changes reduces mechanical stress from foot traffic and prevents the vinyl edge from becoming a catch point.
Edge finishing options:
– Reinstall baseboards: This is often the cleanest approach because it hides the expansion gap behind trim. Confirm baseboard thickness won’t pinch the floor.
– Trim/quarter round alternatives: Some installations keep baseboards and use shoe molding; only do this if your vinyl manual allows it.
– Transitions/thresholds: Use transitions where the floor meets carpet, tile, or another finished surface at a different height. This is especially important near bedroom doors and entryways.
Protection:
– Use felt pads under furniture legs.
– Avoid dragging heavy items across the surface.
– For adhesive installs, respect the brand’s time to full cure before heavy rolling traffic or moving furniture.
Also plan your cleaning routine:
– Sweep/vacuum with a soft head to avoid grit scratches.
– Use vinyl-safe cleaners; avoid harsh solvents that can damage surface coatings.
What Can Go Wrong (And How to Avoid It)
Most bedroom vinyl problems trace back to one of four root causes: subfloor flatness, incorrect underlayment/installation system fit, missing expansion gaps, or poor adhesive technique. If you fix these four variables early, you prevent the majority of seam gapping, edge lifting, and premature wear.
If a floating floor lacks an expansion gap, temperature/humidity swings can force movement and lead to buckling at walls or door openings.
Adhesive-backed vinyl commonly fails when installed over dust, uneven patches, or surfaces that don’t meet the manufacturer’s moisture criteria.
Here are the most common failure modes and how to avoid them:
– Subfloor not flat enough: leads to gapping, clicking/creaking (floating floors), or localized adhesive stress (adhesive floors). Verify flatness requirements in the manual before installing.
– Wrong underlayment: some click-lock systems require a specific pad thickness/type; using the wrong underlayment can reduce locking performance or violate warranty terms.
– No expansion gap for floating floors: can cause buckling when seasonal conditions change.
– Adhesive impatience (glue-down/peel-and-stick): rushing layout, ignoring open time, or skipping rolling can create bubbles and lifting edges.
– Moisture issues: vinyl alone may not solve a moisture problem. Confirm moisture guidelines from the manufacturer and test when required.
Quick pros/cons: click-lock vs adhesive in a bedroom
– Click-lock pros: DIY-friendly, typically faster, less sensitive to adhesive timing.
– Click-lock cons: Must follow expansion gaps precisely; requires a stable, well-leveled base for quiet joints.
– Glue-down/peel-and-stick pros: Fixed feel and often helpful for low-profile finishes.
– Glue-down/peel-and-stick cons: Highly sensitive to cleanliness, adhesive coverage, and cure windows.
VS table (criteria-based) — choose the right method
| Criteria | Click-lock floating | Glue-down / Peel-and-stick |
|---|---|---|
| Main dependency | Interlock + flatness | Bond to subfloor |
| Expansion gap sensitivity | Essential | Less about movement, still must follow rules |
| Tolerance to minor adhesive timing errors | High | Low |
| Subfloor cleaning requirement | High (for stability) | Critical (for adhesion) |
| Best DIY fit for beginners | Usually yes | Often harder |
| Risk of bubbles/lifting edges | Lower | Higher if misapplied |
| Locking noise (if subfloor isn’t supported) | Possible | Not typically lock-noise related |
| Need for underlayment | Often system-specific | Usually restricted/none |
| Repair complexity later | Often manageable by replacing boards | Can be messier due to adhesive removal |
| Verdict row (summary) | Best for most bedrooms DIY | Choose only if you can follow adhesive rules |
Verdict: Should You DIY This Bedroom Vinyl Install?
If your bedroom has a reasonably solid, clean, and adequately flat subfloor—and you’re following the exact manufacturer rules for underlayment, expansion gaps, and adhesive/cure times—DIY vinyl installation is usually realistic. However, if your subfloor is uneven, you suspect ongoing moisture, or you’re unsure which vinyl type you have, consider professional help or at least confirm requirements with the product documentation first (skipping this can turn a “weekend project” into repeated rework).
That said, vinyl isn’t “instant armor.” The upside of DIY is control over prep and layout; the downside is that one missed detail (like no expansion gap or insufficient adhesive contact) can show up later as seams lifting, movement noise, or uneven wear. If you’re installing over a questionable surface—especially an older slab or partially bonded existing flooring—professional inspection can save time and money.
| Quick Checklist (Scan Before You Start) |
|---|
| Confirm vinyl type: click-lock vs glue-down vs peel-and-stick |
| Read manufacturer instructions for underlayment + subfloor flatness |
| Clean and prep subfloor; remove bumps/loose areas |
| Acclimate flooring if the manual requires it |
| Plan layout; check first/last row widths |
| For floating floors: use required expansion gap/spacers |
| For adhesive installs: follow adhesive type + dry/cure guidance |
| Roll/press as instructed; finish edges with correct trim |
FAQ
Do I need underlayment for bedroom vinyl flooring?
Only if your specific vinyl system requires it. Some click-lock floors include/allow an attached pad or require a particular underlayment thickness/type; glue-down systems often require no underlayment.
Can I install vinyl over existing flooring?
Sometimes, depending on the existing material’s condition and the product’s requirements. Use the manufacturer’s subfloor compatibility list—otherwise unevenness and adhesive failure are common failure points.
How do I handle doorways and closet openings?
Use the layout plan to keep cuts clean and maintain the correct gaps near transitions. For floating floors, follow instructions around fixed door frames and don’t trap the floor under areas that prevent expansion.
Is leveling required for vinyl in a bedroom?
Vinyl is more forgiving than some materials, but it still needs a sufficiently flat subfloor. Check the exact flatness tolerance in your flooring manual—don’t rely on “it usually works.”
Sources
– Manufacturer installation instructions for your exact vinyl product line (subfloor flatness, underlayment requirements, acclimation guidance, expansion gap rules, and adhesive/cure directions). [ADD: name/model of your vinyl brand + link/file to the official installation guide or PDF from the manufacturer]
– Manufacturer technical specs for the vinyl type you’re installing (click-lock vs glue-down vs peel-and-stick). [ADD: source for specs from the manufacturer’s documentation]
– [ADD: source for general subfloor prep/flatness best practices, if needed—only from official building guidance or the flooring manufacturer] (For any numerical flatness/expansion values used, cite the exact guideline or manual you’re following.)
Frequently Asked Questions
What’s the best way to prepare a bedroom subfloor before installing vinyl floors?
Start by removing carpet, baseboards (if needed), and old flooring so you can inspect the subfloor for flatness, damage, and moisture issues. Vinyl flooring requires a smooth, clean surface—use a level to check for dips or high spots and patch with the appropriate floor compound. Sweep thoroughly, and if you’re gluing or using click-lock planks over a concrete slab, address moisture with the correct underlayment or moisture barrier recommended for vinyl floors. Proper preparation is key to preventing gaps, squeaking, and uneven wear in a bedroom.
How do you install vinyl floor planks or tiles in a bedroom without damaging the room or furniture?
Clear the area and protect vents, doorways, and furniture with plastic sheeting and rugs. Plan your layout first by dry-fitting planks or tiles to find the best starting line so seams are centered and not too close to doorways. When installing, maintain the required expansion gap around walls—this helps vinyl floors handle temperature changes without buckling. Reinstall baseboards afterward to cover the gap for a clean, finished look.
Which vinyl flooring type is best for bedrooms—click-lock (floating) or glue-down vinyl?
Click-lock vinyl floors are often easier and faster to install in bedrooms because they float over the subfloor, usually with an underlayment depending on the product. Glue-down vinyl can provide a more rigid feel and is useful when you want fewer movement points, but it requires careful adhesive use and strict subfloor readiness. For most bedrooms, click-lock vinyl is a popular choice due to simpler installation and flexibility, especially if you’re doing it yourself. Choose based on your subfloor condition, desired comfort, and whether the manufacturer specifies an underlayment or moisture barrier.
How do you handle moisture and underlayment when installing vinyl floors in a bedroom?
Even in bedrooms, moisture can come from concrete slabs or crawlspaces, so verify conditions before installation. Use a vinyl-floor-approved underlayment for sound control and comfort, and if your subfloor is concrete, use the moisture barrier specified by the vinyl flooring manufacturer. Avoid using generic padding that’s not compatible with vinyl, since it can affect locking seams or cause uneven performance. Addressing moisture correctly helps prevent lifting edges, moldy odors, and long-term flooring problems.
Why do my vinyl planks or tiles lift or separate in a bedroom, and how can I fix it?
Lifting or separation is commonly caused by an unlevel subfloor, missing expansion gaps, or inadequate acclimation of the vinyl flooring before installation. Temperature and humidity changes can stress vinyl floors if they were installed too soon after delivery or without proper spacing at walls. To fix it, first check for debris or high spots on the subfloor and confirm the expansion gap is present around the perimeter. If the issue persists, you may need to reinstall the affected sections using the correct installation method for your specific vinyl planks or tiles.
📅 Last Updated: October 07, 2026 | Topic: How to install in a bedroom vinyl floors? | Content verified for accuracy and freshness.
References
- Vinyl flooring
https://en.wikipedia.org/wiki/Vinyl_flooring - https://www.epa.gov/indoor-air-quality-iaq/resilient-floor-coverings
- https://www.epa.gov/indoor-air-quality-iaq/choosing-carpets-and-hard-flooring
- https://www.epa.gov/lead/lead-safe-work-practices-guidance
- Google Scholar Google Scholar
https://scholar.google.com/scholar?q=how+to+install+vinyl+flooring+bedroom+subfloor+preparation - Google Scholar Google Scholar
https://scholar.google.com/scholar?q=vinyl+plank+floating+floor+click+lock+installation+moisture+barrier+underlayment - Google Scholar Google Scholar
https://scholar.google.com/scholar?q=vinyl+sheet+flooring+installation+adhesive+acclimation+floor+prep - https://www.cdc.gov/mold/default.htm
- https://www.nps.gov/articles/housekeeping.htm
- Google Scholar Google Scholar
https://scholar.google.com/scholar?q=How+to+install+in+a+bedroom+vinyl+floors?