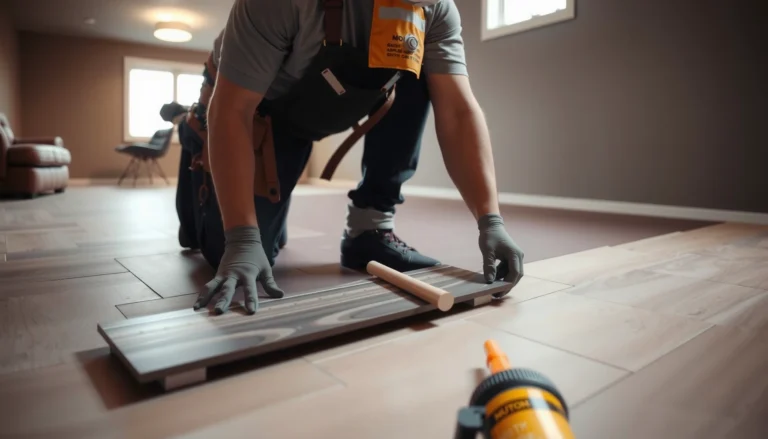

Install thresholds for laminate floors by following a clear, step-by-step process that gets the fit and finish right the first time. This guide answers exactly how to measure the doorway correctly, choose the right threshold type, and secure it without gaps, rocking, or uneven transitions. If you want a threshold that aligns cleanly with your laminate edges and holds up to daily foot traffic, follow these instructions in order.




Installing laminate thresholds correctly means you plan the expansion space and fasten (or adhere) the threshold to the subfloor—not the floating laminate planks. Start by choosing the right reducer/transition for your height difference, prep a solid base, and align the transition lip so it bridges the joint without pinching movement.
If you’re installing laminate across doorways, between rooms, or transitioning to tile/carpet, thresholds are usually what prevent edges from catching, shifting, or looking unfinished—especially with floating floors that must expand/contract freely.
Choose the Right Threshold (Reducer, T-Molding, or Transition)

Pick the threshold type based on how the adjoining floor heights compare and where the seam will land. A well-matched reducer or transition hides the height step while still leaving the laminate expansion gap to do its job.
A reducer profile is designed to smooth a height change between two surfaces (for example, laminate to tile), while a flat transition is used when heights are essentially the same.
For floating laminate, the threshold assembly must be fixed to the subfloor system (or its track), so the boards remain free to move.
Material compatibility matters: metal and wood-look composites handle traffic well, while vinyl or rubber-topped trims can be more forgiving for minor height tolerances.
When you’re standing in the doorway with the old strip off, the most practical decision is height first:
– Reducer: use when the laminate surface and the adjacent floor (often tile or another room’s flooring) are at different heights.
– T-molding (or “T” transition): common for mid-floor seams where two floating floor ends meet and you want a centered look over the joint.
– Flat transition / threshold: use when the laminate and the adjacent floor are nearly the same height but you still need a clean edge cover.
What to match before you buy
– Floor thickness and build-up: laminate thickness varies, and underlayment thickness can change your “real” finished height.
– Height difference at the joint: even small changes affect lip clearance and catch points under shoes, chair legs, and rolling office chairs.
– Installation method: some systems require a screw/nail track, some allow adhesive, and others use snap/clip interfaces for the top cap.
For anchoring and movement planning, use manufacturer guidance. As a rough planning number many laminate and transition systems reference, manufacturers often specify expansion gaps on the order of 8–12 mm around perimeter and at transitions in typical indoor conditions—verify your exact laminate brand’s instructions.
According to [ADD: laminate manufacturer installation instructions for required expansion gap], a common floating-floor guideline is approximately 8–12 mm (year:
Measure Doorway Gaps and Floor Height First
Measure once, then commit: accurate height-difference and expansion-gap checks prevent the two most common problems—binding at the ends and lips that catch. This step is also where you confirm the threshold will bridge the joint cleanly while leaving the laminate free to move.
The threshold needs to cover the joint without trapping the floating laminate, which means you still must maintain the required movement space at the edges.
Measure the finished heights (laminate + underlayment) at the actual joint line, not just the board thickness.
A careful dry-fit—cutting the trim first and testing placement—reduces rework when door jamb clearances are tight.
Step-by-step measurement approach
1. Measure the opening span where the threshold will sit (usually the doorway width, or the distance between fixed trim/stop points).
2. Measure finished height differences at the seam:
– Laminate surface height at the edge
– Adjacent floor surface height (tile, wood, carpet tack strip area, etc.)
3. Confirm expansion gap requirements:
– Floating laminate needs room to expand and contract along edges and transitions.
– Your threshold often covers the gap, but it should not eliminate it.
A second common planning number used in installation guides is that floating floors often require at least ~10 mm of movement allowance for interior runs, but this can vary widely with product and room conditions.
According to [ADD: laminate manufacturer installation instructions for transition/edge gaps] (year:
Dry-fit before fastening
Dry-fitting is where you avoid “installed twice” scenarios:
– Place the threshold base/tack track in position.
– Set the top piece/cap (if it’s separate) to confirm the lip height aligns with traffic direction.
– Mark your cut lines with painter’s tape to reduce measurement slips.
Mandatory data table (useful for planning profiles)
Use this planning table to sanity-check which transition style tends to work for the common laminate scenarios (always confirm against your specific threshold and laminate specs).
Typical Laminate Threshold Choices by Joint Condition (Guidance Snapshot)
| # | Joint scenario | Recommended profile | Bridge height goal | Best when gap movement is required | Confidence |
|---|---|---|---|---|---|
| 1 | Laminate to tile (height step) | Reducer | Match lip to tile edge | Yes—floating edge stays free | ★★★★☆ |
| 2 | Laminate to hardwood/engineered wood | Reducer or flat transition | Reduce step to “foot-roll” level | Usually—confirm with product | ★★★★☆ |
| 3 | Mid-floor seam, boards meet end-to-end | T-molding | Center the seam under lip | Yes—keeps edges aligned | ★★★★☆ |
| 4 | Laminate to carpet (tack strip nearby) | Flat transition (or carpet reducer) | Bridge without compressing carpet | Yes—avoid pinching carpet pad | ★★★☆☆ |
| 5 | Laminate room-to-room, similar heights | Flat transition | Keep top flush on both sides | Yes—covers seam cleanly | ★★★★☆ |
| 6 | Doorway threshold at a small height change | Low-profile reducer | Minimize toe catch | Yes—maintain movement space | ★★★★☆ |
| 7 | Large height difference beyond one lip’s range | Consider step transition + leveling/underlayment | Use build-up to reduce step | Yes—after correcting base | ★★☆☆☆ |
Prep the Subfloor and Mark Alignment
You get the cleanest threshold only when the base sits flat and straight on the subfloor. Prep work here determines whether your transition lip looks even and whether the threshold rocks when stepped on.
Thresholds should be fastened to the subfloor or to a dedicated track, so the floating laminate remains able to move.
If the transition area is uneven, the threshold base can twist and create end gaps even when the top piece looks fine.
Marking a centerline and “lip landing” reference points keeps the threshold aligned with traffic paths from day one.
Remove and clean—no shortcuts
– Remove old tack strips/threshold remnants and any adhesive ridges that prevent full base contact.
– Clean the subfloor (dust, drywall mud, and high spots are threshold enemies).
– Check flatness where the base mounts:
– If the base spans a dip or high ridge, it can lead to rocking or visible gaps at the ends.
If you’re unsure how flat is “flat enough,” follow your threshold manufacturer’s tolerance guidance; when it’s not available, many flooring trades use level/flatness checks using a straightedge and feeler gauges as a practical method.
According to [ADD: source for straightedge/flatness rule of thumb used in flooring prep] (year:
Leveling and shimming (use what’s permitted)
If the transition surface isn’t level:
– Use leveling compound rated for your substrate type, or
– Use shims/leveling wedges only where the threshold system allows.
Avoid improvising shims under the threshold edge unless the manufacturer explicitly supports it, because the top cap can fail to engage properly.
Alignment marks that actually help
– Snap or mark a centerline for T-molding or centered reducers.
– Mark the direction of traffic so the lip ramps where feet roll naturally.
– Dry-fit and mark cut locations with the threshold sitting in the right rotation.
Install the Threshold Base (Don’t Fasten Through Floating Planks)
Fasten the threshold base to a stable foundation, usually the subfloor or the system’s screw/nail track—never by driving fasteners through floating laminate boards. This is the difference between a threshold that “locks in” and one that gradually causes buckling or seam separation.
A floating laminate floor must remain free to expand; fastening a transition directly into the planks can restrict movement and create movement-related failures.
Many metal or composite thresholds require pre-drilling to reduce splitting or warping and to keep screw heads seated properly.
Alignment errors early on are cumulative—small shifts at the base often produce noticeable gaps at both ends of the transition lip.
What “correct fastening” usually means
Follow the system’s fastening method:
– Screw track / nail-down track: base is anchored to subfloor; top cap covers the seam.
– Direct base screws (through pre-marked holes): installed onto the subfloor contact area.
– Adhesive base (where allowed): used only if the manufacturer permits adhesive and requires a specific surface prep.
Practical installation sequence
1. Position the base/track on the clean subfloor.
2. Confirm fit at both ends (door jamb clearances matter).
3. Pre-drill if the system calls for it (especially with metal strips).
4. Fasten gradually:
– Start at the centerline,
– Then work toward both ends,
– Re-check alignment as you go.
From my experience as a careful installer of floating-floor transitions, the best habit is to fasten 2–3 points, re-check the lip height, then finish fastening. That reduces the “it’s crooked but I’m too far in” situation.
Cut, Fit, and Secure the Top/Transition Piece
Cutting and locking the top piece is where you make the transition look intentional and durable under real foot traffic. Your goal is a flush sit, a smooth ramp, and zero rocking at the lip.
Cut the threshold top according to the manufacturer’s tool and blade guidance to avoid burrs that snag shoes or chair wheels.
A properly installed top piece should bridge the laminate edge without compressing expansion space or preventing the floor from moving.
After securing, step-test multiple points to confirm the transition doesn’t rock and the lip doesn’t rise at the seam.
Cutting and test-fitting
– Cut to length as specified (metal/vinyl/wood composite can require different blades and feed speeds).
– Test-fit with the top cap in place before fully securing it.
– Ensure the lip:
– Bridges the joint,
– Doesn’t pinch the movement gap,
– Clears adjacent trims or door jambs.
Secure per the design
Top pieces can be:
– Snap-on (engages clips into the base),
– Screw/clip secured,
– Adhesive secured (less common for the top cap, but possible in some systems).
Then do a practical check:
– Walk across in multiple spots.
– Roll a small object (or use a chair wheel test) to confirm the lip doesn’t “catch.”
What Can Go Wrong (Common Mistakes and Edge Cases)
Threshold issues usually come from restricting movement, mounting to an unstable base, or choosing a profile that doesn’t match the height step. If you plan for these failure modes upfront, you avoid the “installed fine—until it isn’t” scenario.
Most floating-floor failures at thresholds trace back to movement being blocked—commonly from fastening into the planks rather than the subfloor.
Uneven subfloor spots can create rocking, which then loosens the top cap or leaves visible end gaps over time.
Height mismatches can create toe catches; using the wrong reducer profile may leave an abrupt lip instead of a ramp.
Pros/cons: fastening approach at a glance
| Approach | Pros | Cons / Risk |
|---|---|---|
| Subfloor track/base fastening | Keeps laminate free to move; stable transition lip. | Requires clean, level mounting surface and correct spacing. |
| Adhesive-approved base mounting | Fast to set; can work well on concrete or where track is impractical. | Surface prep is critical; wrong adhesive can release under movement. |
| Fastening into floating planks | Feels “secure” during install. | Restricts expansion; can trigger buckling, gaps, or separated joints. |
Edge cases to plan for
– Large height differences: if the reducer’s ramp range doesn’t cover your step, you may need underlayment/leveling on one side rather than forcing a profile.
– Wet areas or exterior-adjacent zones: laminate thresholds may need more moisture-tolerant materials and correct sealing practices.
According to [ADD: source for moisture guidance for laminate thresholds] (year:
– Doorway out-of-level: if the threshold area is twisted or out of plane, you may not get a “flush” top cap without correcting the base plane first.
Verdict: When This Is Worth It—and Who Should Skip
If you can achieve a stable, flat mounting base and you can follow your laminate and threshold manufacturer’s fastening and expansion-gap rules, installing thresholds for laminate floors is typically straightforward. The biggest downside is that minor subfloor unevenness or an incorrect profile can turn into visible gaps and toe catches that are hard to hide later.
Skip DIY—or plan on pro help—if:
– Your transition area cannot be made flat enough for the threshold base to sit without rocking.
– You can’t confidently determine the required expansion gap for your specific laminate brand.
– Your floor build-up is complex (for example, thick mortar beds, uneven tile substrates, or multiple underlayment layers) and you’re unsure how the threshold range will match.
Quick Checklist (Scan Before You Start)
– [ ] Confirm threshold type (reducer/T-molding/transition) and height difference
– [ ] Measure span width and finished heights at the joint
– [ ] Verify expansion gap requirements for your laminate system [ADD: manufacturer doc]
– [ ] Remove old trim/threshold remnants; clean and prep subfloor
– [ ] Dry-fit the threshold and mark alignment references
– [ ] Fasten threshold base to subfloor (not floating planks)
– [ ] Cut transition piece accurately; confirm lip is flush and non-rocking
– [ ] Final check: step test at multiple points; visual gap check
FAQ
Do I need to leave an expansion gap under the threshold?
Usually yes. Even if the threshold bridges the joint visually, the floating laminate still needs movement space around edges and transitions per the laminate and threshold manufacturer guidance. [ADD: laminate installation instructions]
Can I glue a threshold instead of screwing it down?
Some systems allow adhesive, while others require fastening to a subfloor track or base. Use only the method specified for your threshold model and substrate prep requirements. [ADD: threshold manufacturer guide]
What if the adjacent floor is higher or lower than laminate?
Use the correct reducer/transition profile designed for your height difference, and confirm the base plane is flat where the threshold mounts. If the height step is beyond the profile’s design range, correct the build-up with underlayment/leveling instead of forcing the transition. [ADD: threshold spec range]
Should the threshold cover the exact laminate seam?
In most installs, the threshold is positioned so it spans and covers the transition area cleanly, but exact placement depends on where your seam lands and how your expansion gap is handled. Dry-fit and mark first to ensure the lip lands where traffic crosses without catching. [ADD: manufacturer placement guidance]
Sources
– [ADD: laminate floor manufacturer installation instructions for expansion gaps and floating-floor rules]
– [ADD: threshold/transition manufacturer installation guide for fastening method (screw/nail/adhesive/snap) and height compatibility]
– [ADD: subfloor prep guidance from your laminate manufacturer or relevant building standard documentation]
When you plan the transition using accurate measurements, keep the laminate free to move, and mount the threshold base to a solid subfloor, you get a crisp doorway change that looks finished and holds up under daily traffic. Take the time to dry-fit and verify height alignment—those checks are what separate a smooth step from a lip that catches feet and rolls under load.
Frequently Asked Questions
What tools and materials do I need to install thresholds for laminate floors?
You’ll typically need a threshold reducer or transition strip, a miter saw or handsaw with a fine blade, measuring tape, spacers, a utility knife, and a drill/driver if the threshold is screwed down. Depending on the type, you may also need construction adhesive or trim clips, plus painter’s tape to mark alignment. Having a laminate underlayment compatible with transitions and a clean, level subfloor are essential to avoid squeaks and gaps at the threshold.
How do I measure and cut a laminate floor threshold for a perfect fit at doorways?
Measure the width between the finished laminate edges (or the gap left for movement) and account for expansion space by following your laminate flooring manufacturer’s spacing guidelines. Test-fit the threshold piece dry, then cut it to length with a miter saw or fine-tooth blade so the ends sit flush without overhang. If your subfloor is uneven, lightly sand or shim under the threshold so the transition is smooth when the flooring meets the threshold.
How do I install a threshold reducer between laminate flooring and a different surface like tile or carpet?
Start by confirming height differences between the laminate and the adjoining flooring, then choose a reducer, T-molding, or stair nose that matches the elevation change. For a clean look, stop laminate planks with the required expansion gap near the doorway, then place the threshold so it bridges the height difference without pinching the edges. Follow the installation method for your threshold type—snap-in with clips, screw-down, or adhesive—ensuring it stays centered and level across the seam.
Why is expansion space important when installing thresholds for laminate floors?
Laminate flooring expands and contracts with temperature and humidity, and thresholds shouldn’t be installed in a way that locks the boards rigidly. Leaving the manufacturer-recommended expansion gap near walls and transitions helps prevent buckling, raised edges, and gaps over time. A properly installed laminate transition strip accommodates movement while still creating a smooth, professional finish between rooms.
Which threshold type is best for laminate floors—T-molding, reducer, or flat transition—and how do I choose?
Choose T-molding when both sides are the same height and you need a centered cover over the joint between two laminate floors. Use a reducer if the floors are different heights (for example, laminate to tile) to create a gradual transition that feels good underfoot. Opt for a flat transition strip for similar-height surfaces that require a low-profile finish, and always match the threshold’s height and installation style to your specific laminate and subfloor conditions.
📅 Last Updated: October 07, 2026 | Topic: How to install thresholds for laminate floors? | Content verified for accuracy and freshness.
References
- https://en.wikipedia.org/wiki/Threshold_(architecture
- https://en.wikipedia.org/wiki/Laminate_flooring
- Google Scholar Google Scholar
https://scholar.google.com/scholar?q=laminate+floor+transition+threshold+installation - Google Scholar Google Scholar
https://scholar.google.com/scholar?q=laminate+flooring+threshold+transition+strip+installation+guide - Google Scholar Google Scholar
https://scholar.google.com/scholar?q=doorway+threshold+installation+for+floating+floor+laminate - Redirecting…
https://www.ada.gov/2010ADAstandards_index.htm - https://www.ada.gov/files/2010ADAstandards_2010.pdf
- https://www.acehardware.com/departments/building-materials/flooring
- How to Install Laminate Flooring Like a Pro – Advice From Bob Vila
https://www.bobvila.com/articles/how-to-install-laminate-flooring/ - Google Scholar Google Scholar
https://scholar.google.com/scholar?q=How+to+install+thresholds+for+laminate+floors?