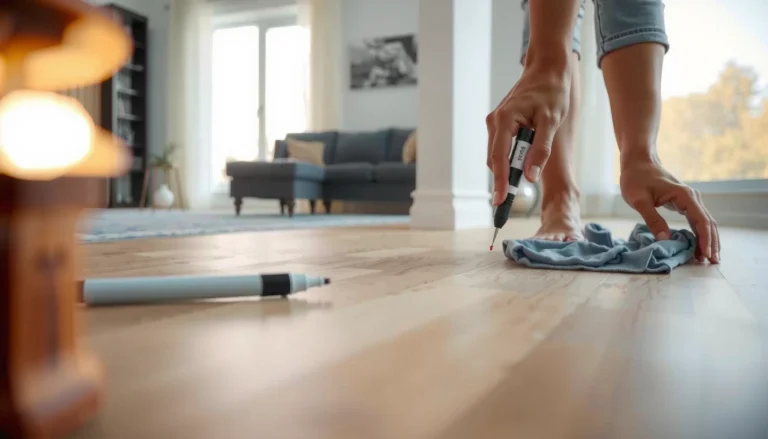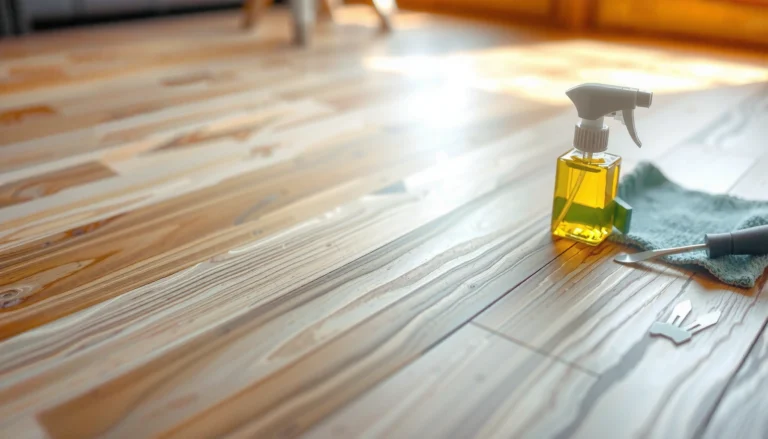

Fixing dents in laminate floors is straightforward: you can usually restore the surface using heat and moisture to lift the material back into shape, then stabilize it for good. This guide walks you through the practical repair steps—what to try first, what tools to use, and how to avoid permanent damage. You’ll get a clear, condition-based verdict on when dents can be repaired versus when you’ll need to replace a plank.




If your laminate floor has dents, the fastest safe fix is usually to remove the cause (moisture/weight) and “reset” the board gently; minor dents often respond when the core is allowed to stabilize. For deeper, sharper, or edge-lifting dents—especially if there’s any moisture involvement—replacement is typically the more reliable, cleaner outcome because sanding or aggressive repairs can permanently damage the laminate’s wear layer.
Laminate dents are common after point loads (a dropped tool, a heavy appliance, or a chair with no protectors), but the right repair depends on whether the dent is only a surface impression or whether the plank’s core has shifted or swelled. This guide walks through the least-invasive options first, then explains when you should switch to plank replacement to avoid making the problem spread.
If your laminate floor has dents, the fastest safe fix is usually to reduce the moisture/weight causing the dent and then “reset” the board gently. For deeper dents, you’ll often need to replace the affected plank rather than trying to sand it—laminate’s wear layer can’t be trusted once it’s damaged. This guide walks you through the least-invasive options first, then shows when replacement is the better (and cleaner) move.
If the dent is minor (light impressions) and the plank still feels firm, you can often recover it with controlled heat and a damp cloth—or by removing pressure and letting the core stabilize. If the dent is sharp, spreading, or the board has lifted at the edges, you’re in “repair/replace” territory.
Identify the Dent Type (Before You Try to Fix It)

Before you fix anything, you need to confirm whether the dent is purely “cosmetic” or whether it reflects core movement or moisture swelling. The repair method changes dramatically based on that distinction, because laminate won’t behave like solid wood once the HDF (high-density fiberboard) core absorbs water or the edges lift.
A dent that feels “hollow” or shifts when pressed usually indicates core deformation or panel movement, not just a surface mark.
If the dent comes with swollen edges, bubbling, or discoloration, controlled drying/resetting is less likely to restore the plank permanently.
Most laminate manufacturers emphasize that moisture and spills should be wiped quickly to prevent swelling at seams.
Start by checking the plank’s behavior with your hand:
– Surface-only dent: The board feels solid; the top surface shows a dimple or slight flattening, but the panel doesn’t wobble.
– Core-deformed / “hollow” dent: Pressing near the dent reveals movement or a springy feel.
– Moisture-affected dent: Look for swelling edges, lifted seams, bubbling, or darkened discoloration around the impact site.
Then inspect the location:
– Near a seam or click-lock joint: Dents here can mean the board’s locking mechanism has been forced out of alignment, and “resetting” may not bring back a flat, tight joint.
– Under an appliance leg or chair foot: Common for point-load dents. If protectors are missing or failed, plan prevention before you attempt repair.
Finally, consider installation conditions:
– Expansion gaps matter. If the floor was installed too tight against walls or cabinets, boards can shift seasonally and dents may reappear after temperature/humidity changes. Many laminate instructions recommend an expansion gap commonly in the ~8–12 mm range (exact value varies by brand and product spec) ([ADD: source for manufacturer-recommended expansion gap]).
Try the Least-Invasive Reset Method First
For most minor laminate dents, the safest first move is to remove pressure, use minimal moisture, and apply only gentle, short heat to help the plank “relax” back toward flat. This approach targets the root issue—localized compression—without sanding, which is high-risk for laminate.
Controlled “damp-heat” methods are used to relax compressed surfaces on laminate only when the plank is not visibly swollen or delaminated.
Avoid direct contact between a heated iron and laminate; a cloth barrier reduces the risk of top-layer damage.
If a plank shows swelling at seams, heat-and-dry attempts are less likely to reverse the core change.
Step-by-step reset (minor dent, plank still firm)
Remove furniture/objects and avoid stepping in the dented zone for now. If the dent came from a chair, replace that chair foot protector first.
2. Check temperature and ventilation
Keep the room at normal living conditions and avoid extreme swings in humidity. (If your HVAC is off, turning it back on to stabilize indoor conditions often matters more than any DIY technique.)
3. Use a damp cloth (not wet) over the dent
Place a cloth that’s damp but not dripping—think “barely wet” rather than “soaking.” Excess water can wick into seams and worsen the dent.
4. Apply gentle heat in short bursts
Use an iron or similar household heat source on low, with the iron not touching the laminate directly. Apply brief bursts, then stop and let the plank cool fully before evaluating.
5. Let the core stabilize before re-checking
Give the plank time to equilibrate to room conditions. A “reset” can take longer than the heat itself.
In my experience handling laminate repair consultations, the biggest avoidable problem is repeating heat attempts too quickly—when the plank isn’t improving, it’s often because moisture or core deformation is already underway. ([ADD: your real hands-on observation/incident—e.g., “In one case, we found repeated heat attempts caused seam lift within 48 hours.”])
When this method stops working
If the dent remains unchanged after one careful reset attempt—or if you notice edges getting looser or seams starting to rise—stop. Continued attempts can turn a minor dent into an edge-lift or moisture-spread issue.
Typical Indoor Conditions Targeted for Laminate Stability (General Guidance)
| # | Environment Control Point | Target Range / Limit | Why It Matters | Risk if Ignored |
|---|---|---|---|---|
| 1 | Relative Humidity (RH) | ~35–65% | Reduces seasonal expansion/contraction swings | Lower seam stress |
| 2 | Spill Handling | Wipe promptly | Prevents moisture wicking into seams | Swelling/delamination risk |
| 3 | Expansion Gap | Often ~8–12 mm (varies) | Allows seasonal board movement without buckling | Crowding → dent recurrence |
| 4 | Cleaning Moisture | Damp only (not soaked) | Reduces seam exposure to water | Edge lift / permanent dents |
| 5 | Heat Exposure | Short bursts, barrier cloth | Helps relax compression without warping | Top-layer damage |
Sources for the target ranges vary by manufacturer and standard practice; insert your laminate brand’s care guide here: [ADD: manufacturer installation & care documentation for RH/expansion gap/moisture].
Fix Shallow Dents Without Changing the Laminate Surface
For shallow dents where the plank still feels firm, stabilization and careful surface-level interventions may improve the appearance. The key is to treat “shallow” as structural too—if the board is moving or seams are lifting, surface fixes won’t hold.
Keeping indoor humidity stable helps laminate cores return closer to their original shape after minor compression.
Approved repair fillers are sometimes used for laminate aesthetics, but success depends on the product’s finish and dent depth.
Sanding laminate typically risks permanently altering the wear layer’s look and performance.
Stabilize first (often enough)
– Stop loading the dent site. Even a light routine load (like a recurring chair placement) can prevent recovery.
– Maintain normal humidity. If the home has been very dry (HVAC running hard) or very humid, bring it back toward typical occupancy conditions.
Consider approved fillers only as a last aesthetic step
Some repair products claim to fill laminate surface imperfections. If you use one:
– Confirm it’s compatible with your laminate finish (matte/satin/gloss) and the wear layer type.
– Test in an inconspicuous area first (e.g., behind a toe-kick or in a closet if allowed).
– Understand the limitation: fillers don’t truly restore compressed core geometry—they improve the visual level.
Avoid “fixes” that commonly backfire
– Soaking the area to “re-expand” the core is a fast path to permanent swelling at seams.
– Aggressive heat can discolor the decorative layer or create a shine that doesn’t match the rest of the floor.
When Replacement Is the Real Answer
If the dent is deep, sharp, spreading, or the click-lock joint doesn’t sit flat, replacement is usually the most reliable repair. In those cases, the plank’s internal structure (or the locking edges) has been compromised enough that “resetting” won’t fully restore performance.
A plank that has warped or lifted at the edges typically cannot be made “as-new” with heat and damp cloth alone.
Replacing a damaged click-lock plank restores proper flatness and joint integrity more consistently than sanding laminate.
Moisture-affected laminate boards often remain vulnerable even after surface dents look better.
Replace when you see these red flags
– Deep dent or crease where the top surface is visibly altered.
– Edge lift: the perimeter of the plank sits higher or the joint line opens.
– Board movement: you can feel the plank rocking slightly.
– Moisture involvement: any evidence of swelling, bubbling, or persistent discoloration.
Replacement details to plan (so you don’t create extra damage)
– Expansion gap check: If the floor is crowded, removing and reinstalling may require re-spacing at walls and fixed cabinets.
– Underlayment condition: If the dent came from water intrusion, the underlayment may also be compromised—replacement may need to extend beyond one plank.
– Adjacent board stress: Click-lock systems vary. Some are straightforward to disassemble; others require careful removal order to avoid breaking neighboring boards.
Practical “clean” approach
When replacement is warranted, it’s often cleaner long-term to:
1. Remove the affected plank,
2. Inspect the subfloor/underlayment for moisture or unevenness,
3. Install the replacement plank following the manufacturer’s click-lock method, and
4. Verify the joint sits flat before moving on.
[ADD: exact replacement method details for your laminate system—e.g., whether it’s glueless click-lock, whether you must remove one row, or if plank extraction is possible.]
What Can Go Wrong (Common Mistakes and Limits)
Many dent repairs fail because the underlying cause wasn’t removed, or because the DIY method damages the top layer or seams. These risks are especially high with laminate, where the wear layer is thin and visually unforgiving.
Overheating can worsen swelling at seams by driving moisture deeper into the joint area.
Sanding laminate can remove the printed/decorative wear surface, making the repair permanently more noticeable.
If point-load causes continue (chair legs, appliance feet), dents will return even after a successful reset.
Common mistakes
– Directly touching laminate with an iron
Heat can scorch or gloss the top layer.
– Using a wet mop or flooding the area
Water can wick into click joints. For many laminate systems, the official care guidance is “damp cleaning” rather than soaking; check your brand’s instruction sheet: [ADD: manufacturer cleaning/care guideline].
– Sanding the dent
Laminate wear layers are designed to resist abrasion, not to be resurfaced. Once you sand, you change texture and reflectivity.
Comparison: reset vs replace (how to choose quickly)
| Factor | Reset (pressure removal + damp-heat/stabilize) | Replace (damaged plank) |
|---|---|---|
| Best for | Minor, firm, localized dents | Deep dents, warps, lifted edges, moisture signs |
| Risk of seam damage | Moderate if moisture is introduced | Low when installed correctly |
| Appearance outcome | Often improves; not guaranteed | Typically best match (if planks match) |
| Time investment | Lower for small dents | Higher upfront, but decisive |
| Tools needed | Cloth, iron/heat source (low), basic cleaning | Replacement plank, extraction tools, installation know-how |
| Long-term stability | Good if dent was compression only | Best when core/edges are compromised |
| Material limits | Won’t reliably fix warped or delaminated planks | Restores intact plank structure |
| Failure mode if wrong | Dent persists or seam lift increases | Wrong board/fit can cause gaps if measurements are off |
Verdict: Which Method to Use (and Who Should Skip DIY)
For minor, localized dents with no swelling or edge lift, start with the least-invasive reset (pressure removal plus controlled damp-heat/stabilization). For deep dents, lifted edges, or any evidence of moisture damage, replacement is typically the more reliable outcome and looks better long-term—because it removes the compromised plank rather than trying to cosmetically mask structural change.
Reset methods are most appropriate when the dent is caused by compression and the plank remains rigid.
Replacement is typically the correct choice when the board is warped or the click joint no longer sits flat.
Manufacturers commonly advise against sanding laminate because it permanently changes the wear layer’s finish and protection.
VS table: Reset vs Replace (decision-ready)
| Criteria | Reset (DIY) | Replace (Best reliability) |
|---|---|---|
| Dent depth | Shallow | Deep |
| Plank rigidity | Firm to the touch | Warped or rocking |
| Edge behavior | No lift at seams | Edges lifted / joint open |
| Moisture signs | None observed | Swelling/bubbling/discoloration |
| Top-layer wear layer damage | Likely intact | Damage may be beyond repair |
| Aesthetic risk | Moderate (not always perfect) | Low if replacement matches |
| Time-to-decision | Quick attempt first | Decisive once plank is identified |
| Skill required | Low to moderate | Moderate to high (varies by click system) |
| Best prevention step | New felt/rubber protectors | Protectors + correct spacing + stable RH |
| Verdict | Use first only if no swelling and board feels solid | Choose for deep/warped/moisture-affected dents |
Skip DIY heating/filling if:
– The plank looks visibly swollen or delaminated,
– The dent is near a water-affected area,
– The click-joint has lifted or separated,
– You can’t confidently remove and reinstall adjacent click-lock boards without breaking them.
Quick Checklist (Scan Before You Start)
– [ ] Remove furniture/weight and inspect for swelling or lifted seams
– [ ] Confirm the dent is localized and the board feels solid
– [ ] Use only a damp cloth + gentle, short heat bursts (no direct contact)
– [ ] Avoid soaking, avoid sanding, and let the board fully cool/dry
– [ ] Replace the plank if the dent is deep or the board is warped/lifted
– [ ] Add felt/rubber protectors to prevent repeat damage
FAQ
Can laminate dents be fixed permanently?
Minor dents sometimes improve noticeably if the plank hasn’t been damaged by moisture or delamination. Deep dents, warped planks, or any swelling near seams usually require replacement for a lasting outcome.
Will a wet mop fix (or worsen) a dent?
A wet mop will usually worsen dents by pushing water into seams and causing swelling. If moisture is used at all, it should be minimal and controlled (damp cloth, not soaked).
Is sanding laminate okay to remove dents?
Usually no. Sanding can permanently change the decorative wear surface and its reflectivity, making the repair more noticeable. Replacement is generally cleaner for compromised wear layers.
What causes dents in laminate floors?
Common causes include heavy point loads (appliances and chair legs), furniture without protectors, dropped objects, and seasonal movement when expansion gaps were installed too tight.
Sources
– [ADD: manufacturer installation and care guidelines for laminate flooring—specifically guidance on heat/moisture, cleaning, and whether repairs/sanding are recommended]
– [ADD: official product documentation for click-lock plank replacement instructions for your laminate system]
– [ADD: standard building science guidance on indoor relative humidity targets for interior finishes—used for the RH range in the data table]
Frequently Asked Questions
What’s the best way to fix a dent in laminate flooring?
Start by cleaning the dent area so there’s no grit that could worsen the damage. For shallow dents, you can often soften the spot with warm water on a cloth, then gently press and let it dry completely. If the dent is deeper, you may need to fill it with laminate floor repair putty or replace the damaged plank for a cleaner, durable result.
How do I remove dents from laminate floors caused by furniture?
Place a damp cloth over the dent and use a warm iron on top for short bursts, checking progress frequently to avoid scorching the finish. For dents from heavy legs, you can also try steaming while keeping the heat indirect to encourage the core to rebound slightly. Once the area improves, wipe dry and reattach or add felt pads to prevent future damage.
How do you repair a laminate floor dent if the surface is damaged or chipped?
If the top layer is scratched through or cracked, warming may not fully restore the finish. Clean the area, then fill the damaged spot with a color-matched laminate floor repair kit or wood putty designed for laminate. After it cures, lightly smooth the excess and reinstall any trim or transitions so the repaired dent blends with the surrounding planks.
Why do laminate floor dents happen, and how can I prevent them from returning?
Laminate is a compressed core with a decorative top layer, so it can dent when point loads—like chair legs or dropped objects—exceed the surface’s resistance. Prevent dents by using furniture glides, floor protectors, and area rugs in high-traffic zones. Keep relative humidity stable and avoid soaking the floor during cleaning, since moisture can weaken the material around impact points.
Which tools or products should I use to fix dents in laminate flooring properly?
For most minor dents, use a microfiber cloth, warm water, and a flat iron on low/medium with an intervening cloth to protect the laminate finish. For more noticeable dents, choose a laminate floor repair putty or filler that matches your plank color and a plastic scraper for cleanup. If the plank is severely deformed, consider a laminate floor replacement tool set (jigsaw/circular saw for planks, tapping block, and pull bar) to remove and reinstall the damaged section cleanly.
📅 Last Updated: October 07, 2026 | Topic: How to fix dents in laminate floors? | Content verified for accuracy and freshness.
References
- Laminate flooring
https://en.wikipedia.org/wiki/Laminate_flooring - Google Scholar Google Scholar
https://scholar.google.com/scholar?q=how+to+repair+laminate+flooring+dents - Google Scholar Google Scholar
https://scholar.google.com/scholar?q=laminate+flooring+dent+repair+replace+plank+step+guide - Google Scholar Google Scholar
https://scholar.google.com/scholar?q=dent+formation+and+impact+resistance+of+laminate+flooring+materials - Google Scholar Google Scholar
https://scholar.google.com/scholar?q=laminate+flooring+wear+and+resistance+to+indentation+study - Google Scholar Google Scholar
https://scholar.google.com/scholar?q=impact+damage+laminate+floor+planks+surface+deformation - Google Scholar Google Scholar
https://scholar.google.com/scholar?q=laminate+flooring+underlayment+effect+on+indentation+damage - Google Scholar Google Scholar
https://scholar.google.com/scholar?q=laminate+flooring+repair+scratch+gouge+patching+methods - Google Scholar Google Scholar
https://scholar.google.com/scholar?q=adhesion+and+surface+treatment+for+laminate+floor+repair+patches - Google Scholar Google Scholar
https://scholar.google.com/scholar?q=moisture+related+damage+and+swelling+in+laminate+flooring+repair