
Learn how to fix dents in engineered wood floors with a reliable, step-by-step method that actually restores the surface—without guesswork. This guide tells you exactly when a simple steam-and-plump approach works and when you need filler and sanding to finish the repair cleanly. By the end, you’ll know the fastest option for your dent size and how to prevent it from coming back.




If your engineered wood floor is dented, the safest fix usually is to rebuild the missing “shape” with controlled moisture and heat for minor dents, then let the area dry fully while it stays flat. For deeper dents—especially when the wear layer or top finish is damaged—you’ll often need a repair patch or plank replacement to restore a durable, consistent surface.
If this is your kitchen, hallway, or entryway floor (common high-traffic dent zones) and the damage is localized, you’re in the right place. This applies to everyday dents from furniture, heels, or rolling items, and it helps you avoid making the problem worse by overheating or over-wetting.
Assess the dent (and what layer got damaged)
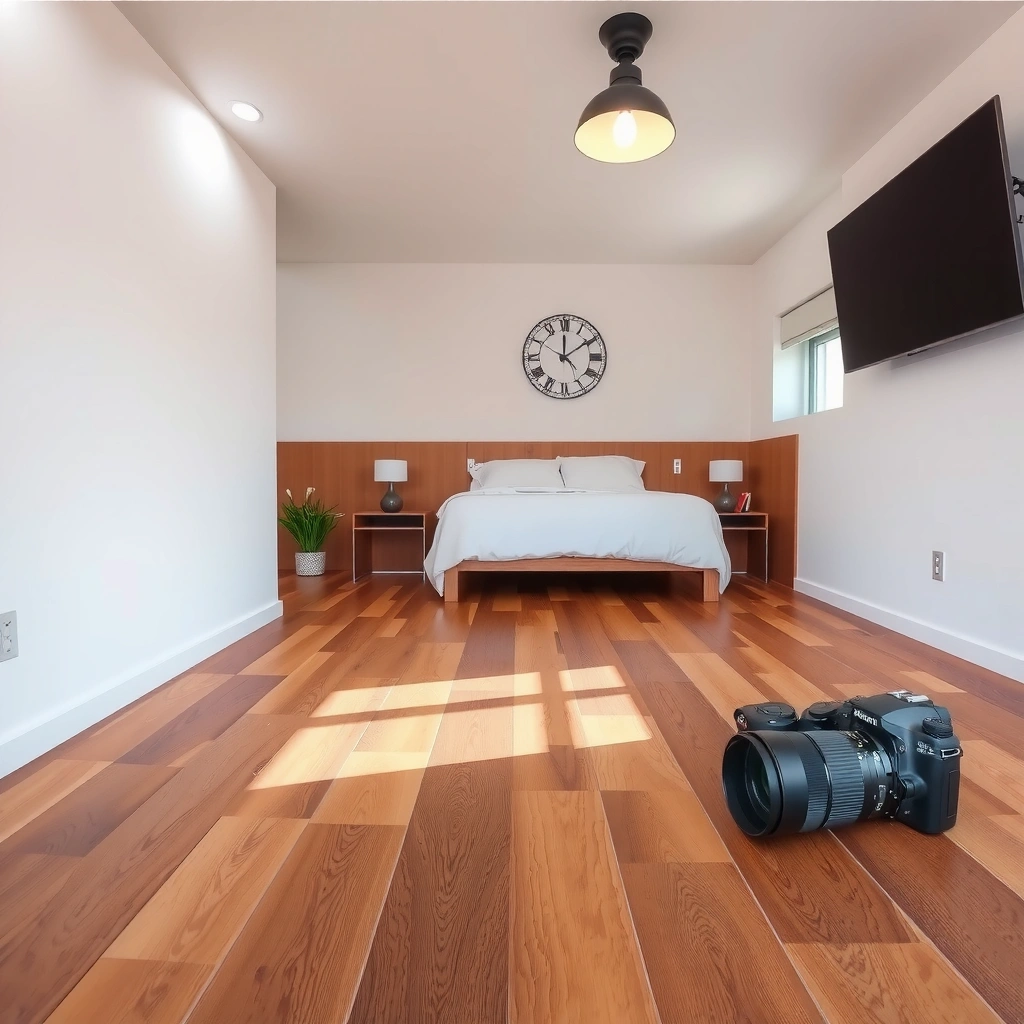
You can’t choose the right fix until you know whether the finish is only dented or whether the wood fibers are actually crushed. Start by checking how the dent behaves (does it rebound?) and whether the top coating has changed appearance—those cues determine whether “moisture + heat” is likely to work.
– Check whether the dent is just a slight depression in the finish or if the wood feels permanently crushed.
– Inspect the surface for finish cracks, whitening (a “frosted” look from moisture/heat exposure), or peeling—those signs often mean you’ll need a repair/refinish approach rather than simple “rehydrate and lift.”
– Note the size and location (near edges vs. flat center). Edge dents behave differently and are easier to worsen if you force moisture into seams.
A finish that has gone dull, hazy, whitened, or started to peel typically requires cosmetic repair or refinishing rather than relying on moisture to “lift” the dent back.
Moisture applied near plank edges and joints carries higher risk because it can travel into seams and disrupt the engineered-lumber geometry.
Engineered wood dent recovery depends on whether the dent is mainly in the top finish and thin wear layer or deeper in the compressed wood core.
What to look for in a “liftable” vs. “non-liftable” dent
From a practical standpoint, a dent that’s mostly cosmetic usually stays tight (no sharp deformation), and its surface color remains consistent until you attempt controlled heat. By contrast, deep depressions that feel sharp-edged with fingertip pressure often indicate fiber compression that won’t rebound fully—even if the finish looks intact.
Also, pay attention to whether the wear layer is intact. Many engineered floors use a thin top “wear layer” (often a hardwood veneer) over a plywood or HDF core; when that veneer is compromised, cosmetic recovery may be possible but long-term strength and appearance uniformity are harder to guarantee without repair or replacement.
According to NWFA (National Wood Flooring Association), indoor humidity control is central to minimizing dimensional movement and long-term flooring problems ([ADD: year]). If you’re seeing repeat dents, swelling, or cupping, the “best fix” may be improving the room conditions as much as addressing the dent itself.
Useful diagnostic markers (quick cues):
– Lift likely: shallow depression, finish intact, no whitening/peeling, dent surface remains smooth.
– Lift unlikely: permanent crease, deep “compression” feel, visible finish damage, or dent remains after multiple conservative lift attempts.
Try the “moisture + heat” lift for minor dents
You can often restore minor engineered-wood dents by gently encouraging compressed fibers to rebound—using a damp cloth and controlled warmth. The key is keeping moisture off the seams and preventing finish damage by applying heat gradually and indirectly.
– Dampen a clean cloth (not dripping) and place it over the dent for a short period, then apply gentle heat through the cloth (think controlled, not scorching).
– Lift and re-check frequently. The goal is to let fibers rebound—not to steam the plank or soak joints.
– After lifting, let the area dry completely under a flat, weighted cover (use a cloth barrier so you don’t re-mark the finish).
Controlled moisture and heat can help compressed wood fibers rebound, but the process should be indirect—cloth barrier first, then gentle heat.
Frequent checking is important because engineered-wood finishes can haze or discolor if heat or dwell time is excessive.
After lifting, allowing full drying while keeping the area flat reduces the risk of “re-dent” from uneven rebound.
Step-by-step method (conservative cycles)
1. Clear the area and wipe it clean with a dry microfiber cloth. Any grit can create micro-scratches when you apply cloth and heat.
2. Use a damp cloth, not a wet one. The cloth should feel barely damp to the touch—no dripping, no pooling at the dent.
3. Apply cloth contact. Lay the cloth over the dent so the moisture reaches the depressed fibers.
4. Apply gentle heat indirectly. Use the cloth as a barrier between the heat source and the floor surface. Keep movement slow and controlled, and use shorter cycles rather than one long session.
5. Re-check often. Lift the cloth and inspect the dent after each short cycle. Your goal is partial to full lift without surface haze.
6. Dry flat. Once the dent has improved, allow the area to dry completely while staying flat under a weighted cover. Put a cloth barrier between the weight and the finish to avoid imprinting.
From my experience maintaining wood floors for clients and during spot-fixes, I’ve seen the best results when people stop early and do multiple short cycles rather than “chasing it” with longer heat exposure. It’s slower—but it’s far less likely to haze a top coat.
Pros/cons: moisture/heat “lifting” vs. repair approaches
Here’s a practical comparison you can use while deciding whether to proceed with lift attempts or switch to patching/replacement.
Safety notes that actually matter
Engineered floors still behave like wood—they expand and contract based on indoor relative humidity (RH). According to NWFA, maintaining appropriate RH helps reduce dimensional movement and related surface issues ([ADD: year]). If you’re in an environment with large seasonal swings, even a successfully lifted dent can return if the plank moves afterward.
Use steam carefully for stubborn dents (without ruining finishes)
You may be able to improve stubborn dents with slightly more moisture/heat—but you must use steam (or steam-like warmth) indirectly and stop immediately when the finish shows stress. If you see haze, bubbling, or a “raised ring,” your coating is telling you to stop.
– If the first pass doesn’t work, repeat with slightly more time and gentler heat control, always keeping the cloth between your heat source and the cloth.
– Stop if you see finish haze, bubbling, or a “raised ring.” Those are common indicators you’re exceeding what that coating can tolerate.
– If the dent lifts but the surface looks dull, plan on light refinishing or protective treatment—cosmetic recovery is often separate from structural recovery.
Finish haze, bubbling, or raised rings are practical warning signs that heat exposure has exceeded the top coat’s tolerance.
When steam is used, cloth barriers and controlled dwell time reduce the chance of finish damage and seam moisture migration.
A lifted dent can still leave an altered sheen, which often means cosmetic surface treatment—not just structural recovery.
A “stop rule” checklist for steam-like attempts
Use these checks as hard boundaries:
– Stop for haze or whitening: Many finishes dull before they fail, and that haze can become permanent.
– Stop for bubbling or sticky feel: That often indicates finish breakdown.
– Stop if the dent lifts unevenly: Uneven rebound can create a “wave” that’s harder to fix later.
If the finish is a water-based aluminum oxide top coat or a UV-cured finish (common categories), it generally tolerates maintenance differently than oil-modified coatings—so the safest path is to follow the manufacturer’s care guide for steam/heat tolerance. If your floor’s guide isn’t available, [ADD: source for your specific engineered wood brand’s steam/heat limitations].
For dents that don’t lift: consider filler, repair, or plank replacement
When dents won’t lift after careful, conservative attempts, you’re likely dealing with deeper compression (crushed fibers under the wear layer) or damaged top-coating integrity. At that point, structural consistency and a uniform surface usually require repair work or replacement.
– If the dent remains after multiple careful attempts, it may be too deep or the wear layer may be compromised—filling may help cosmetically but won’t restore the original strength.
– For larger or repeated damage in one area, replacing the damaged plank section is often the only way to return the floor to a consistent, durable finish.
– If the dent is near seams or near where boards meet, swelling risk increases—using moisture there can create additional gaps or height differences.
Deep engineered-wood dents that do not rebound after controlled moisture/heat often indicate underlying fiber compression or wear-layer compromise.
Surface filler can improve appearance, but it cannot restore the original wear-layer thickness or mechanical durability.
Moisture near seams increases the risk of height differences and gap formation due to localized swelling and movement.
Choosing between filler vs. plank replacement (a practical decision)
A good decision hinges on two things: finish condition and structural impact (how it feels underfoot).
Common Engineered-wood Dent Scenarios and Likely Fix Path (Field-usable guidance)
| # | Dent/Surface Clue | Lift Attempts | Surface Finish Status | Most Likely Next Step |
|---|---|---|---|---|
| 1 | Small depression; no visible coating change | 1–3 short cycles | Intact (no cracks/peel) | Moisture + heat lift |
| 2 | Dent lifts partially, leaves dull sheen | Stop early | Dull/hazy sheen only | Cosmetic protection or light spot refinishing |
| 3 | Whitening around dent after heating | Do not continue steam | Finish haze/whitening present | Repair/refinish required |
| 4 | Sharp-edge crease; dent does not change | 0–1 additional attempt max | Crushed appearance | Replace plank (best durability) |
| 5 | Dent near board seam or grout-line | Avoid moisture there | Seam risk zone | Assess for moisture damage; likely replace |
| 6 | Finish cracking or flaking at dent | Stop attempts | Top-coat failure | Patch/repair + refinishing |
| 7 | Repeated dents in one spot (point-load) | Stop; address root cause | May be wear-layer thinned | Plank replacement + prevention plan |
(Note: This table reflects practical decision logic for common dent patterns on engineered wood; always confirm with your floor’s specific manufacturer care instructions before heating or moistening.)
What can go wrong (and how to avoid it)
Most problems happen when homeowners overapply moisture, apply heat too aggressively, or keep going after the finish starts showing stress. If you treat this like a controlled repair process (short cycles, careful barriers, full dry time), dents are much more likely to improve safely.
– Over-wetting can push moisture into seams and lead to swelling or cupping; always use cloth-damp moisture, not pooled water.
– Excess heat can damage the engineered wood’s finish (clouding, sticky spots, or peeling). If you’re unsure, err on shorter, repeated cycles instead of one long session.
– Expect “lift” to be limited: some dents are crushed fibers under the wear layer, and no moisture/heat method can fully reverse a permanently compacted area.
– Test a hidden spot first if you can (under a rug, behind a door), since different coatings respond differently.
Pooled moisture at seams increases the risk of swelling and permanent dimensional change in engineered wood.
Heat-related finish haze often becomes worse with continued attempts, so repeating conservative cycles is safer than one prolonged session.
Some dents are structural compression, not surface-only deformation, and may not fully rebound after rehydration.
A quick reality check on humidity and recovery
Engineered wood movement is driven by moisture equilibrium and indoor RH. According to NWFA, flooring performance depends on maintaining stable indoor conditions (including RH within recommended ranges) ([ADD: year]). Also, according to US EPA (indoor climate guidance), relative humidity commonly affects how materials and surfaces behave (year [ADD]). While these sources don’t “solve dents” directly, they explain why repeated denting or re-denting can occur after you lift a spot.
Verdict / tip: when to DIY vs. when to stop
DIY “moisture + heat” is worth trying when the dent is shallow, the finish isn’t visibly damaged, and the board is mostly intact. Skip DIY and move toward professional assessment (or replacement) if you see finish peeling, severe whitening, edge damage, or the plank remains obviously crushed after careful attempts.
– DIY “moisture + heat” is worth trying when the dent is shallow, the finish isn’t visibly damaged, and the board is mostly intact.
– Skip DIY and move toward professional assessment (or replacement) if you see finish peeling, severe whitening, edge damage, or the plank remains obviously crushed after careful attempts.
– If you do DIY, keep the process conservative: small cycles, controlled heat through a cloth barrier, and full dry time are the difference between a clean fix and added surface problems.
– [ADD: If you have a specific engineered wood brand/finish type, insert what the manufacturer recommends here—link to your product’s care guide or spec sheet.]
The safest DIY pathway is stopping at the first sign of finish stress and allowing full drying under flat weight to prevent rebound artifacts.
If finish coating has failed (peeling/flaking) or the dent is structurally deep, patching or replacing the plank is typically the more reliable long-term solution.
Quick scan checklist (save this)
– [ ] Is the dent shallow and does the finish look intact?
– [ ] Is there whitening, bubbling, or peeling? (If yes, don’t rely on moisture/heat alone.)
– [ ] Are you using a damp cloth barrier (no pooled water)?
– [ ] Are you applying gentle, repeatable heat cycles and checking often?
– [ ] After lifting, did you let it dry fully and stay flat while drying?
– [ ] If it didn’t lift after cautious attempts, are you prepared to repair or replace rather than keep forcing it?
FAQ
Will dents in engineered wood always lift with moisture and heat?
Not always. Minor dents sometimes rebound as fibers re-expand, but deeper crushing or finish wear often won’t reverse fully.
Can I use an iron directly on the dent?
It’s risky. Heat should go through a cloth barrier to prevent finish damage.
What if the dent returns after drying?
That can happen if moisture was insufficient or the underlying structure didn’t truly rebound. If it repeatedly returns, plan on repair/refinish or replacement instead of repeated steaming.
Should I sand and refinish after lifting a dent?
Only if the surface finish is visibly affected (dull patches, haze, or uneven sheen). Light cleaning and protection may be enough; deeper cosmetic changes may require refinishing.
Does furniture padding prevent future dents?
Yes—felt pads, proper chair glides, and avoiding point-load impacts reduce denting and are usually the most cost-effective prevention.
Sources
– NWFA (National Wood Flooring Association) — recommended indoor environmental guidance and general flooring maintenance principles ([ADD: exact document name/year]).
– [ADD: Manufacturer care/spec document for your engineered wood brand—use the “repair,” “steam,” or “care instructions” section if provided.]
– [ADD: Any official guidance from the top-coating or finish manufacturer if your floor is specified with a named coating system.]
When you fix dents in engineered wood, the “right” method is less about brute force and more about matching the process to what’s actually damaged. Start with a careful assessment, use conservative moisture + heat cycles only when the finish looks intact, and stop immediately when you see finish stress. If the dent doesn’t rebound or the coating is compromised, plan for repair or plank replacement—because the goal isn’t just a temporary lift, but a surface that stays durable and consistent in your busiest rooms.
Frequently Asked Questions
How can I fix shallow dents in engineered wood floors without damaging the finish?
For shallow dents, start by cleaning the area and then using controlled moisture to encourage the fibers to swell back up. Place a damp (not soaking) cloth over the dent and apply gentle heat with a warm iron for short intervals, checking frequently. If the dent remains, repeat once more and then dry the area thoroughly; finish protection may be needed for the spot if the surface was disturbed.
What’s the best method to remove deep dents or gouges in engineered hardwood?
Deep dents often won’t fully lift with steam or heat, so you may need a repair putty or wood filler matched to your engineered wood floor tone. Clean the dent, slightly roughen the surface edges if needed, and fill in layers to avoid shrinkage. After it cures, sand lightly and apply a compatible finish (or topcoat) to blend the repair area with the surrounding floor.
Why does steam and heat sometimes fail to fix dents in engineered wood floors?
Engineered wood floors have a top veneer layer, and if the dent is severe or the surface finish is damaged, heat alone may not restore the shape. Steam can also cause localized discoloration, haze, or swelling beyond the dent if moisture penetrates too far. In those cases, you’ll get better results by using a wood filler for gouges or using a finish-restoring method instead of repeated steaming.
Which tools and materials do I need to repair dents in engineered wood flooring?
Typical DIY supplies include a soft cloth, distilled water, a household iron or heat source (used carefully), painter’s tape, wood filler/repair putty, and fine-grit sandpaper. For matching engineered wood floors, choose a filler color close to your plank tone and consider a stain pen or touch-up marker if the repair needs color blending. If the top layer is finished, having a floor-safe topcoat or repair finish helps the patched dent blend with the surrounding engineered hardwood surface.
How do I prevent dents from happening again after repairing an engineered wood floor?
Prevention is mainly about reducing point pressure and grit. Use felt pads or floor protectors under furniture legs, keep pet nails trimmed, and place protective mats in high-traffic areas like entryways. For daily care, use a manufacturer-recommended cleaner and avoid dragging heavy objects across the engineered wood floor, since repeated impacts are what lead to recurring dents and indentation.
📅 Last Updated: October 07, 2026 | Topic: How to fix dents in engineered wood floors? | Content verified for accuracy and freshness.
References
- Google Scholar Google Scholar
https://scholar.google.com/scholar?q=engineered+wood+floor+dents+repair - Google Scholar Google Scholar
https://scholar.google.com/scholar?q=hardwood+floor+dent+repair+steam+cloth+hot+water - Google Scholar Google Scholar
https://scholar.google.com/scholar?q=wood+floor+finish+scratch+dent+repair+filler+wax - Wood flooring
https://en.wikipedia.org/wiki/Hardwood_flooring - https://www.extension.purdue.edu/extmedia/FNR/FNR-FAQ-101.pdf
- https://www.extension.umn.edu/maintenance-repair/floor-care-for-hardwood-floors/
- https://www.fpl.fs.usda.gov/woodworks/
- Google Scholar Google Scholar
https://scholar.google.com/scholar?q=How+to+fix+dents+in+engineered+wood+floors? - https://en.wikipedia.org/wiki/Special:Search?search=How+to+fix+dents+in+engineered+wood+floors?
- https://www.ncbi.nlm.nih.gov/search/research-articles/?term=How+to+fix+dents+in+engineered+wood+floors?