

Want to waterproof sheet vinyl floors the right way? This step-by-step guide walks you through sealing seams, protecting edges, and preventing water from wicking beneath the vinyl for a durable, leak-resistant finish. Follow these exact steps and you’ll know precisely what to do before, during, and after installation to stop moisture problems at the source.


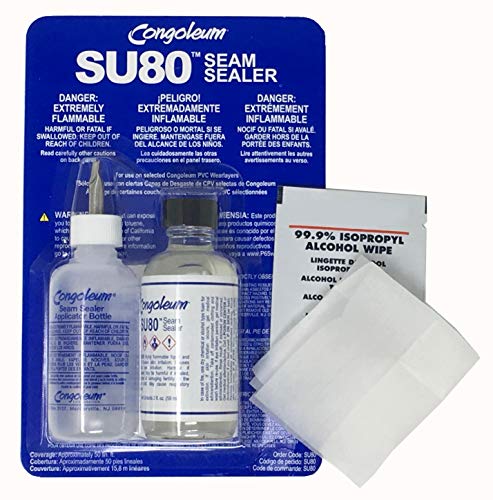
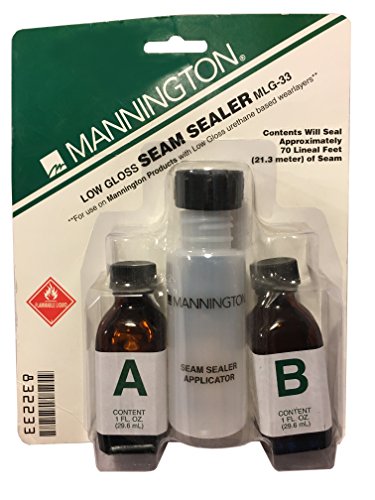
Waterproofing sheet vinyl floors is mainly about sealing seams, edges, and perimeter gaps—not about “soaking” the vinyl surface. Clean and dry the subfloor first, then seal the joints using the manufacturer-approved seam system and perimeter/transition sealing so water can’t travel underneath.
If you’re dealing with a bathroom, laundry room, kitchen spill-prone areas, or you want extra protection around wet zones, this guide is for you. It’s especially relevant when your sheet vinyl has seams, exposed edges, or a perimeter gap where moisture can creep beneath.
Check your sheet vinyl type and water risk level
Sheet vinyl can be water-tolerant, but waterproofing requirements depend on the product system (vinyl plus any underlayment). Your best outcome comes from matching your sealing approach to both (1) the flooring’s installation instructions and (2) the specific places water is most likely to migrate.
Most sheet vinyl manufacturer instructions differentiate between “resistant to splashes” and “suitable for wet areas,” and those terms are not the same as true waterproof installation.
Water intrusion on resilient flooring typically follows paths at seams, perimeter edges, inside corners, and around penetrations—not the vinyl field.
If the underlayment is present, compatibility with seam/edge sealing matters because some underlayments can be damaged by aggressive sealants.
Start by confirming what you actually have: sheet vinyl thickness, whether it’s backed/unbacked, and whether a membrane/underlayment is part of the system. Then do a quick “water path” assessment of the room. In a bathroom, common pathways include the tub/shower boundary (even when water doesn’t fully reach the floor), the toilet base area, and the route from sinks to drains. In kitchens and laundry rooms, water migration often comes from wet mopping, accidental spills, or condensation.
To keep this practical, decide whether you need:
– Splash/spill protection (most common): prevent water from getting under the vinyl during typical household incidents.
– Wet-zone containment: more intensive sealing at perimeter gaps, transitions, and joints when the floor regularly faces wet wiping or intermittent standing moisture.
A useful mindset here is to treat waterproofing as a joints-and-edges job. If you seal only the center of the sheet but leave seam lines or perimeter gaps untreated, you’re likely leaving water an easy route underneath.
What to look for in the specs
1. Seam sealing method: Some products require a specific seam tape + adhesive/sealer system.
2. Edge/perimeter guidance: Instructions may specify caulk type, whether to use a flexible sealant, and where not to apply sealers.
3. Moisture condition limits for the subfloor prior to installation.
For measurable context, subfloor moisture limits vary by manufacturer and test method. According to ASTM F2170, in-situ RH testing is used for slabs; many flooring systems apply manufacturer-specific maximum RH thresholds (exact thresholds must come from your flooring/subfloor product specs) (ASTM F2170). If you don’t yet know your subfloor readings, plan for this step before sealing.
Prep for waterproofing: subfloor flat, clean, and dry
Preparation determines whether your seam and edge sealants bond and stay bonded. Before you seal anything, make sure the subfloor is flat, contaminant-free, and dry enough for both your vinyl system and your chosen sealant.
Resilient flooring seam/edge sealants require a clean, sound substrate for adhesion; dirt, dust, and waxy residues can cause peeling or gaps.
If the subfloor isn’t flat, seams and perimeter edges can separate slightly, creating micro-paths for water.
Sealing over an already-damp substrate can trap moisture under the vinyl, increasing the risk of odor, mold growth, or adhesive failure (per manufacturer and moisture-testing guidance).
From a workflow standpoint, prep is where you reduce risk the most:
– Remove contaminants: Old adhesive residue, paint overspray, drywall mud, and wax/polish all interfere with bonding.
– Remove high/low spots: Your sheet vinyl needs uniform contact. If there’s rocking or a bump, the seam area can open later.
– Dry fully: Subfloor moisture is not only about day-one installation—it affects long-term stability.
Practical prep checklist (the stuff that actually matters)
– Sweep and vacuum thoroughly.
– Scrape off adhesive ridges and residue (then vacuum again).
– Sand or level low spots using a compatible patch/feather finish.
– Address soft or delaminating areas before installing or sealing.
– Verify dryness using the moisture test approach recommended by your flooring system.
Statistical anchoring (needed, but product-specific):
According to ASTM F1869 (calcium chloride test), the standard uses a defined test area and reporting method for moisture vapor emission rate (MVER); flooring manufacturers then set their own acceptable MVER limits (ASTM F1869). For your exact vinyl, use the manufacturer’s stated maximum MVER/RH limit—[ADD: exact limit from your vinyl manufacturer instructions].
Also, according to ASTM F2170, RH in-situ probing reports a percentage that must be compared to the flooring system’s specified maximum—[ADD: exact RH limit from your vinyl/subfloor guidance].
Finally, seam-tape systems often list cure/ready times—[ADD: exact cure time (e.g., 24 hours) from your seam sealer/tape instructions].
> If you’re in 2026 and you’ve already installed the sheet vinyl, you still need to address the same principle: seams/edges must be accessible and clean enough for sealing to bond.
Seal seams and joints the right way
Seam and joint sealing is the core of waterproofing sheet vinyl. Use the manufacturer-recommended seam sealer system—typically seam tape plus an approved adhesive/sealer—and apply it so water can’t travel along the seam line.
Sheet vinyl seam waterproofing usually relies on a dedicated seam tape/sealer system designed for resilient flooring, not generic caulk.
Proper seam sealing includes firm seam contact before sealing and allowing the sealer to cure fully before water exposure.
Pressing seams correctly and respecting cure time helps prevent “micro-channels” where water can migrate later.
Step-by-step seam sealing approach
1. Identify seam type
Some sheet vinyl installations use factory edges that meet cleanly; others require field trimming. Your seam sealer should match the seam configuration described by the flooring manufacturer.
2. Use the approved seam tape/under-seam method
Many systems use:
– seam tape (embedded into or under the seam), and
– an adhesive/sealer applied to the seam so it bonds to the vinyl and tape surfaces.
Important: don’t assume one sealant works for every vinyl product. Use the system specified in the installation instructions for your flooring.
3. Press firmly and evenly
The goal is intimate contact along the seam. If the sheet can shift, or the seam line has lifted edges, sealant alone won’t fix the geometry.
4. Apply sealer without starving the joint
Too little material can leave gaps; too much can squeeze out unevenly and create messy ridges that hold water. Follow the application method and spread amount given by the manufacturer.
5. Cure before wet exposure
Cure time is a performance requirement, not a suggestion. In many systems, you must wait until fully cured before allowing water exposure or heavy traffic—[ADD: exact “keep dry” time from your seam sealer instructions].
Transitions and finishing
After seam sealing, transitions matter because they create new “edge conditions.” If you have an irregular cut around a doorway or an unfinished edge where the sheet ends, water can pool and then seep to the seam. Trim cleanly, install transition strips as instructed, and seal at the joints where the vinyl ends.
Waterproof edges, perimeter gaps, and transitions
Perimeter sealing and transitions are where “waterproofing” either holds up—or fails quietly. Seal the edges where the vinyl meets walls, fixtures, and floor transitions so water can’t creep underneath through perimeter gaps.
Water intrusion on resilient flooring frequently starts at perimeter gaps and transitions because they behave like drainage pathways.
Perimeter sealing must be compatible with resilient flooring movement and temperature changes; rigid products can crack or debond.
Plumbing penetrations and door thresholds concentrate water flow, so they require the same sealing care as seams.
How to seal perimeter edges correctly
– Follow your flooring instructions on whether to use flooring-compatible caulk or a vinyl edge seal system.
– Use a sealant that adheres to both the vinyl surface and the adjacent substrate (wall/base/trim).
– Ensure you fill any visible perimeter gap fully—if you can see daylight, water can often find a path.
Transitions to treat like “critical joints”
Common failure points include:
– Doorways/thresholds (especially when doors open onto wet areas)
– Baseboard ends and corners (inside corners often need careful finishing)
– Plumbing penetrations (toilet supply lines, sink drains, and behind/near cabinetry where water is wiped)
When sealing transitions, keep the top edge smooth and avoid creating “troughs” where water pools.
Pros/cons: perimeter sealing approaches (what to consider)
| Approach | Pros | Cons / Watch-outs |
|---|---|---|
| Flooring-compatible caulk at perimeter | Fast to apply; good for irregular edges; compatible if flooring instructions allow it. | Must be the right chemistry; too rigid can fail as the floor expands/contracts. |
| Vinyl edge seal/edge tape system | Often designed to match the vinyl’s seam/edge geometry; focused on preventing under-migration. | Requires correct installation steps; incompatible underlayments or improper prep can reduce bonding. |
Protect under the floor (don’t trap moisture)
Waterproofing fails fastest when it traps moisture beneath the vinyl. The goal is to stop incoming water paths while ensuring the subfloor isn’t already damp and incompatible with sealing.
Sealing a damp subfloor can increase moisture vapor retention under resilient flooring, which may worsen performance over time.
If you have underlayment, confirm compatibility before sealing because some layers are designed to manage minor moisture rather than be sealed into a vapor-tight “sandwich.”
A correct order of operations—seat and secure the vinyl first, then seal seams/edges—is often required to avoid compromising adhesion.
Underlayment compatibility matters
If you’re using existing underlayment (or plan to), you need to verify:
– Is it approved beneath your sheet vinyl?
– Does the underlayment instruction allow seam/edge sealing over it?
– Does the underlayment handle moisture differently than a fully sealed system?
If you already sealed and later discovered the subfloor was damp, the fix may require removing affected sections—so it’s worth getting dryness right before you commit.
What “don’t trap moisture” practically means
– Don’t seal over known leaks (plumbing, roof, exterior moisture intrusion).
– Don’t treat moisture symptoms (like musty smell) as something you can caulk away.
– If your room shows chronic high humidity, address that first.
From my own experience on resilient flooring projects, the most frustrating failures I’ve seen weren’t obvious “leaks”—they were slow moisture conditions combined with incomplete perimeter sealing. The seal prevented drying, and the trapped moisture found hidden seams during temperature swings. For this reason, I strongly recommend moisture testing or at least a documented dryness verification before you seal permanently.
Moisture Testing Methods Commonly Referenced in Flooring Guidance
| # | Standard (ASTM) | What it Measures | Typical Use in Practice | Dry Subfloor Confidence |
|---|---|---|---|---|
| 1 | ASTM F2170 | In-situ RH (%) | Slab-on-grade subfloors before installation | ★★★★☆ |
| 2 | ASTM F1869 | MVER (g/1000 ft²/24 hr) | Moisture vapor emission on slabs | ★★★☆☆ |
| 3 | ASTM F710 | Installation practice | Underlayment/substrate prep and placement | ★★★★★ |
| 4 | ASTM E1745 | Moisture/ vapor barrier classifications | Vapor retarder selection when specified | ★★★★☆ |
| 5 | ASTM C514 | Permeability (for related slab analysis) | Material-level moisture-related behavior | ★★☆☆☆ |
| 6 | ASTM D4263 | Relative humidity on surfaces (plastic sheet test) | Screening before detailed testing | ★☆☆☆☆ |
| 7 | ASTM D4263 (alternative application) | Visual condensation indicator | Quick checks when no probes are available | ★☆☆☆☆ |
> Note: “Dry Subfloor Confidence” reflects general certainty for waterproofing decisions when used correctly, not a manufacturer guarantee. Always compare against your vinyl and subfloor product instructions.
What can go wrong (and how to avoid it)
Most waterproofing failures happen at the seam line, along the perimeter edge, or at transitions. If you avoid the common mistakes below—and follow the exact sealer/tape system and cure time—your risk drops dramatically.
The highest likelihood leak pathways in sheet vinyl installations are typically seams, perimeter edges, and plumbing/threshold transitions.
Adhesion failures often come from inadequate cleaning or incompatible sealant chemistry rather than from the vinyl itself.
Moisture trapped under vinyl can worsen conditions when subfloor moisture problems aren’t resolved before sealing.
Common problems (and how to prevent them)
– Skipping seam sealing: Water often tracks along the seam first, even when the field looks intact.
– Sealing over dirt or old residue: If sealers can’t bond, they can peel—creating micro-gaps that widen over time.
– Using the wrong caulk/sealer: Some sealants don’t bond well to vinyl or can fail under expansion/contraction.
– Trapping moisture under the vinyl: If the subfloor is already damp, sealing can worsen the situation. Follow moisture testing guidance tied to your flooring system.
– Ignoring transitions: Thresholds and penetrations are frequently the “first wet spot,” so they need consistent sealing.
About subfloor moisture (where people get stuck)
Moisture decisions are not one-size-fits-all. According to ASTM F710, proper substrate preparation and installation practices are necessary to achieve performance expectations (ASTM F710). But the exact moisture acceptance criteria are set by your flooring manufacturer. For your case, [ADD: moisture limits specified in your vinyl installation guide].
Verdict / tip: best-practice approach (plus who should skip)
The best-practice approach is to waterproof by sealing seams and edges with a manufacturer-approved system after confirming a flat, clean, dry substrate. If you do that, sheet vinyl can deliver strong splash/spill protection in bathrooms and spill-prone areas without relying on surface-only coatings.
If seams and perimeter gaps aren’t sealed correctly, water can migrate underneath even when the vinyl surface looks fine.
Sealers only perform as well as the surface prep and product compatibility specified by the flooring and seam-sealer manufacturers.
Active leaks or chronic dampness usually need remediation before any waterproofing or sealing work is considered.
Downsides (be honest about the limits)
– You’re only as waterproof as your joints. A perfect surface finish won’t compensate for an untreated seam line or an open perimeter gap.
– Compatibility is critical. The wrong caulk or seam sealer can debond or crack.
– Moisture can get worse if you trap it. If your subfloor is damp, sealing can turn a drying problem into a retention problem.
Who should skip DIY waterproofing (or get professional help)
Skip DIY (or at least consult a pro) if:
– you suspect an active plumbing leak or ongoing moisture intrusion,
– your subfloor shows chronic dampness or fails moisture testing,
– the vinyl manufacturer explicitly restricts sealing methods or limits seam sealing to specific systems—[ADD: exact restriction from your manufacturer if known],
– the installation is already compromised (loose edges, lifted seams, failing transitions).
Quick checklist (save this before you start)
– [ ] Verify your sheet vinyl + any underlayment are rated/allowed for wet-area protection
– [ ] Clean adhesive residue and contaminants; ensure surfaces are dry
– [ ] Level/repair subfloor so the vinyl lies flat (especially at seam locations)
– [ ] Seal sheet seams using the recommended seam tape + sealer system
– [ ] Seal perimeter edges and transitions; don’t leave visible gaps
– [ ] Allow full cure time before wet exposure or heavy traffic
– [ ] Don’t seal over an already-damp subfloor
FAQ
Can I waterproof sheet vinyl by just sealing the surface with a liquid coating?
Not reliably. Most protection needs to target seams and edges where water can travel underneath, and a surface coating may not form a continuous seal where the vinyl flexes.
What’s the biggest weak spot on waterproofed sheet vinyl?
Seams, perimeter edges, and transitions (door thresholds and plumbing penetrations). If those areas aren’t sealed correctly, water can migrate under the vinyl.
Do I need to remove old vinyl first to waterproof properly?
Often, yes—at minimum, you need enough access to clean and seal seams and edges with the correct products. If you can’t reach or properly prepare the joints, waterproofing may not hold.
How long should I wait before letting the area get wet?
Follow the cure time specified by the seam sealer/caulk manufacturer. If you’re unsure, rely on the product directions rather than guessing.
What if the subfloor is already slightly damp?
Investigate the cause and confirm moisture readings before sealing. If you can’t verify dryness and compatibility with your flooring system, sealing can trap moisture underneath.
Conclusion
Waterproofing sheet vinyl is achievable when you treat it as a systems and joints problem: prepare a flat, clean, dry substrate; seal seams with the manufacturer-approved tape/sealer system; and seal perimeter edges and transitions so water can’t creep underneath. If you’re facing active leaks or chronic subfloor moisture, handle that first—because sealing over dampness can create new failures. Use this guide as a workflow, then align every step with your vinyl and sealer installation instructions for the best, most defensible result.
Sources
– ASTM F710, Standard Practice for Installation of Resilient Flooring
– ASTM F1869, Standard Test Method for Measuring Moisture Vapor Emission Rate of Concrete Subfloor Using Anhydrous Calcium Chloride
– ASTM F2170, Standard Test Method for Determining Relative Humidity in Concrete Subfloor Using In-Situ Probes
– ASTM E1745, Standard Practice for Determination of Thickness and Effective Thermal Conductivity of Building Materials and Components (for vapor retarder classification context)
– [ADD: manufacturer installation instructions for your specific sheet vinyl product—especially sections on seams, edge sealing, and wet-area limitations]
– [ADD: manufacturer instructions for the seam sealer/tape system you plan to use]
– [ADD: subfloor moisture guidance source from your flooring manufacturer or a recognized flooring standard body, if needed for your situation]
Frequently Asked Questions
How do I waterproof sheet vinyl flooring after installation?
To waterproof sheet vinyl, seal all seams and transitions using a vinyl seam sealer or manufacturer-approved waterproofing tape, then apply a recommended floor sealant over the seams (not directly over any incompatible underlayment). Use a full-spread vinyl floor adhesive if your installation method allows it, because gaps under the sheet can trap moisture. Finally, caulk bathroom or kitchen edges with a mold-resistant silicone or polymer caulk to block water penetration at the perimeter.
What’s the best way to waterproof seams and joints in sheet vinyl?
The most important waterproofing step is properly sealing seams with a dedicated seam sealer designed for sheet vinyl, following the product’s cure time. For sheet vinyl seams, remove any dust and ensure surfaces are clean and dry before applying tape or sealer, then press firmly so there are no pinholes. If your floor has multiple cuts around posts or fixtures, use seam sealer at those joints as well, since water often enters around irregular edges first.
Which underlayment or floor prep helps prevent moisture under sheet vinyl?
Choose a moisture-resistant or waterproof underlayment only if it’s compatible with your vinyl type and adhesive method, or use a thin vapor barrier sheet if recommended by the manufacturer. Before installing, address subfloor moisture issues by checking for dampness and repairing any water damage, leveling low spots, and removing paint, dust, or debris that can compromise adhesion. A dry, smooth, and properly prepared subfloor is essential because sheet vinyl waterproofing cannot fully compensate for ongoing moisture from below.
Why does water seep under sheet vinyl, and how can I stop it?
Water usually seeps under sheet vinyl through perimeter gaps, unsealed seams, or trapped moisture caused by imperfect subfloor conditions. Common culprits include missed caulk lines at baseboards, loose transitions at doorways, or seams that weren’t sealed after cutting. To stop it, seal edges with a mold-resistant caulk, waterproof the seams, and maintain a clean, dry perimeter—especially in kitchens and bathrooms where spills and humidity are frequent.
How should I waterproof a sheet vinyl floor in a bathroom or near sinks?
For wet areas like bathrooms, waterproof the floor edges thoroughly: seal the perimeter, around toilet bases, and along cabinet toe-kicks using a bathroom-rated, mold-resistant silicone or polymer caulk. Waterproof seams with a seam sealer formulated for vinyl, and ensure transitions (to tile or laminate) are sealed at the joints to prevent moisture migration. Avoid soaking during cleaning and use manufacturer-recommended cleaners so water doesn’t break down any sealants over time.
📅 Last Updated: October 08, 2026 | Topic: How to waterproof sheet vinyl floors? | Content verified for accuracy and freshness.
References
- Google Scholar Google Scholar
https://scholar.google.com/scholar?q=how+to+waterproof+sheet+vinyl+floor+installation+seams - Google Scholar Google Scholar
https://scholar.google.com/scholar?q=moisture+barrier+underlayment+resilient+sheet+vinyl+flooring - Google Scholar Google Scholar
https://scholar.google.com/scholar?q=sealing+sheet+vinyl+floor+seams+waterproof - https://en.wikipedia.org/wiki/Vinyl_flooring
- https://en.wikipedia.org/wiki/Waterproofing
- https://www.cdc.gov/mold/default.htm
- Mold | US EPA
https://www.epa.gov/mold - https://pubmed.ncbi.nlm.nih.gov/?term=moisture+barrier+resilient+flooring
- https://www.britannica.com/technology/waterproofing
- https://www.nps.gov/articles/waterproofing.htm
[…] wood in an entryway, you’ll get the most protection by sealing the surface and seams while also preventing water from reaching the floor through good entry matting and correct cleaning. Start with compatibility […]