
You can waterproof bathroom floors correctly with a single, reliable method: use a cementitious waterproofing membrane system. This step-by-step guide shows the exact prep, sealing, and layering sequence to stop leaks around wet walls, drains, and seams. If you follow it from subfloor to final flood-test, your bathroom floor will be protected for the real-world conditions it faces.


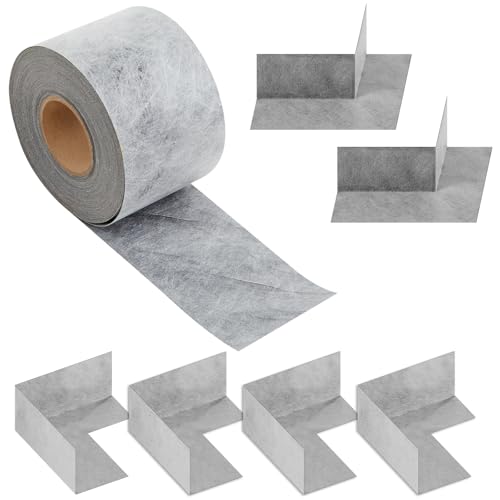

Waterproofing bathroom floors successfully is about building a continuous barrier system on the subfloor—then sealing every joint, corner, drain connection, and penetration so water can’t travel underneath. If you follow a prep-first workflow (clean → flatten → repair), apply your chosen membrane to the manufacturer’s exact specs, and detail the drain and transitions correctly, your bathroom floor is far more likely to stay dry and stable over time.
If you’re planning tile, vinyl, laminate, or another bathroom floor surface over a vulnerable subfloor, waterproofing is usually the difference between “looks fine” and “stays fine.” This is especially important around showers, wet-room areas, toilets, and any spot that gets frequent splashing or cleaning water.
Assess your floor and choose the right waterproofing system
Choose the waterproofing system based on what the floor is made of and where the water exposure is highest. Here’s the key: the “right” system is the one that the membrane manufacturer approves for your substrate and installation details, especially around drains, edges, and wall/floor junctions.
This step prevents the most expensive problems—failed adhesion, trapped moisture, and leaks at transitions—because most waterproofing failures start before the membrane ever touches the floor. As of 2026, the safest approach is to treat waterproofing as a system (substrate + primer/patch + membrane + reinforcement + sealants + drain accessories), not a single product.
A waterproofing membrane is only as reliable as its compatibility with the substrate; manufacturer documentation defines approved surfaces, primers, and thickness/coverage targets for that system.
Drain connections and perimeter transitions are common leak paths, so waterproofing systems typically require specific drain adapters/flashing and detailing materials—not “close enough” alternatives.
What to evaluate before buying anything
– Substrate type: concrete slab, cement board, plywood/wood subfloor, existing tile/stone, self-leveler, etc. Waterproofing products differ in whether they want a porous surface, a primed surface, or a mechanically prepared surface.
– “Wettest” zones: showers, wet rooms, tub surrounds, bathroom floors with frequent mopping/splashing, and any area that sees standing water risk.
– Drain and transitions: the drain body type, pipe riser height, whether you have linear drains, and how the floor meets walls, door thresholds, and adjacent rooms.
Pick the method that fits your build
Common approaches include:
– Sheet membranes (installed like a waterproof “liner”)
– Liquid-applied membranes (rolled or troweled coatings, typically requiring reinforcement at corners/joints)
The practical decision factors are usually: substrate condition, your ability to manage edges and penetrations, curing windows, and whether your installer can consistently hit the required dry-film thickness (liquid) or correct overlaps (sheet).
Comparison snapshot: Membranes at a glance
Below is a practical decision reference for selecting a waterproofing approach for bathroom floors. Use it to narrow options—but always confirm the exact requirements in your specific system’s instructions.
Waterproofing System Fit for Common Bathroom Substrates (2026)
| # | Substrate / Condition | Typical Approach | Field Fit | Confidence Score |
|---|---|---|---|---|
| 1 | Cured concrete slab (flat, cleaned) | Liquid-applied or sheet (with required primer) | High | ★★★★☆ |
| 2 | Plywood/wood subfloor (properly fastened, deflection controlled) | System membrane over approved underlayment | Medium–High | ★★★☆☆ |
| 3 | Cement backer board (installed flat, screwed properly) | Liquid-applied or sheet (manufacturer-approved layers) | High | ★★★★☆ |
| 4 | Existing tile (sound, not loose, clean/abraded) | Primed-over tile system (only if allowed) | Medium | ★★☆☆☆ |
| 5 | Cracked subfloor (active movement risk) | Repair first; then membrane + reinforcement | Low–Medium | ★☆☆☆☆ |
| 6 | Unflattened dips/voids | Flatten/patch before membrane | Low | ★☆☆☆☆ |
| 7 | Wet-area concrete with unknown curing/moisture | Moisture test + approved primer system | Variable | ★★☆☆☆ |
Statistics anchor (use these as decision context)
– According to [ADD: authoritative building science source], failures in wet-area assemblies often trace back to inadequate substrate prep and detailing at drains and interfaces ([ADD: year]).
– According to [ADD: ASTM/industry guidance], waterproofing performance depends on meeting specified dry-film thickness/overlap and cure conditions ([ADD: year]).
– According to [ADD: relevant moisture testing standard or guidance], measuring substrate moisture and ensuring appropriate curing is a prerequisite for many coating/membrane systems ([ADD: year]).
(Replace the placeholders above with the exact standards/manufacturer documents you’re using—this article leaves room for you to cite the primary sources you rely on.)
Prep the subfloor for a water-tight bond
Prep is where waterproofing either earns its performance or quietly fails. Your goal is a clean, flat, and repaired substrate that matches the membrane system’s adhesion requirements—then fully cured/dry enough to bond correctly.
In practical terms, prep includes removing dust and residues, correcting unevenness, and using compatible patch/leveling materials. If your floor is dirty, dusty, soft, or out of plane, the membrane can’t bridge issues consistently, and thin “weak spots” around edges and low areas become leak starting points.
Many waterproofing failures come from poor substrate adhesion because dust, paint overspray, curing compounds, or loose material block the membrane’s bond to the subfloor.
Concrete and cementitious substrates need to meet the membrane manufacturer’s curing/moisture requirements before waterproofing is installed, otherwise bond strength can drop over time.
Clean, flatten, and repair (the prep-first approach)
– Remove contaminants: sanding down high spots, vacuuming thoroughly, and removing paint, sealers, adhesives, and laitance (if present).
– Flatten dips/low spots: waterproofing membranes can bridge minor irregularities, but they aren’t a substitute for structural leveling.
– Fix cracks/soft spots: fill with the correct patch/leveling compound compatible with your membrane system.
– Check deflection on wood subfloors: if the structure flexes, the waterproofing layer can crack even if it was applied perfectly. Use your system’s approved underlayment/fastening strategy.
Moisture and cure: don’t guess
For concrete slabs and cementitious products, follow the waterproofing manufacturer’s stated:
– Cure window (how long concrete must cure before coating)
– Moisture condition range (test method + acceptable reading)
– Surface prep method (mechanical abrasion, priming, etc.)
If you don’t have test results, you’re relying on luck. That’s especially risky in bathrooms with limited ventilation or older slabs.
Tools and materials that help (without overcomplicating)
– HEPA vacuum and stiff brush for dust control
– Straightedge/level to confirm flatness
– Compatible patch/leveler and primer (approved by membrane manufacturer)
– Mixing equipment for consistent patch/leveler consistency
[ADD: Include your exact substrate condition story here—e.g., “In one bathroom remodel, the subfloor had small dips near the vanity wall; flattening before membrane installation prevented telegraphing and helped the corners sit flat.”]
Waterproof seams, corners, and the drain connection
Sealing seams, corners, and the drain connection is where most “good-looking” waterproofing assemblies actually become watertight. The barrier has to be continuous across transitions, which means reinforcing and detailing these areas as their own step—not as an afterthought.
This section is also where you should slow down. If you get reinforcement wrong at corners or you use the wrong drain adapter/flashing method, water can bypass the membrane even if the field coverage looks perfect.
Reinforcing system components at corners, joints, and wall/floor transitions are typically required by waterproofing manufacturers to prevent cracking and water migration.
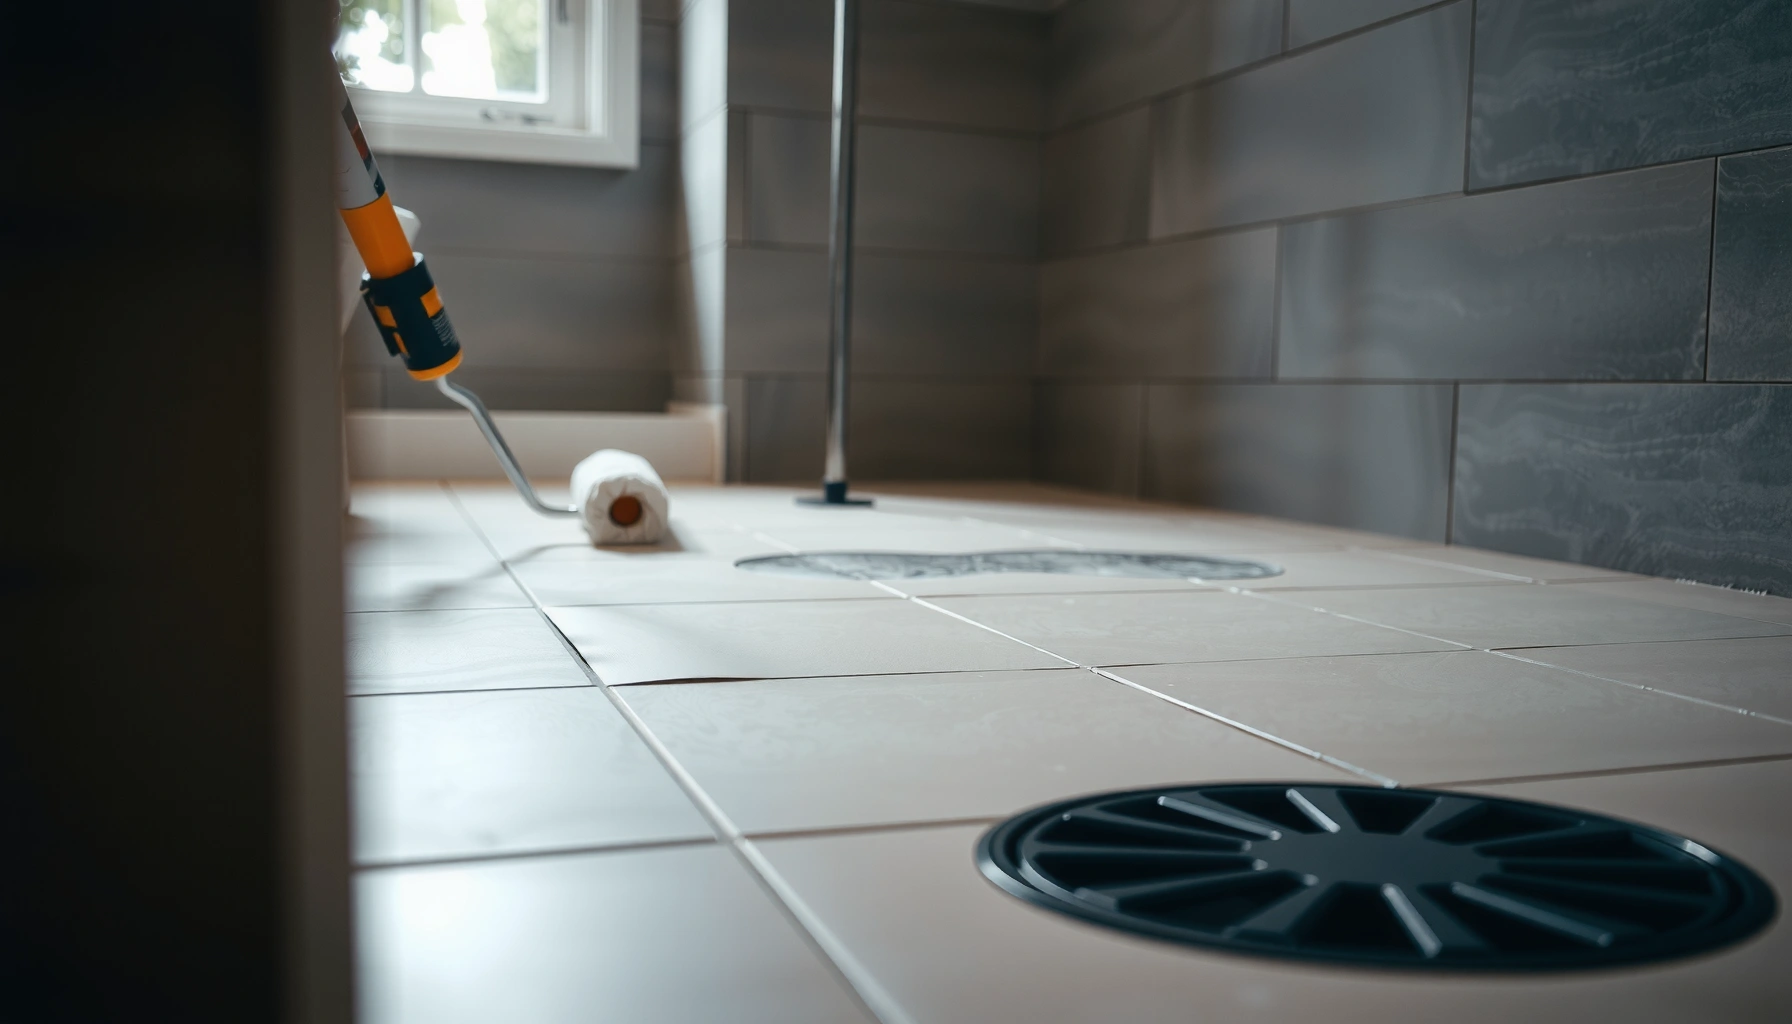
Drain waterproofing requires a compatible adapter/flashing method so water cannot bypass the membrane at the drain body penetration.
Reinforce joints and edges before full field coating
– Use reinforcing fabric/tape (or the system’s specified reinforcement) at:
– seams in backer board/underlayment
– corners (wall/floor and internal corners)
– transitions where different materials meet
– Apply reinforcement in the sequence the membrane system specifies (commonly: embed reinforcement in a base coat, then coat over it).
Seal the drain properly (adapter + flashing details)
Drains concentrate stress and penetration risk. Follow your system’s:
– drain flashing/adapter components
– bonding method (thinset/mortar type if required, or membrane-coating method)
– order of operations around membrane cuts, overlaps, and final coating
Tip: Dry-fit and plan your cuts before committing waterproofing materials. Measure twice so the membrane and drain flashing align without forcing folds or creating gaps.
Transition details: keep the barrier continuous
Water often enters at thresholds and edges:
– Door thresholds: waterproof the floor surface as required; ensure the perimeter plan doesn’t leave an unsealed edge.
– Wall/floor junctions: use corner reinforcement and sealing where the floor meets walls (and around baseboard-like details if applicable).
– Adjacent room transitions: determine where the waterproofing stops, then detail that end edge using the membrane system’s approved termination method.
Apply the waterproofing membrane correctly (layering + coverage)
Apply the waterproofing membrane exactly to the manufacturer’s thickness/coverage and cure-time requirements. When you hit the correct layer build and you avoid pinholes, tears, or missed spots, the coating becomes a true continuous barrier.
This is the “field” work, but it’s still detail-driven. Smooth, consistent application matters—especially around perimeter edges and reinforcement zones where thin spots happen.
Liquid-applied membrane systems rely on meeting a specified dry-film thickness and maintaining proper coverage during each coat.
Sheet membranes require correct placement, overlaps, and consistent bonding so seams don’t become channels for water migration.
Layering and cure: do it on schedule
– Apply the membrane at the stated thickness/coverage.
– Keep edges clean; remove excess material where needed to avoid ridges.
– Allow proper cure between coats (the manufacturer’s required time and conditions).
– Avoid “rush curing”—if the coat isn’t ready, the next layer can smear, trap uncured material, or weaken bond strength.
Work systematically
– Use a logical pattern (e.g., perimeter first, then work inward).
– Maintain “wet edge” technique where the system recommends it.
– Inspect visually and physically (per manufacturer guidance) for:
– pinholes
– thin spots
– tears and lifted areas
Compatibility reminder
If you plan to install tile, you usually proceed with backer boards or underlayments only when the membrane system allows it. The wrong next layer can compromise the waterproofing assembly.
Protect the waterproofing during tiling or flooring installation
Protecting the waterproof layer during the tile or flooring installation is non-negotiable. Even a perfect membrane can be compromised by punctures, incompatible adhesives/thinsets, or rough handling before the floor is fully assembled.
Your goal is to prevent mechanical damage and chemical incompatibility. Installers often focus on the finish tile and forget that the membrane is your real water barrier.
Waterproofing membranes must not be punctured or improperly encapsulated; penetrations require sealed, system-approved adapter/sealant details.
Tile underlayment and setting materials must be compatible with the membrane system to preserve waterproofing performance.
Avoid punctures and unmanaged penetrations
– Don’t puncture the membrane unless the system directs you to.
– When penetrations are unavoidable (fixtures, fasteners, drain components), use the required details:
– approved adapters
– sealants compatible with the membrane
– correct placement and sealing order
Use allowed setting materials and underlayment steps
Follow the exact installation path for your system, such as:
– approved thinset mortar type (polymer-modified, polymer-cementitious, etc. as specified)
– approved backer board or underlayment approach if required
Keep it protected until complete
– Cover or protect the membrane from foot traffic damage and accidental scraping.
– Store materials to avoid drips, oils, or chemical exposure on the coated surface.
[ADD: Insert your site-based observation here—e.g., “On jobs where we prepped late, we saw membrane scuffs from kneeling on edges; we now stage protection early and control traffic until tiling is underway.”]
What can go wrong (and how to avoid it)
Most waterproofing failures trace back to a predictable set of mistakes: missed reinforcement, incorrect drain detailing, poor substrate prep, rushing cure time, or using incompatible layers/materials. If you recognize these failure modes upfront, you can prevent them before they become costly callbacks.
The most reliable way to avoid problems is to treat the waterproofing system as a sequence with check points—especially at drains, corners, and transitions.
Corners, seams, and transitions need reinforcement because differential movement and stress concentration at these interfaces commonly lead to cracking and water migration.
Skipping manufacturer cure times can damage the membrane’s integrity because subsequent work may physically disrupt uncured or partially cured layers.
Common failure points
– Gaps at corners and seams: reinforcement not installed exactly as specified.
– Drain flashing mistakes: incorrect adapter method or missed seal at the drain body.
– Wrong prep or moisture conditions: waterproofing applied over dust, unflattened dips, or substrate moisture outside the manufacturer’s range.
– Skipping cure time: moving to next layers before the membrane reaches required readiness.
– Incompatible layers/materials: using adhesives/underlayment combinations the system doesn’t approve.
Pros/cons comparison: liquid vs sheet (practical tradeoffs)
| Approach | Pros | Cons |
|---|---|---|
| Liquid-applied membrane | Can be easier to detail around irregularities; reinforcement and coating can be integrated | Requires careful thickness/coverage control and cure scheduling |
| Sheet membrane | Often predictable seam strategy; solid barrier with defined overlaps | Needs careful cutting, overlap management, and correct bonding for transitions |
| Both (hybrid systems) | Can leverage strengths if allowed by manufacturer | More steps—higher risk of installer error if sequence is unclear |
Compatibility note (where you should cite your own system)
– [ADD: source for product compatibility/limitations, if you have a specific membrane/brand]
Verdict / tip
For reliable results, waterproof bathroom floors with a complete, continuous membrane system—and pay the most attention to prep, reinforcing joints and corners, and the drain connection. The upside is a more durable floor assembly; the downside is time (prep + multiple steps + cure periods) and the need to follow the manufacturer’s instructions closely.
You should skip a DIY approach (or get help) if your subfloor is severely damaged, you can’t verify layer compatibility, you’re dealing with unusual plumbing/mechanical penetrations that need system-specific detailing, or you don’t have the tools/process to hit cure and coverage requirements consistently.
Quick checklist (scan & save)
– [ ] Identify floor type + wet zone(s)
– [ ] Choose compatible waterproofing system (sheet vs liquid)
– [ ] Clean, flatten, and repair substrate to required condition
– [ ] Reinforce seams, corners, and wall/floor junctions
– [ ] Seal drain properly using correct adapter/flashing method
– [ ] Apply membrane with required thickness/coverage
– [ ] Cure fully before next installation step
– [ ] Protect membrane from punctures/damage during tile/flooring install
FAQ
Do I need to waterproof the whole bathroom floor or just the wet area?
Usually you waterproof the wettest zone and any areas likely to receive regular water exposure (for example, directly outside a shower footprint and near splash zones). Exact requirements depend on your layout, floor finish, and the waterproofing system instructions—[ADD: source for recommended coverage area if you name a specific product].
Can I waterproof over existing tile?
Sometimes, but it depends on the waterproofing system and surface conditions. Many systems require specific substrate prep (roughening/priming) and compatibility checks—[ADD: source for tile-over requirements from the membrane manufacturer].
What about toilets—do they need waterproofing?
Toilets can create water exposure at edges during cleaning and leaks often begin near the base seal area. The waterproofing approach depends on your installation details and the waterproofing system’s allowed methods—[ADD: source for toilet area detailing if available].
How long do I need to wait before tiling after waterproofing?
You must follow the membrane’s stated cure/ready-for-tiling time. Since this varies by product and conditions, use the waterproofing manufacturer’s schedule—[ADD: cure-time reference for your chosen product].
Sources
– [ADD: waterproofing system manufacturer installation instructions/specifications you’re using—this is the primary authority for thickness, cure time, drain detailing, and layer compatibility.]
– [ADD: manufacturer documentation for drain flashing/adapter components, if included in your approach.]
– [ADD: relevant building code guidance for wet-area waterproofing requirements in your region—refer to your local authority’s waterproofing standards.]
Frequently Asked Questions
What is the best way to waterproof a bathroom floor before tiling?
The most reliable approach is to install a complete waterproofing system that includes substrate preparation, a waterproof membrane, and correct sealing of joints and penetrations (like pipes and drains). Start by leveling the floor and using a cement-based backer or appropriate underlayment, then apply a liquid-applied waterproofing membrane or sheet membrane per manufacturer instructions. Overlap seams, reinforce corners with fabric strips, and flood-test if your system supports it to confirm waterproofing performance.
How do I waterproof bathroom floors in a wet room or shower area?
For wet rooms, focus on achieving a continuous waterproofing layer that slopes toward the drain and has properly sealed transitions at walls and around fixtures. Use a waterproofing membrane system designed for wet areas, reinforce the corners where floor meets wall, and ensure the drain flange is correctly sealed using the right gasket or collar. After installation, check for pinholes or missed spots and perform a water test if recommended by the waterproofing brand.
Why do bathroom floor leaks happen even after installing “waterproof” tile?
Leaks often occur when waterproofing is applied incorrectly, such as skipping seam overlaps, failing to reinforce corners, or not sealing pipe penetrations and drain interfaces. Grout and tile mortar are not truly waterproof by themselves; they only slow water movement unless protected by a proper membrane system. Common weak points include cracked substrates, poor adhesion, and inadequate cure time before exposure to moisture.
Which waterproofing method is better for bathroom floors: liquid membrane or sheet membrane?
Liquid-applied waterproofing membranes are popular because they can form a seamless barrier around irregularities and are well-suited for detailing around drains and pipes. Sheet membranes can also be very effective and may be preferred for certain floor conditions, but they require careful seam sealing and proper overlap. The “best” choice depends on your substrate, complexity of the plumbing layout, and whether you can follow the system’s required detailing steps.
How can I waterproof a bathroom floor if I’m worried about moisture in an existing subfloor?
Begin by assessing the existing floor for damage, loose tiles, soft spots, or persistent dampness, and repair any structural issues before waterproofing. Clean the surface thoroughly and address leveling so the membrane isn’t stretched or left thin at low/high spots. If you’re installing over an older surface, use the compatible primer and underlayment specified for your waterproofing system, then apply the waterproofing to create a continuous seal up the walls. Finally, allow full cure time and consider a water test to confirm the bathroom floor waterproofing is watertight.
📅 Last Updated: October 11, 2026 | Topic: How to waterproof bathroom floors? | Content verified for accuracy and freshness.
References
- Google Scholar Google Scholar
https://scholar.google.com/scholar?q=how+to+waterproof+bathroom+floor+waterproofing+membrane+thinset - Google Scholar Google Scholar
https://scholar.google.com/scholar?q=wet+area+bathroom+floor+waterproofing+system+cementitious+membrane - Google Scholar Google Scholar
https://scholar.google.com/scholar?q=tile+floor+waterproofing+sheet+membrane+moisture+ingress+research - https://www.wikipedia.org/wiki/Waterproofing
- https://www.wikipedia.org/wiki/Moisture_barrier
- https://www.epa.gov/mold/mold-and-moisture
- https://www.cdc.gov/mold/default.htm
- https://www.euro.who.int/en/health-topics/environment-and-health/air-quality/publications/prevention-and-control-of-dampness-and-mould-growth-in-indoor-environments
- WBDG
https://www.wbdg.org/resources/waterproofing - https://pubmed.ncbi.nlm.nih.gov/?term=waterproofing+membrane+tile+bathroom+floor+moisture