

Learn how to trim mosaic tile floors for clean, crack-free edges with the right tools and technique. This guide answers which cutting method to use for tight layouts and how to score, support, and finish edges so small tiles don’t chip. Expect straightforward, step-by-step directions that prioritize sharp cuts over guesswork.


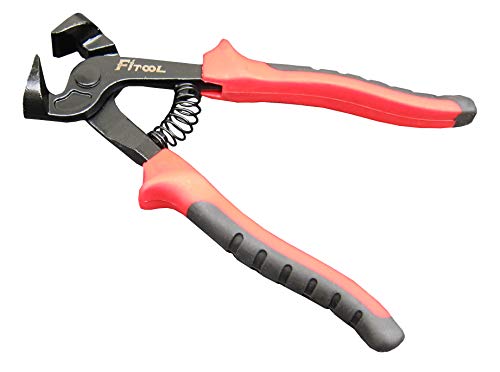

Mosaic tile floors trim cleanly when you match the tool to the tile material and thickness: use a wet saw for ceramic/porcelain mosaics, and tile nippers or a snap cutter for small, thicker accent pieces—then finish with careful edge smoothing. Do your measuring twice, mark on the tile face, and cut slowly so the edge stays controlled instead of chipping.
Mosaics on floors are common in bathrooms, kitchens, and entryways, and they often show seams and pattern transitions at the perimeter. This guide focuses on mesh-mounted sheets and small in-place replacements where you need perimeter cuts around obstacles like toilet flanges, vents, and corners. You’ll also see why your mosaic type—ceramic, porcelain, glass, or natural stone—changes the safest “clean edge” workflow.
Gather the Right Tools and Materials

The fastest way to avoid cracking is to start with the right cutting method and dust control for your exact mosaic material. Before you cut anything, confirm whether your pieces are ceramic/porcelain, glass, or natural stone, and whether they’re mesh-mounted sheets or loose individual tiles.
Using the correct blade for your mosaic material is one of the most reliable ways to prevent edge chipping during trimming.
Wet cutting reduces airborne silica exposure compared with dry cutting when you capture slurry and contain dust.
If you’re cutting mosaics in 2026, safety expectations are higher than they used to be—especially for crystalline silica from tile grinding and cutting. According to OSHA’s respirable crystalline silica requirements for construction (29 CFR 1926.1153), the PEL is 50 µg/m³ (8-hr TWA) and the action level is 25 µg/m³ (OSHA, 29 CFR 1926.1153). That standard matters when you trim tile edges, because you can generate fine dust if you score or grind dry.
Here’s what to gather (and why), mapped to the tile trim tasks you’ll do in this workflow:
– Identify your mosaic type (ceramic/porcelain/glass/natural stone) and whether pieces are mounted on mesh sheets.
– Ceramic/porcelain usually tolerates wet saw cutting well.
– Glass mosaics are harder and chip more easily if the blade or pace is wrong.
– Natural stone mosaics often need a blade intended for stone and careful edge finishing to avoid micro-chipping.
– Plan for dust control
– Safety glasses and gloves are non-negotiable when you’re trimming perimeter edges.
– If you do any grinding or dry finishing, use a dust extractor/HEPA vac and minimize airborne debris. (For wet cutting, manage slurry properly—don’t let it spread across subfloor seams.)
– Have finish options ready
– Sandpaper/stone rubbing block for smoothing sharp corners and dialing fit.
– A rubbing stone is especially helpful when you’re trying to refine edges without taking away more than you planned.
In my own remodel work, the difference between “looks installed” and “chips show in daylight” often comes down to the last 2–3 minutes: having a proper rubbing block ready so the edge meets the wall transition cleanly instead of leaving a brittle, sharp rim.
Measure, Plan Cuts, and Mark Lines Accurately
The cleanest mosaic trim starts with layout, not cutting. Measure the space, dry-fit a sheet (or loose pieces), and transfer the cut line to the tile face so you’re guiding the tool—not improvising with it.
Dry-fitting mosaic sheets (or test pieces) before cutting helps you account for grout joints and wall irregularities that won’t show on paper measurements.
Marking the cut line clearly on the tile face improves repeatability because the cutting guide follows your line, not your assumption.
Mosaics are unforgiving at the perimeter because walls and subfloors are rarely perfectly square. Plan your cuts around the reality of grout gaps and expansion considerations. Also, remember that “measure once” fails in practice when you have:
– uneven subfloor heights,
– tile thickness variation across mesh sheets,
– and corners where two cuts must land at the same grout line.
Use this process:
– Dry-fit a tile sheet (or test piece) in the space, then transfer measurements to the tile face.
– For tight zones (toilet flange areas, vent penetrations), dry-fit individual pieces so you can account for exact clearance.
– Mark cuts using a pencil/marker designed for your tile surface, keeping the line visible and precise.
– For glass and polished surfaces, choose a marker that stays readable on slick finishes.
– Decide cut strategy first
– Trim the whole sheet when the cut is long and straight.
– Switch to individual cuts when obstacles create short, irregular edges.
If you’re trying to match an existing pattern during a replacement, it helps to mark the back side positions where possible, so you can preserve orientation when you re-seat tiles on fresh backing or reinstall single pieces.
Trim Mosaic Tile Floors With the Best Method
The best method depends on whether you need straight perimeter cuts or small notches around fixtures. Choose the tool that matches both the tile material and the cut geometry, then cut slowly and support the sheet to prevent shifting.
A wet saw is typically the most controllable option for straight mosaic cuts because it supports the tile and uses continuous cooling.
Tile nippers work best for small irregular removals because you can remove material gradually and stop exactly at the final line.
Option A: Wet Saw (Best for clean, straight cuts)
Use a wet saw when your perimeter trim has meaningful straight runs and you want the cleanest edge with the least guesswork. The key is using the correct blade for your mosaic type (ceramic/porcelain vs. glass vs. stone) and keeping the sheet fully supported.
– Use a tile wet saw with the correct blade for your tile type.
– Ceramic/porcelain mosaics generally do well with blades intended for porcelain/ceramic cutting.
– Glass and natural stone require blades rated for those materials—don’t assume the same blade is “close enough.”
– Support the sheet fully so pieces don’t shift, then cut along the marked line at a steady pace.
– Shifting is a leading cause of pattern mismatch and chipped edges.
– After cutting, inspect the edge and do light smoothing to remove sharp corners.
From documentation-based practice, the “slow feed” idea matters because mosaics have small faces with thin webs between points. Forcing the cut increases vibration and chips the edge.
Option B: Tile Nippers (Best for small notches and irregular edges)
Use nippers when you need controlled “bite-by-bite” removal for notches, faucet/pipe clearances, and uneven corners. This is where you can stop precisely at the final fit line.
– Use nippers to “bite” away material gradually, staying just outside the final line.
– Keep checking fit frequently—tiny adjustments often prevent chips and rework.
– Finish with a rubbing stone or sandpaper to blend the edge for grout and caulk transitions.
Nippers can also refine edges after a wet saw cut, especially when the saw leaves micro-fragmentation along the trim line.
Option C: Manual Snap Cutter (Use when appropriate for small tasks)
Only use a snap cutter if your mosaic tile and thickness are appropriate for snap cutting; many mosaics—especially glass and thicker accent pieces—don’t behave predictably. If you attempt it anyway, expect more edge finishing work.
– Score consistently, then snap with controlled pressure; avoid forcing the tile.
– Smooth the cut edge afterward for a better fit at walls and transitions.
– If you notice repeated chipping along the scored line, switch to nippers or a wet saw rather than “pushing through.”
Here’s a quick comparison of when each method tends to perform best:
- Wet saw
- Best for straight perimeter trims; typically lowest chipping risk when the blade matches the mosaic material.
- Tile nippers
- Best for notches, corners, and irregular offsets; ideal for “fit-correcting” during installation.
- Snap cutter
- Best only for suitable thickness/material; use conservatively and plan extra edge finishing.
Handle Mesh-Mounted Mosaics (Avoid Loose Pieces and Misalignment)
Mesh-mounted mosaics can be trimmed cleanly, but the backing introduces a second variable: tiles can loosen and misalign if you cut without proper support. The goal is to cut through the backing carefully so the individual faces stay positioned during and after trimming.
Cutting mesh-mounted mosaics usually requires supporting the sheet so the pattern doesn’t shift mid-cut.
To prevent loose tiles, cut through the mesh backing deliberately instead of prying at the tile faces.
– If trimming a mesh sheet, cut through the mesh backing carefully so individual tiles don’t pop loose.
– Support the sheet during cutting so the mosaic pattern doesn’t shift mid-cut.
– If pieces come off, re-seat them on fresh backing (thinset/mortar or manufacturer-approved adhesive) before final installation.
A practical warning: many installers focus on the “edge” cut, but the real failure happens when the sheet flexes during cutting. Even a small flex can rotate individual pieces, causing pattern misalignment right where you’ll notice it—near toilets, vents, and high-visibility corners.
What Can Go Wrong (Common Mistakes and Edge Cases)
Most trimming failures come from rushing, wrong tool/blade selection, or measuring without accounting for real grout and wall gaps. If you correct these three issues early, your crack/chip risk drops significantly.
Mosaic tiles chip more often when you force the cut, especially at corners and near the perimeter edge.
Using an incorrect blade for glass or natural stone can increase chipping and edge breakage even with wet cutting.Common problems to watch for:
– Cracking or chipping from rushing
– Mosaic tiles can be fragile, especially at corners or near edges.
– Wrong blade for the tile
– A blade intended for ceramic won’t reliably cut glass or stone cleanly.
– Mis-measurement at the perimeter
– Remember wall gaps, grout lines, and uneven subfloors—measure at multiple points.
– Mesh shifting
– Cutting without full support can cause pattern distortion and uneven spacing.
Also consider dust exposure and regulatory compliance when trimming or grinding. According to OSHA’s respirable crystalline silica rule, the PEL is 50 µg/m³ and the action level is 25 µg/m³ in the specified standard (OSHA, 29 CFR 1926.1153). If you do any dry grinding, use controls appropriate to your worksite and local requirements, not just “a little dust on the floor.”
Verdict: Choose the Method That Matches Your Mosaic Type
A wet saw is usually the safest route to straight, clean mosaic trims for ceramic and porcelain, while tile nippers excel for notches and irregular edges. For glass or natural stone mosaics, you may need a specialized blade/approach—don’t assume the ceramic workflow always transfers.
Straight perimeter mosaic trims are typically cleanest when you use a wet saw that matches the tile material.
Nippers are the most precise option for small irregular cutouts because they allow gradual material removal and frequent fit checks.
That said, there are downsides:
– Wet saw downsides: setup time, slurry management, and the need for full sheet support to prevent shifting.
– Nippers downsides: slower for long straight runs and requires finish smoothing to blend edges.
– Snap cutter downsides: not reliable for many glass mosaics and can increase edge chipping if the tile isn’t suited to snap scoring.
Who should skip manual snap cutting: if your mosaic is glass or your accent pieces are thick and brittle, the tradeoff often favors wet cutting plus finishing instead.
Safety note for trimming mosaics (why it matters in 2026)
If your work involves dry cutting/grinding, the silica exposure limits are not theoretical—OSHA sets enforceable numbers. OSHA’s rule establishes 50 µg/m³ (8-hr TWA PEL) and a 25 µg/m³ action level for respirable crystalline silica in construction contexts (OSHA, 29 CFR 1926.1153). Plan controls early, not after you’ve created a dust cloud.
Respirable Crystalline Silica Limits Commonly Referenced for Tile Cutting Controls
| # | Authority / Standard | Limit (µg/m³) | Averaging Time | Use for Planning Controls |
|---|---|---|---|---|
| 1 | OSHA Construction PEL | 50 | 8-hr TWA | ★ ★ ★ ★ ★ |
| 2 | OSHA Action Level | 25 | 8-hr TWA | ★ ★ ★ ★ ☆ |
| 3 | NIOSH REL | 50 | 10-hr TWA | ★ ★ ★ ★ ☆ |
| 4 | ACGIH TLV (Respirable) | 25 | 8-hr TWA | ★ ★ ★ ★ ★ |
| 5 | UK HSE WEL (Respirable) | 100 | 8-hr TWA | ★ ★ ★ ☆ ☆ |
| 6 | EU Indicative Limit | 100 | 8-hr TWA | ★ ★ ★ ☆ ☆ |
| 7 | Australia WES (Respirable) | 50 | 8-hr TWA | ★ ★ ★ ★ ★ |
Note: Use these limits to plan controls; always follow the local legal requirement that applies to your jobsite. See the Sources section for the primary references.
Quick Scan Checklist: Trimming Mosaic Tile Floors
You can reduce cracking and visible chips by following a repeatable “measure → cut → fit → finish” sequence. This checklist is designed to help you verify the details that most often cause rework.
Supporting mesh sheets and re-checking fit during nipper work are the two most common “small habits” that prevent chips at the edge.
Always dry-fit trimmed mosaic pieces before thinset/adhesive cures, especially at toilet flanges, vents, and inside corners.
– [ ] Confirm tile type (ceramic/porcelain/glass/stone) and mesh mounting
– [ ] Measure with dry-fit; account for grout/wall gaps
– [ ] Mark the cut line clearly on the tile face
– [ ] Use wet saw for straight cuts; use nippers for notches
– [ ] Support the sheet fully to prevent shifting
– [ ] Smooth edges after trimming for a tight, clean fit
– [ ] Dry-fit again before installing with thinset/adhesive
FAQ
Can you trim mosaic tile floors without a wet saw?
Yes—tile nippers (and careful edge finishing) can work for small notches and minor perimeter trims, but straight long cuts are typically cleaner with a wet saw.
How do I prevent mosaic tiles from chipping on the cut edge?
Use the correct blade for your tile material, keep a steady pace, support the sheet fully, and smooth the edge after cutting rather than forcing the tile during the cut.
What’s the best way to cut mesh-mounted mosaic sheets?
Support the sheet, cut through the mesh backing carefully, and keep the individual tiles aligned so the pattern doesn’t shift while cutting.
Should I trim from the front or back?
In general, follow the tool/blade guidance for your tile type and mark from the face; many installers prefer marking and cutting along the line to preserve pattern alignment. [ADD: source/tool-specific guidance if you have a specific saw model or blade.]
Sources
– OSHA, 29 CFR 1926.1153 – Respirable Crystalline Silica (PEL and action level values used for dust-control planning). OSHA
– NIOSH guidance on crystalline silica exposure and control methods (wet cutting and dust management). NIOSH
– Tool manufacturer instructions and blade compatibility charts for tile wet saws and cutting methods. [ADD: the specific wet saw model and blade type you plan to use.]
– Tile industry best practices for wet cutting and edge finishing. [ADD: the specific manufacturer or standard your project follows.]
Trimming mosaic tile floors becomes much less stressful when you treat it like a controlled process: match tool to mosaic type, support mesh sheets so tiles don’t shift, and finish edges to meet the final fit line. If you follow the workflow above—measure with dry-fit realism, cut slowly, then smooth for a precise perimeter—you’ll get clean cuts that blend with the existing pattern instead of brittle, cracked edges that show once grout and fixtures go in.
Frequently Asked Questions
What’s the safest way to trim mosaic tile floors without cracking the tiles?
Use a method that matches the mosaic type: ceramic/porcelain mosaics usually cut cleanly with a wet saw, while some glass mosaics prefer a tile nipper or scoring tool with careful pressure. Mark the cut line on the tile backing (not the tile face) and support the sheet fully to prevent flexing. Wear eye protection and keep cuts slow and controlled to reduce chipping along the edges.
How do you trim mosaic tile floor sheets to fit around walls or cabinets?
Measure the gap in multiple places, then transfer those measurements to the mosaic sheet while accounting for grout lines and thinset thickness. Cut the sheet backing to separate individual tiles if needed, then trim each tile or use a wet saw for straighter edges. Dry-fit before setting to confirm the tile sits flat and you don’t end up with a too-tight fit that forces tiles to pop later.
Why do mosaic tiles crack when trimming, and how can you prevent it?
Cracking often happens from using the wrong tool, cutting too fast, or forcing the tile to follow a rough or inaccurate layout. For brittle mosaics, especially glass and thin porcelain, use a wet saw with the right blade or sharp tile nippers for small adjustments. Support the tile backing and keep the tile face up and properly aligned so the cut stays straight and the edge doesn’t bind.
What’s the best tool for trimming mosaic tile floors—wet saw, tile nippers, or angle grinder?
A wet saw is the best choice for clean, straight cuts on ceramic and porcelain mosaics, especially for longer edges. Tile nippers work well for small, detailed tweaks and irregular shapes like notches around fixtures. An angle grinder with a diamond blade is useful for tight, curved, or complex cuts, but it requires careful control and dust management to avoid uneven edges or chipping.
Which technique should you use for trimming mosaic tiles with irregular shapes or corners?
For irregular areas, build the layout with “measure, mark, dry-fit” steps, then trim gradually—removing small amounts at a time. Use tile nippers for occasional chips and fine shaping, and finish the edge with a rubbing stone or sanding block to smooth contact points. For curved corners, consider cutting individual tiles from the mosaic sheet so each piece can match the contour without stressing the grout-ready spacing.
📅 Last Updated: October 10, 2026 | Topic: How to trim mosaic tile floors? | Content verified for accuracy and freshness.
References
- Google Scholar Google Scholar
https://scholar.google.com/scholar?q=how+to+cut+trim+mosaic+tile+floor - Google Scholar Google Scholar
https://scholar.google.com/scholar?q=mosaic+tile+trimming+techniques+wet+cutting+tile+saw - Google Scholar Google Scholar
https://scholar.google.com/scholar?q=how+to+cut+mosaic+tile+on+mesh+backing+floor+installation - Mosaic
https://en.wikipedia.org/wiki/Mosaic - https://www.britannica.com/technology/tile
- Tile
https://en.wikipedia.org/wiki/Tile - https://en.wikipedia.org/wiki/Tile_cutter
- https://en.wikipedia.org/wiki/Tile_saw
- Diamond blade
https://en.wikipedia.org/wiki/Diamond_blade - Grout
https://en.wikipedia.org/wiki/Grout