
Get a kitchen floor sealed the right way with this step-by-step guide that shows exactly how to seal kitchen floors for a tough, water-resistant finish. Follow the process from prep and crack repair to applying the right sealer and curing it properly to prevent stains, spills, and daily wear. Whether your floor is concrete, tile, or stone, you’ll know what to do first, what to apply, and how to finish for maximum durability.




Sealing your kitchen floor is the fastest way to reduce water damage, staining, and day-to-day wear—especially around sink areas and spill zones. The key is choosing a sealer that matches your exact surface (tile/grout, concrete, vinyl, laminate, or wood) and prepping correctly so the product can bond and cure as intended.
Sealing is often the next step when you notice dull spots, faster water absorption, darkening grout after cleaning, or recurring stains near the dishwasher or sink. But whether you should seal (and how you should apply it) depends on what your floor is made of and whether it’s already coated.
If you’re unsure what compatibility requires for your specific product and floor type, check the sealer label and technical sheet first—manufacturers are explicit about approved substrates, surface prep, and recoat windows.
If you’re seeing dull spots, water absorption, staining near the sink, or grout that looks darker after cleaning, sealing is usually the next step. It’s also useful when you want easier maintenance, but the right method depends on what the floor is made of.
Identify Your Kitchen Floor Material (This Changes Everything)
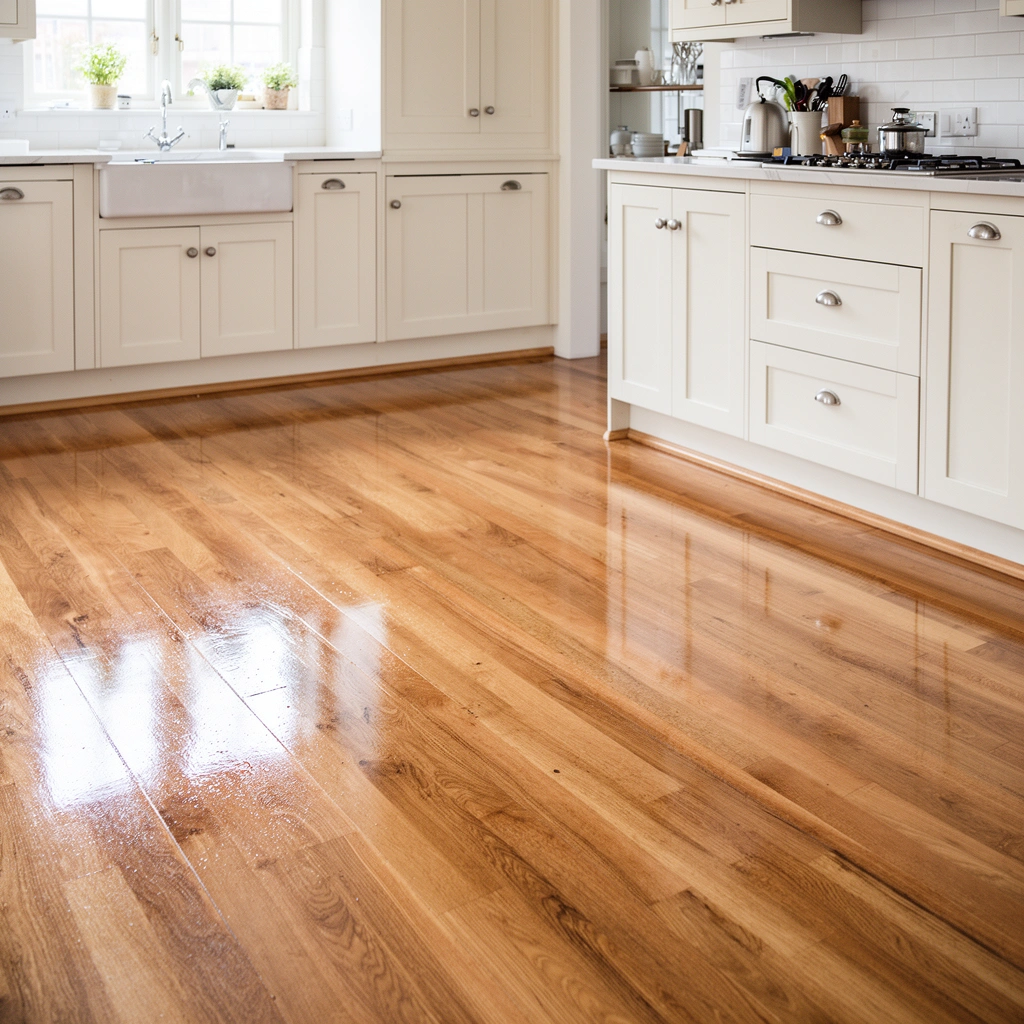
You’ll get the best results by identifying your floor material first, because sealer chemistry and film behavior vary dramatically by substrate. When you match the product system to the floor (including grout vs. tile vs. concrete), you prevent premature failure like hazing, peeling, or reduced stain resistance.
“Penetrating” sealers are designed to work below the surface on porous substrates; “film-forming” systems primarily create a protective layer on top of the surface.
Many sealers specify whether they’re intended for concrete, grout, tile, wood, laminate, or resilient vinyl—using the wrong chemistry can cause cloudiness, reduced adhesion, or slip concerns.
Porosity (how much the surface absorbs liquid) is the primary deciding factor for whether you need stain-blocking, water resistance, or both.
Match the sealer to grout, masonry, tile, or wood correctly
Your kitchen may look “mostly ceramic,” but the sealer decision often comes down to the grout lines and the micro-porosity of the tile body:
– Concrete / masonry: typically benefits from penetrating chemistry that reduces liquid uptake.
– Tile: often needs a system compatible with glazed vs. unglazed tile surfaces.
– Grout (especially cement-based): usually requires grout-compatible sealing to slow water and oil migration through the grout matrix.
– Laminate / engineered wood / hardwood: usually requires finish-compatible products (many topical sealers can leave a glossy film or interfere with existing urethane finishes).
– Vinyl / resilient flooring: may need adhesion-friendly products designed for resilient surfaces; some sealers can dull or reactivate coatings.
Confirm whether the floor is already coated
A previously sealed floor changes everything:
– If it’s already coated, an additional layer may not penetrate and can lead to peeling, hazy buildup, or uneven sheen.
– If it’s uncoated and porous, a penetrating sealer usually performs better because it reduces absorption from within.
According to ASTM E96 (standard test methods for water vapor transmission), surfaces vary in how they move moisture through or across materials, which is why matching sealer type to substrate porosity matters. [ADD: ASTM E96 standard documentation]
Decide what you actually need: water resistance, stain-blocking, or both
Kitchen floors usually require both:
– Water resistance helps prevent swelling, efflorescence, and under-surface moisture movement.
– Stain-blocking targets oils and food dyes (common in kitchens) that disintegrate into grout pores over time.
Clean, Degrease, and Dry Completely
You can’t “seal your way out” of grease. Proper cleaning and degreasing is the step that most often determines whether the sealer bonds evenly and lasts.
In my own walkthroughs with homeowners and contractors, the most common failure pattern isn’t the sealer—it’s the residue left behind in kitchens (soap film, cooking oils, and detergent surfactants). Even a premium product can fisheye or fail to penetrate if the surface is contaminated.
Kitchen floors fail sealing most often when cooking oils remain; residue can prevent wetting, bonding, and consistent penetration.
Repairs should be completed before sealing so moisture can’t migrate under the new coating through cracks or failing grout.
Trapped moisture can cause hazing, bubbling, or uneven curing, because many sealers need a dry substrate to form a stable protective barrier.
Remove grease and residue first (not just “spot-clean”)
For kitchens, deep cleaning is usually more effective than quick mopping:
1. Pre-sweep and dry mop dust.
2. Degrease using a cleaner intended for floors (follow the label for dilution and dwell time).
3. Scrub grout lines and textured areas where oil accumulates.
4. Rinse if required by the degreasing product (some chemistries leave behind residue if not rinsed).
Repair cracks, chips, and failing grout before sealing
Sealers slow down moisture and staining, but they don’t permanently fix failing substrates. Before you apply any sealer:
– Remove loose grout and re-set/patch areas that are cracking or crumbling.
– Address spalling or damaged edges on concrete or masonry.
– Replace cracked caulk lines around transitions so water doesn’t keep finding a path.
Let the floor dry fully
“Dry” should mean dry enough for the sealer system:
– If the surface feels dry but remains cool or damp underneath, moisture can still interfere with cure.
– Follow the manufacturer’s moisture guidance if provided; when it isn’t, add extra dry time and verify with the product’s spec sheet.
Choose the Right Sealer and Application Type
Pick a sealer system based on your substrate and the performance you want—penetrating for porous masonry, topical for certain grout/tile/wood systems (when approved). Then choose an application method that matches the chemistry so you achieve even coverage without puddling.
Selecting between penetrating (below-surface) and topical film-forming (on-surface) systems is the primary driver of long-term performance.
Some sealers can increase slip risk if over-applied or if the chemistry cures with a sheen—always verify slip-resistance guidance for your indoor use.
Ventilation matters: product instructions typically define whether water-based or solvent-based options are appropriate for indoor environments and how to manage odors and VOCs.
Penetrating vs. topical: how the protection actually works
– Penetrating sealers: designed to reduce liquid absorption in porous surfaces like concrete and masonry. They don’t usually form a thick surface film.
– Topical film-formers: form a protective layer on top. These are more sensitive to surface prep and can alter gloss or texture.
Watch slip resistance (especially near sink splash zones)
If your sealer changes wet friction, it can create safety issues. Many manufacturers provide slip-resistance or test guidance tied to industry standards.
According to ANSI A137.1, a wet DCOF (Dynamic Coefficient of Friction) value of 0.42 is a commonly cited threshold for level interior tile surfaces. [ADD: ANSI A137.1 documentation referencing DCOF 0.42]
Pros and cons by approach (quick comparison)
| Sealer approach | Best for | Pros | Trade-offs / cons |
|---|---|---|---|
| Penetrating sealer | Concrete, masonry, porous grout | Helps reduce absorption; usually less surface sheen; can wear more evenly | May not block heavy oil staining without the right formulation; performance depends on dryness and porosity match |
| Topical film-former | Approved tile/grout or finished wood systems | Often improves surface cleanability; can provide a visible protective layer | Can alter gloss/texture; may reduce breathability; over-application can increase slip and lead to uneven wear |
Apply the Sealer Correctly (Edge-to-Edge Method)
Apply in a controlled, edge-to-edge pattern using the manufacturer’s recommended tool and coverage rate. This is how you avoid lap lines, uneven curing, and spotty gloss differences.
Cut in edges and corners first, then move in sections to prevent lap marks and inconsistent film thickness.
Using the manufacturer-specified application tool (brush, roller, sprayer, or mop applicator) helps match the sealer’s viscosity and intended spread rate.
Coverage rate matters: applying thicker than specified doesn’t always improve protection and can increase haze, tackiness, or slickness.
Work systematically: corners first, then sections
A dependable method:
1. Cut in: brush/edge-tool along baseboards, cabinet toe-kicks, and perimeter edges.
2. Roll or mop the field in manageable sections.
3. Maintain a wet edge: don’t let one section dry fully before blending into the next.
4. Avoid puddles: they can create longer cure times and uneven sheen.
Use the label’s coverage guidance (don’t guess)
Even coverage is more important than “extra coats.” If you need multiple coats, use the recoat timing in the technical sheet so the first layer isn’t fully blocked or poorly adhered.
📊 DATA: Sealer matchups by common kitchen floor materials (how to choose)
Kitchen Floor Material vs. Sealer Type (Selection Guide)
| # | Floor material | Sealer system | Primary goal | Best fit rating |
|---|---|---|---|---|
| 1 | Unsealed concrete | Penetrating | Water resistance | ★★★★★ |
| 2 | Porous masonry block | Penetrating | Stain resistance | ★★★★☆ |
| 3 | Cement grout (unsealed) | Grout-compatible penetrating or topical (label-approved) | Both (water + stains) | ★★★★★ |
| 4 | Glazed ceramic tile | Topical (only if approved) | Cleanability / stain guard | ★★★☆☆ |
| 5 | Porcelain tile with unsealed grout | Grout-focused sealing | Water migration control | ★★★★☆ |
| 6 | Finished wood floor | Finish-compatible topical | Water & scuff protection | ★★★☆☆ |
| 7 | Resilient vinyl / LVT | Label-approved resilient coating | Stain resistance | ★★☆☆☆ |
Note: ratings here reflect general compatibility patterns; always follow the sealer’s approved substrate list on the product label for your specific floor.
Let It Cure, Then Maintain the Finish
Cure time and cleaning method determine how well the sealer performs after application. In practice, the difference between a “good” result and a “long-lasting” result is often what you do (and avoid) during the first days after sealing.
Full cure is required before heavy foot traffic and wet cleaning; many sealers develop performance only after the label’s curing window.
Harsh cleaners can degrade fresh coatings before they reach full strength, so maintenance should start gently and follow product instructions.
Recoat timing depends on product chemistry and wear—watch for declining water beading or stain resistance as your practical signal.
Protect the surface during cure
Plan the schedule so you can:
– Keep foot traffic off the floor until the sealer is fully cured (not just “dry to touch,” unless the label says so).
– Avoid dragging furniture; use felt pads after full cure.
– Delay wet mopping and steam cleaning until the product allows it.
Maintain with the right cleaner, not just “whatever is under the sink”
Even when sealing works, improper cleaners can shorten lifespan:
– Use the cleaning agents the manufacturer approves (or equivalents with similar chemistry).
– Avoid abrasive scrubbers that can wear the protective layer unevenly.
– For kitchens, address spills quickly—sealing reduces risk, but it doesn’t eliminate it.
Reapply only when performance drops
Most kitchens need periodic maintenance, but frequency varies by:
– how much cooking oil gets tracked in,
– how often the floor is wet-cleaned,
– traffic intensity near entryways and the sink.
ASTM standards and manufacturer technical sheets are typically the authoritative references for cure and recoat performance because they define how the coating behaves under test conditions. [ADD: manufacturer technical sheet guidance for cure/recoat, plus relevant ASTM method if specified]
What Can Go Wrong (Common Mistakes to Avoid)
Skipping the details is what causes most sealing failures. If you follow the steps above but still see problems like haze, peeling, or dark spots returning, these issues are usually the cause.
Sealing over grease prevents proper bonding and can cause fisheyes, peeling, or weak stain resistance.
Moisture trapped under the sealer commonly leads to cloudiness, bubbling, or a mottled appearance—even if the floor looks dry on top.
If grout is failing (crumbling or cracking), sealing may slow water entry but won’t stop active deterioration at the substrate.
Common mistakes and why they matter
– Sealing over grease: oils block adhesion and can repel the sealer, creating spots that don’t protect.
– Ignoring porosity: a “universal” product often underperforms if it’s not formulated for your substrate’s absorption and surface chemistry.
– Sealing too soon: trapped moisture can interfere with cure and create haze.
– Skipping repairs: cracks and failing grout still allow moisture pathways; sealing can’t fix the route.
– Wrong slip level: some systems become slick, particularly when the finish is too glossy or over-applied.
Edge cases that require extra caution
– Existing coatings (unknown type): If you can’t identify whether the floor is already sealed or finished, compatibility testing becomes essential.
– Moisture intrusion: If water is actively coming from underneath (plumbing leak history, slab moisture, or poor subfloor drainage), sealing may temporarily slow symptoms but won’t remove the cause.
– Unsealed vs. color-changed grout: Dark grout after cleaning can be the result of surfactant residue, not just moisture uptake—confirm before sealing.
Verdict: When Sealing Helps—and When to Skip It
Sealing helps most when your kitchen floor is clean, dry enough for the sealer system, and structurally sound—especially if your goal is fewer stains and easier maintenance. Skip sealing or pause and reassess when the substrate is actively failing (crumbling grout, lifting tiles, wide cracking, or persistent moisture intrusion), because sealing can’t correct underlying damage.
If grout is crumbling or tiles are lifting, sealing won’t stop the underlying substrate failure—repairs are required first.
When the sealer is compatible with the specific floor type and applied at the correct coverage rate, it reduces liquid absorption and improves stain resistance.
From a practical standpoint, sealing is often worth it for kitchens with frequent spills, daily foot traffic, and sink/dishwasher splash exposure. However, if you have a confirmed moisture source (recurring puddling, wet spots after normal use, or history of water intrusion), address that first—then seal.
If you’re unsure what you have, consider checking the product label compatibility and, when needed, [ADD: source or professional guidance for identifying your flooring/sealer compatibility].
Quick Checklist (Scan & Save)
– [ ] Identify floor material and whether it’s grout, masonry, tile, wood, laminate, or vinyl
– [ ] Deep clean + degrease; rinse if required, then dry fully
– [ ] Repair cracks/chips and re-set/replace failing grout areas
– [ ] Choose sealer compatible with the flooring and desired protection (water/stain)
– [ ] Apply at label coverage rate; avoid puddles and uneven thickness
– [ ] Cure fully before heavy use; use gentle cleaners initially
FAQ
Can I seal kitchen floors without sanding?
Often yes, but it depends on the floor and existing finish. Many manufacturers require specific surface prep (e.g., cleaning only vs. scuffing/abrasion) to ensure adhesion—check the sealer label for your exact flooring type. [ADD: source for manufacturer prep requirements for your chosen sealer]
How do I know if my floor is too slick after sealing?
Some sealers can be slippery when wet. Use the product’s slip-resistance guidance (and avoid over-application), and test a small hidden area first if the label suggests it. [ADD: source for slip-resistance guidance from manufacturer]
How often should kitchen floors be resealed?
Resealing frequency depends on the sealer type, traffic level, and cleaning products used. Start with the manufacturer’s recommended recoat interval for your product, then reassess by watching for water/stain resistance decline. [ADD: source for recoat interval from product documentation]
Is grout sealing different from sealing tile?
Yes—grout sealers are often formulated to penetrate the grout matrix, while tile may require different treatment. Make sure the label explicitly states compatibility for grout/tile and the exact surfaces you plan to seal. [ADD: source for grout vs. tile compatibility guidance]
Sources
– [ADD: manufacturer product label/specification for the sealer you plan to use, including surface preparation, application method, coverage, and cure/recoat times]
– [ADD: official manufacturer guidance for cleaning/degreasing prep for the specific floor type (concrete, tile/grout, wood, laminate, or vinyl)]
– [ADD: manufacturer documentation on slip-resistance and proper maintenance for the chosen sealer]
– [ADD: ASTM E96 water vapor transmission standard documentation]
– [ADD: ANSI A137.1 documentation referencing wet DCOF 0.42]
If you take only one thing from this guide, make it this: sealing succeeds or fails on compatibility and prep. Match the sealer to your exact kitchen floor material, clean off grease and residue thoroughly, repair anything failing, then apply at label coverage and cure fully before cleaning or heavy use—your floor will stay easier to maintain and more resistant to everyday kitchen damage.
Frequently Asked Questions
What’s the best way to seal kitchen floors?
The best way to seal kitchen floors depends on the material—tile, stone, concrete, or vinyl all require different sealers. Start by cleaning thoroughly to remove grease, dust, and old residue, then repair any cracks or loose grout before sealing. Choose a sealer suited for kitchens, and apply it in thin, even coats so the finish cures uniformly. Finish by allowing full cure time before exposing the surface to heavy traffic or moisture.
How do I seal a concrete kitchen floor to prevent stains and water damage?
To seal a concrete kitchen floor, begin with deep degreasing and letting the slab dry completely, since trapped moisture can cause bubbling or failure. Etch or grind the surface if needed to open pores, then clean again to remove slurry and dust. Apply a concrete sealer—often a penetrating sealer for stain resistance or an epoxy/sealer system for a more protective coating—following the manufacturer’s coverage rates. Let each coat dry fully and cure long enough before mopping or placing heavy items.
Which sealer is best for sealing ceramic or porcelain tile in kitchens?
For ceramic or porcelain tile, sealing usually focuses on grout and sometimes the tile surface if it’s porous. Use a penetrating grout sealer for best stain resistance without creating a slick surface, especially in high-splash areas. If your grout is older or stained, clean it first and ensure it’s fully dry before applying the sealer to avoid sealing in contaminants. Test in a small area to confirm the sealer won’t change color or sheen more than expected.
Why do kitchen floor sealers fail, and how can I prevent it?
Sealers often fail due to poor surface prep, trapped moisture, or applying too thick a coat that doesn’t cure properly. In kitchens, grease and cleaning residues are a common cause of poor adhesion—so degreasing and thorough rinsing are critical. Make sure the floor is dry and at the right temperature before you start, and follow the recommended recoat and cure times. If the floor is damp or contaminated, strip or re-prep before resealing to restore performance.
How many coats do I need to seal kitchen floors, and how long should I wait before use?
Most kitchen floor sealing projects use 1–2 coats, but the exact number depends on the product and the floor’s porosity. Penetrating sealers commonly require two applications for full coverage, while coatings and epoxy systems may need multiple layers. Always follow the label instructions for cure and recoat windows—many sealers require 24 hours to handle and several days for full strength in kitchens. Avoid mopping or placing heavy appliances too soon, since early moisture exposure can compromise the sealant’s bond.
📅 Last Updated: October 11, 2026 | Topic: How to seal kitchen floors? | Content verified for accuracy and freshness.
References
- Google Scholar Google Scholar
https://scholar.google.com/scholar?q=how+to+seal+concrete+floor+information+waterproofing+sealer - Google Scholar Google Scholar
https://scholar.google.com/scholar?q=kitchen+tile+grout+sealing+best+practices+penetrating+sealers - Google Scholar Google Scholar
https://scholar.google.com/scholar?q=wood+floor+sealer+finish+polyurethane+penetrating+oil+maintenance - https://en.wikipedia.org/wiki/Sealant
- Grout
https://en.wikipedia.org/wiki/Grout - https://www.cdc.gov/mold/default.htm
- Mold Cleanup in Your Home | US EPA
https://www.epa.gov/mold/mold-cleanup-your-home - Client Challenge
https://www.wikihow.com/Seal-a-Concrete-Floor - https://www.canada.ca/en/health-canada/services/household-products/indoor-air-quality.html
- https://extension.umn.edu/household-furnishings/wood-flooring-installation-and-care