Replacing laminate floors in a basement is a DIY project that pays off fast—if you prep the subfloor and control moisture first. This step-by-step guide walks you through removing the old boards, fixing any damage, installing the underlayment, and laying new laminate so it locks cleanly and stays stable. By the end, you’ll know exactly what to do to get a basement-ready finish that won’t buckle, gap, or peel.




Replacing laminate floors in a basement is doable, but the success hinges on moisture control and correct subfloor prep. If you plan for slab moisture testing, use the right basement underlayment/vapor control, and keep a true expansion gap, you can install a floating laminate floor that won’t buckle as humidity changes.
If your basement has a concrete slab (common), you’ll need to treat laminate installation a bit differently than an above-grade room. This guide is for homeowners replacing an existing laminate floor (or removing it to address damage) and want a practical, step-by-step process that matches how most laminate floating-floor systems are designed to work.
This is for you if you’re replacing a basement laminate floor over concrete and you want predictable results without guesswork. It’s also a good fit if your existing floor has lifted seams, sounds hollow, or shows early signs of buckling—because those symptoms are usually tied to moisture and slab flatness rather than the laminate “wearing out.”
Replacing laminate floors in a basement is doable, but the success hinges on moisture control and correct subfloor prep. Plan for a moisture check, install the right underlayment, and keep an expansion gap so the planks can move safely as humidity changes. This guide walks you through removal, prep, installation, and the common basement pitfalls that cause buckling.
Planning and moisture check (don’t skip this)

Moisture control is the make-or-break step for basement laminate, and it starts before you buy materials. In most basement slab situations, you don’t want to rely on “it looks dry”—you want documented moisture testing and a basement-rated underlayment/vapor barrier plan that matches your laminate brand’s instructions.
Basement laminate flooring behaves differently than upstairs flooring because concrete can transmit moisture for years. According to ASTM F2170, in-situ relative humidity testing measures the actual RH condition within the slab (not just the air you feel). According to ASTM F1869, the calcium chloride method measures moisture vapor emission rate (MVER), which predicts how much moisture vapor migrates upward into the flooring system. (Install acceptance limits still come from your laminate manufacturer.)
A basement laminate floor is only as stable as the moisture-control system underneath it. If your laminate manufacturer requires a specific vapor retarder or test method, that requirement controls the entire installation plan.
Concrete humidity is not the same as indoor humidity. ASTM F2170 and ASTM F1869 are designed to tell you what’s happening inside the slab—exactly where laminate can fail.
– Check basement humidity and slab moisture before you buy or install anything (humidity swings are a major laminate failure trigger).
– Confirm the laminate brand’s install instructions for basements, including required underlayment and any moisture testing method: .
– Decide on the direction and layout early (most floating floors look best when planks run ).
Choose the right moisture-control path for your situation
Moisture diagnostics and vapor control aren’t interchangeable: the “test method” tells you whether moisture is present, and the “vapor barrier/underlayment system” tells you how the flooring will be protected. If your tests indicate elevated moisture, you may need to adjust the underlayment approach—or, in some cases, pause and solve the moisture source before installing laminate.
Below is a practical contrast to help you decide what to do first when you’re planning laminate flooring in a basement:
| Moisture option | What it tells you | Best for | Key limitation |
|---|---|---|---|
| ASTM F2170 (RH probe) | Relative humidity within the slab | When your laminate spec references RH limits | You still must match the manufacturer’s acceptance criteria |
| ASTM F1869 (calcium chloride) | Moisture vapor emission rate (MVER) | When your laminate spec references MVER limits | Test setup details matter; follow the standard and manufacturer instructions |
| Indoor RH monitoring | How humidity in the basement air changes over time | Planning acclimation and understanding swings | It does not measure slab moisture directly |
A quick way to stay grounded: treat laminate flooring in a basement as a system. Moisture measurement methods come from your test standard, and vapor control comes from your laminate manufacturer’s underlayment requirements. When those two pieces are aligned, you reduce the odds of buckling and seam separation.
Remove the old laminate and inspect the subfloor
Removal and inspection determine whether your new basement laminate flooring can sit flat and lock together correctly. If you skip inspection, you’re more likely to build on problems like high spots, cracks, and debris—which can telegraph into seams or create uneven “clicking” and joint stress.
For removal, you’ll want to avoid damaging the slab and you’ll want to be confident you’re actually removing the floating layer—not leaving old pad stuck to the concrete. In my experience, careful baseboard/shoe molding removal saves time later, because it prevents you from wrestling with stuck trim that can tear underlayment remnants.
Before you install new laminate in a basement, you must remove trim and existing floating layers cleanly so the underlayment can sit flat without ridges. Even small debris can create flex points that show up as seam gaps.
Inspection is not optional: laminate flooring transmits stress through the planks, so slab cracks, soft spots, or high ridges can become joint failures over time.
– Remove trim carefully (baseboards/shoe molding), then pull up the laminate using the reverse of the click-lock installation method.
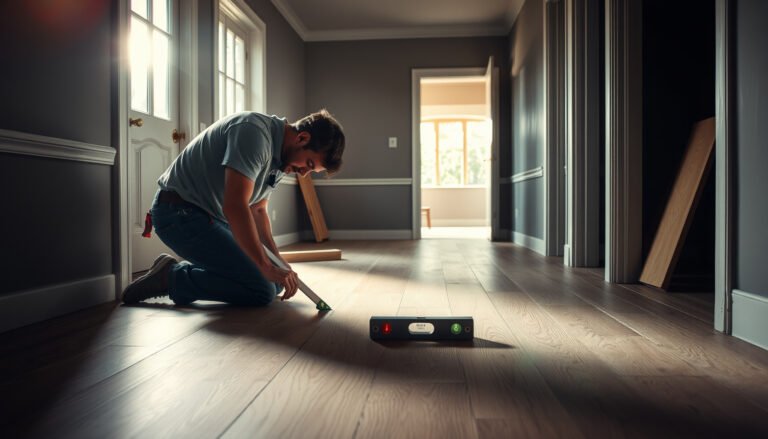
– Inspect the concrete/subfloor for high spots, cracks, or soft areas; fix anything that would prevent flat, uniform support.
– Clean thoroughly—dust and debris under underlayment can create flex points that later show up as seams or squeaks.
Flatness matters for laminate’s click-lock joints
Laminate floating floors require uniform support. Many manufacturer instructions use a flatness tolerance concept that’s similar to “no more than 3/16 in (4.8 mm) variation over 10 ft (3 m),” but you must confirm your exact product’s tolerance in the install guide. When the slab is out of tolerance, you typically address it with grinding and/or a manufacturer-approved leveling compound.
Also watch for cracks or spalled concrete. Small hairline cracks may not be a deal-breaker, but they can indicate slab movement or moisture migration paths. If you see active deterioration, get guidance from a qualified flooring installer or concrete contractor before you cover it with basement laminate flooring—because moisture control isn’t just about underlayment, it’s also about the slab’s condition.
Don’t forget debris control
Basement concrete often holds fine dust. Underlayment laid over dust can create a “springy” base layer, which can make planks feel uneven and can prevent joints from seating fully during installation. Use a proper vacuum and wipe/clean the surface as directed by your underlayment and leveling system guidance (when dust removal is specified). Let any patching compound cure fully before underlayment.
Prep the basement slab and install the correct underlayment
Correct slab prep plus the right basement underlayment/vapor barrier prevents moisture-driven movement and protects the floating system. The main goal is to get a flat, clean surface, then install a moisture-control layer that matches your laminate’s specifications.
In basement laminate flooring installs, underlayment is doing multiple jobs: cushioning (in some systems), vapor control (in many basement systems), and sometimes sound reduction. If your laminate brand requires a specific underlayment type or an added vapor barrier sheet (for concrete slabs), you should follow those steps exactly. Research and industry guidance consistently treat this as part of the “system,” not an optional upgrade.
If your slab fails flatness tolerance, you usually need grinding and/or leveling before underlayment goes down. Underlayment can help with minor imperfections, but it cannot safely correct major slab variation.
Basement laminate flooring systems often require a vapor barrier designed for concrete. That underlayment choice affects moisture performance and joint stability more than most other installation variables.
– Verify the floor is flat enough for your laminate system; if it’s out of tolerance, plan for grinding and/or leveling compound per the laminate guidance.
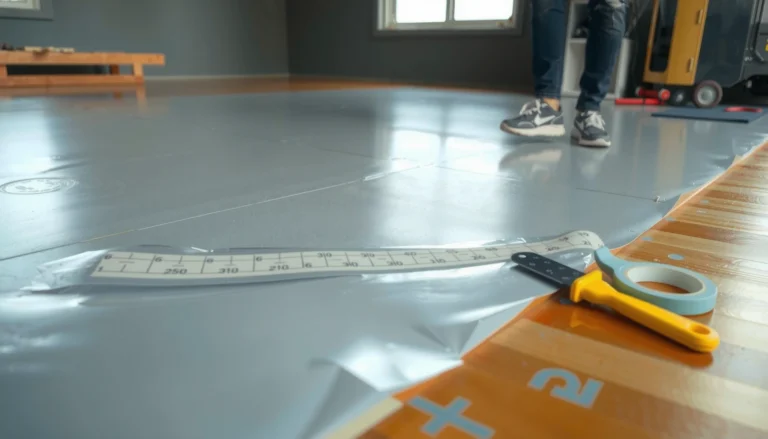
– Install an underlayment and (if required) a vapor barrier system designed for basement concrete: .
– Maintain the expansion gap around all fixed edges (walls, posts, columns). Use spacers while installing so the gap doesn’t get “accidentally” closed.
Use a manufacturer-aligned underlayment “stack”
A basement laminate flooring system typically looks like this (names vary by brand): concrete slab → vapor barrier/underlayment → floating laminate with an expansion gap at fixed edges → transitions/thresholds to manage movement at doorways.
One practical rule: don’t stack underlayments. If your laminate calls for an underlayment with integrated vapor control, don’t add a second vapor barrier unless the manufacturer explicitly allows it. Over-building can trap moisture or change the planks’ effective height and movement.
Common spec checkpoints (quick reference)
Below is a data table you can use as a planning scaffold while you wait on your laminate’s exact instruction sheet. (Always treat your specific product’s written requirements as the final authority.)
Moisture- and Prep-Related Standards Commonly Referenced for Laminate Over Concrete Basements
| # | Standard / Method | Primary focus | Typical output | Basement laminate suitability |
|---|---|---|---|---|
| 1 | ASTM F2170 | Slab in-situ RH | RH% at depth | ★★★★★ |
| 2 | ASTM F1869 | MVER testing | MVER value | ★★★★★ |
| 3 | ASTM F710 | Surface preparation | Prep criteria | ★★★★☆ |
| 4 | ASTM D4263 | Plastic-sheet screening | Moisture presence indicator | ★★★☆☆ |
| 5 | ASTM E96 | Permeance testing (materials) | Perm rate / vapor transmission | ★★★★☆ |
| 6 | Indoor RH monitoring practice | Environmental swing tracking | RH trend (% over time) | ★★★☆☆ |
| 7 | Underlayment spec compliance | System match | Approved materials & installation | ★★★★★ |
This table summarizes where the industry points you: ASTM F2170 and ASTM F1869 are measurement standards, while prep and material-permeance standards help you select compatible layers. Your basement laminate flooring still needs manufacturer-specific acceptance limits and system instructions.
Install the new laminate correctly (floating-floor rules)
If you install laminate as a true floating floor, you prevent the most common basement failure modes (buckling, joint separation, and clicking issues). Your job is to let the planks expand and contract freely while keeping joints locked and the underlayment undisturbed.
Floating-floor rules exist because laminate expands with humidity. As humidity increases, the laminate flooring in a basement needs room to move—otherwise it pushes against walls and fixed posts and can buckle. Most laminate systems are designed with no rigid fastening through the planks; fastening is handled at the perimeter only if the manufacturer allows it.
Basement laminate flooring should be installed as a floating floor: no nails or screws through the planks. Fasten perimeter trim only if your manufacturer’s installation instructions permit it.
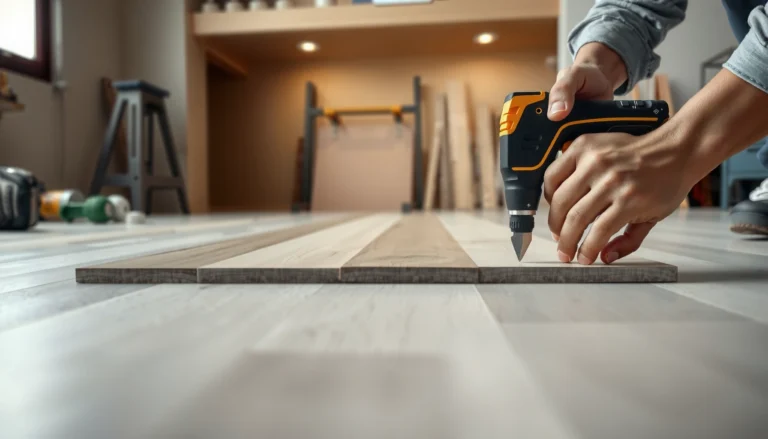
Correct click-lock technique matters. For most systems, forcing misaligned ends or tongues/grooves during installation can break the locking profile and later show up as gaps.
– Start with the manufacturer-recommended starting wall and maintain consistent plank spacing and staggered end joints.
– Lock planks using the correct angle/technique for your click system—don’t force misaligned joints (this is where broken tongues/grooves happen).
– Keep the floating design intact: no rigid fastening through the laminate planks. Fasten only to walls/trim if the instructions allow it.
Plan for expansion gaps you can actually maintain
A practical baseline for many floating laminate installs is an expansion gap around the room perimeter of roughly 1/4–3/8 in (6–10 mm). Because your basement has moisture swings, don’t assume “a smaller gap is fine.” According to NWFA guidance on resilient and laminate-type floating floors (and widely adopted installer practices), maintaining manufacturer-required expansion space is essential for protecting joints and preventing buckling.
Use spacers and verify the gap at corners, around posts, and next to pipes. I’ve seen projects where the gap “seemed closed” after trim went back on—because small spacer removal errors go unnoticed until the first seasonal humidity increase.
Keep acclimation and temperature consistent
Laminate planks need time to equilibrate to the basement environment so they don’t “move” excessively during the install. Many manufacturer instructions call for acclimation inside the installation space for a set period (commonly 48 hours in industry practice, but your product may differ). Because basements can be cooler and more humid than upstairs rooms, follow the exact acclimation guidance in your laminate brand’s installation sheet.
Stagger seams for strength and appearance
Staggering end joints improves structural stability and reduces the chance that small joint gaps align across multiple rows. Use the manufacturer-recommended minimum offset (often something like 6 in / 15 cm depending on plank length) so the locking mechanism experiences less stress during expansion.
Finish edges, transitions, and basement-specific details
Finishing is where you prevent the “last 10%” mistakes that create movement restrictions or trap laminate against hard surfaces. In basements, this means planning transitions at doorways, reinstalling trim correctly, and protecting likely moisture zones where water splashes or humidity concentrates.
After the laminate flooring is installed, you typically remove spacers and reinstall baseboards/shoe molding so the perimeter is covered—but not pinning the laminate. If your laminate uses undercut baseboards or a specific finishing method, follow that. The goal is a clean look while preserving the floating gap function.
Transitions are a movement management tool. Doorways and openings often need thresholds or transitions so laminate flooring in a basement can expand without pushing against a rigid edge.
Reinstall trim in a way that doesn’t trap the floating layer. If baseboards are too tight or pinned through the planks, seasonal movement can cause buckling or joint separation.
– Reinstall baseboards/shoe molding after the floor is down so you don’t trap the laminate against the wall.
– Add transitions at doorways and between rooms to allow movement (thresholds often need to be installed per flooring guidance).
– If your basement has a sump area, bathroom fixtures, or likely splash zones, plan how you’ll protect the perimeter from moisture: .
Protecting perimeter areas without voiding the warranty
Basements can have localized moisture—near sump pits, laundry areas, or under plumbing. The temptation is to seal everything, but not all sealants are laminate-safe. Many laminate warranties explicitly restrict sealing methods because they can interfere with movement or with the performance of the vapor-control underlayment.
Follow the manufacturer’s explicit allowances: some systems allow certain perimeter sealing approaches; others require that the floating gap remain unsealed except by the trim system. When in doubt, prioritize movement and system compatibility over “DIY sealing.”
What can go wrong (common basement laminate problems)
Basement laminate problems are usually predictable, and they typically trace back to moisture exposure, flatness issues, or incorrect floating installation practices. When a basement floor fails, it’s rarely because the planks were “bad”—it’s because one part of the system didn’t match the conditions.
Below are the most common failure patterns and how to diagnose them early so you don’t repeat the same mistake after reinstallation. This troubleshooting mindset is especially important for laminate flooring in a basement because humidity changes seasonally and because slab moisture can be intermittent.
Buckling in basement laminate is commonly caused by moisture plus blocked expansion gaps—either from trim pressure, missing perimeter spacing, or underlayment/vapor control mismatch.
Uneven feel and seam separation often point to slab flatness problems or debris trapped under underlayment. Fixing it later usually means removing sections and correcting the base.
– Buckling or cupping: usually caused by excess moisture, missing vapor control, or an expansion gap that got blocked.
– Uneven feel and joint separation: typically from slab unevenness or underlayment installed over debris or uneven patches.
– Clicking problems during install: often incorrect angle/force, end joints not staggered properly, or planks not acclimated to the basement environment.
Quick diagnosis tips you can do before it becomes catastrophic
– If joints open right after install: check flatness and whether planks seated fully during locking.
– If seams grow seasonally: suspect moisture swing and expansion gap restrictions.
– If only one area fails: inspect localized moisture sources (near plumbing, sump, exterior walls) and whether the underlayment/vapor barrier was continuous.
Pros/cons can help you decide whether to keep troubleshooting or plan a removal and re-install:
| Scenario | What to check first | Why it matters |
|---|---|---|
| Seams open near walls | Expansion gap continuity and trim pressure | Blocked movement can turn humidity into buckling stress |
| Floor feels springy in spots | Underlayment debris and slab flatness | Flex points stress locking edges and create gaps |
| Cupping or waves | Moisture control coverage and moisture source | Humidity-driven movement without vapor control warps planks |
Verdict / tip + scan checklist
If you follow the moisture requirements and keep the floor properly “floating,” replacing laminate in a basement can be a straightforward weekend-to-weekend project. The downsides are that basement moisture issues can be hard to diagnose without proper testing, and if you install over an uneven slab you may see seam gaps later.
Who should skip DIY: if you suspect significant slab moisture or you’re not confident measuring/leveling and following the manufacturer’s moisture + underlayment requirements, consider hiring a flooring installer and ask them to follow the same specs you’re using. This isn’t just about skill—it’s about system compliance (test method, underlayment type, vapor control continuity, expansion gap).
A basement laminate replacement works when moisture testing, compatible underlayment, and a maintained expansion gap all line up—then the floating floor can move safely with seasonal humidity.
When any one part of the basement laminate system is “close enough,” the failure typically shows up as buckling, cupping, or joint gaps. That’s a signal to correct the system, not just the visible surface.
Quick scan checklist (save this):
| Step | Yes/No |
|---|---|
| Confirm laminate basement rules (moisture + underlayment) | [ ] |
| Check slab flatness and fix high/low areas | [ ] |
| Acclimate planks per manufacturer instructions | [ ] |
| Remove old laminate and clean thoroughly | [ ] |
| Install required vapor barrier/underlayment | [ ] |
| Maintain expansion gap around walls and posts | [ ] |
| Use correct click/locking method for your planks | [ ] |
| Add transitions/thresholds to allow movement | [ ] |
| Reinstall trim without pinning the floor | [ ] |
Sources:
– ASTM F2170 (standard for in-situ relative humidity testing for concrete) —
– ASTM F1869 (standard for anhydrous calcium chloride test for moisture vapor emission rate) —
Frequently Asked Questions
What’s the best way to remove old laminate flooring in a basement without damaging the subfloor?
Start by removing baseboards and any transition strips, then pull laminate planks carefully from the seams if they’re click-lock. If the laminate is glued down, use a floor scraper or pry bar and remove adhesive residue thoroughly so the replacement laminate lays flat. Keep an eye out for moisture issues by checking for soft spots, bubbling, or staining—basements are prone to water problems that can ruin new flooring.
How do I prepare a basement subfloor before installing new laminate floors?
Inspect the subfloor for levelness and repair any cracks or low areas using an appropriate patch compound. Address moisture concerns first by ensuring the concrete is dry, then consider using a quality vapor barrier underlayment designed for basement laminate installations. Finally, allow materials to acclimate and keep humidity stable so the laminate floor won’t buckle or separate after installation.
Why does laminate flooring fail in basements, and how can I prevent it?
The most common cause is excess moisture from concrete, leading to swelling, moldy underlayment, and warped boards. Poor subfloor prep—like unlevel spots or leftover adhesive—also causes gaps, squeaks, and joint separation. Use a basement-rated underlayment/vapor barrier, ensure proper leveling, and avoid installing laminate in conditions where humidity is outside the manufacturer’s range.
Which underlayment and vapor barrier should I choose for basement laminate flooring?
Look for an underlayment specifically intended for basement or concrete subfloors, ideally with an integrated vapor barrier or a separate 6-mil (or manufacturer-specified) plastic sheet. If your basement is on the wetter side, choose systems that meet local code and provide strong moisture protection while still supporting floating laminate installation. Always follow the laminate flooring manufacturer’s instructions so the underlayment thickness and type are compatible with the click-lock system.
How do I install laminate flooring in a basement while preventing gaps, buckling, and water damage?
Install laminate as a floating floor with the proper expansion gap around walls, columns, and doorways, since basements can shift with humidity. Use spacers during installation, stagger plank seams, and tap boards gently to keep joints tight without over-stressing them. After installation, maintain consistent indoor humidity and promptly address any leaks—your moisture barrier and proper installation details help the laminate floor last longer.
📅 Last Updated: October 22, 2026 | Topic: How to replace laminate floors in a basement? | Content verified for accuracy and freshness.
References
- Laminate flooring
- Underlayment
- https://www.cdc.gov/mold/default.htm
- https://www.epa.gov/mold/prevention
- https://www.epa.gov/mold/mold-cleanup-and-remediation
- https://www.armstrongflooring.com/support/installation-guides.html
- https://scholar.google.com/scholar?q=replace+laminate+floors+in+a+basement+moisture+preparation Google Scholar
- https://scholar.google.com/scholar?q=laminate+flooring+installation+basement+concrete+moisture+barrier+underlayment Google Scholar
- https://scholar.google.com/scholar?q=how+to+remove+replace+laminate+flooring+floating+floor+basement Google Scholar