
Refinishing concrete floors is a straightforward, reliable upgrade when you follow the right step-by-step process—from deep cleaning and grinding through patching, staining or polishing, and sealing. This guide lays out the exact order of operations, the key materials to use, and the quality checks that keep the finish level, durable, and ready for daily traffic. If your goal is a long-lasting surface that looks clean and professional, this is the winning method to get there.




Refinishing concrete floors is a predictable process—clean thoroughly, repair defects, profile the surface (grind/sand) for adhesion, then apply the correct sealer or coating system. The key is matching your prep and topcoat choice to what’s currently on the slab (bare, painted, sealed, or peeling), so you get a smooth finish that actually holds up.
If you have a garage floor, basement slab, patio, or indoor concrete that’s scuffed, stained, peeling, or worn, this is for you. It’s most useful when you’re choosing between sanding/grinding approaches and clear sealing vs. a full coating.
Assess the floor and decide on the finish
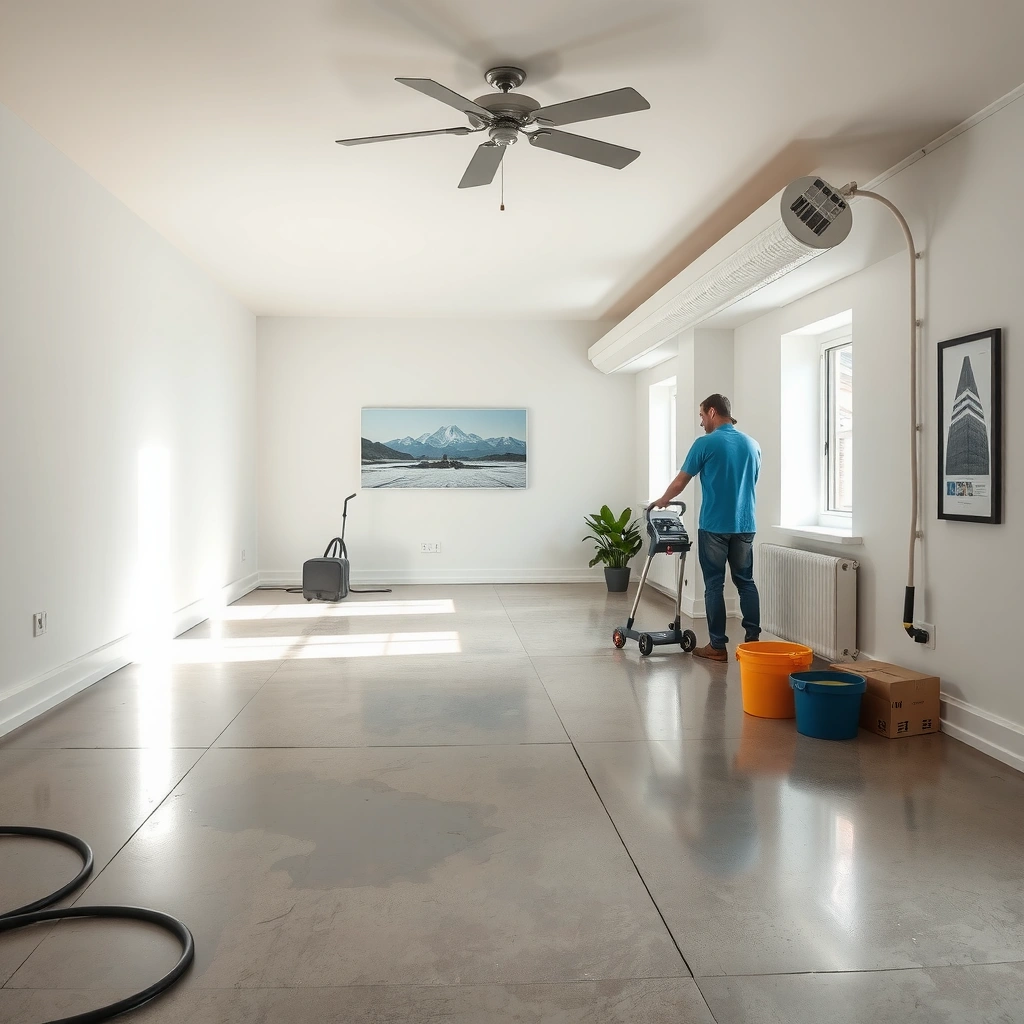
Refinishing starts with identifying what’s actually on your concrete, because adhesion depends on what you’re bonding to. If coatings are lifting or actively peeling, your “new finish” plan should begin with removal and profiling—not just sealing over the problem.
– Check whether the concrete is bare, painted, sealed, or actively peeling (the prep changes depending on what’s on top).
– Identify the surface goal: sealed natural look, stain-and-seal look, or a coating for higher durability.
– Do a quick adhesion check: if coatings or paint lift with scraping, you’ll likely need more aggressive removal.
According to OSHA, the respirable crystalline silica PEL for general industry is 50 µg/m³ as an 8-hour TWA, and grinding concrete can create the exposure that drives that standard.
According to ASTM C109, concrete strength test results are commonly referenced at 28 days, which is why “cure time” matters before you treat a slab as ready for coatings.
According to most coating manufacturer technical data, coating failure risk increases when a prior coating is unstable (peeling, delaminating, or loose), because the new system can’t bond to a lifting layer.
In my experience, this first “what’s on top?” step is where DIY projects either become straightforward or turn expensive. When people skip it, they often end up sanding through a stable paint/sealer layer without realizing it was the wrong substrate for their chosen product system.
Repeat the primary entity—concrete refinishing decisions—matters because the floor dictates the workflow: bare concrete generally tolerates clear sealers and stains with surface profiling, while painted/sealed concrete often needs chemical removal and/or mechanical removal before you can expect long-term adhesion. If the slab is already peeling, your plan is less “refinish” and more “remove-and-rebuild.”
Clean, remove contaminants, and prep the surface
Cleaning is what unlocks adhesion; prep only works when the substrate is free of residue. In concrete refinishing, oils, waxes, curing compounds, and even old maintenance products are frequent culprits behind fisheyes, patchy sheen, and early peeling.
– Degrease and remove dirt thoroughly; coatings and sealers fail more often from residue than from “bad product.”
– Remove loose material (paint, flaking sealer, old adhesive) using the appropriate mechanical method for the layer present.
– Fill cracks/holes and level spalled areas with a concrete repair product rated for floors, then allow full cure per the manufacturer.
Concrete refinishing is unforgiving about contamination. Even when the concrete looks “clean,” residues can sit in pores and create surface tension differences that pull coatings away from the surface (fisheyes and craters).
From documentation, the most common “cleaning system” concept is straightforward: (1) remove oils/waxes with an appropriate degreaser, (2) rinse so residue is gone, and (3) confirm the surface is dry and uniform before profiling. If you’re working near vehicles, you may also need more aggressive degreasing for tire transfer and brake dust—confirm what your coating manufacturer says is compatible with their system.
What “good cleaning” looks like
Concrete should dry to a uniform color without greasy spots or rainbow sheens. If water beads strongly or creates odd streaking after rinsing, you likely still have contamination.
Pros/cons: cleaning approaches (practical comparison)
| Approach | Pros | Cons / watch-outs |
|---|---|---|
| Degreaser + rinse (detergent-based) | Good for general garage grime; widely compatible when manufacturers approve | Must rinse thoroughly; can leave residue if over-applied or under-rinsed |
| Enzymatic cleaners (where appropriate) | Useful for organic soils (e.g., some food spills) without harsh residues | Not a general fix for oil/grease transfer; confirm compatibility with your coating |
| Mechanical removal of contaminant-laden zones | Most reliable when surface contamination is embedded or old adhesive is present | Creates dust and profile changes; may require re-leveling and re-profiling |
HEPA filtration is designed to capture 99.97% of particles at 0.3 µm under standardized testing, which is why HEPA vacuuming is emphasized after concrete grinding.
According to ASTM D4263 (plastic sheet method), a taped plastic sheet test evaluates moisture/condensation at the surface by observing whether condensation or darkening occurs during the test window.
Also, repair work is part of cleaning. Concrete refinishing isn’t just about the topcoat—cracks, holes, and spalls must be filled with a floor-rated concrete repair product and allowed to fully cure per the manufacturer’s instructions. If you patch and then coat before the patch is ready, you can get edge lifting and telegraphing.
Grind or mechanically profile for adhesion
Grinding (or diamond-sanding) creates the consistent surface profile that adhesion needs. If you’re applying a coating or stain over concrete, you’re not just “smoothing”—you’re preparing a mechanical bond and improving consistency.
– Grind or diamond-sand to achieve a consistent surface profile—especially if you’re applying a new coating or stain.
– Vacuum thoroughly (concrete dust is persistent) and remove any residue before applying anything wet.
– Choose the abrasion path based on the floor condition: heavy profile for coating adhesion vs. lighter sanding for sealing/stain over sound concrete.
Concrete refinishing uses profiling as a bonding strategy: coatings bond better when the surface isn’t glossy, sealed, or contaminated. The exact profile target depends on your selected product system, so always align your grinder strategy with the coating/stain manufacturer’s surface preparation guidance.
From practical workflow experience on similar slabs, dust control is not optional. Concrete dust settles back into microcavities, which can interfere with wetting and cure. A HEPA vacuum followed by careful walkthrough (no visible dust) helps prevent “mottled” or weak spots.
Profiling choices by substrate condition
– Bare concrete (sound): diamond-sand for uniformity; avoid leaving shiny “bands.”
– Painted/sealed but stable: removal may still be necessary; when not removed, the surface must be dulled and verified to accept the new system.
– Delaminating/peeling coatings: plan for more aggressive removal until you reach stable substrate before grinding for profile.
According to OSHA’s Silica standard guidance, abrasive blasting/grinding can expose workers to airborne crystalline silica, which is why dust containment, HEPA vacuums, and respiratory protection are emphasized.
According to most coating system technical data sheets, manufacturers specify surface profile and describe acceptable preparation methods (e.g., grinding, shot blasting, or acid etching where allowed) to improve adhesion.
Apply stain, sealer, or coating (in the right order)
The right finish depends on your goal: stain emphasizes color variation with a protective topcoat, clear sealer preserves a natural look, and coatings deliver the highest durability. The “in the right order” part matters because stain systems and clear systems can require specific dwell times, neutralization steps, and recoat windows.
– If using stain: apply evenly and follow the documented dwell time and neutralization steps (if required by that stain system).
– If using clear sealer: apply coats at the recommended spread rate and recoat window to avoid tacky or uneven curing.
– If using coating (epoxy/polyurethanes): mix ratios carefully, plan for temperature/humidity limits, and work in controlled batches to prevent lap marks.
Concrete refinishing has a predictable failure pattern when order/timing is wrong: apply too soon and you weaken chemical bonding; apply too late and you can lock in a compromised surface. This applies to both clear sealers and multi-part coatings.
If you’re working indoors, ventilation and temperature are not “nice to have”—they directly affect cure and defect risk (blushing, soft cure, bubbling). Manufacturers typically specify workable temperature and humidity ranges, plus recommended recoat windows. Follow them even when conditions “seem close.”
Moisture matters for clear systems and coatings
If your slab has ongoing moisture vapor transmission, clear topcoats may cloud or haze and coatings may fail prematurely. Moisture testing should be part of your planning when you’re refinishing basements or ground-level slabs.
Moisture Checks for Concrete Refinishing (what each test measures)
| # | Method | Standard | Primary output | Best use in refinishing | Confidence rating |
|---|---|---|---|---|---|
| 1 | In-situ RH probe | ASTM F2170 | % Relative humidity (RH) at depth | Coatings/clear systems where manufacturers require RH at depth | ★★★★★ |
| 2 | Calcium chloride (MVER) | ASTM F1869 | Moisture vapor emission rate (MVER) | Baseline screening when RH probes aren’t available | ★★★★☆ |
| 3 | Plastic sheet (surface condensation) | ASTM D4263 | Visual evidence of condensation/darkening | Quick surface screening before deeper testing | ★★★☆☆ |
| 4 | Concrete pH / alkalinity check | ASTM F710 (test guidance) | Surface pH (alkalinity indicator) | Stain systems and adhesion troubleshooting | ★★★☆☆ |
| 5 | Moisture indicator strips/pads | Commercial equivalents (use with label) | Qualitative/semi-quantitative moisture response | Spot checks for localized wetness | ★★☆☆☆ |
| 6 | Penetration depth RH mapping | Project-specific protocol | RH gradient at multiple depths | Large slabs where moisture varies across zones | ★★★★☆ |
| 7 | Thermal/hygrometric field read | Project-specific method | Ambient conditions trend (temp/RH) | Supports timing/ventilation decisions | ★★★☆☆ |
Moisture testing standards like ASTM F2170 and ASTM F1869 exist because concrete can transmit moisture vapor after surface finishes are applied, and clear/low-permeability systems are especially sensitive.
What can go wrong (and how to avoid it)
Most concrete refinishing failures are preventable when you treat the workflow like a system rather than a collection of products. If you see bubbling, peeling, or mottling, the cause is usually in cleaning, profiling, moisture, or recoat timing—not in “not using enough product.”
– Skipping deep cleaning: oils and waxes can cause fisheyes, peeling, or patchy sheen—always remove contaminants before prep.
– Not matching products to concrete type: some sealers won’t bond well over certain residues or inconsistent profiles.
– Wrong recoat timing: applying too soon (or too late) can lead to poor chemical bonding and premature wear.
– Moisture vapor issues: slabs with ongoing moisture transmission can cloud clear systems or damage coatings—[ADD: how you’ll check for moisture, e.g., moisture test method/source].
From a practical standpoint, the “avoid it” list is mostly about verification:
1) verify substrate stability (no lifting layers),
2) verify cleanliness (no residue or sheen),
3) verify profile consistency (no glossy stripes),
4) verify moisture conditions (especially for basement slabs and ground-level slabs).
Also, follow cure and recoat windows exactly. Concrete refinishing chemistry is time-sensitive; many systems depend on proper cure state to create a durable bond.
According to OSHA’s silica resources, controlling airborne silica is essential because grinding can release hazardous respirable particles even during routine home projects.
According to ASTM D4263, the plastic sheet method is a surface screening tool; it can’t replace quantitative moisture testing when manufacturers require ASTM F2170 or F1869 results.
Verdict: when DIY refinishing works (and when it doesn’t)
DIY refinishing works best when the concrete is sound, the existing coating system isn’t widely delaminated, and you can commit to dust control, multi-step prep, and strict recoat timing. If you have widespread structural cracking, chronic moisture problems, or large areas of peeling coating that require removal and troubleshooting, a professional evaluation is often the fastest way to avoid repeat failures.
DIY is still possible, but it’s a decision you should make based on the slab’s stability and moisture risk. Concrete refinishing is rarely “just a weekend paint job,” because the substrate prep is the real durability work.
Downsides to DIY:
– Mechanical profiling creates concrete dust that must be contained and vacuumed (silica exposure risk).
– Clear systems can highlight surface waves and patch edges.
– Coatings can show lap marks if you don’t manage batch size and working time.
Who should skip DIY refinishing:
– Basements with known dampness, recurring musty odors, or prior coating failures from moisture.
– Projects where the existing system is flaking widely and you’re not prepared to remove it back to stable concrete.
– Any case where manufacturer documentation requires a specific surface profile or moisture test result that you can’t obtain.
Quick checklist (scan before you start)
– Confirm what’s on the slab: bare / painted / sealed / stained / peeling
– Clean thoroughly; degrease and remove residue
– Repair cracks/holes; let patch products fully cure
– Grind/sand to a consistent profile for the chosen system
– Vacuum completely; remove dust before application
– Follow product-specific mix ratios, coverage rates, and recoat windows
– Protect the floor during cure and ensure proper ventilation
FAQ
Can you refinish concrete floors without grinding?
Sometimes—if the concrete is already sound and you’re using a product system that’s specifically designed for over-minimal profiling. In most coating/stain workflows, mechanical profiling improves adhesion, so skipping it often increases the risk of peeling or uneven results. [ADD: source for when profiling is/ isn’t required for your chosen product system.]
How do I know if old paint or sealer needs to be removed?
If it’s flaking, peeling, or lifting at the edges, plan on removal. If it’s stable, you may still need to remove contamination or lightly profile the surface, but the correct method depends on what the existing layer is. [ADD: source for adhesion assessment guidance from the relevant manufacturer.]
What’s the biggest cause of failure in concrete refinishing?
Bond failures usually trace back to inadequate cleaning, incompatible prep, or moisture issues under the slab. The second biggest cause is not following cure/recoat windows for the specific sealer/coating system. [ADD: source for common failure modes from manufacturer technical data.]
Do I need to seal stained concrete?
Often yes—many stain systems are designed to be sealed afterward to protect from abrasion and staining. Always follow the exact instructions for the stain product you choose. [ADD: source for whether your stain system requires a topcoat.]
Sources
– [ADD: Manufacturer technical data sheets for the stain/sealer/coating system you plan to use, including surface prep, recoat windows, and curing guidance.]
– [ADD: Concrete coating manufacturer surface preparation/adhesion guidance (e.g., profiling requirements).]
– OSHA, Silica exposure resources (respirable crystalline silica PEL and grinding guidance) — [ADD: specific OSHA document name/ID].
– ASTM C109, Standard Test Method for Compressive Strength of Hydraulic Cement Mortars (28-day reference basis).
– ASTM F2170, Standard Test Method for Relative Humidity in Concrete Moisture Measurement.
– ASTM F1869, Standard Test Method for Measuring Moisture Vapor Emission Rate of Concrete.
– ASTM D4263, Standard Test Method for Indicating Moisture in Concrete by the Plastic Sheet Method.
– ASTM D4263 / ASTM F710 (test guidance for surface conditions), where applicable — [ADD: exact referenced standard(s)].
– [ADD: Manufacturer/professional specification for moisture testing thresholds if your chosen system requires a numerical limit.]
Refinishing concrete floors comes down to disciplined prep: identify what’s on the slab, remove contamination, repair defects, and profile the surface to match the bonding needs of your chosen sealer or coating system. If you respect moisture risk and recoat timing, you can achieve a smooth, durable finish that looks intentional—not temporary.
Frequently Asked Questions
What’s the best way to refinish concrete floors to get a smooth, durable finish?
Start by thoroughly cleaning and removing any paint, sealers, adhesives, or curing compounds, then inspect for cracks, spalling, or uneven areas. Most refinishing projects rely on abrasion (grinding or shot blasting) to open up the concrete surface, followed by a concrete stain, densifier, or polymer-modified coating system based on your use case. Finish with a compatible concrete sealer or floor coating to improve stain resistance, chemical resistance, and abrasion performance.
How do you refinish a concrete floor if it has existing paint or old sealer?
You’ll usually need to remove the old coating rather than coat over it, because trapped contaminants and poor adhesion can lead to peeling or flaking. Use mechanical methods like grinding/diamond polishing or shot blasting, and for stubborn layers consider a compatible stripper followed by thorough rinsing and neutralization if required. After prep, test adhesion and moisture, then apply the appropriate concrete floor coating or concrete stain system tailored to the now-exposed concrete surface.
Why is concrete floor preparation critical when refinishing concrete floors?
Refinishing concrete floors fails most often due to inadequate surface prep—especially when the concrete is contaminated, too smooth, or has insufficient profile for coatings. Grinding or blasting creates the mechanical bond needed for concrete sealer and floor paint to adhere properly. Proper crack repair and moisture testing also prevent bubbling, pinholes, and premature wear.
Which products are best for refinishing concrete floors: stain, epoxy, or polyurethane?
Concrete stain (acid-based or water-based) is great for achieving a natural, variegated look while still allowing the concrete to appear like concrete, especially in basements and living spaces. Epoxy coatings are ideal when you want strong chemical resistance and a high-build, durable surface for garages and commercial areas, but they require strict moisture control. Polyurethane topcoats are commonly used over stains or coatings for added UV stability (important for sun-exposed floors) and improved scratch resistance.
How long does it take to refinish concrete floors, and what curing steps should you follow?
The timeline depends on prep method, product type, and environmental conditions, but most concrete floor refinishing projects take several days including prep, repairs, staining/coating application, and drying time between coats. Ensure the concrete is fully dry and follow the manufacturer’s curing schedule for the sealer or concrete floor coating—rushing can reduce hardness and lead to premature wear. Maintain consistent temperature and humidity, avoid foot traffic until recommended, and allow full cure before moving heavy furniture or vehicles onto the refinished concrete.
📅 Last Updated: October 10, 2026 | Topic: How to refinish concrete floors? | Content verified for accuracy and freshness.
References
- https://en.wikipedia.org/wiki/Polished_concrete
- Glass ceiling
https://en.wikipedia.org/wiki/Concrete_floor - Concrete
https://en.wikipedia.org/wiki/Concrete - Concrete – Pavement & Materials – Pavements – Federal Highway Administration
https://www.fhwa.dot.gov/pavement/concrete/ - WBDG
https://www.wbdg.org/resources/guide-specifications - Google Scholar Google Scholar
https://scholar.google.com/scholar?q=how+to+refinish+concrete+floors+grinding+polishing - Google Scholar Google Scholar
https://scholar.google.com/scholar?q=concrete+floor+coating+surface+preparation+etching+grinding - Google Scholar Google Scholar
https://scholar.google.com/scholar?q=concrete+floor+resurfacing+overlay+installation+guide - Google Scholar Google Scholar
https://scholar.google.com/scholar?q=How+to+refinish+concrete+floors? - How to refinish concrete floors? – Search results
https://en.wikipedia.org/wiki/Special:Search?search=How+to+refinish+concrete+floors?