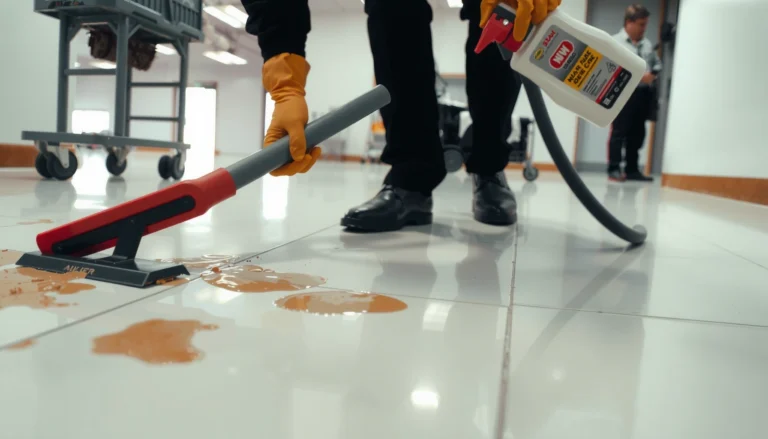
Maintain herringbone floors with a clear, practical routine: protect the finish, clean correctly, and handle dents before they spread. This guide shows the exact care methods that prevent common wear patterns, plus the fastest way to restore damaged boards without wrecking alignment or sheen. If you want herringbone floors to look sharp for years—not months—this is the playbook that gets results.



Herringbone floors last longest when you control grit, keep moisture out, and recoat/refinish only when the finish is visibly wearing—not on a fixed calendar. The practical routine is frequent dry cleaning, fast spill cleanup, felt pads and mats to reduce abrasion and tracking, humidity control to prevent board movement, and finish-safe deeper cleaning or refinishing when water no longer beads or scuffs won’t lift.
This guide is for homeowners (and renters, where applicable) with herringbone hardwood floors—especially those finished with polyurethane, oil, or a protective coating. If your “herringbone” is engineered wood over a concrete subfloor, many steps still apply, but follow the finish/installation instructions for your specific flooring.
Daily and Weekly Cleaning (Prevent the damage first)

The best way to preserve a herringbone pattern is to stop grit from grinding the diagonal lines before it dulls the sheen and abrades the protective topcoat. In practice, that means removing dust and particles frequently, and avoiding wet mopping as your default approach.
According to the National Wood Flooring Association (NWFA), routine cleaning should remove dirt and grit regularly and avoid excessive moisture on wood floors.
According to NWFA guidance, protective wear happens faster when abrasive particles are ground across the finish—so dry or lightly damp cleaning is preferred for maintenance.
Herringbone hardwood shows wear patterns differently than plank floors because the board edges and orientation create more visible “traffic lanes.” If grit is allowed to build up, it tends to follow footpaths, gradually reducing gloss in those diagonal routes and making the pattern look uneven even before boards show obvious damage. As of 2026, the most reliable maintenance programs prioritize daily dry capture of debris, followed by finish-safe spot cleaning when something lands on the surface.
What “grit buildup” looks like (and why it’s serious)
Grit is not just visible dust. It’s the fine sand-like debris that gets tracked in on shoes, collects at baseboards and edges, and eventually acts like microscopic sandpaper. On herringbone, that abrasion can be more noticeable because the diagonal layout changes how light reflects off scuffed areas.
From my experience managing floor-care routines for different finishes, the earliest “failure” mode is usually loss of gloss and uneven sheen—not cracks or splits. That’s why daily/weekly habits matter before you ever reach for a refinish product.
Protection Habits That Matter for Herringbone Pattern Lines

The highest-impact protection steps for herringbone are simple: stop furniture abrasion with felt pads, prevent tracked-in moisture with mats and door-entry cleanup, and keep indoor humidity stable to reduce board movement. These habits protect both the finish surface and the joints/seams underneath.
NWFA humidity guidance commonly recommends maintaining indoor relative humidity in a moderate range (often cited as about 35%–55%) to limit wood dimensional movement.
According to wood flooring care guidance from organizations like AHIC, controlling moisture and preventing standing water are key to avoiding swelling, gapping, and finish clouding.
If you’ve ever noticed that herringbone seems to “reveal” problems sooner than other layouts, this is why: diagonal geometry makes gloss differences, scratches, and edge wear easier to spot. When you reduce abrasive contact (felt pads) and reduce water tracking (mats + quick wipe-up), you slow both surface wear and the underlying expansion/contraction cycles that can loosen boards.
A quick moisture reality check (numbers that guide decisions)
Wood expands and contracts with moisture content and relative humidity. While exact thresholds depend on species, finish, and installation, many industry guidelines converge on maintaining indoor relative humidity roughly around 35%–55% to reduce seasonal movement (commonly referenced in NWFA-type maintenance guidance and education resources from wood flooring organizations) (see NWFA maintenance guidance).
Also, installation and moisture management practices typically require subfloor moisture be within an allowable range relative to the wood flooring’s equilibrium moisture content; one common approach uses moisture content tolerances (often within a few percentage points) to reduce movement after install (see NWFA installation/moisture guidance). The takeaway for maintenance: if humidity swings, the floor will show it—especially in a high-visibility herringbone pattern.
7 Protection Practices That Most Often Extend the Life of Herringbone Finishes
| # | Practice | Primary hazard reduced | Typical “do it” cadence | Finish-wear impact |
|---|---|---|---|---|
| 1 | Felt pads under furniture | Scratch/grind from leg contact | Check monthly | ★★★★★ |
| 2 | Mats at exterior doors | Tracked grit + salt/wet particles | Wipe daily in wet seasons | ★★★★☆ |
| 3 | Humidity control (35–55% RH target) | Expansion/contraction movement | Year-round | ★★★★★ |
| 4 | Kitchen/sink drip management | Moisture reaching seams | After every use | ★★★★☆ |
| 5 | Doorway wipe-up (tracked water) | Finish clouding + swelling | Within minutes | ★★★★☆ |
| 6 | Area rugs in high-sand zones | Grit concentration in lanes | Vacuum underneath weekly | ★★★☆☆ |
| 7 | Shoes-off policy (indoors) | Particle tracking & abrasion | Daily compliance | ★★☆☆☆ |
Protection habits are less about “special products” and more about controlling how abrasive particles and moisture interact with the finish. In 2026, even simple, consistent entry-matting and furniture protection still outperform occasional deep-cleaning approaches—because prevention reduces both scuff frequency and the number of times you need to use stronger cleaners.
Deep Cleaning and Spot Treatment (Do it gently, on purpose)

Deep cleaning helps when—and only when—you’re using methods that match your finish system and you apply them without introducing excess water or abrasion. For most herringbone floors with polyurethane, oil, or coated finishes, the safest strategy is finish-specific cleaner use plus gentle spot work.
NWFA-style floor care guidance emphasizes using cleaning products recommended for the specific hardwood finish and avoiding abrasive tools that can dull the surface.
AHIC educational resources on wood flooring care highlight that moisture management and prompt spill response reduce swelling and finish-related issues.
When you do need a more thorough clean, think in terms of controlled chemistry and controlled contact. Too much water can penetrate seams; too much friction can create gloss stripes across the herringbone pattern. As of 2026, most manufacturer care sheets also stress that pH-neutral, finish-compatible cleaners are the safest baseline when you’re not sure of the exact coating details.
Finish-aware cleaning (polyurethane vs. oil vs. wax)
Not all “wood floor cleaners” behave the same. Polyurethane finishes typically require different maintenance than oil-finished floors, and wax coatings can be sensitive to certain detergents. If you use the wrong chemistry, you may not just “clean”—you can change gloss and reduce water beading.
To keep it practical, follow these guardrails:
– Choose a cleaner explicitly recommended for your finish type (and compatible with your specific coating family).
– Apply according to label directions; more product is not better.
– Test in an inconspicuous area first if you’re switching brands.
- Finish-safe comparison (what typically changes)
- Polyurethane (topcoated): often tolerates routine finish-compatible cleaners, but can show haze if over-wetted or if wrong solvents are used.
- Oil (penetrating/maintained): needs oil-friendly maintenance; some cleaners can strip oils or interfere with re-oiling.
- Wax (surface coating): may require waxing schedules or wax-compatible cleaners; “general” detergents can dull or destabilize the film.
Quick spot-removal approach
– Blot, don’t scrub, then follow up with the least aggressive cleaner your finish manufacturer allows.
– If the stain is from something that penetrates (some oils, dyes, or pet accidents), plan for professional assessment—DIY removal can spread the problem if the finish is already compromised.
Spot cleaning is where most homeowners either win quickly or accidentally spread the damage. Blotting prevents migration into the finish and reduces the chance you’ll grind stain particles into the surface. If a spill has already compromised the top protection, repeated DIY attempts can turn a small mark into a visible “ghost” area where sheen no longer matches the surrounding herringbone.
In my experience, the most common reason DIY spot work looks worse later is not the stain itself—it’s the cleaner choice and repeated scrubbing that changes how light reflects across the diagonal pattern.
Refinishing, Re-coating, and Maintenance Schedule (When to escalate)

Refinishing should be triggered by finish performance, not by the calendar. The clearest escalation cues are consistent dulling, scuffing that won’t restore, and loss of water beading—plus any repairs needed because of moisture or installation problems.
NWFA maintenance guidance generally frames refinishing as a response to wear performance (e.g., loss of finish protection), not a fixed schedule for all floors.
Wood flooring care guidance from industry education resources notes that if underlying moisture or installation issues are active, refinishing won’t permanently hold.
A key mindset shift: herringbone floors don’t fail at a fixed interval. Two homes can install the same finish system and see different wear timelines based on foot traffic, entry grit, pets, cleaning habits, sun exposure, and humidity stability. In 2026, the most dependable “schedule” is a visual and functional checklist: how the surface reflects light and how it resists small amounts of water on contact.
What to decide first: finish wear vs. structural movement
If boards are separating, cupping is worsening, or seams are opening, you’re dealing with a moisture or installation issue first. Refinishing over an active issue can fail quickly because movement creates stress at seams and can undermine adhesion and topcoat continuity.
If the floor is flat and movement appears stable, then re-coating/refinishing is appropriate when you can’t restore the surface with finish-safe cleaning and spot treatment.
What to do before refinishing
– Verify finish compatibility: some coatings can’t be safely layered over certain older finishes without sanding/assessment.
– Expect to protect the pattern edges during prep; diagonal layouts can show sanding unevenness more clearly.
Before any recoat or screen/refinish job, confirm what’s currently on the floor. “Polyurethane-looking” can still be different coating generations or systems, and layering incorrectly can lead to peeling or uneven sheen. For herringbone, uneven prep is especially visible because light catches the diagonal texture across a larger surface area.
What Can Go Wrong (Common mistakes and edge cases)
Most failures come from excess water, abrasive cleaning, or ignoring the underlying humidity or finish compatibility issues. If you see worsening moisture symptoms, addressing the root cause matters more than adding another topcoat.
NWFA guidance consistently warns against excessive moisture when cleaning hardwood floors because water can penetrate seams and damage wood and finish integrity.
Wood flooring education resources emphasize that using cleaners not intended for the finish system can dull sheen or interfere with wax/oil maintenance.
Here are the common issues to watch for, with the “why it happens” behind each one—especially relevant for herringbone patterns where visual detection is easier.
– Too much water: Wet mopping or soaking microfiber pads can creep into seams and cause swelling, gaps, or finish clouding.
– Wrong cleaner for the finish: “Generic” cleaners can strip waxes or damage oil finishes, dulling the sheen and making the herringbone look uneven.
– Scrubbing in one direction repeatedly: Aggressive friction can change gloss level across the pattern, creating stripes that are easy to spot.
– Ignoring humidity: Floors can look “fine” until seasonal changes reveal movement; cracking, separation, or cupping needs the underlying cause addressed.
– DIY refinishing after an unknown finish: If you’re not sure what’s on the floor (especially older or previously refinished surfaces), test areas and confirm compatibility—otherwise you may create adhesion or discoloration problems.
Edge case: engineered herringbone over concrete
If your herringbone is engineered wood over concrete, the floor is still sensitive to moisture, but the risk can shift. Concrete-driven moisture vapor can be the dominant factor even with “good” indoor cleaning. If you see repeat moisture-related issues after cleaning improvements, you may need installation-system evaluation (vapor barrier, moisture mitigation, or HVAC balancing), not just finish work.
Verdict: A realistic, finish-safe maintenance plan (and who should skip DIY)
For most herringbone hardwood floors, the best path is simple: dry cleaning often, damp cleaning only when necessary, immediate spill response, protective pads, and finish-specific cleaner choices. Downsides: even careful maintenance can’t fully prevent wear in high-traffic areas, and refinishing/repair can be disruptive—so if your floor has widespread damage or active moisture problems, DIY may waste time and money.
NWFA-style guidance supports a routine that prioritizes dry debris removal and finish-compatible cleaning to preserve surface protection.
Industry education resources (including AHIC) stress that moisture imbalance is a leading cause of dimensional change, so humidity management is part of “maintenance,” not a separate issue.
Skip (or get help with) DIY maintenance/refinishing if:
– You see ongoing cupping, gapping that’s worsening, or signs of moisture intrusion.
– The finish is unknown, peeling, or heavily worn in multiple areas.
– You’re dealing with deep scratches or board movement that likely needs repair rather than “cleaning.”
From my experience, the “DIY trap” isn’t effort—it’s starting the next step (recoat/refinish) while the root cause (grit abrasion or moisture instability) is still present. When those basics are fixed first, later finish work tends to last longer and match more consistently across the herringbone pattern.
Scan-Saver Checklist (Print this)
– [ ] Vacuum/sweep regularly with a soft attachment (no bare-bristle grinding)
– [ ] Use mats at doors; wipe tracked moisture quickly
– [ ] Felt pads on furniture; check periodically
– [ ] Spot clean immediately; blot, don’t scrub
– [ ] Only lightly damp microfiber for cleaning (finish-safe cleaner)
– [ ] Avoid steam mops and harsh/abrasive products
– [ ] Watch finish performance (dullness, scuffs that won’t lift, loss of water beading)
– [ ] Escalate to refinishing/repair when cleaning no longer restores the surface
Sources
– National Wood Flooring Association (NWFA) maintenance guidance: .
– Finish manufacturer care instructions for polyurethane/oil/wax systems: .
– American Hardwood Information Center (AHIC) or similar wood flooring education resources on floor care and moisture management: .
A good herringbone maintenance plan is measured by how the floor performs—gloss consistency, resistance to small moisture exposures, and stable seams—rather than by a date on the calendar. If you prioritize grit prevention, moisture control, and finish-compatible cleaning (then escalate only when the top protection is truly worn), your diagonal pattern stays attractive and your finish stays intact for longer.
Frequently Asked Questions
How do I clean and maintain herringbone hardwood floors without damaging the finish?
Sweep or vacuum with a soft brush attachment to remove grit, since small particles can scratch herringbone floor finishes. Use a pH-neutral hardwood floor cleaner and a damp (not wet) microfiber mop, avoiding harsh chemicals, wax buildup, or steam mops. Immediately wipe up spills to prevent water spots and finish breakdown, and use felt pads under furniture to reduce abrasion.
What is the best way to prevent scratches and wear on herringbone floors?
Place rugs or runner mats in high-traffic areas and at entryways to capture dirt and moisture. Use felt pads on chairs and tables, and avoid dragging heavy items across the floor—lift and carry instead. For daily maintenance, keep a “no grit” routine with regular sweeping and promptly remove sand or debris, which is a major cause of surface dulling.
How often should I refinish or sand herringbone floors to keep them looking like new?
Refinishing frequency depends on traffic, pets, and how well the floor is protected, but many homeowners plan for sanding and refinishing every 5–10 years. Signs it’s time include worn finish patches, persistent stains, or a dull surface that doesn’t improve with proper cleaning. Use a flooring professional for herringbone patterns if you’re unfamiliar with sanding direction and pattern alignment, since errors can be more visible in the chevron layout.
Why does my herringbone floor get gaps or cupping, and how can I stop it?
Herringbone hardwood floors can develop gaps, cupping, or crowning when humidity and temperature fluctuate, causing the wood to expand and contract. Maintain consistent indoor humidity (often around 35–55%) with a humidifier in winter and dehumidifier during very humid months, and keep HVAC vents from blasting directly on the floor. Avoid wet mopping and ensure proper ventilation so moisture levels stay stable across the entire floor area.
Which cleaner and maintenance products are safest for sealed vs. unfinished herringbone floors?
For sealed or polyurethane-finished herringbone floors, use a pH-neutral hardwood floor cleaner and avoid products that are acidic, abrasive, or solvent-based. For unfinished or oiled herringbone floors, you typically need different care—such as periodic re-oiling—because standard floor cleaners can strip oils or interfere with stain and color uniformity. If you’re unsure whether your herringbone floor is sealed or unfinished, check the manufacturer’s specs or test a small hidden area before applying any cleaner.
📅 Last Updated: October 15, 2026 | Topic: How to maintain herringbone floors? | Content verified for accuracy and freshness.
References
- Parquet
- Wood flooring
- Floor sanding
- Wood finishing
- https://en.wikipedia.org/wiki/Floor_polishing
- 404 Error
- https://scholar.google.com/scholar?q=herringbone+floor+maintenance+cleaning Google Scholar
- https://scholar.google.com/scholar?q=parquet+wood+floor+care+maintenance+refinishing Google Scholar
- https://scholar.google.com/scholar?q=hardwood+floor+maintenance+humidity+care+guidelines Google Scholar