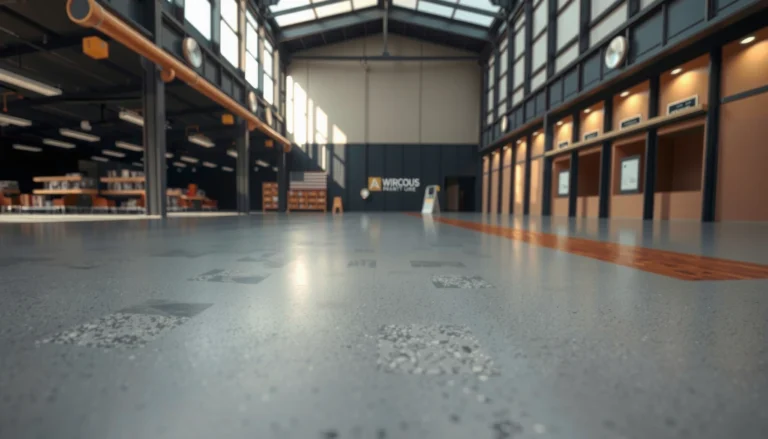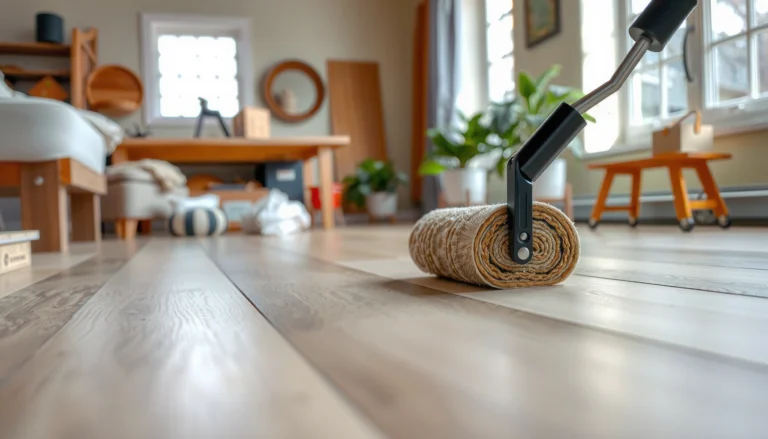

Level your laminate floors before installing a living room by fixing high spots and filling low areas until the subfloor stays within a 3/16-inch variation over 10 feet. This is the quickest path to preventing squeaks, gaps, and premature wear in your new flooring. If you want the fastest, most reliable results, follow a straightedge survey, then use the right self-leveling compound or floor patching where needed.




Level your laminate floor by making the living room subfloor truly flat and dry—not merely “smooth.” The reliable DIY workflow is to map low/high spots with a long straightedge, spot-fix dips and remove ridges, then re-check flatness and moisture compliance to your laminate manufacturer’s stated limits before clicking planks in place.
If your living room subfloor has visible dips, waves, or squeaks, leveling is usually the difference between a clean click-lock install and boards that separate or feel “springy.” This guide is for DIYers who want a practical workflow and know where mistakes commonly happen.
Check flatness (and moisture) before you start

You should confirm both flatness and moisture risk before buying leveling products, because correcting the substrate after laminate is down is expensive and disruptive. In practice, most “gapped seams” and “bouncy joints” trace back to out-of-flat subfloors and/or slabs outside the moisture limits set by the laminate brand. As of 2026, laminate warranties routinely require you to follow the manufacturer’s test method and acceptance criteria—not just “best effort.”
A long straightedge map tells you where the living room subfloor is actually low or high, which is the basis for choosing patching vs. self-leveling.
ASTM E1155 describes how floor flatness is evaluated by measuring deviations from a straightedge.
Straightedge mapping for living room flatness
Start with the entire area you’ll plank (including the area under common rolling traffic like recliners and walkways). Use a long straightedge (commonly 6–10 ft / 1.8–3 m in DIY workflows) and methodically check across:
– Joist-to-joist direction (if you’re over wood framing)
– Across joists (the other direction)
– Perimeter-to-center
– Door openings and transitions where laminate seams often land
When you map the living room subfloor, mark:
– Low areas (likely requiring patch/self-leveler)
– High ridges (likely requiring sanding/skim removal)
– Spots that change depending on where the straightedge is placed (often meaning movement, not just unevenness)
According to ASTM E1155, the flatness assessment is based on measuring deviations from a straightedge and recording the magnitude of those deviations.
Moisture risk check tied to your laminate brand
Moisture control is not optional; laminate flooring is dimensionally sensitive, and many manufacturers specify maximum moisture vapor emission rates or maximum in-situ RH limits. Look for:– Recent spills or recurring dampness
– Efflorescence (white powder) on concrete
– Musty odors
– Damp crawlspaces or missing vapor barriers
– Subfloors that feel cool/clammy in winter
Then perform the test method your laminate manufacturer requires. Two common standards you’ll see referenced are:
– ASTM F1869 (calcium chloride “MVER” test). Results are reported in lb/1,000 sq ft/24 hr (ASTM F1869).
– ASTM F2170 (in-situ relative humidity probes). Results are reported as % RH at slab depth (ASTM F2170).
If your laminate brand references moisture testing, follow it exactly; “similar” tests can void warranty in some cases.
Flatness tolerance: write it down now
Before you buy a leveling compound, record your laminate manufacturer’s:
– Flatness tolerance (typically stated as a max deviation over a distance)
– Underlayment requirements (type and thickness)
– Maximum allowable buildup limits for leveling/feathering
– Any restrictions on where patching is allowed (some brands limit thickness or require approved products)
This avoids the most expensive mistake: leveling the living room subfloor to the wrong standard.
Leveling Outcomes by Living-Room Subfloor Condition (DIY Relevance, 2026)
| # | Living-room subfloor condition | Main flatness issue | Typical fix type | DIY flatness improvement potential |
|---|---|---|---|---|
| 1 | Cured concrete slab with trowel ridges | High spots/lip | Sand/skim | ★★★★☆ |
| 2 | Plywood/OSB subfloor (solid, well-fastened) with localized dips | Small low areas | Feather-finish patch | ★★★★☆ |
| 3 | Concrete slab with broader low areas (overall waves) | Wide low field | Self-leveling underlayment | ★★★☆☆ |
| 4 | Existing ceramic tile with lippage at grout lines | High ridges/edges | Grinding/skim | ★★☆☆☆ |
| 5 | Old adhesive/trowel blobs from prior flooring removal | Localized humps + bond issues | Scrape + patch only after bonding prep | ★☆☆☆☆ |
| 6 | Squeaky, moving plywood/joists (deflection underfoot) | Movement, not just unevenness | Repair first, then level | ☆☆☆☆☆ |
| 7 | Concrete with active moisture symptoms (dampness/failed moisture tests) | Moisture-driven defects | Moisture remediation before leveling | ★☆☆☆☆ |
Prep the living room subfloor properly
You get the best leveling results when the living room subfloor is solid, clean, and free of anything that blocks adhesion. Leveling compounds and patches can’t “float” over loose materials or bond to dust, so proper prep is what makes the flatness gains last after the laminate is installed.
Cleaning before patching/self-leveling matters because dust and residue reduce mechanical bond and can cause debonding.
ASTM F710 focuses on how concrete floor preparation affects performance of floor coverings, including surface condition and preparation concepts.
Remove obstacles that prevent a flat base
Start by taking the living room down to what leveling products can realistically bond to:
– Remove old flooring/adhesives, including “mastic islands,” paint overspray, and ridge-forming lumps
– Pull or grind down any fastener heads (wood subfloors) so they don’t telegraph through
– Scrape out thin bedding material ridges and any protruding nails/screws
If you’re working over concrete, pay extra attention to:
– Loose topping, spalled areas, and patched spots with feather edges that aren’t stable
– Concrete contaminants (oils, curing compounds) that can interfere with primer/patch bond
Repair movement before you “fix flatness”
If the living room subfloor squeaks or visibly flexes, leveling alone won’t solve the root issue. Before patching or self-leveling, address:
– Loose subfloor sheets (re-screw/fasten where appropriate)
– Missing blocking under seams
– Structural movement that keeps changing the surface underfoot
Clean to support bonding
A practical rule: if you can sweep up dust by hand, leveling prep isn’t done. Vacuum thoroughly with a HEPA system where possible, then verify:
– The surface is dry enough for the primer/compound system you’re using
– There’s no sanding slurry, paint dust, or leftover debris
From my walkthroughs, the most common “DIY redo” happens because leveling was applied over a contaminated or loosely bonded spot—.
Level low spots with patching or self-leveling underlayment
Leveling low areas is the fastest path to a trouble-free click-lock laminate install because most seam separation issues start at depressions. Choose patch compound for small, localized dips and use self-leveling underlayment for larger, widespread low areas where feathering would take too long or create humps.
Feather-finish patching is typically used to correct localized depressions and transition edges smoothly.
Self-leveling underlayment is intended for broader unevenness and is applied according to its label for thickness limits and coverage.
Patch vs. self-leveler: when each makes sense
Here’s a decision structure that keeps the living room subfloor flatness approach aligned with product purpose:
| Method | Best for low spots | Pros | Tradeoffs |
|---|---|---|---|
| Feather-finish patch compound | Small dips and spot correction | More control; easier cleanup | Can be slow across large areas; risk of “waves” if applied too thick |
| Self-leveling underlayment | Widespread low areas / slab-wide waves | Faster leveling over broad fields; designed to flow to an even plane | Requires strict prep, priming, mixing accuracy, and edge/containment planning; thickness limits are non-negotiable |
How to apply so the living room subfloor stays flat
– For small dips: apply patch gradually, feather the edges, and don’t “build a ridge” by overfilling.
– For larger areas: prime (if required), mix accurately, and apply within the product’s thickness range.
– Avoid humps by applying in the thinnest practical layers, especially on transitions where you don’t want a new high spot to form.
Also plan your workflow around cure time. Don’t install laminate immediately—wait for the compound to reach the label’s required cure before sanding or rechecking flatness.
Smooth out high spots and handle transitions
High spots cause laminate to flex at joints, which can show up as squeaks, micro-gaps, or a “springy” feel. The goal is to remove ridges and ensure transitions don’t create steps that defeat your leveling work.
High ridges must be removed or skimmed down so laminate joints don’t repeatedly flex on installation pressure.
After grinding or sanding, you should re-check flatness because residual dust and patch edges can temporarily hide or exaggerate deviations.
Grind/sand carefully, then re-check
Work methodically:
– Use sanding/grinding tools appropriate for concrete or wood surfaces
– Remove ridges without gouging the living room subfloor
– Vacuum thoroughly after any abrasive work before measuring again
Re-check flatness after you clean—dust can mask unevenness and can also alter how your straightedge contacts the surface.
Plan transitions (doorways, halls, stair edges)
Transitions are where the living room laminate plan usually meets other flooring types or thresholds. When you level, you can accidentally create:
– A new step at a doorway
– A pinch point at a threshold strip
– A seam lineup where leveling thickness peaks
Plan to keep leveling feathered where possible, and match your underlayment thickness strategy to your laminate manufacturer’s installation details.
Verify flatness again, then prep for installing laminate
Once patching and smoothing are complete, you confirm that the living room subfloor meets the laminate brand’s flatness tolerance and underlayment/moisture requirements. This last verification step is what prevents a good-looking subfloor from turning into a later warranty call.
Most laminate installation guides require you to meet a stated flatness tolerance measured with a straightedge (or similar method) before installing planks.
Underlayment thickness and type are not optional “extras”—they can affect seam performance and must match the laminate manufacturer’s instructions.
Re-run flatness checks after curing and cleanup
After compounds cure and you remove all sanding residue:
1. Straightedge-map again
2. Confirm any corrected low/high zones are now within tolerance
3. Verify you didn’t create new highs while blending edges
If your laminate brand specifies moisture tests, ensure your living room subfloor remains compliant over the time window between testing and installation (some brands require re-testing if there’s long delays).
Prepare for laminate install details
Before you open a box of laminate planks, prep the key installation items:
– Use the underlayment type/thickness required by the laminate manufacturer
– Maintain required expansion gaps at walls and fixed objects
– Acclimate laminate to the living room conditions per the manufacturer’s instructions (humidity/temperature shifts matter more as of 2026, when many installers see more HVAC fluctuation month-to-month)
What can go wrong (common leveling mistakes)
Most laminate failures after installation come from substrate problems that leveling couldn’t legally or physically “fix.” If you want a stable, quiet living room floor, avoid these common traps.
Skipping the full “map” step can leave the worst low spot untouched, and laminate will flex there even if the rest looks flat.
Leveling over a moving or squeaking subfloor transfers movement into the laminate joints, which can lead to seam separation or recurring noise.
Common mistakes to watch for
– Skipping the map step: You fix random areas while the true depression remains.
– Leveling over loose/moving subfloor: Laminate reflects motion through seams and can squeak.
– Using the wrong product: Patch/self-leveler systems must match your substrate (wood vs. concrete vs. tile residue) and be compatible with primers if required.
– Overbuilding thickness: Too much buildup can violate laminate manufacturer installation limits or underlayment assumptions.
– Rushing cure/installation: Always follow the leveling product’s specified cure time—don’t guess.
Verdict, quick checklist, and key FAQ
Verdict / tip: If you identify low vs. high areas, spot-fix correctly, and verify flatness/moisture to your laminate brand’s limits, you’ll usually get a stable, quiet living room floor—especially with click-lock systems. The tradeoff is time (and mess) versus “just installing,” and it becomes significantly more involved if the subfloor has movement or moisture issues. Skip DIY leveling (or pause and reassess) if you find widespread structural movement, ongoing dampness, or you cannot locate your laminate manufacturer’s flatness/moisture tolerance statements.
Quick checklist (save this):
| Step | Check | Done when… |
|---|---|---|
| Map the floor | Low/high areas with a straightedge | You can point to the problem zones |
| Prep | Subfloor clean + solid | No loose boards; no debris/adhesive lumps |
| Fix lows | Patch or self-leveler used correctly | Surface is brought up smoothly |
| Fix highs | Sand/skim high spots | No ridges that can stress joints |
| Re-check | Flatness verified again | You meet the laminate’s tolerance |
| Install prep | Underlayment + gaps per spec | Everything matches manufacturer instructions |
Sources (use with your product specs)
– ASTM F710 — Standard Practice for Preparing Concrete Floors to Receive Resilient Flooring (preparation/flatness concepts).
– ASTM E1155 — Standard Test Method for Determining Floor Flatness Using a Straightedge Method (flatness measurement approach).
– ASTM F1869 — Standard Test Method for Measuring Moisture Vapor Emission Rate (commonly calcium chloride; uses lb/1,000 sq ft/24 hr reporting).
– ASTM F2170 — Standard Test Method for Determining Relative Humidity in Concrete (in-situ RH probes; % RH reporting).
– Your laminate flooring manufacturer’s installation instructions — .
Leveling laminate in a living room comes down to one goal: a flat, solid subfloor that matches your laminate manufacturer’s moisture and flatness tolerances. Map the uneven areas, prep the base, fix lows and highs with compatible materials, then re-check before installing. If you want, tell me what your subfloor is (concrete, plywood, tile, etc.) and what kind of unevenness you see (dips, waves, or high ridges), and I’ll suggest the most appropriate leveling approach and what to verify from the relevant spec.
Frequently Asked Questions
How do I check if my living room floor is level before installing laminate?
Start by using a long straightedge (6–10 ft) and a level to spot high and low spots across the entire room, especially along doorways, corners, and where furniture will sit. Mark any uneven areas with tape and measure the difference in height, because laminate flooring usually requires the subfloor to be flat within a small tolerance (often around 1/8 in. over 6 ft, depending on the manufacturer). If the floor dips more than the recommended range, you’ll need leveling compound or a subfloor prep approach before installing laminate.
What’s the best way to level a laminate floor for a living room?
The best method depends on how uneven your subfloor is and what type of subfloor you have (wood subfloor vs. concrete). For minor imperfections, self-leveling underlayment or feather-finished leveling compound can smooth low areas quickly; for larger issues, you may need to add underlayment layers, repair subfloor boards, or plane down high spots. Always follow the leveling compound manufacturer and your laminate floor instructions, and prime porous concrete if required so the compound bonds properly.
Why does laminate flooring need a flat, level subfloor, and what happens if it isn’t?
Laminate floating floors rely on a flat surface to distribute load evenly across the boards. If the subfloor is uneven, the planks can flex too much, leading to joint separation, squeaking, gaps, and even click-lock failure over time. Proper subfloor leveling helps prevent hollow spots and protects the laminate’s locking system, improving durability and overall appearance in your living room.
How do I level a concrete subfloor before installing laminate in my living room?
First, thoroughly clean the concrete and remove paint, sealers, and debris that can prevent adhesion. Use a moisture test recommended for your laminate installation requirements, then grind down high spots and fill small cracks with an appropriate patch. For low areas, pour a self-leveling underlayment, spreading it to the desired flatness, and let it cure fully before laying laminate flooring and installing any required vapor barrier.
Which leveling method should I use on a wooden subfloor under laminate flooring?
On wood subfloors, focus on fixing structural problems first—screw down loose boards, replace damaged sections, and address bounce or deflection. For uneven areas, you can sand/plane high spots, then use a wood-compatible leveling compound or patch system for low areas before installing laminate. Make sure the surface is flat within the laminate manufacturer’s tolerance and confirm you’re using the correct underlayment for your laminate and subfloor type to avoid future squeaks and uneven wear.
📅 Last Updated: October 20, 2026 | Topic: How to level a laminate floors before installing living room? | Content verified for accuracy and freshness.
References
- Floor
- Underlayment
- Screed
- Self-leveling concrete
- Glass ceiling
- Flooring
- Flatness
- https://scholar.google.com/scholar?q=laminate+floor+subfloor+flatness+leveling+installation Google Scholar
- https://scholar.google.com/scholar?q=how+to+level+a+subfloor+for+laminate+flooring+self-leveling+underlayment Google Scholar
- https://scholar.google.com/scholar?q=concrete+floor+flatness+tolerance+before+flooring+installation+ASTM Google Scholar