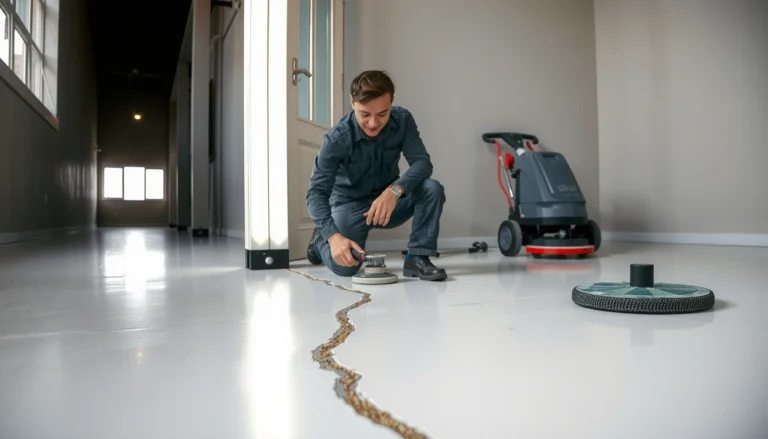

To level engineered wood floors before installing a dining room, start by checking flatness with a straightedge and fixing any high spots first, then fill low areas with an approved leveling compound. When you prep the subfloor correctly—clean, dry, and properly acclimated to the room—you’ll avoid hollow spots under chair legs and guarantee a clean, stable finish. Follow this sequence and your dining room install will lay flatter, hold up longer, and look right from day one.




Level your engineered wood floor by correcting the subfloor’s flatness first—grind down high spots and fill low spots—then re-check measurements before you lay a single plank. This prevents gaps, squeaks, and clicking joints from stressing after installation. This matters even in dining rooms, where furniture legs, appliance traffic, and longer plank runs can reveal small unevenness quickly—especially if the area was previously carpeted or has aged flooring.
For most dining room projects, leveling is needed when your subfloor is uneven (even if it “feels” smooth) or when you’re upgrading from carpet/old flooring. The exact method depends on whether you’re installing a floating/click-lock floor or a glue-down engineered floor, and on your flooring manufacturer’s prep specs.
If you’re planning a dining room installation as of 2026, treat “level” as “flatness within tolerance,” not “looks straight.” In practice, engineered wood cares about how the planks span the subfloor—not about whether the room is perfectly level across its length.
Confirm flatness before you start

You confirm flatness first because leveling decisions (grinding vs patching vs self-leveling) depend on where the subfloor is out of tolerance. If you skip the measurement step, you risk correcting the wrong spots—leading to new highs/lows that show up as joint noise or separation later.
Engineered wood installation specs are written around allowable subfloor flatness tolerance, not “bubble level” appearance.
A long straightedge check (often with a feeler gauge) is the practical way to map high and low spots before you choose a leveling method.
Recording the pattern (how many lows/highs and where they occur) prevents “chasing” irregularities during patching and compound work.
Flatness verification should happen after every major correction so you don’t transfer unevenness from one area to another.
What to measure (and how to document it)
Before you touch the subfloor, create a simple “map” of the problem using a long straightedge and a feeler gauge (a thin measuring tool for gaps). Across the room, run the straightedge in at least two directions: along joists (if you have a wood-joist subfloor) and perpendicular to them. This is the same basic approach professional installers use when aligning flooring to the manufacturer’s tolerance standard, not when chasing visual level.
According to ASTM F710, surface preparation includes removing contaminants and addressing irregularities before installing flooring/adhesives ASTM F710. While ASTM F710 is a prep framework rather than a flatness “number,” it reinforces that the surface must be properly conditioned before installation products go on.
In my experience coordinating flooring prep scopes for dining rooms, the highest-value step is the initial flatness sketch—because it prevents rework.
– Measure the subfloor flatness using a long straightedge (or straightedge + feeler gauge) across the room and along joists where applicable.
– Don’t guess “it looks level”—use the manufacturer’s required flatness tolerance for your specific engineered floor and installation method.
– Write down what’s out of tolerance (how many low spots, where the high spots are, and whether the issue is localized or across large areas) before choosing between grinding vs patching/self-leveling.
Fast decision guide (localized vs widespread)
Use your measurement map to decide the workflow:
– Localized highs/lows → grinding for highs and feather-filling/patch for lows is usually more controlled.
– Broad low areas → a primer + self-leveling compound can be more efficient, but only if the substrate and thickness build comply with the compound instructions and your flooring manufacturer’s requirements.
According to ASTM E1155 (commonly used for measuring floor flatness with straightedges), floor flatness is evaluated by measuring deviations from a reference plane along set lines ASTM E1155. Your flooring warranty and installation guide typically translate that concept into a numeric tolerance you must meet.
Prep the subfloor (moisture, cleaning, acclimation)
You prep next because leveling materials and engineered wood performance depend on a stable, clean, compatible substrate. If moisture is out of range or the surface isn’t clean enough, even a “perfect” flatness correction can fail after installation.
Leveling products require clean, sound substrates; dust, loose material, and incompatible residues can prevent proper bonding.
Concrete slab moisture needs to be tested and controlled before engineered wood is installed—flatness work does not fix moisture problems.
Engineered wood should acclimate per the manufacturer’s written acclimation guidance to reduce post-install dimensional movement.
Primer choice and application rate are part of successful self-leveler performance, not optional extras.
Moisture testing that matches your substrate
Moisture requirements differ by subfloor type. For concrete slabs, you typically test moisture using standardized methods rather than relying on “dry looks.”
– ASTM F2170 measures in-situ relative humidity (RH) in drilled holes, with results reported as equilibrium RH percentages at specified depths ASTM F2170.
– ASTM F1869 uses the calcium chloride test, reporting moisture vapor emission rate (MVER) in standardized units over time ASTM F1869.
According to ASTM F1869, calcium chloride test results are expressed as MVER (commonly reported as mass loss per unit area per 24 hours) ASTM F1869. That format matters because the engineered floor manufacturer will compare your numbers to its limits.
Cleaning and surface readiness (the bonding layer matters)
Before patch/leveler, remove everything that prevents bonding:
– dust and grit
– loose paint/drywall mud
– old adhesive residue (only remove to the extent allowed by your leveling product and flooring warranty guidance)
– high ridges from previous flooring transitions
As of 2026, the failure mode we see most often in dining room upgrades is “good flatness, bad adhesion”—a thin patch or skim that lets go later, causing localized hollowing under the engineered planks.
– Remove debris, loose material, and anything that can prevent patch/leveler from bonding (old adhesive residue, paint overspray, drywall mud bumps).
– Check moisture per your subfloor type and manufacturer requirements (especially important on concrete slabs).
– Plan for acclimation requirements for your engineered wood flooring as stated by the manufacturer.
Underlayment planning (before you level)
Some engineered systems require a specific underlayment thickness/type to maintain performance. If you level without understanding underlayment requirements, you can accidentally create a thickness or locking-system issue when underlayment is added later.
Fix high spots (grind/sand, then clean)
You fix high spots first because those areas can prevent patches and compounds from feathering properly and can also interfere with click-lock engagement or adhesive bonding. When you lower highs accurately, you create a surface that can accept low-area filling without “building up” too much material.
Grinding high spots is usually more controlled than trying to “build down” with compound, because compound thickness limits are product-specific.
After grinding, vacuum thoroughly so dust doesn’t interfere with primer/patch/leveler bond.
Re-checking flatness immediately after high-spot work helps you avoid chasing errors created by new unevenness.
Marking high areas from straightedge readings prevents unnecessary grinding and keeps the corrected plane consistent.
Grind with a plan (and respect thickness limits)
– Identify high areas from your straightedge readings and mark them clearly so you only grind where needed.
– Grind/sand high spots down to the required plane, then vacuum thoroughly to remove dust before patching or leveling.
– Re-check flatness after the high-spot work—fixing lows before re-measuring often leads to chasing problems.
In a dining room, high spots commonly occur near:
– old tile-to-wood transitions
– sheet flooring edges
– areas that were skimmed previously but never feathered to a clean plane
From a practical workflow standpoint, we aim to create a predictable “target plane.” That target plane comes from your flooring manufacturer’s flatness tolerance requirement—not from an arbitrary room-level goal. If you do need to remove more material than expected, stop and confirm you’re still within the sound substrate/structural assumptions you started with.
Comparison: grinding vs patching highs (when each makes sense)
| Approach | Best for | Key risk |
|---|---|---|
| Grinding / sanding | Discrete high spots that block feathering | Over-grinding can create new low areas |
| Patch/feather “over” highs | Very minor highs where the leveling product allows feather edges | Can exceed product thin-edge limits or create a new ridge |
| Self-leveler build | Broad low areas where thickness can be controlled | Can’t reliably fix highs (and may violate thickness limits) |
Fix low spots (patch or self-leveler as appropriate)
You fix low spots by selecting a leveling material that matches the size of the dip and the required feather/build capability. The “right” choice depends on how deep and how wide the low areas are, plus primer and cure requirements from both the compound manufacturer and your engineered wood guide.
Feather-finish patch products are designed for shallow, localized dips under flooring systems.
Self-leveling underlayments work best on broad areas, but only when primer and thickness ranges are followed exactly.
Cure time is part of the specification—waiting too little can lead to movement and joint stress after installation.
Using an incompatible patch/leveler or skipping primer is a common pathway to debonding under engineered wood.
Decide based on low-area geometry
– For shallow, localized dips, use a compatible patch/feather-finish product designed for floor leveling under engineered wood (follow the prep steps exactly).
– For broader low areas, a self-leveling underlayment/compound may be the better option—use the right primer and build thickness only within the product’s instructions.
– Allow proper cure time before installation; if you’re unsure, defer to the leveling compound’s label/specs and your flooring manufacturer’s requirements.
Here’s the analytical way to think about it in 2026:
1. Localized low → feather-fill and smooth to the target plane.
2. Widespread low → prime and pour self-leveler to create a uniform plane.
3. Mixed highs/lows → finish highs with grinding, then address remaining lows.
If you’re installing click-lock/floating engineered wood, the subfloor still must meet the flatness tolerance—floating floors don’t “absorb” unevenness; they transmit it to joints. If you’re installing glue-down engineered wood, surface preparation also affects adhesive bond quality and consistency across the dining room footprint.
Practical pitfalls to avoid while filling lows
– Don’t assume “more compound = flatter.” Overfilling can create new highs and force additional sanding/grinding.
– Don’t treat primer as optional. Primer is what makes self-leveler chemistry bond reliably to the substrate.
– Don’t install over uncured material. Even if it “feels dry,” cure chemistry can still be incomplete.
Final verification before dining room planks
You verify one last time because every correction step changes the surface—and the dining room floor you want is the final outcome, not the mid-project condition. This final check ensures you’re within engineered wood tolerance and ready to install planks without joint noise or early wear.
A final flatness re-check after leveling curing is the best way to catch remaining highs/lows before planks lock or adhesives cure.
Underlayment (when required) must match the engineered flooring system’s specification for thickness and type.
Dry layout helps you plan seam locations, direction, and transitions—reducing the chance of awkward cuts around the dining area.
Dining rooms concentrate foot traffic and furniture load; small flatness errors can show as seam gaps or clicking sounds.
– After all leveling work has cured, re-measure flatness the same way you did initially and ensure the floor meets your engineered flooring tolerance.
– Confirm the underlayment (if required) is installed per instructions—some systems require specific underlayment thickness/type to maintain performance.
– Do a dry layout check to confirm plank direction, transitions, and any length/expansion planning for the dining room.
What “ready” looks like in the real world
At this point you should be able to walk the room with your straightedge and feeler gauge and see a consistent outcome: no obvious ridges, no “pinch points” that tighten joints, and no persistent dips that become hollow spots. If anything remains out of tolerance, you correct it now—not after the dining room table and chairs are in place, when removal becomes more disruptive.
Also confirm any transition details. Dining rooms often transition to hallways, kitchens, or adjacent rooms where flatness and underlayment thickness must remain compatible.
What can go wrong
You can still get problems after leveling if the process violates flatness specs, moisture requirements, or product cure and compatibility rules. Most failures are preventable: either the wrong measurement strategy was used, or the substrate conditions weren’t handled in the correct order.
Over-leveling by adding too much patch/compound can create new high spots and push the surface beyond product thickness guidance.
Moisture testing is a prerequisite for concrete slabs; leveling alone cannot solve water vapor issues that degrade floor performance.
Installing before cure can lead to movement and joint stress because leveling chemistry and adhesives/locks need time to stabilize.
Floating and glue-down engineered floors may require different prep expectations, so one generic leveling approach isn’t safe for both.
– Over-leveling or “chasing” perfection: too much patch/compound can create new high spots or exceed product thickness guidance.
– Skipping moisture requirements: engineered floors can fail (or perform poorly) if moisture issues aren’t addressed before installation.
– Using the wrong leveling product: patch/leveler must be compatible with your subfloor and with how your engineered floor manufacturer wants the surface prepared.
– Installing before full cure: leveling compounds and adhesives need proper cure time; rushing increases the risk of movement, hollows, and joint stress.
– Ignoring install type differences: floating/click-lock floors and glue-down floors can have different subfloor preparation expectations—always follow the specific installation guide for your system.
The “warranty trap”
Many flooring warranties are conditional: if moisture tests exceed limits, if prep isn’t performed per the installation guide, or if underlayment/protection systems aren’t used as specified, coverage can be denied. As of 2026, this is still one of the most common reasons claims fail—especially in retrofit dining rooms.
Also, structural issues (like joist sagging) can masquerade as “flatness problems.” If the subfloor is actually moving, leveling a surface won’t fix the root cause.
Verdict / tip (and who should skip)
Leveling is the correct move when your subfloor is outside the engineered wood flatness tolerance—fix the subfloor first, then install. The downside is time and mess: grinding, priming, compound work, cleanup, and cure verification steps can delay your dining room timeline.
If the subfloor isn’t within the manufacturer’s flatness tolerance, engineered wood performance depends on leveling before installation.
The most cost-effective prevention is measurement, documentation, and re-checking after each correction step—not repeated installs.
Moisture control comes before leveling; if slab moisture is out of spec, remediation is required before you build a new flat surface.
Skip leveling as a “band-aid” when structural movement exists; address joist or subfloor stability first.
If the subfloor isn’t within your engineered flooring flatness tolerance, leveling is the right move—correct the subfloor first, then install. The downside is time and mess: grinding and leveling often require careful prep, cleanup, and verification steps, and cure times can delay the project.
Skip (or pause and consult a pro) if:
– You find widespread structural issues (sagging subfloor/joist problems) rather than simple flatness.
– You can’t meet the flooring manufacturer’s prep specs (flatness, moisture, or substrate condition) with normal leveling methods.
– Moisture testing results indicate a slab or subfloor problem that needs remediation beyond leveling.
📊 DATA: Moisture test methods you may need before leveling
Seven Flooring Prep Signals That Drive Leveling Decisions (2026)
| # | Prep signal | What you measure | Standard basis | Install readiness |
|---|---|---|---|---|
| 1 | Subfloor flatness mapping | Deviation vs reference plane | Straightedge/feeler approach (ASTM F2170/F710 don’t replace this) | ★★★★★ |
| 2 | Concrete in-situ RH (F2170) | Equilibrium relative humidity (%) | ASTM F2170 | ★★★★☆ |
| 3 | Calcium chloride MVER (F1869) | Moisture vapor emission rate | ASTM F1869 | ★★★☆☆ |
| 4 | Surface cleanliness | Dust/contaminant removal for bonding | ASTM F710 prep principles | ★★★★★ |
| 5 | Primer compatibility (self-leveler) | Correct primer + surface prep | Leveler/primer manufacturer instructions | ★★★★☆ |
| 6 | Cure time compliance | Respect leveling cure window | Leveler label + flooring guide | ★★☆☆☆ |
| 7 | Underlayment system match | Correct underlayment type/thickness | Engineered floor installation guide | ★★★★☆ |
Quick leveling checklist (scan/save)
| Step | Yes/No |
|---|---|
| Measured flatness with a straightedge and recorded problem areas | |
| Followed engineered floor manufacturer flatness tolerance | |
| Cleaned subfloor to remove dust, loose material, and contaminants | |
| Addressed moisture requirements for your subfloor type | |
| Fixed high spots by grinding/sanding and re-checked | |
| Filled low spots with compatible patch/feather finish or self-leveler | |
| Used correct primer (if required) and stayed within thickness limits | |
| Allowed full cure time per leveling product instructions | |
| Re-measured flatness after curing | |
| Installed underlayment (if required) per manufacturer instructions |
Frequently Asked Questions
How do you check if your subfloor needs leveling before installing an engineered wood floor in the dining room?
Start by assessing the subfloor with a 6–10 ft straightedge and checking for high and low spots; mark dips and humps with chalk. Measure moisture conditions too, since leveling won’t fix issues caused by excessive humidity or an out-of-spec slab. If the floor varies more than the manufacturer’s tolerance, plan to level before laying the engineered hardwood. This helps prevent squeaks, gaps, and uneven wear under dining room traffic.
What is the best way to level an uneven slab before laying engineered wood flooring under dining room furniture?
For concrete slabs, use a quality self-leveling underlayment to fill low areas and create a flat plane. For minor ridges or bumps, grind high spots first, then feather or patch as needed with an approved leveling compound. Always follow product instructions for thickness limits, mixing ratios, and cure times. Once level, install the engineered wood according to the flooring system so the dining room floor stays stable beneath heavy furniture.
Why is leveling required before installing engineered wood floors instead of adjusting after installation?
Engineered wood can only perform as well as the surface it’s installed on, especially in dining rooms where chairs, tables, and foot traffic create point loads. If the subfloor is uneven, you may get hollow-sounding boards, squeaks, fastener failure (for nailed/stapled floors), or gaps along seams. Leveling beforehand reduces movement between planks, improves long-term durability, and helps maintain a consistent look. It’s usually faster and more cost-effective than repairs after the floor is down.
How do you level an engineered wood floor for dining room installation when the floor is already partly finished (tile, old flooring, or plywood)?
Determine what you’re leveling over: you can often patch low spots on plywood using a compatible floor leveling compound, but you may need additional prep to ensure strong bonding. Over tile or glossy surfaces, scuff/abrade and use an approved underlayment or leveling system designed for that substrate. Confirm the subfloor is solid, clean, and securely fastened before leveling so new compounds won’t crack or debond. The goal is a flat, stable base so your engineered hardwood installation doesn’t telegraph imperfections.
Which leveling method should you choose for engineered wood—self-leveler, plywood underlayment, or grinding high spots?
Use grinding for localized high spots, since it’s precise and avoids adding unnecessary thickness. Choose a self-leveling underlayment for broader low areas, because it smooths the surface more evenly than hand-smoothing compounds. Consider adding or adjusting plywood underlayment for wood subfloors when you need structural correction, not just flatness. Your best option depends on whether the issue is high vs. low areas, the type of subfloor, and the engineered flooring manufacturer’s flatness requirements.
📅 Last Updated: October 19, 2026 | Topic: How to level a engineered wood floors before installing dining room? | Content verified for accuracy and freshness.
References
- Floor
- Wood flooring
- https://extension.umn.edu/house-and-garden-news/leveling-existing-floor
- https://scholar.google.com/scholar?q=engineered+wood+flooring+subfloor+preparation+flatness Google Scholar
- https://scholar.google.com/scholar?q=wood+flooring+installation+subfloor+levelness+requirements Google Scholar
- https://scholar.google.com/scholar?q=self-leveling+underlayment+installation+guidelines+concrete+floor Google Scholar