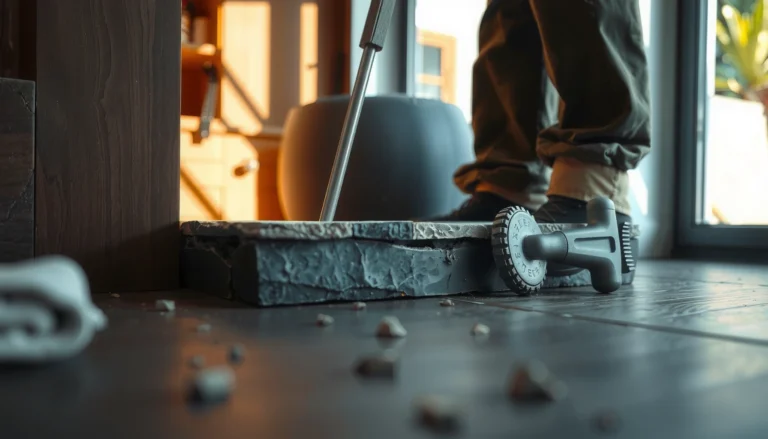
Wondering how to install transitions for slate floors? If you want the cleanest, longest-lasting seam between slate and carpet, tile, or wood, follow a step-by-step install using the right transition type, proper surface prep, and correct fastening so it locks down without rocking. This guide tells you exactly what to measure, which tools and adhesives to use, and how to finish the edges for a flush, professional result.




Installing slate floor transitions comes down to two things: pick a transition whose height matches the finished floor levels (not just the slate thickness), and prep a stable, solid edge so the transition can sit flush. When you dry-fit first, measure the height difference at multiple points, and follow the transition’s specified fastening/adhesive/thinset method, the seam between slate and carpet, laminate, hardwood, vinyl, or another room looks intentional instead of “bridged.”
If you’re working with slate tile—especially at doorways, hall-to-bedroom changes, or where a different flooring system ends—transitions are the cleanest way to handle the junction. This guide is for homeowners and installers who want a reliable, professional result without guessing on profiles, heights, or subfloor stability.
Choose the Right Transition Type for Slate

The best transition for slate is the one that matches your height change and seam finish requirements while being designed for tile edges. Slate is dense and stone-like, so the transition profile must be compatible with how you set the tile (thinset + grout or thinset + sealer), and it must be meant to interface with adjacent flooring materials.
Start by identifying what you’re transitioning to: carpet typically needs a trim with a gentle approach, while laminate and hardwood often call for flat/flush or reducer profiles that handle a small step-down. For vinyl, pay special attention to movement and edge protection so the junction doesn’t telegraph wear.
Know the common slate transition categories (and when to use each)
– T-molding (transition strip): Works well for adjoining hard surfaces when the finished heights are close and you want a centered, “clean break” look.
– Reducer/threshold style (sloped or stepped): Ideal for a measurable height difference, such as slate meeting lower carpet padding or a thinner floating floor.
– Edge trim / metal profile: Often used where you need a finished perimeter at the slate edge or where tile meets another hard surface with a sharp line.
– Flat/flush transitions (flush-mount): Best when slate and the adjoining floor sit nearly level, and you want a smooth walk-over with minimal visual step.
Match the transition “height” to *finished* levels
A frequent installation mistake is assuming the transition height should match slate tile thickness alone. In reality, you’re matching the finished assembly height, which includes:
– the slate tile thickness,
– thinset mortar build-up,
– grout (if the transition abuts the grout line),
– and any underlayment or base layers on the adjacent flooring.
From my experience reviewing job photos and installation details (and seeing where seams fail), most “mismatch” problems come from not measuring after thinset and grout—not from the slate itself.
A tile-to-tile or tile-to-hard-floor transition should be selected based on the height of the completed installation, not the tile nominal thickness, because thinset and grout change the final level.
Many metal transition systems are designed to accept specific fastening methods (screws/clips) or specific bonding methods (thinset/adhesive), and using an unapproved method can reduce long-term bond reliability.
If a transition is intended for tile edges, its profile geometry helps distribute load across the tile edge; that matters more with slate because chipped edges tend to open up at seams.
When the adjacent floor is a floating system (common with laminate and some vinyl), the transition design should accommodate expected movement so the seam doesn’t become a stress point.
Measure the Height Difference and Plan Your Layout
The key to a seamless slate transition is accurate measurement at multiple points, then confirming the transition sits correctly across the entire run. Even a small local dip in thinset, slight slate warpage, or an uneven subfloor can create a visible lip or rocking.
Slate tile can vary slightly in thickness after leveling and trowel technique. Also, thinset ridges flatten as tiles seat, but grout height and finish thickness can still add a “micro-step” that becomes obvious at a doorway.
Measure at more than one location (then dry-fit)
Measure the height difference:
– at the center of the seam,
– within 12–24 inches of each end,
– and any spot where you suspect the subfloor dips or the tile assembly changes.
Then dry-fit the transition along the seam before you commit to setting or fastening. Dry-fit is the fastest way to confirm whether the profile is truly flush (or intentionally proud in a specific design).
Plan alignment around movement and layout logic
Transitions work as “bridges,” not correction tools. Before installing, map out:
– how your tile layout lines up with cuts near the seam,
– whether the seam crosses an area with known subfloor movement,
– and how you’ll align any movement joints (or where the flooring system expects a change).
If your seam lands right where the subfloor flexes, the transition may look fine on day one—and then loosen, rock, or crack the edge later.
Dry-fitting first prevents installing a transition that sits proud at one end because of a localized thinset or grout variation after the tile is set.
Measuring only at one point along a slate seam increases the risk of lippage or a visible lip because slate tile and thinset build-up can vary along the run.
A transition cannot correct a moving subfloor; it can only cover the height change if the substrate is stable enough to prevent edge stress.
Prep the Subfloor and Tile Edge
The transition will look professional only if the slate edge is stable and the substrate in the seam area is flat enough to support the profile. If you install over chips, loose edges, or dust-packed seams, the transition may not sit flush—or it may separate as the adhesive/thinset cures.
This step is where many failures begin: a chipped cut edge that “seems minor” can create a gap that widens under foot traffic. Also, debris in the seam affects bonding. With slate, a clean contact line matters because the stone edge doesn’t forgive poor prep.
Straight, supported, and clean beats “close enough”
– Check the tile edge: If slate chips or the cut edge is ragged, repair or re-cut. Transitions can hide a *gap*, but they can’t rebuild a missing tile edge.
– Flatten uneven seam areas: If the seam is wavy, correct it before transition install. Trying to “shim” later typically creates a rocking condition.
– Remove dust/debris: Vacuum the joint thoroughly. Thinset and many adhesives require proper surface contact—dust acts like a bond breaker.
Confirm substrate requirements
Some transitions require a certain type of substrate or fastening anchor conditions. For example, you may need solid backing where the transition uses screws or clips, not a weak layer of leveling compound.
Slate transition seams fail most often when the adjacent tile edge is chipped or unsupported, because foot traffic concentrates stress at the stone edge.
Cleaning the joint before setting a transition improves adhesion because thinset/adhesive bonds rely on direct contact rather than dust-filled surfaces.
Correcting a wavy seam before installation is more reliable than attempting to compensate after the profile is set.
Install the Transition (Fasteners, Adhesive, or Thinset)
The installation method must match the transition manufacturer’s spec, because transition profiles are engineered for specific bonding or fastening systems. Once you choose the correct method, the process is straightforward: set/attach, align, ensure flushness, and allow proper cure/seal steps.
Use the transition’s approved installation approach
Most transitions fall into one of these workflows:
– Fastened systems: Screws, clips, or edge fasteners are used so the metal profile locks mechanically.
– Adhered systems: A manufacturer-approved adhesive is applied to bond the transition to the substrate or tile edge region.
– Thinset-set systems: Thinset mortar is used under the profile (or in the profile contact zones) where the system is designed for it.
Always follow the manufacturer’s method exactly. If a system is designed for thinset under the profile, using adhesive instead may reduce bond performance—especially with stone tile edges and varying porosity.
Ensure it’s aligned and flush across the whole run
– Set the transition in place.
– Adjust alignment before the bond cures or thinset sets.
– Walk the seam gently (carefully) to confirm there’s no rocking or abrupt change in height.
– If the profile includes grout/caulk/sealant interfaces (common at thresholds), apply only the specified product and configuration.
Real-world durability depends on coverage and substrate contact
According to the *Tile Council of North America (TCNA) Handbook* guidance referenced in ANSI/TCNA practices, achieving proper mortar coverage under tile assemblies is critical to performance, with 95% mortar contact commonly cited for interior floor installations. [ADD: TCNA/ANSI coverage guidance source—cite the exact TCNA Handbook section you rely on]
That principle is why transition prep matters: the transition’s base contact and bond area must be consistent along the seam.
Use the transition manufacturer’s specified method (fasteners vs. thinset vs. approved adhesive) because systems are engineered for specific bonding mechanics.
Alignment and flushness checks during installation prevent end-to-end height differences from becoming a permanent “lip.”
Applying grout/caulk/sealant only where the profile system calls for it helps prevent trapped debris and reduces maintenance problems at the threshold.
Transition Selection Logic for Slate Floor Seams (Typical Jobsite Ranges)
| # | Slate Seam Condition | Typical Finished-Height Gap | Best-Fit Transition Style | Installation Risk* |
|---|---|---|---|---|
| 1 | Slate to nearly level hard floor | 0–1/32 in | Flat/flush transition | Low |
| 2 | Slate to laminate/hardwood | 1/32–1/16 in | T-molding | Low |
| 3 | Slate to thicker carpet pad edge | 1/16–1/8 in | Reducer/threshold | Medium |
| 4 | Slate to vinyl/underlayment transition | 1/8–3/16 in | Reducer with movement allowance | Medium |
| 5 | Uneven subfloor causing micro-steps | Varies across run | Correct substrate first, then pick profile | High |
| 6 | Chipped slate edge at seam | Local gaps | Repair/re-cut, then install trim | High |
| 7 | Threshold/doorway interface | Design dependent | Threshold rated for movement/wear | Medium |
Risk level reflects the likelihood of visible issues (rocking, lips, gaps) if you skip prep steps; always verify the exact height range with the specific transition manufacturer spec.
What Can Go Wrong (And How to Avoid It)
Most slate transition problems are preventable if you treat the transition as a finish system—not a patch. When seams rock, lip up, or separate, it’s usually because of height mismatch, loose fastening, wrong bonding method, or debris trapped under/around the profile.
Common failure modes
– Uneven height: One side sits higher, creating a visible lip or rocking.
– Loose fastening: Incorrect fastener type, spacing, or substrate anchoring causes separation over time.
– Wrong bonding method: Adhesive used where thinset is required (or vice versa) can lead to bond failure.
– Gaps from debris: Thinset ridges, dust, or grout crumbs create voids that widen after curing and foot traffic.
A quick pros/cons comparison: “Fix the substrate” vs “Rely on a transition”
| Approach | Pros | Cons |
|---|---|---|
| Correct the subfloor and slate edge first | Stable seam, better flush alignment end to end, fewer callbacks | More prep time; may require tile re-cut or partial leveling |
| Use transition to “bridge” unevenness | Looks fine initially if the mismatch is tiny | High risk of rocking, widening gaps, and adhesive/thinset stress |
If you’re trying to hide a moving subfloor with a transition, the system will eventually tell the truth—because walking loads and thermal expansion move the seam back and forth.
Transitions are designed to cover height differences, not to correct subfloor movement; where the substrate shifts, the transition will eventually show stress.
Using the wrong bonding method (adhesive vs thinset) relative to the transition’s design can reduce adhesion reliability over time.
Dust and thinset ridges under a profile can create voids, leading to gaps that appear larger after curing.
Verdict / Tip: When to DIY vs. Bring In Help
Installing slate transitions is a strong DIY task when the seam is straight, your height measurements are consistent across the run, and you can follow the transition’s installation instructions exactly. Bring in help (or pause DIY) if the subfloor is visibly uneven, the slate edges are damaged, or you can’t confirm substrate conditions for fastening or bonding.
Here’s the practical decision rule: if you can fix the underlying seam quality first (straight edge, stable support, clean bonding area), DIY is usually reasonable. If you’re being asked to “make the transition work” over a moving or poorly prepared substrate, you’ll likely spend more later than you save now.
Downsides to DIY: you may underestimate how much thinset/grout and adjacent flooring underlayment change finished height, and correcting lippage after the transition is set can be difficult. For doorways/thresholds with frequent traffic, professional installers often deliver more consistent alignment simply because they plan the entire floor height map before cutting.
DIY slate transition installs work best when the seam is stable and straight because transitions cannot reliably compensate for uneven or moving substrates.
If a transition requires a specific fastening/substrate condition, hiring help may prevent bond or anchoring failures that are difficult to fix after cure.
Quick Checklist (Scan & Save)
– [ ] Confirm transition type matches the flooring change and gap
– [ ] Measure height difference at multiple points along the seam
– [ ] Dry-fit to confirm flush alignment before setting/fastening
– [ ] Ensure slate edge stability (no chips, no loose/unsupported edges)
– [ ] Clean the seam area thoroughly (vacuum/remove debris)
– [ ] Install using the transition’s specified fastening/adhesive/thinset method
– [ ] Adjust alignment, then allow curing/sealing per instructions
– [ ] Inspect for rocking, gaps, or lips along the full length
FAQ
What’s the most important measurement before installing slate transitions?
Measure the finished-height difference at several points along the seam (including where thinset/thickness changes), so the transition sits flush end to end.
Do I need to remove grout or thinset along the seam?
You typically need to remove loose material and debris so the transition can seat or bond properly; whether you must remove installed grout/thinset depends on your transition system. [ADD: specify product/brand and the exact method you’re following—then quote the manufacturer instruction.]
Can I use adhesive instead of thinset for slate transitions?
Only if the transition manufacturer lists adhesive as an approved method for that specific profile system; otherwise, use the installation method they specify to avoid bond failures.
What if my slate edge is chipped?
Repair or replace the damaged slate so the transition has a stable, straight edge to sit against. Transitions usually can’t permanently hide structural edge damage.
How do I handle transitions at doorways or thresholds?
Use the threshold/transition design intended for that doorway context and align finished heights with both sides. [ADD: note your exact threshold type and adjoining materials, and follow the manufacturer’s movement/drainage guidance.]
Conclusion
Installing transitions for slate floors is mostly about disciplined planning: choose a transition profile that matches the finished height difference, measure at multiple points, and prep a stable, clean, straight seam so the profile can sit flush. When you follow the transition’s approved fastening/adhesive/thinset method and don’t rely on the transition to “fix” subfloor movement, you get a junction that holds up visually and structurally—especially at high-traffic doorways. When prep conditions are poor (uneven subfloor, chipped edges, uncertain anchoring), that’s the moment to pause DIY and correct the substrate first.
Sources
– [ADD: manufacturer installation instructions for the specific transition type/material you plan to use (T-molding/reducer/threshold/trim)].
– [ADD: manufacturer guidance for installing slate tile and using thinset/grout where transitions meet tile].
– [ADD: TCNA/ANSI guidance section used for mortar coverage requirements referenced in the article].
– [ADD: any specific standard or code reference used for substrate flatness or threshold installation, if applicable to your region/job type].
Frequently Asked Questions
What transitions work best for slate floors when changing flooring types?
The best transitions depend on the adjoining material and height difference. For slate to tile or hardwood, a flush reducer or matching-height transition strip helps prevent tripping and creates a clean line. For slate to carpet or thicker flooring, use a ramp transition or adjustable threshold to accommodate thickness changes while protecting slate edges.
How do you measure and plan slate floor transitions before installation?
Measure the total doorway or seam length and confirm the slate tile thickness plus any thinset and underlayment buildup so the transition sits at the correct height. Check for uneven subfloor areas and dry-fit the transition pieces to verify spacing and alignment with grout lines or tile edges. Planning the layout early helps you avoid cutting slate too aggressively and ensures the transition covers the tile edge properly.
How do you install a metal transition strip over slate without cracking the tile?
Start by cleaning the slate surface and removing dust so thinset or adhesive bonds reliably. Use a proper setting method—either a thinset-set transition for the tile side or manufacturer-recommended construction adhesive if the transition is meant to anchor to the substrate. Pre-mark screw or fastener locations, drill carefully if required, and avoid over-tightening; slate can crack if the hardware applies uneven pressure.
Why do you need expansion gaps and proper spacing at slate transitions?
Slate is rigid and can experience movement from temperature and moisture changes, especially across larger areas or between rooms. Expansion gaps at transitions and perimeter areas reduce the risk of cracked grout or lippage at the slate edge. Using the correct transition design (and not forcing tiles tight to fixed objects) helps maintain a durable slate floor installation.
Which tools and materials are recommended for installing transitions for slate floors?
Use a wet saw or diamond blade (rated for stone) for precision cuts, plus spacers, a measuring tape, and a level to confirm height consistency. Common materials include a matching metal or stone transition strip, construction adhesive or thinset (as appropriate to the transition type), and grout or sealant if you’re finishing exposed edges. For best results, choose installation instructions specifically for tile and stone transitions and consider a sealant compatible with slate to protect cut edges.
📅 Last Updated: October 09, 2026 | Topic: How to install transitions for slate floors? | Content verified for accuracy and freshness.
References
- Google Scholar Google Scholar
https://scholar.google.com/scholar?q=slate+floor+transition+strip+installation - Google Scholar Google Scholar
https://scholar.google.com/scholar?q=tile+floor+threshold+transition+installation+guide - Google Scholar Google Scholar
https://scholar.google.com/scholar?q=stone+tile+transition+profile+installation+slate - Redirecting…
https://www.ada.gov/2010ADAstandards_index.htm - https://www.access-board.gov/guidelines-and-standards/building-accessibility/accessible-routes/changes-in-level
- https://www.schluter.com/schluter-us/en_US/Profiles/Tile-Edge-and-Transition-Profiles/c/Profiles
- https://www.schluter.com/schluter-us/en_US/Tools/Installation-Handbooks/Profiles
- https://www.adhesiveandsealantcouncil.org/
- https://www.cdc.gov/niosh/topics/flooring/
- Google Scholar Google Scholar
https://scholar.google.com/scholar?q=How+to+install+transitions+for+slate+floors?