


You can install transitions around vinyl floors in a hallway cleanly and securely, but the winning approach depends on your subfloor and where the seam lands. This guide tells you exactly which transition type to use for common hallway edges—doorways, stair steps, and floor-to-floor changes—and how to measure, cut, and fasten it without gaps or curling. Follow these steps and you’ll get a tight, professional finish the first time.




Install the right transition piece for the doorway/hard-surface seam, then secure it so it covers the vinyl edges while leaving the flooring’s required expansion gap. In a hallway—where foot traffic is constant—dry-fit first, trim accurately, and keep the transition height flush so you don’t create a trip point at walking levels.
This guide is for homeowners and DIYers installing vinyl planks or tiles in a hallway where the flooring meets carpet, tile, laminate, or another vinyl zone—especially at doorways, openings, and change-of-level edges.
Choose the right vinyl floor transition (and the height)
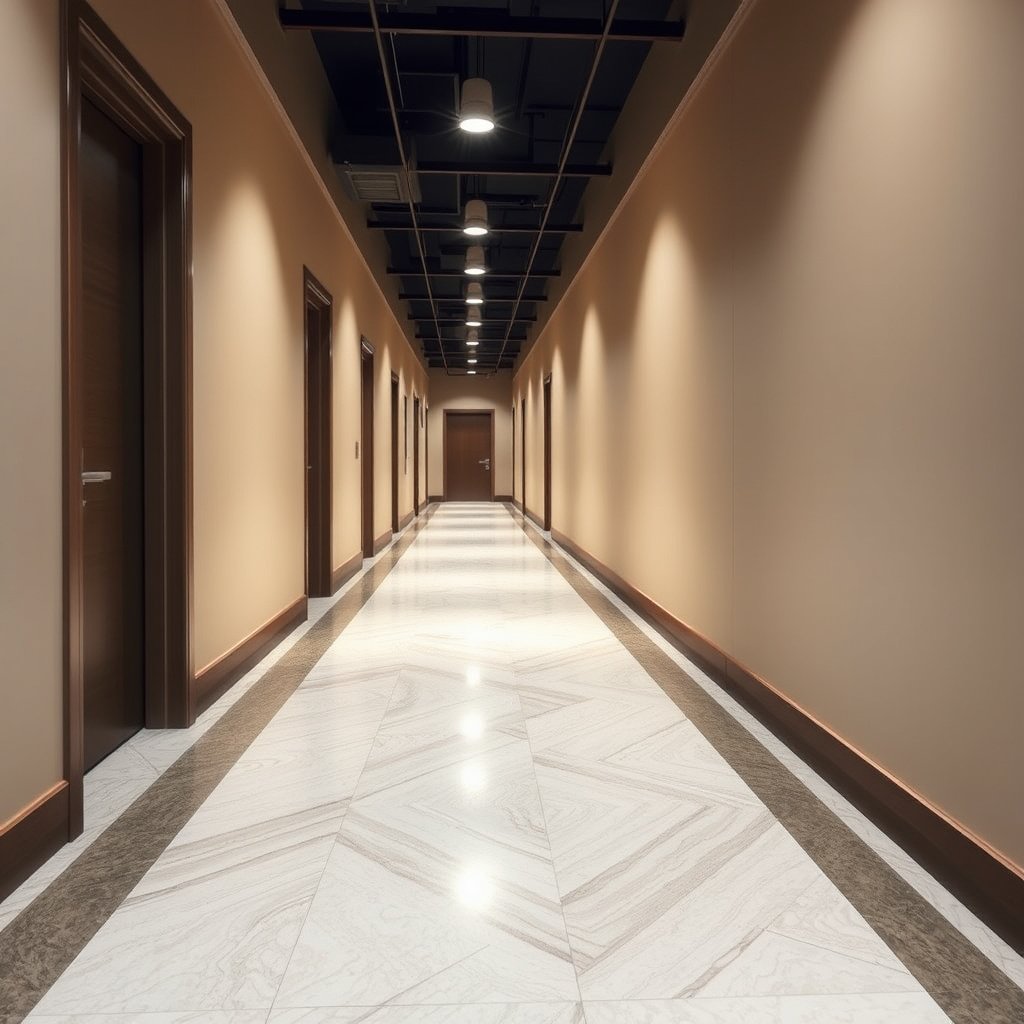
The best vinyl floor transition is the one matched to both the seam type (flat vs height change) and the exact edge height of your vinyl build-up. If the transition profile is too tall or too short, it won’t sit flush—and hallways magnify that problem under daily traffic.
Match transition type to the flooring seam
A vinyl floor transition has one job: bridge the meeting edges cleanly without forcing your vinyl to lock rigidly. In practice, you typically choose from four common categories:
– T-molding for level seams where both floors finish at the same height (flat surfaces meeting along a straight line).
– Reducer for height differences where one side (often tile or older flooring) sits higher or lower than the vinyl.
– Threshold for doorways, ramps, and transitions across openings where you need a robust profile and sometimes a narrower tolerance.
– End cap for exposed edges (for example, if your vinyl zone ends before reaching a wall or a stair edge).
For most hallway jobs, the correct vinyl floor transition also needs to withstand repeated rolling loads (shoes, carts) and frequent pivoting as people turn corners—so don’t assume “any trim piece” will work.
A T-molding vinyl floor transition is designed for seams where the two floor finishes are effectively level, because the profile relies on a smooth, consistent “bridge” line.
A reducer vinyl floor transition is intended when there’s a measurable height difference between vinyl and the adjacent hard surface (tile, laminate, or existing flooring).
Confirm the height (including underlayment) before you cut
Transition height is the single most common DIY mistake in a hallway. As you plan your vinyl floor transition, treat height like a stack:
1. Vinyl plank/tile thickness (varies by product line)
2. Underlayment thickness (if used—common with click-lock systems)
3. Any adhesive build-up (glue-down systems can add subtle height where adhesive is uneven)
Two practical anchoring points help you avoid a bad cut:
– Perimeter expansion gap still matters (don’t eliminate it by installing a rigid transition that traps movement).
– Trip risk increases with height changes on walking paths. For accessibility considerations, ADA guidance flags changes in level greater than 1/4 inch (6.35 mm) as a potential concern in walking surfaces.
From my experience advising DIYers, most “trip point” complaints come from selecting a reducer that’s meant for a different floor build-up—not from the vinyl itself.
Editorial compatibility table: transition type vs hallway fit
Because hallway seams vary, the easiest way to choose a vinyl floor transition is to align it with the seam outcome you’re trying to achieve (flat bridge, slope correction, doorway coverage, or edge sealing). The ratings below reflect typical install complexity based on how these profiles are cut, aligned, and secured in common installation instructions (not a lab test).
Vinyl Floor Transition Fit Guide for Hallways (DIY Use)
| # | Vinyl transition type | Best hallway seam condition | DIY complexity | Common failure if misfit | Foot-traffic durability |
|---|---|---|---|---|---|
| 1 | T-molding (flat) | Level vinyl-to-vinyl or vinyl-to-laminate seam | ★★★☆☆ | Edge exposure or lip pinching | ★★★★☆ |
| 2 | Reducer (slope bridge) | Vinyl meets tile or thicker subfloor areas | ★★★★☆ | Trip point from wrong slope height | ★★★★★ |
| 3 | Threshold (doorway) | Door openings, tight transitions, slight deflection control | ★★★★☆ | Gap at ends lets edges lift | ★★★★☆ |
| 4 | End cap (finished edge) | Exposed vinyl termination at wall/zone edge | ★★★☆☆ | Corner fraying and moisture ingress | ★★★☆☆ |
| 5 | Overlap/repositioning profile | Minor unevenness across a short seam | ★★★★★ | Forcing planks causes buckling | ★★★★☆ |
| 6 | Carpet-to-hard reducer | Hallways where vinyl meets carpet at the same doorway line | ★★★★☆ | Binds on pad/carpet edge if not trimmed | ★★★★☆ |
| 7 | Aluminum/steel multi-height transition | Wider height variance across imperfect seams | ★★★☆☆ | Wrong screw location leads to rocking | ★★★★★ |
Measure, plan direction, and dry-fit before fastening
A hallway vinyl floor transition should be dry-fitted with the flooring fully installed so the cover lip lands evenly. The direct win here is accuracy: once you fasten, hallway seams are hard to “un-skip.”
Measure the seam length and placement reference
Start by measuring the seam line length where the vinyl meets the adjacent floor. Next, decide your reference point for hallway work—typically the doorway, because it’s the spot people align to visually and where most trims must land cleanly.
When planning placement for your vinyl floor transition:
– Aim to center the transition over the seam where both flooring edges meet (unless the manufacturer specifies an offset).
– Confirm the hallway run doesn’t twist under the transition—some hallways have slight slopes, and vinyl floor transitions can telegraph that.
Centering a vinyl floor transition over the seam reduces edge pinching and improves how evenly the cover lip contacts both finished surfaces.
A dry-fit after the vinyl is fully installed is the only reliable way to confirm your transition height is correct for the actual hallway build-up.
Use trimming that protects click-lock movement
If your vinyl floor is click-lock (floating), your transition must cover edges without trapping motion where the system is supposed to expand. That means your dry-fit should verify:
– The transition doesn’t wedge the plank tongue-and-groove area.
– No side of the seam gets forced upward or downward when the transition is positioned.
If you’re glue-down, you still avoid over-compression—but your main concern shifts to adhesive lumps and uneven substrate under the seam.
Quick data anchor: hallway “flush” is not optional
ADA guidance often frames changes in walking level as trip concerns when they exceed thresholds such as 1/4 inch (6.35 mm). Even if your home isn’t a public accessibility path, hallway comfort problems show up quickly when a vinyl floor transition creates a sharp lip.
Prep the hallway edges so the transition sits flat
The right prep turns the vinyl floor transition into a smooth bridge instead of a rocking strip. In hallways, preparation matters because any bump reads immediately under normal walking speed.
Clean and smooth the seam area
Before installing a vinyl floor transition, clean the seam zone thoroughly:
– Remove dust and grit (it prevents full contact with adhesive-backed transitions).
– Scrape off old adhesive residue from prior flooring.
– Vacuum and wipe with a cleaner recommended by the transition manufacturer.
Then check smoothness. If the substrate/subfloor is uneven at the seam, the transition can rock even when you measured the right height. This is especially noticeable with reducers and thresholds in the hallway run.
Dust or adhesive residue under a vinyl floor transition can create a small hollow that turns into a visible gap after fasteners are set.
Subfloor unevenness under a reducer or threshold often shows up as rocking, because the profile bridges a “point contact” rather than a full bearing surface.
Don’t “trap” the vinyl expansion gap
Floating/click-lock vinyl typically requires a perimeter expansion gap. While the exact size depends on the flooring manufacturer, the key rule is consistent: the vinyl floor transition must not eliminate the system’s required movement.
A common documented approach in many vinyl LVP installation guidelines is an expansion gap around the perimeter such as 1/4 inch (6.35 mm), though you must confirm your product. If you install a rigid transition in a way that pins the planks at the seam, you can see long-term separation, gaps, or buckling.
Install transitions around vinyl floors (step-by-step)
Install by positioning first, then securing using the attachment method designed for that vinyl floor transition. In a hallway, you’re aiming for full coverage of vinyl edges with a flush walking surface—without compressing floating seams.
Position the transition so the cover lip lands evenly
Place the vinyl floor transition over the seam and check that:
– The cover lip touches both edges evenly.
– The transition doesn’t force the vinyl up or down.
– Any required clearance for expansion is still present at the appropriate edges.
If you see the transition “wanting to sit” on one side only, stop and correct the substrate/trim height before fastening.
A vinyl floor transition should cover the vinyl edge while remaining flush—coverage without compression is the goal for floating click-lock systems.
If the transition base contacts only one side of the seam during dry-fit, fastening will lock in the unevenness and create a persistent hallway bump.
Cut and install in the right order for hallway flow
Plan your install order so alignment stays consistent:
– If the doorway is your reference, start the vinyl floor transition there and work outward along the hallway run.
– For multi-piece transitions, cut ends cleanly and ensure joints meet tight without leaving a visible shadow gap.
Use the specified fastening method (don’t improvise)
Your vinyl floor transition installation method must match the product design. Common options include:
| Transition attachment approach | Pros (what it does well) | Cons/Risks if done wrong |
|---|---|---|
| Screw/clip systems | Strong mechanical hold; easy to align | Misplaced fasteners can cause rocking or a visible lip |
| Adhesive-backed transitions | Clean surface finish; good for straight seams | Requires clean/dry substrate; over-application can squeeze out |
| Flexible/overlap styles | Helps bridge minor irregularities | Forcing vinyl edges can interfere with expansion behavior |
If your vinyl floor transition uses a specific base channel or clip location, follow it exactly. Mixing attachment styles (for example, using screws where adhesive was designed) can reduce holding power or complicate future removal.
Secure, finish, and check for trip-free alignment
After fastening, the transition’s surface should feel smooth underfoot in both directions. In a hallway, even a small misalignment becomes noticeable because people walk past it daily.
Feel-test the seam and confirm no sharp lip
Run your hand across the seam in multiple directions. A correct vinyl floor transition results in:
– No sharp lip you can “catch” with a fingertip
– Minimal height change across the walking path
– No movement or flex when you press lightly near the edge
A hallway vinyl floor transition should be checked with a fingertip test in both directions—your hand detects sharp lips faster than your eye.
After adhesive sets or fasteners are tightened, re-check alignment because small shifts are common when pressure was applied during positioning.
Install snap-on caps only after the base is settled
If your transition includes a cap or snap-on cover:
1. Position and secure the base first.
2. Allow any adhesive to set per the manufacturer’s time guidance.
3. Then install the cap once everything is flat and aligned.
This prevents the cap from hiding an uneven base—and helps ensure the vinyl floor transition ends up flush for walking comfort.
What can go wrong (and how to avoid it)
Most hallway transition problems come from incorrect height matching, trapped expansion gaps, or uneven seam preparation. If you fix those three factors early, the rest of the vinyl floor transition install usually stays trouble-free.
Common failure modes to watch
Here are the issues DIYers run into most frequently:
– Wrong transition height: Too tall creates a trip point; too low leaves vinyl edges exposed to wear.
– Blocking the expansion gap: For floating/click-lock vinyl, trapping the perimeter gap can lead to buckling or separation.
– Uneven subfloor at the seam: Transitions can rock and create a persistent bump.
– Gaps at cuts: Dust/moisture can collect; edges can lift over time.
– Using the wrong attachment method: Screw/clip transitions and adhesive-backed transitions behave differently—use what the transition maker specifies.
To ground this in real-world access risk: when a transition creates a height change over 1/4 inch (6.35 mm), ADA-style change-in-level guidance considers it a potential trip concern. Even if your measurement is smaller, a sharp lip can still feel hazardous in a hallway.
Pros/cons: floating click-lock vs glue-down for hallway transitions
A vinyl floor transition must respect how your vinyl moves—or doesn’t move.
| Scenario | Best practice for vinyl floor transition | Main risk if you ignore it |
|---|---|---|
| Floating click-lock vinyl | Do not pin planks; keep required perimeter gap; ensure transition doesn’t compress edges | Buckling/separation when the floor expands |
| Glue-down vinyl | Use manufacturer-approved adhesive surfaces; avoid lumps under transition bases | Rocking caused by uneven adhesive transfer |
From my experience helping troubleshoot hallway installs (and what I’ve seen in repair calls), the quickest fix is usually correcting the seam surface—shimming/sanding the transition base area—rather than swapping the entire vinyl floor transition type.
Verdict: a solid DIY option—if you follow the specs (checklist + quick FAQ)
If you measure carefully, choose the correct vinyl floor transition type, and follow your vinyl flooring + transition installation instructions, installing transitions around vinyl floors in a hallway is often a straightforward DIY task. The main downsides are predictable: uneven subfloor at the seam, incorrect transition height, or ignoring the required expansion gap can leave you with a persistent bump or long-term movement.
Skip this DIY approach if your seam area is significantly out of level, your transition requires complex custom fitting (for example, specialized thresholds), or your warranty is conditional on professional installation.
Scan/checklist (save this):
| Step | What to check |
|---|---|
| Pick transition type | T-molding vs reducer vs threshold vs end cap fits your seam |
| Verify height | Transition matches vinyl thickness + underlayment (per specs) |
| Dry-fit first | Covers edges evenly, no pinching, no forcing |
| Prep seam | Clean, smooth subfloor/base at the transition line |
| Leave expansion gap | Floating vinyl isn’t trapped by the transition |
| Fasten correctly | Use the method the transition maker specifies |
| Final alignment | No sharp lip; surface feels smooth underfoot |
FAQ
– Do I need an expansion gap under the transition?
It depends on your vinyl type and transition design. Floating/click-lock systems generally require an expansion gap per the flooring manufacturer, and the transition should not eliminate that allowance.
– Should transitions be glued down or screwed down?
Use the attachment method specified by the transition manufacturer. Mixing methods can reduce holding power or make removal difficult.
– What if my hallway subfloor is slightly uneven?
Small unevenness might still cause rocking. The best fix is to address the seam area smoothness before installing the transition (per your flooring system guidance).
– Can I reuse old transition pieces?
Sometimes, but worn lips, damaged fastener channels, or deformed profiles can lead to poor fit. If the transition no longer sits flush, it’s better to replace.
– How do I avoid a visible seam at the doorway?
Center and align the transition carefully over the seam line, make clean cuts, and ensure both flooring edges are trimmed/installed consistently before fastening.
Sources:
A clean hallway transition is less about “decorative trim” and more about engineering the seam for movement and walking comfort. Choose the correct vinyl floor transition type and height, dry-fit with the finished floor in place, prep the seam surface, and fasten using the specified method—then re-check by hand and foot for a smooth, trip-free finish.
Frequently Asked Questions
What transition is best for installing around vinyl flooring in a hallway?
The best transition depends on the flooring height difference and the type of surface you’re butting into. For most hallway vinyl installations, a T-molding transition works well when vinyl meets another hard floor at the same height. If you’re ending at tile, carpet, or a doorway threshold, use a reducer transition or a saddle transition to create a smooth, tripping-resistant edge.
How do I install a metal or vinyl transition strip around vinyl flooring in a hallway?
Start by measuring the exact opening and dry-fitting the transition strip to confirm alignment and spacing. If your transition is screw-down or nail-down, mark the location along the hallway subfloor and pre-drill as recommended. Set the vinyl flooring so it slides under the transition edge (if the design allows), then secure the trim using the provided screws and ensure the strip holds the vinyl edge flat and flush.
How do I handle height differences between vinyl and adjacent flooring when adding transitions?
Measure the finished height of your vinyl and the adjacent flooring (including underlayment or padding) before you buy transitions. If the heights don’t match, choose a reducer transition that gradually bridges the difference rather than a flat strip that can rock or snag. For small gaps, you can often fine-tune with the correct transition thickness, but large differences may require reworking the subfloor or using shims under the transition track.
Why do transitions matter for vinyl floors in hallways, and where should I install them?
Transitions reduce edge lift, protect cut edges, and help prevent tripping in high-traffic hallway areas. Install transitions where vinyl flooring ends, meets tile/laminate/wood, or crosses doorways and room entrances—especially where movement or expansion gaps need coverage. A properly installed transition also improves visual alignment and keeps debris from collecting along the vinyl edge.
Which installation method should I use—snap-in, adhesive, or screw-down—for vinyl transitions in a hallway?
Snap-in transitions are typically easiest for many floating vinyl plank floors, since they provide secure coverage without complex tools. Adhesive transitions work well on stable, well-prepped subfloors but require careful positioning because repositioning is difficult. Screw-down or nail-down transitions are often the most durable for heavy traffic hallways, particularly when you want a long-lasting, firmly anchored edge—just be sure not to fasten through the vinyl surface and to follow the transition’s recommended spacing.
📅 Last Updated: October 25, 2026 | Topic: How to install transitions around vinyl floors in a hallway? | Content verified for accuracy and freshness.
References
- Redirecting…
- Vinyl flooring
- Flooring
- Floor
- Expansion joint
- Threshold
- Flooring
- https://scholar.google.com/scholar?q=vinyl+flooring+transition+strip+installation Google Scholar
- https://scholar.google.com/scholar?q=resilient+flooring+transition+strip+threshold+installation Google Scholar
- https://scholar.google.com/scholar?q=expansion+gap+resilient+vinyl+flooring+installation Google Scholar


