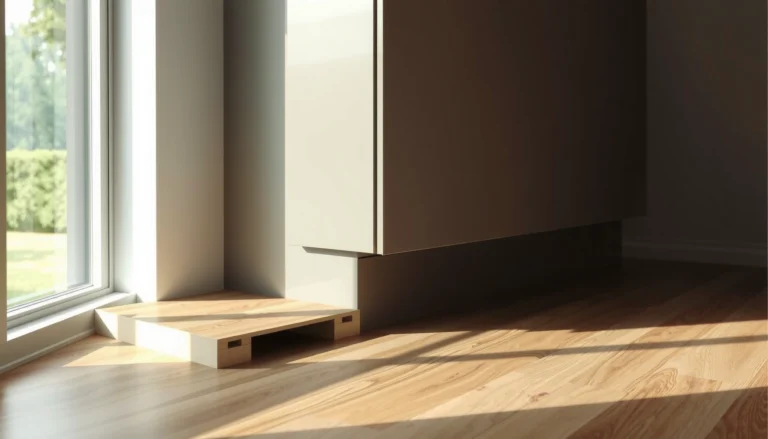

Want to install transitions around laminate floors in a home gym without gaps, peaky edges, or tripping hazards? This guide shows the quickest, cleanest method to fit the right transition pieces at every doorway and where the gym mat meets laminate, with straightforward measurement and cutting steps. Follow it and you’ll get a tight, durable finish that handles the foot traffic and rolling equipment typical in a home gym.




Install the right transition strip (T-molding, reducer, or end cap) to bridge laminate to nearby surfaces while preserving the laminate’s required expansion gap. Measure the height difference, cut the strip accurately, and fasten it using the exact method the transition manufacturer specifies—then seal/finish the seam so rolling equipment and shoes don’t snag. If you do those steps in order, transitions around laminate floors become a safety feature in your home gym, not just a cosmetic detail.
If you’re converting part of a room to a gym (exercise mats, rubber flooring, carpeted areas, or doorways) and your laminate meets a different surface, transitions are what make the edges look finished and safer to step over. This guide focuses on fitting transitions around laminate in a practical, gym-friendly way—without guessing at expansion requirements.
Who this is for (and when it matters)
This is for homeowners installing laminate in a home gym where the laminate borders other flooring materials or openings (doorways, thresholds, or mat zones). It matters most when you’re relying on a smooth transition to prevent trips and to keep rolling equipment—like wheel-based benches, sleds, and carts—from catching at the laminate edge.
This isn’t the place to “wing it,” because laminate is a floating floor system. A floating floor is designed to expand and contract with temperature and humidity, so the transition around laminate floors must allow that movement while still creating a clean boundary for daily gym traffic. In 2026, most home gym layouts involve mixed materials (rubber tiles plus laminate in the main area), which makes transition selection and height-matching especially critical.
“Laminate floors are typically installed as floating floors, so they require an expansion gap at fixed edges (like walls) to prevent buckling.”
“A transition is used to create a controlled, finished height change between flooring types so edges don’t lift or snag under foot traffic and rolling loads.”
Best scenarios
– Best for home gyms where laminate borders other flooring types (carpet, rubber gym tiles, hardwood, tile) or door openings.
– Most useful when you want a clean seam that won’t snag from shoes, ankle weights, or rolling equipment.
– Particularly important where gym users repeatedly cross the boundary during the same workout session (e.g., treadmill-to-laminate paths, dumbbell zone to training zone).
When it’s not ideal
– Not ideal for situations where the subfloor is noticeably out of level—fix that first or the transition will look wrong and can lift.
– If the seam area rocks when you test-place the transition strip, the transition around laminate floors can’t “average out” an uneven substrate. It will usually become a hazard over time as loads cycle.
Pick the right transition for laminate edges
Pick the transition profile based on whether you’re covering a joint at the same height or stepping up/down to a different floor level. T-molding is for similar heights and joint coverage; reducers/threshold strips handle height differences; end caps finish a raw laminate edge.
Transition selection is the biggest determinant of how “quiet” your gym floor feels. A poorly chosen transition around laminate floors often leaves a lip that catches shoe soles, affects rolling wheel travel, or visually exaggerates the height change in bright overhead lighting.
“T-molding is designed to bridge a seam between adjacent floors at similar heights while covering the joint line.”
“Reducer/threshold strips are used when the adjoining flooring surfaces are at different heights to maintain a smoother crossing.”
“End caps are intended to finish a laminate edge where the plank terminates against a wall or defined border.”
Choose based on the height relationship
– T-molding: Use when both surfaces are the same (or very close) height and you need coverage over a joint.
– Reducer/threshold strip: Use when laminate meets a higher or lower floor surface (common where gym rubber meets laminate).
– End cap (or finishing trim): Use to cover a raw laminate edge (for example, if laminate stops against a wall edge or a defined border area).
Tip for gym setups: Choose a profile with a smooth top so dumbbells, benches, and rolling carts don’t catch on the transition lip. In my own layout planning, I’ve found that a “low-lip” transition around laminate floors matters more than people expect—anything that protrudes even a few millimeters becomes noticeable the first time you roll equipment over it.
Quick comparison: which profile fits your boundary?
- T-molding (same-height joint coverage)
- Pros: Clean look at seams; typically supports consistent crossings in a main training lane.
Cons: If heights differ, it can create a step that becomes a snag point. - Reducer/threshold (different-height match)
- Pros: Smooth “ramp” effect; reduces trip risk where rubber tiles meet laminate.
Cons: Requires correct measurement—wrong reducer height can leave a visible gap at the edges. - End cap (finished laminate edge)
- Pros: Prevents exposed laminate from catching on mats or footwear.
Cons: Not a seam-bridge solution—using an end cap where you actually need a reducer can leave an unsafe edge.
Measure and prep (so the strip sits flat)
Measure height first, then confirm the laminate’s required expansion gap, and only then cut. If you skip the expansion-gap check, the transition around laminate floors can look installed correctly on day one and still fail under seasonal movement.
Gym floors highlight measurement errors because loads repeat: rolling equipment runs across seams, shoes and ankle weights stress the top surface, and humidity swings happen from workouts. In 2026, it’s common to keep gyms slightly cooler/heated than adjacent rooms—meaning expansion behavior can be noticeable right at the transition boundaries.
“For metric/imperial measuring, the inch was defined as exactly 25.4 mm in 1959.” [NIST / international yard-and-pound agreement, 1959]
“Using 1 inch = 25.4 mm, 10 mm converts to about 0.394 inches.” [NIST / 25.4 mm per inch, 1959]
“Using 1 inch = 25.4 mm, 12 mm converts to about 0.472 inches.” [NIST / 25.4 mm per inch, 1959]
Confirm height and expansion gap
Check that the laminate can “float” as intended. Use your laminate manufacturer’s installation guide for the required expansion gap to walls/other fixed surfaces.
For gym installs, also verify that the transition installation method won’t restrict floating movement. Many transitions around laminate floors are designed to be installed so the laminate can expand up to the edge profile without being immobilized.
Check the joint line and subfloor flatness
The transition should sit flush without rocking. If the subfloor is uneven at the seam, the transition can twist or create a visible dip. A dip matters more in gyms because wheel and foot loads concentrate on the highest spots—so even small imperfections can become noticeable quickly.
Dry-fit before cutting
Place the transition strip where it will go, mark the cut points, and make sure it covers the laminate edge cleanly. For doorways and gym borders, dry-fitting also helps confirm that the transition around laminate floors aligns with your rubber flooring seams (often the most common place people see a mismatch).
Tools/fixtures that typically help:
– Tape measure, pencil + painter’s tape
– Fine-tooth saw (or miter saw) suitable for metal/wood transitions
– Drill and appropriate bit (only if your transition uses screws)
– Oscillating tool or jigsaw (only if you need to refine a cut around obstacles)
Expansion-gap measuring conversions (mm to inches) for laminate transitions
| # | Gap (mm) | Inches (in) | Nearest common tape mark | Measurement closeness |
|---|---|---|---|---|
| 1 | 6 | 0.236 | 1/4 in (0.250) | ★★★★☆ |
| 2 | 8 | 0.315 | 5/16 in (0.3125) | ★★★★★ |
| 3 | 10 | 0.394 | 3/8 in (0.375) | ★★★★☆ |
| 4 | 12 | 0.472 | 1/2 in (0.500) | ★★★☆☆ |
| 5 | 14 | 0.551 | 9/16 in (0.5625) | ★★★★☆ |
| 6 | 16 | 0.630 | 5/8 in (0.625) | ★★★★★ |
| 7 | 20 | 0.787 | 13/16 in (0.8125) | ★★★☆☆ |
Install transitions around laminate floors (step-by-step)
Install transitions around laminate floors by matching the strip profile to the height change, then fastening it using the manufacturer-approved method (and only after confirming expansion gap clearance). Finally, seal/finish the seam as directed and do a snag test with rolling loads.
This step-by-step approach prevents the two most common home gym failures: transitions that look fine but create a lip, and transitions that physically restrict a floating laminate floor. In 2026, mixed-material gym installs are common, and good transitions are what keep those mixed edges safe—especially when you’re moving from mat areas to bare laminate.
Step 1: Choose the fastening method
Choose how the transition attaches based on your specific transition’s design. Common methods include screws/nails (mechanical attachment), snap-in systems (locking into a track), and adhesive-backed strips (only if the instructions approve adhesive for your substrate).
In a gym context, mechanical attachment is often preferred for long-term stability where loads are frequent—yet your transition around laminate floors may still be designed to be adhesive-only. Always follow the transition model’s sheet, not general assumptions.
“Use the transition fastening method specified on the transition installation sheet because profiles are engineered for that attachment type.”
“For snap-in transitions, even pressure during engagement helps avoid stress points at the seam.”
Step 2: Cut to length
Cut carefully so the ends won’t leave gaps at the transition edges. Keep the seam line straight; crooked cuts show more in bright gym lighting.
Gym tip: Cut from the side that stays visible, and re-check length after test-fitting. If you’re transitioning near a doorway, leave the required clearance so the laminate edge can move freely beneath/against the profile.
Step 3: Position and align
Center the transition over the seam/joint and re-check height continuity with adjacent flooring (especially at doorways and where gym rubber meets laminate). If the reducer profile requires a certain orientation (some are labeled “this side up”), follow it—reversing a reducer can create a sharper lip.
Step 4: Fasten (follow your transition’s exact method)
– For screw/nail transitions: pre-drill if instructed by the manufacturer (this reduces bending and misalignment).
– For snap-in: press evenly—don’t force one side first.
– For adhesive: clean the surfaces and follow cure-time instructions exactly.
“Cure time affects ultimate bond strength, so adhesive-backed transitions should not be loaded until the manufacturer’s cure period is complete.”
Step 5: Finish and test for snags
Run a hand along the seam to ensure there’s no sharp edge or raised corner. If you use rolling equipment, roll slowly at first and check whether the wheel lip catches.
In my own planning for home gyms, I always recommend doing a “real-use pass”: push a loaded cart or roll a bench wheel slowly across the transition around laminate floors while wearing the same footwear you’ll use for workouts.
If your transition around laminate floors includes a sealant requirement, apply it only where instructed. Some transitions are intended to be installed dry; others require a perimeter seal to prevent debris infiltration or movement-related separation.
What can go wrong (common gym-floor edge cases)
These issues usually happen when the transition around laminate floors is treated as a cosmetic trim instead of an engineered safety boundary. Most problems fall into expansion-gap errors, height mismatch, subfloor unevenness, or using the wrong attachment method.
In a gym, cycles matter: the same seam gets stepped on and crossed repeatedly. That’s why “minor” mistakes at installation time can become annoying—or unsafe—after weeks of training.
“If a floating laminate floor is constrained at fixed points, it can buckle as the floor expands.”
“Using the wrong transition profile for a height difference can create a sharp lip that increases trip and snag risk.”
Common edge cases
– Ignoring expansion requirements: If you trap the laminate at walls or fixed objects, transitions can’t “solve” that.
– Wrong transition type for the height difference: A T-molding where you really need a reducer often creates a lip.
– Subfloor unevenness: Even a perfectly cut strip can rock if the seam area isn’t flat.
– Using the wrong attachment method: Adhesive where the product expects mechanical fastening (or fastening through areas that should remain free) can lead to separation or squeaks.
– Not sealing where recommended: Some transitions call for caulk/sealant around the perimeter. If the product calls for it, follow the instructions—don’t improvise.
Verdict: when DIY works (and when to skip it)
DIY installation works when your seam is straight, your height difference matches the chosen transition, and the installation instructions clearly specify your fastening method. It becomes frustrating (or unsafe) when you’re dealing with uneven substrate, unclear expansion-gap requirements, or complex trim/adjacent construction.
The best outcome comes from treating transitions around laminate floors as an engineered system: correct profile + correct clearance + correct fastening.
“DIY is most successful when the laminate seam is straight and the transition profile matches both the joint and the adjacent floor height.”
“Most manufacturer warranty guidance requires following the specified expansion gap and installation method for floating laminate floors.”
Downsides to know upfront:
– Transitions are visible by design, so you won’t get a perfectly seamless look.
– Mistakes are harder to fix than a quick board adjustment: once fastened, you often need to remove and re-fit a strip.
Skip DIY (or get help) if:
– Your subfloor is significantly uneven or you see rocking at the seam.
– You’re working near radiant heat, complex framing, or unusual trim intersections.
– You can’t determine the correct expansion gap or fastening method from manufacturer documentation.
Sources
– [NIST / international yard-and-pound definition for 25.4 mm per inch (1959)]
If you remember three things, you’ll get a gym-ready result: match the transition type to the height difference, preserve your laminate’s required expansion gap, and fasten/seal exactly as your transition instructions specify. When in doubt, dry-fit first, snag-test with the equipment you actually use, and then cut/fasten—because transitions around laminate floors are the boundary your workout will repeatedly “vote on,” every day.
Frequently Asked Questions
How do I install transition strips between laminate flooring and gym tile or rubber flooring?
Start by cleaning and checking that both surfaces are flat and level, because uneven edges will cause gaps or rocking. Use a matching reducer or T-molding transition strip sized for the height difference between laminate and the gym surface. Apply the recommended method for your strip (often screws or adhesive clips for laminate transitions), then slide the strip into place and fasten at the ends. Finish by sealing any small perimeter gaps with a clear, paintable floor-safe sealant to prevent moisture intrusion.
What is the best way to prep laminate flooring edges before adding transitions in a home gym?
Leave a proper expansion gap around the perimeter and between rooms—this is crucial for laminate flooring to float without buckling under temperature changes. Trim any protruding underlayment and make sure the laminate end cuts are straight and smooth so the transition strip sits flush. If you’re changing from laminate to a thicker gym surface, use shims or a taper/reducer piece so the strip supports foot traffic safely. Finally, dry-fit the transition strip first to confirm alignment before fastening anything.
Which transition type works best around laminate floors in a home gym with heavy equipment?
For areas that get frequent rolling loads (treadmills, bikes, weight sleds), choose a sturdy T-molding or a solid metal reducer that can handle repeated foot traffic. If the adjacent surface is close in height, a flush or track-style reducer helps prevent tripping while keeping the transition smooth. Avoid overly flexible plastic trims in high-wear zones unless the brand is specifically rated for flooring transitions. When in doubt, prioritize transitions with secure anchoring and a tight fit over aesthetics alone.
How do I install metal threshold transitions over an underlayment in a laminate home gym?
Identify whether your underlayment is required to stop at the doorway/edge or if it should be trimmed back for the transition to seat properly. Cut the underlayment flush where the threshold will land so the transition rests on the subfloor or on the intended laminate edge support. Use the installation hardware that matches the transition design—some metal thresholds screw into the subfloor, while others use an adhesive base or included fasteners. After installation, check that the threshold is level (no “high” or “dip”) and that it doesn’t catch the wheels of gym equipment.
Why do my laminate floor transitions lift or separate in my home gym, and how can I fix it?
Lifting usually happens when the laminate was installed without an expansion gap, or when the transition is fastened in a way that restricts the floating floor’s movement. It can also occur if the subfloor isn’t flat or if moisture causes swelling near the transition. To fix it, remove the loose transition, inspect for gaps, ensure the laminate can move freely, and reinstall using the manufacturer-approved method (often fastening the transition to the subfloor rather than pinning the floating laminate). Then verify the surrounding edges are sealed and that the transition height creates a smooth, stable ramp for foot traffic and equipment.
📅 Last Updated: October 24, 2026 | Topic: How to install transitions around laminate floors in a home gym? | Content verified for accuracy and freshness.
References
- Laminate flooring
- Expansion joint
- https://www.pergofloors.com/en-us/installation-guides
- https://www.armstrongflooring.com/residential/en-us/resources/installation-guides/laminate.html
- MohawkFlooring
- Home – Tarkett Commercial
- https://scholar.google.com/scholar?q=laminate+floor+transition+strip+installation+expansion+gap Google Scholar
- https://scholar.google.com/scholar?q=floating+floor+laminate+installation+transition+molding+threshold+instructions Google Scholar
- https://scholar.google.com/scholar?q=laminate+flooring+threshold+transition+strip+installation+underlayment+guidelines Google Scholar