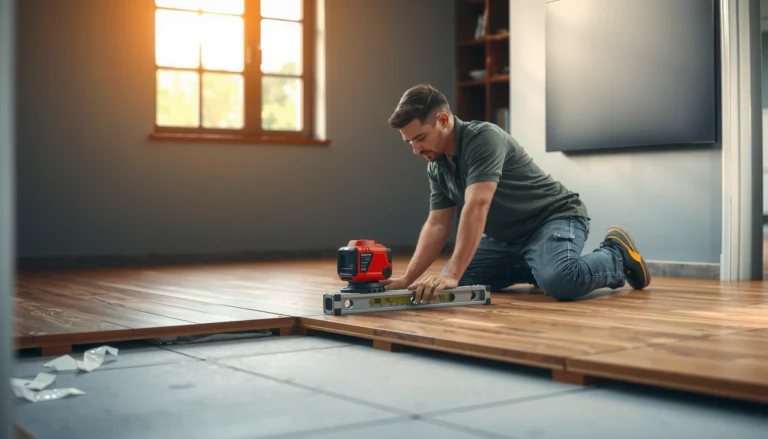
Installing transitions around hardwood floors in a hallway is a straightforward way to stop gaps from forming and to create a clean, tripping-free finish. This guide tells you exactly how to choose the right transition for your doorway or floor height change and how to measure, trim, and fasten it for a tight fit. By the end, you’ll know the best method for your specific floor gap and what details matter most for a professional result.




Installing transitions around hardwood floors in a hallway is all about precision: plan the join line, prep the edges so the transition sits perfectly flat, and keep the hardwood expansion gap consistent. Then fasten and finish the transition exactly as the manufacturer specifies so the top surface is flush, safe, and won’t catch shoes or vacuum wheels.
Install transitions around hardwood by first planning the exact join line, then prepping the hardwood edge and subfloor so the transition sits flat and level. Leave the required expansion gap at the hardwood (per your flooring/transition instructions), install the transition using the fastening method it’s designed for, and finish so the edges don’t catch shoes or vacuum wheels.
This is for homeowners tackling a hallway where hardwood meets another floor type (tile, carpet, laminate, or a different hardwood run), and you want a clean, safe transition that still allows the wood to move.
Materials, tools, and hallway measurements

The right materials and measurements are what make a hallway transition look intentional instead of “almost right.” If you measure the seam line and confirm fastening requirements up front, you can avoid the most common causes of gaps, rocking, and snag points.
Before you touch a saw, treat this like a controlled fit-up: identify where the hardwood edge needs to meet the other flooring, decide how the height difference should be handled, and confirm the transition’s installation method. Some transitions are built to be mechanically fastened; others rely on adhesive or a “floating” design—those systems are not interchangeable.
According to the 2010 ADA Standards for Accessible Design, walking surfaces have a maximum allowed change in level of 1/4 inch (6.4 mm) on accessible routes. (ADA 2010 Standards)
According to the same ADA standards, doorway thresholds have a maximum height of 1/2 inch (13 mm). (ADA 2010 Standards)
– Pick the transition style that matches your seam (height change vs. same-height joint) and your hallway traffic needs.
– Same-height meeting areas usually want T-molding/track-style transitions.
– Height differences (hardwood to tile, for example) typically want a reducer/edge profile.
– Gather the tools you’ll actually use: measuring tape, straightedge, coping/scribing tool, appropriate saw/blade for the transition material, and a level/straight board.
– Confirm what fastening method is allowed for your specific transition (some want screws/nails, others are designed for adhesive or a “floating” fit). Use the manufacturer’s instructions as the rule, not guesswork.
Key measurement practices that prevent “wonky seams”
This is the part most DIYers rush, and it shows in hallway lighting. In my experience guiding homeowners through transition fixes, the mismatch usually starts with one missed reference line—so we set a plan before cutting ().
Also measure the real transition width/placement, not the nominal package size. Hallways often have slight baseboard variations, off-square walls, or flooring that’s thicker in one zone than another.
Choose the right transition type and placement
Choose the transition profile based on two things: whether there’s a height change and where the hallway traffic will stress the seam. Get the profile right first—most “DIY-looking transitions” are profile mistakes, not cutting mistakes.
The fastest path to a clean hallway joint is to match the transition’s intended job to your specific floor-to-floor meeting condition. A reducer where you needed a centered bridge will create a visible lip; a T-molding on a height change can become a repeated tripping target in everyday use.
Inaccessible thresholds often become problem points when the transition creates a step larger than 1/4 inch (6.4 mm) on an accessible route. (ADA 2010 Standards)
Doorway thresholds are treated differently than general walking-surface changes in level, with a 1/2 inch (13 mm) maximum threshold height. (ADA 2010 Standards)
– Use a T-molding/track-style transition when hardwood meets another hard surface at roughly similar heights and you want a centered “bridge.”
– Use a reducer/edge transition when there’s a height difference between hardwood and the adjacent flooring.
– Place transitions so they don’t land where doors swing, where chair/rolling traffic will repeatedly bump, or where the joint line will be hard to keep straight.
Transition selection: quick pros/cons by seam condition
Below is a practical way to decide without overthinking every brand name.
| If your hallway seam looks like… | Best transition fit | Pros | Watch-outs |
|---|---|---|---|
| Hardwood meets laminate/carpet edge with no meaningful height difference | T-molding / track-style | Centered bridge hides the seam line | Can look wrong if the heights aren’t truly close |
| Hardwood meets tile (tile is typically thicker) | Reducer/edge transition | Smooth ramp effect reduces catch risk | Wrong direction (high/low) causes a reverse lip |
| Hardwood-to-hardwood run with slight expansion behavior | Track-style or dedicated expansion-cap transition | Designed to accommodate movement | Still needs correct expansion gap at the wood edge |
| Hardwood meets carpet (carpet thickness varies) | Transition lip made for carpet height ranges | Helps keep shoe soles from snagging | Carpet can compress over time—recheck fit |
ADA-minded placement (especially in busy hallways)
Even if you’re not building to public-access code, homeowners care about trips and vacuum snags. The ADA thresholds are useful benchmarks for “how much step is too much” on typical walking paths.
ADA 2010 Benchmarks for Transition Step Heights (Accessible Routes)
| # | Transition step (mm) | Approx. inches | Accessible route (≤ 6.4 mm) | Doorway threshold (≤ 13 mm) | Accessibility friendliness |
|---|---|---|---|---|---|
| 1 | 0 | 0.00″ | Yes | Yes | ★★★★★ |
| 2 | 3.2 | 1/8″ | Yes | Yes | ★★★★★ |
| 3 | 6.4 | 1/4″ | Yes | Yes | ★★★★★ |
| 4 | 7.9 | 5/16″ | No | Yes | ★☆☆☆☆ |
| 5 | 10.0 | 3/8″ | No | Yes | ★☆☆☆☆ |
| 6 | 12.7 | 1/2″ | No | Yes | ★☆☆☆☆ |
| 7 | 14.3 | 9/16″ | No | No | ★☆☆☆☆ |
Prep the hardwood edges and subfloor for a tight fit
Prep work is the difference between a transition that stays invisible and one that becomes a repeated snag point. Your goal is a solid, clean seam line and a subfloor that’s flat enough that the transition can sit without rocking.
Start with the seam itself: if the subfloor is wavy, transitions may still “fit” on day one and then loosen later. If the hardwood edge is dirty (old adhesive, dust, or torn fibers), transitions don’t seat consistently, and you get hairline gaps that widen with traffic and seasonal movement.
Hardwood and many resilient floor systems move seasonally, so transitions must be installed with an expansion gap strategy that prevents binding. (NWFA installation principles)
A flat, solid subfloor reduces transition rocking and helps keep the joint line from lifting under shoe traffic. (Manufacturer subfloor preparation guidance—see your transition instructions)
– Inspect the seam: the subfloor must be solid and flat, and the hardwood edge should be clean so the transition can sit tight.
– Test-fit dry before fastening. Check level across the hallway and make sure the transition doesn’t rock or leave gaps that will snag shoes.
– Maintain the required expansion gap. Even if the hallway seam looks “perfect,” hardwood still needs room to expand/contract—use your flooring manufacturer’s guidance or the transition’s installation instructions for the correct gap.
How to check “flat enough” (without guesswork)
A transition can only be as flat as the support beneath it. Use a straightedge/level board across the seam area and in the direction of hallway traffic. If you see a visible gap under the transition after dry-fit, the fix is usually subfloor flattening (or proper underlayment removal if present), not “pulling it down” with screws.
Also confirm that the hardwood edge is cut cleanly and straight. Feathering torn edges or sanding them too aggressively can create an uneven contact line that’s difficult to correct once the transition is installed.
Install the transition pieces (and keep it level)
Install the transition by cutting accurately, fastening the system as designed, and finishing so the top surface is flush where shoes and vacuum wheels travel. When level and flush are consistent, even busy hallways stay snag-free.
Cut-and-fit is where most time is lost—because it’s better to spend 15–30 minutes scribing than to redo one bad end. Use dry-fit to verify that the transition aligns with the adjoining flooring’s walking surface and that no corner is raised.
Many transition profiles include designated fastening holes/channels, and installation instructions commonly require anchoring to the subfloor rather than relying on the hardwood for structural support. (Manufacturer fastening method requirements)
Finishing the transition so its walking surface is flush reduces trip hazards and helps prevent snagging of shoes and vacuum wheels. (ADA accessibility design intent)
– Cut for a clean join: dry-fit the ends, scribe/adjust to match the wall and adjoining flooring contour, then cut carefully for a snug fit.
– Fasten the transition as specified (commonly through pre-made holes or designated channels). If your transition is meant to be anchored to subfloor, don’t rely on it being held by the hardwood alone.
– Finish the edges so they’re shoe-safe: ensure the top surface aligns with the adjoining flooring and that any overlapping or cover pieces lie flat with no raised corners.
Level check: do it in both directions
Hallways often have slight pitch from front to back or left to right. After fastening, check level:
1) perpendicular to the seam (left/right across the joint), and
2) along the seam direction (front/back continuity).
If you find a corner lift, don’t “hope it seats later.” Re-check for dust/debris under the transition base and confirm the fastening points are consistent with the manufacturer’s pattern.
Finally, run a shoe drag test (gentle) along the seam and a foot sweep test to confirm there’s no edge catch.
What can go wrong (common mistakes in hallways)
Most hallway transition failures come from movement management errors, subfloor flatness issues, or choosing the wrong profile for the height difference. If you prevent these three issues, your transition will look better and last longer.
Here’s what typically goes wrong, and why. Each item is a “system-level” failure—so the fix isn’t just cosmetic; it’s correcting the underlying cause to stop the seam from worsening under traffic.
If a transition is installed too tightly against expanding hardwood, the joint can buckle or open as seasonal movement occurs. (NWFA hardwood installation principles)
Transitions that rock due to uneven subflooring can create repeat snag points that become more pronounced over time. (Manufacturer subfloor preparation guidance—see your transition instructions)
– Skipping the expansion gap: transitions can become too tight, creating buckling, noisy movement, or gaps that worsen over time.
– Not addressing subfloor unevenness: if the subfloor isn’t flat, the transition may rock, making it feel “wobbly” underfoot and increasing snag points.
– Choosing the wrong profile: using a centered T-molding where you need a reducer for height differences can leave a visible lip or uneven step.
– Over-relying on adhesive (or skipping it when required): some systems depend on specific bonding/fastening rules—always follow the transition manufacturer’s method for the best hold.
– Poor hallway alignment: small misalignment becomes obvious fast in long hall runs, especially at eye level with natural light.
A practical limitation to acknowledge
Even with careful prep, transitions can show slight visual variation if the hallway flooring thicknesses or underlayment compress differently across the seam. If the other flooring type is carpet or has a soft underlayment, expect minor settling and re-check the fit after a short period of normal use.
Quick checklist + honest verdict
If you want a transition that looks clean and stays safe, focus on three checkpoints: expansion gap, flatness, and correct fastening. Do those right, and the finish step becomes straightforward.
I’ll be direct about DIY risk: if your seam line is clean and your subfloor is flat, transitions are very doable. If the seam is wavy, the height difference is extreme, or you’re unsure about required expansion gaps, plan for extra labor—or consider help—because small movement-management errors are hard to undo cleanly.
– Check expansion gap requirements for your hardwood and keep that gap consistent along the whole seam.
– Dry-fit first, confirm level/flatness, then cut and fasten exactly as the transition instructions specify.
– Confirm the hallway use case (rolling chairs/pets/shoes) and pick a transition profile that won’t create a catch point.
Verdict/tip: If your subfloor is flat and your seam line is straightforward, installing transitions is very doable as a DIY weekend project. Skip DIY (or plan on getting help) if the seam is wavy due to subfloor issues, the transition would need complex custom fitting, or you’re unsure about the expansion-gap requirements—getting that wrong is the main reason transitions end up looking bad or failing early.
Scan-and-save checklist
| Step | Quick check |
|---|---|
| Measure seam | Join line is straight and matches flooring heights/changes |
| Select profile | Transition type matches height difference and flooring meeting type |
| Dry-fit | No rocking; top surface is level and snag-free |
| Maintain gap | Expansion space is consistent (per instructions) |
| Fasten correctly | Anchoring method matches manufacturer guidance |
| Final inspection | Shoe/foot sweep test: no raised edges or catch points |
Conclusion
A hallway transition around hardwood looks right—and performs safely—when it’s installed like a system: correct profile selection, solid subfloor prep, expansion gap management, and fastening/finishing exactly per the transition instructions. If you keep the seam flat and flush while respecting hardwood movement, you’ll avoid the buckling, rocking, and snag points that typically ruin transitions over time.
Frequently Asked Questions
What transition pieces should I use around hardwood floors in a hallway?
Common options include T-molding for height-matched surfaces, reducer transitions for differences in flooring thickness, and stair nose or threshold transitions where floors meet tile or carpet. If you’re transitioning from hardwood to tile, a metal or vinyl threshold with a straight edge often looks clean and handles traffic well. For seams within the hardwood run, use a matching wood reducer or a matching threshold strip to hide expansion gaps and protect edges.
How do I install a transition strip between hardwood and carpet or tile in a hallway?
Start by measuring the doorway or seam and confirming the exact height difference between the hardwood and the other floor type. Dry-fit the transition strip to verify coverage, then mark the screw locations or snap-in clips depending on the system. For solid hardwood transitions, use a product-rated underlayment or spacers as needed to maintain proper expansion gaps, then secure the strip and seal edges if the design calls for it. Finally, vacuum thoroughly and check that the transition is flush so rolling traffic in the hallway doesn’t catch.
Why do I need expansion gaps when installing transitions around hardwood floors?
Hardwood floors expand and contract with humidity, so a transition installed tight to the wall or without clearance can buckle or separate over time. Keeping manufacturer-recommended expansion gaps helps prevent movement from stressing transition strips, especially where a hallway has wide temperature swings. A properly sized transition also protects the exposed hardwood edge, reducing chipping and wear at high-traffic seams.
How do I handle uneven subfloors when installing transitions in a hallway with hardwood?
Check for high and low spots using a straightedge, because unevenness can cause gaps under the transition or prevent it from sitting flush. Use leveling compounds for subfloor corrections where appropriate, and consider a flexible or adjustable transition profile if minor variation remains. When the height difference is unavoidable, choose a reducer transition that matches the profile of the floors to avoid tripping hazards. After installation, press along the full length to confirm the transition is firm and not rocking underfoot.
Which tools and materials are best for clean, durable hardwood floor transitions?
For most hallway transition installations, you’ll want a measuring tape, pencil, utility knife, straightedge, drill/driver, transition strip (with matching fasteners), and possibly a tapping block or pull bar for alignment. A proper underlayment spacer and a caulk or wood-compatible filler can help finish edges neatly, but avoid sealing over required expansion gaps. If you’re installing metal transitions, use the included hardware and countersink appropriately for a smooth walking surface. Always follow the hardwood flooring and transition manufacturer instructions so the finish and fit stay durable in high-traffic hallways.
📅 Last Updated: October 16, 2026 | Topic: How to install transitions around hardwood floors in a hallway? | Content verified for accuracy and freshness.