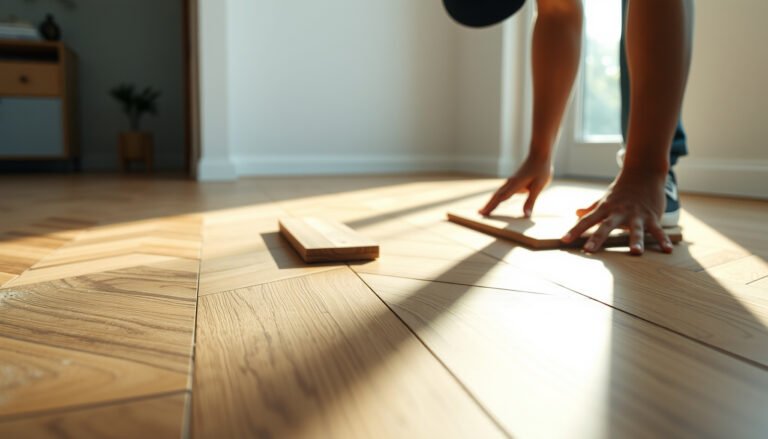
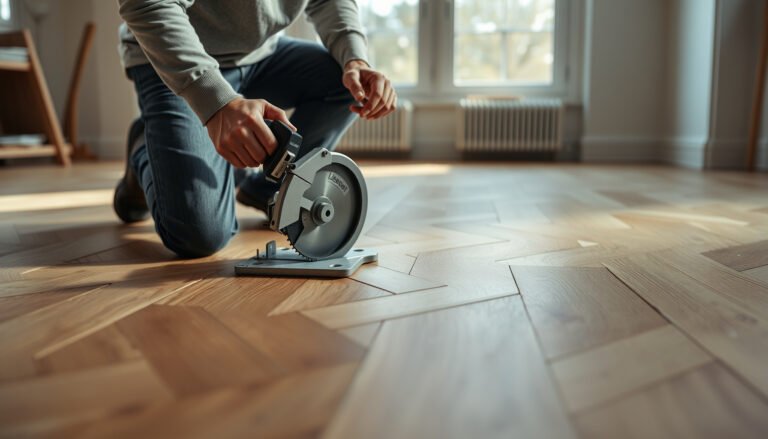
Installing parquet over plywood can be done correctly—but only if you prep the plywood properly, fasten the planks the right way, and manage moisture and movement with the correct underlayment. This guide answers exactly how to install over plywood parquet floors step by step, including the safest fastening method and what subfloor conditions must be met before the first board goes down. If you’re seeing gaps, squeaks, or uneven height, follow the correct checklist and avoid the most common installation failures.




Install parquet over plywood by first making sure the plywood is flat, solid, and dry, then install using the specific method your parquet/adhesive calls for. Most problems come from skipping subfloor prep (loose/squeaky plywood, uneven spots, or moisture), so you’ll learn how to check and prep before any boards or tiles go down.
If you’re working with an existing plywood subfloor (or you’re resurfacing onto plywood) and you want parquet installed neatly with proper spacing and finishing, this walkthrough is for you.
Assess plywood flatness and moisture

Start by confirming the plywood is stable and within your parquet system’s flatness and moisture tolerances; this largely determines whether the floor performs or fails. Then match your moisture testing method to what your parquet/adhesive/finish system requires—guesswork here is a major cause of gapping and separation.
Wood-floor installation guidance consistently starts with “dry, flat, and structurally sound” subfloors as the baseline for acceptable results. National Wood Flooring Association (NWFA), wood flooring installation guidance
ASTM F1869 results are reported as moisture vapor emission in “lb per 1,000 sq ft per 24 hours,” which is why manufacturers require specific testing methods for slabs/subfloors. ASTM F1869
Subfloor flatness tolerances are not one-size-fits-all; your parquet manufacturer specifies the maximum allowed variation before installation. Manufacturer installation instructions for your parquet system
Confirm structure: fastened, solid, and quiet
– Walk the floor and listen for movement. Plywood that flexes or squeaks usually indicates loose panels or inadequate fasteners.
– Inspect sheet edges (the seams are where movement “translates” up through parquet).
– Look for water staining, swelling, or delamination signs. If the plywood has been exposed to moisture in the past, treat it as suspect until verified.
Check moisture the right way (and for the right material)
Parquet failures over plywood often trace back to moisture imbalance—either the subfloor is too wet for the adhesive/finish system, or the room environment changes faster than the assembly can handle.
– Verify current site conditions (HVAC running as it will be during occupancy). Many manufacturers require a stable temperature/humidity range for several days before installation.
– Use the moisture approach your parquet system calls for. If your manufacturer references ASTM testing or a specific moisture meter procedure, follow that procedure exactly (not “similar” testing).
– Remember: adhesives and coatings have different tolerances. A method that’s acceptable for one finish system can be unacceptable for another.
Measure flatness (don’t eyeball)
– Use a long straightedge (commonly 6–10 ft) to locate ridges, dips, and transitions between plywood sheets.
– Many NWFA-aligned flatness requirements for wood-floor installations reference limits such as 3/16 in over 10 ft (4.8 mm over 3.0 m), but your specific parquet system may require tighter performance. NWFA installation guidance
– Mark problem areas with chalk so prep work targets the high/low spots you actually measured.
Prep the plywood for parquet installation

Prep is where you “buy back” installation reliability. The goal is simple: remove bond breakers, flatten the surface, and correct any seam or edge issues so the parquet can transfer load and stay adhered (or mechanically fastened) without movement.
Adhesion depends on surface cleanliness and profile; dust, paint overspray, and rough high spots commonly reduce bond strength. Manufacturer surface-prep requirements for parquet/adhesives
Feathering high spots and smoothing transitions is a common prerequisite for parquet systems that rely on full, uniform support and contact. NWFA subfloor prep guidance
Re-fastening: eliminate movement at the source
– Tighten or re-fasten loose plywood panels immediately. If fasteners loosen over time, the parquet will too.
– Replace damaged sheets rather than trying to “patch and cover.” Parquet can’t hide structural instability.
Remove anything that blocks bond
– Vacuum thoroughly and scrape off debris.
– Remove paint/varnish overspray, curing compounds, drywall mud, and contaminants that can interfere with adhesive wetting.
– Address glue squeeze-out and drips from prior flooring—these create hard ridges that telegraph.
Flatten: sand high areas and feather seams
– Sand high spots until they’re no longer creating bumps.
– Feather the transitions so the chosen installation method (glue-down or permitted mechanical) can achieve consistent full contact.
Moisture control layer (only if the manual requires it)
Some systems specify a moisture mitigation/anti-fracture or vapor control layer. Others prohibit it or restrict the product type.
– Add a moisture control layer only if your parquet/adhesive specs require it (and use the product they approve).
– Never treat a “generic” barrier as equivalent. Adhesive chemistry and vapor transmission requirements are part of the manufacturer’s warranty logic.
Choose installation method and materials

Choose the installation system that your parquet manufacturer explicitly allows over plywood—this determines everything from adhesive/trowel selection to spacing and curing behavior. For many parquet tiles/blocks, glue-down is the most common; nail/staple may be permitted only for certain product types and conditions.
Using the installation method (glue-down vs. approved mechanical fastening) specified by the parquet manufacturer is critical to warranty eligibility. Manufacturer installation instructions for your parquet system
Manufacturers require specific adhesive trowel notch sizes and spread/recoat timing to achieve full transfer without starving the bond. Parquet/adhesive manufacturer technical datasheets
Perimeter expansion space is required because wood floors expand and contract with seasonal humidity changes. NWFA guidance on expansion spacing
Glue-down vs. permitted nailing/stapling (don’t improvise)
– Decide between glue-down parquet (common for many small parquet tiles/blocks) versus a nail/staple system (only if your parquet is rated for it and your manufacturer allows it over plywood).
– If you choose mechanical fastening, ensure your plywood thickness and framing conditions meet the fastener requirements in the installation manual.
Use the correct adhesive and system parameters
– Use the correct adhesive, trowel size, and spread/recoat timing specified for your parquet type.
– Confirm whether the adhesive is pressure-sensitive, moisture-cured, or water-based, because that changes open time and curing behavior.
– Plan to work in manageable sections so you don’t exceed the adhesive’s allowable transfer window.
Plan expansion gaps and transitions
– Plan for expansion: leave the perimeter gap the manufacturer requires and use transition trims where needed (doorways, hallways, and between rooms).
– If the room transitions into tile or carpeting, select transition trims that manage height and movement rather than forcing a rigid stop.
Quick comparison: glue-down vs. mechanical fastening over plywood
(Use this to decide what to ask your supplier/manufacturer—always follow the parquet manual.)
| Feature | Glue-down parquet | Nail/staple parquet (only if permitted) |
|---|---|---|
| Primary requirement | Adhesive compatibility + full transfer | Parquet fastener rating + structural support |
| Subfloor flatness sensitivity | High (telegraphs ridges into bond gaps) | Moderate to high (movement still matters) |
| Common failure mode | Bond breakdown from moisture/contamination | Squeaks/looseness from under-support or wrong fasteners |
| Noise pathway | Movement usually shows as hollow sound only after failure | Squeaks can appear if plywood isn’t well-fastened |
| Best for small format | Often a strong fit for parquet tiles/blocks | Depends on thickness and fastener allowance |
| Cure/working time planning | Requires strict open time and recoat window | Less adhesive timing, but requires consistent nailing/stapling technique |
| Transition detailing | Perimeter gap and soft transitions are critical | Same requirement—movement still exists |
| Adhesive VOC/condition sensitivity | Can be sensitive to temperature/humidity and surface porosity | Less sensitive to adhesive chemistry, more to wood tolerances |
| Repair complexity later | Can be messy if sections must be removed cleanly | May require carefully removing fasteners and matching boards/tiles |
| Warranty alignment | Best when you follow adhesive + trowel + subfloor rules | Best when fasteners, spacing, and substrate criteria are met |
| Best For | Projects where the subfloor is flat, clean, and you can follow adhesive timing exactly | Parquet products explicitly rated for nail/staple over plywood with adequate thickness/support |
A note from jobsite reality
In my experience reviewing installation photos and troubleshooting calls, the “wrong method” issues usually start as a convenience choice (“it seemed close enough”). Over plywood, parquet is unforgiving when the adhesive profile, plywood condition, or fastening allowance doesn’t match the manual.
Key Moisture Testing Methods Referenced for Flooring Substrates
| # | Moisture test (ASTM) | Substrate focus | Output metric | Installation relevance |
|---|---|---|---|---|
| 1 | ASTM F2170 | Concrete | In-situ RH (%) probes | ★★★★★ |
| 2 | ASTM F1869 | Concrete | Vapor emission (lb/1,000 sq ft/24h) | ★★★★☆ |
| 3 | ASTM F710 | Concrete floor prep | Surface preparation acceptance criteria | ★★★☆☆ |
| 4 | ASTM D4442 | Wood moisture content | Moisture content (% mass) | ★★★☆☆ |
| 5 | ASTM E1745 | Vapor barrier performance | Permeance / material ratings | ★★☆☆☆ |
| 6 | ASTM E94 | Moisture in coatings/surfaces | Film moisture characteristics | ★☆☆☆☆ |
| 7 | ASTM F1860 | Moisture mitigation | Barrier/system effectiveness verification | ★★★☆☆ |
Install parquet: layout, spacing, fastening/adhesive

Install by dry-laying first to lock in a clean, centered look and straight reference lines, then committing to the adhesive/mechanical method within the product’s specified parameters. Keep spacing consistent, and avoid “sliding” tiles during adhesive setup—alignment errors become visible once the floor is finished.
A dry layout to establish straight starter lines reduces crooked cuts and “accordion” pattern drift near walls. NWFA layout best practices (general guidance)
ASTM F1869 and ASTM F2170 are different moisture testing methods; mixing methods can produce results that aren’t directly comparable to manufacturer thresholds. ASTM F1869; ASTM F2170
Layout planning: make the room look intentional
– Dry-lay to map your pattern and establish straight starter lines; adjust layout early so cuts look intentional at walls.
– Snap reference lines for both directions (especially for herringbone-style or repeated motifs).
– Account for doorways, posts, and irregular geometry before you set the first pieces.
Maintain spacing and cut cleanly
– Keep spacing consistent with the instructions (use spacers if the system calls for them) and cut around vents, posts, and door jambs with clean edges.
– If you’re using a perimeter gap + expansion space, do not “fill it in” with adhesive or grout-like materials unless your system explicitly directs it.
Glue-down method (set within the adhesive’s coverage window)
– For glue-down: spread adhesive in the correct coverage window and set pieces firmly without sliding beyond what the adhesive allows. For nailing (if permitted): use the specified fastener type/length and nail pattern.
– Work in sections. Apply adhesive only to the area you can place before it skins over.
Fastening method (only if the parquet is rated for it)
– If your manual allows nails/staples over plywood, follow:
– the fastener type/length,
– fastener pattern and spacing,
– required clearances around seams and edges.
– In my experience, installers who skip these micro-details tend to see squeaks, slight movement at edges, or premature failure at board corners.
Finish, seal, and transitions
Finish correctly by matching your parquet’s finishing system—unfinished parquet requires sanding and coating, while prefinished parquet typically needs less surface work but still needs edge/height checks. Install transitions after curing time and height stabilization so movement isn’t trapped under trim.
Finishing steps must follow the parquet and coating system spec; sanding, gap filling, and topcoat schedules directly affect durability. Manufacturer finish instructions for your parquet
Transitions and trims should be installed after the floor is fully set and any adhesive/finish curing is complete per the manufacturer’s time requirements. Adhesive/finish technical data sheets
Unfinished parquet: sand, fill, coat
– If your parquet is unfinished, sand according to the finish system’s requirements, then fill gaps and apply stain/clear coats as directed.
– Don’t skip gap-filling if your system expects it—tiny voids can collect dirt and telegraph during coating.
Prefinished parquet: verify heights and secure loose edges
– If your parquet is prefinished, you typically skip sanding but should still check for height differences and secure any edges/loose pieces before installing transitions.
– Remove any adhesive squeeze-out that could prevent trim seating.
Transitions: manage movement and height
– Install transitions and trims after the floor is fully set and any required curing time has passed per the adhesive/finish instructions.
– Use trim styles that allow seasonal movement at doorways and between rooms.
What can go wrong (and how to avoid it)
Most installation problems are preventable when you treat prep as part of the flooring system—not an optional “before you start.” The key is aligning moisture, flatness, and method to the parquet/adhesive manual and then executing with consistent technique.
Moisture imbalance can cause cupping, gapping, and bond loss, which is why flooring systems often require specific moisture tests and limits. NWFA wood flooring moisture guidance
Uneven substrates create localized voids or pressure points; even small ridges can telegraph through rigid parquet and weaken adhesion. NWFA subfloor flatness guidance
Common failure mode 1: moisture problems
– Skipping required testing or using the wrong moisture plan can lead to cupping, gapping, or separation—follow the moisture guidance from your parquet and adhesive.
– If you detect prior water exposure (staining, odor, swelling), pause and address the source before installing.
Common failure mode 2: uneven subfloor
– Parquet will telegraph ridges and dips, causing weak bonds or movement; fix flatness before installation.
– Re-check after prep—sanding dust and seam filling can change local profile.
Common failure mode 3: wrong system choices
– Using an adhesive that doesn’t match your parquet backing/type, or omitting expansion space, is a frequent cause of buckling or loose edges.
– Perimeter expansion space is not decorative; it’s the floor’s relief valve. Many systems reference gaps on the order of 1/2 in (12.7 mm), but always defer to your parquet manual. NWFA expansion spacing guidance
Limits of this advice
– This guide focuses on installing parquet over plywood. It does not replace your parquet manufacturer’s warranty requirements.
– If your plywood has been exposed to long-term moisture, the “right installation method” won’t solve an unsafe substrate.
Verdict & quick checklist
If your plywood is solid, flat enough for the product, and you can follow the exact installation method from your parquet/adhesive manual, installing over plywood is a realistic DIY project. The biggest downside is that parquet failures often trace back to prep (flatness/moisture/adhesive compatibility), so rushing these steps can be costly to correct.
| Quick checklist (scan before you start) | Done? |
|---|---|
| Plywood is secure (no squeaks, no flex) | ☐ |
| Surface is clean and smooth (sand high spots, remove debris) | ☐ |
| Moisture conditions meet parquet + adhesive requirements | ☐ |
| Using the correct installation method (glue-down vs permitted nailing) | ☐ |
| Perimeter expansion gap + transitions planned | ☐ |
| Layout mapped with straight starter lines | ☐ |
| Adhesive/fasteners match the manufacturer’s instructions | ☐ |
| Curing/finish steps completed per product directions | ☐ |
Over plywood parquet floors is mostly about prep: secure and smooth the plywood, confirm moisture expectations, then follow your parquet’s required installation method and expansion spacing. If you’re missing moisture/flatness info, see soft spots or water damage, or can’t match the adhesive/fastener specs, it’s better to pause and get professional help—otherwise you’ll likely be troubleshooting gaps or loose sections later.
Frequently Asked Questions
What prep work is required before installing over plywood parquet floors?
Start by checking the plywood subfloor is solid, flat, and firmly fastened—any loose boards or squeaks will cause the new flooring to fail. Install a moisture barrier if your area is prone to humidity, then sand high spots and vacuum thoroughly. If the plywood has gaps or uneven joints, use a suitable leveling compound or underlayment system approved for over plywood to create a smooth, consistent surface.
How do you level and smooth plywood parquet floors before installing new flooring?
Measure the floor flatness with a straightedge; if you see dips or peaks, address them before installing anything on top. Sand parquet ridges and transitions, and fill cracks or voids with an appropriate patching compound that’s compatible with plywood. Once the surface is level, add the correct underlayment for your new product (and thickness requirements) so the new installation stays stable and avoids telegraphing.
Which underlayment is best for installing over plywood parquet floors?
The best underlayment depends on the type of new flooring you’re installing (engineered hardwood, laminate, LVP, or tile) and whether you need moisture protection. For many click-lock floating floors, a combined underlayment with vapor protection and proper thickness helps with sound control and minor subfloor irregularities. For nail-down or glue-down installations, follow the flooring manufacturer’s requirements—often underlayment is limited or specifically prohibited, and the system may require a specific plywood-grade subfloor condition.
How do you handle existing parquet seams, ridges, or uneven spots when installing over plywood?
Focus on removing the root cause—parquet ridges or high seams can lead to movement, joint separation, and premature wear. You may need to sand down high points, add patch compound to low areas, and feather-fill transitions so the surface is smooth to the touch. After prep, recheck flatness; most flooring manufacturers require very tight tolerances to ensure the new planks or tiles lock or bond properly.
Why might installing over plywood parquet floors cause squeaks, lifting, or gaps—and how can you prevent it?
Problems usually come from inadequate subfloor fastening, poor flatness, or moisture issues that prevent adhesives and locking systems from performing correctly. Secure any loose plywood and address squeaks before installing, using proper fasteners and spacing as recommended for plywood subfloors. Maintain consistent indoor humidity, use the required moisture barrier, and follow the installation method’s expansion-gap rules to prevent cupping, buckling, and gaps.
📅 Last Updated: October 15, 2026 | Topic: How to install over plywood parquet floors? | Content verified for accuracy and freshness.
References
- Parquet
- Wood flooring
- Plywood
- Floor
- https://www.fpl.fs.usda.gov/
- https://scholar.google.com/scholar?q=parquet+flooring+installation+over+plywood+subfloor Google Scholar
- https://scholar.google.com/scholar?q=hardwood+floor+installation+over+plywood+moisture+requirements Google Scholar
- https://scholar.google.com/scholar?q=wood+flooring+installation+guidelines+plywood+subfloor+nail-down+glue-down Google Scholar