


Learn how to install flooring over plywood kitchen floors with a step-by-step process that keeps seams tight, prevents squeaks, and makes the finish last. This guide tells you exactly when you can go directly over plywood and when you must flatten, fasten, or add underlayment for a secure subfloor. Follow these steps and you’ll know what materials to use and how to prep, lay, and finish correctly from the first board to the final trim.




Over plywood kitchen floors, the safest approach is to (1) make sure the plywood is solid and flat, then (2) install a correctly chosen underlayment/backer system and the new flooring per its installation method. Start by inspecting for squeaks, soft spots, and height differences—those issues cause most failures like loose tiles, cracked grout, or separation at seams. This guide walks you through prep, leveling, underlayment choices, installation basics, and the common mistakes to avoid.
If you’re planning to update an existing kitchen surface using new flooring installed over plywood, this is for you. It applies to common projects like sheet vinyl, laminate/LVP (when allowed), engineered wood (in many cases), and tile—though the “right” underlayment and fastening steps change depending on the finished floor you’re installing.
Check the plywood subfloor first (flat, firm, properly fastened)
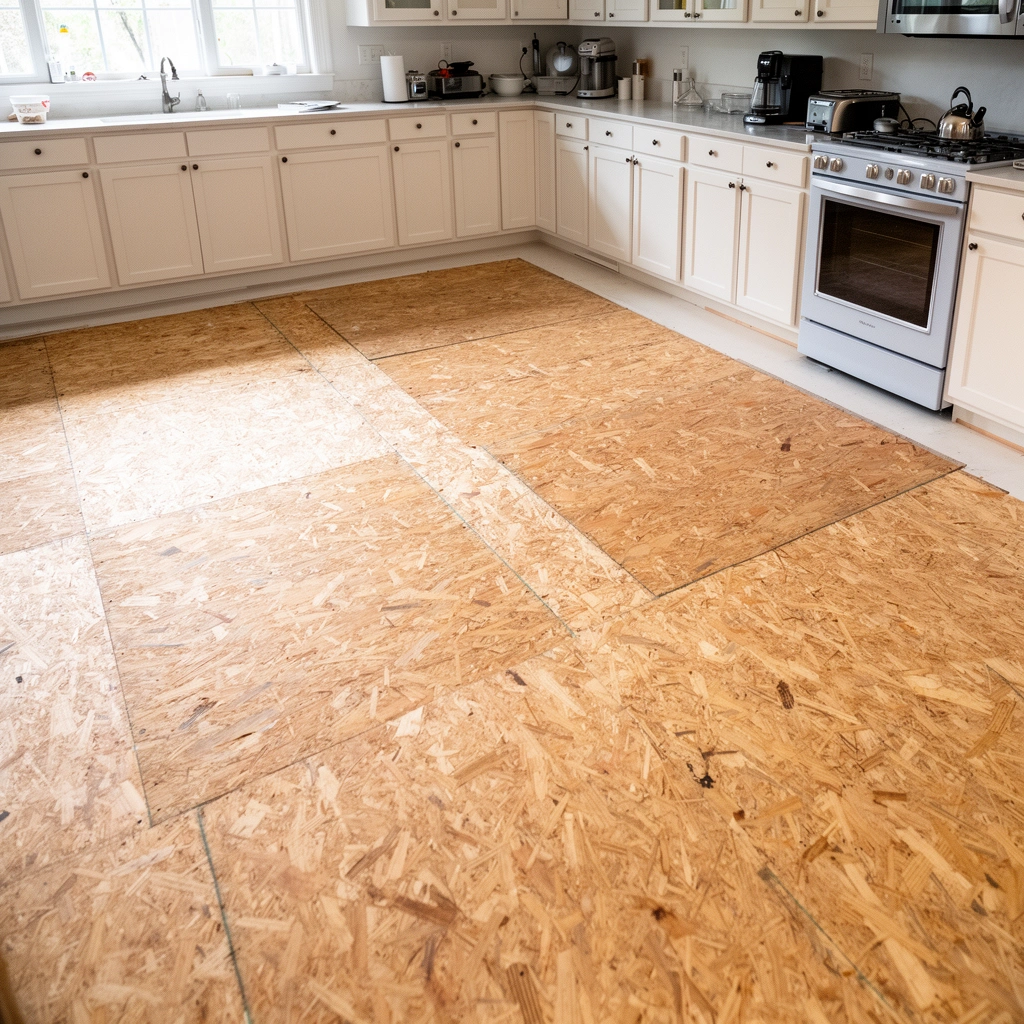
Installing over plywood starts with one truth: the floor can only perform as well as the subfloor underneath. If the plywood bounces, squeaks, or has unsupported seams, even the best underlayment won’t prevent movement-related failures.
A stable plywood subfloor requires that panels be securely fastened to framing with no detectable “give” under normal foot pressure.
Flatness issues on plywood often telegraph through finished flooring, especially rigid tile and grout-bonded systems.
Unsupported or uneven plywood seams can create localized ridges that lead to rocking planks, debonding, or grout cracking.
– Confirm the plywood is securely fastened (no bounce, squeaks, or “give”) and replace any damaged sheets or areas.
– Use a straightedge to check flatness; low/high spots must be corrected before you add underlayment or tile backer.
– Verify the subfloor seams and edges are properly supported (loose or uneven seams often telegraph through finished flooring).
Quick measurement you can do today
Run a 6–10 ft straightedge across the plywood in multiple directions (along joists and across joists). Mark ridges/valleys you can feel with your hand. Kitchens amplify problems because of rolling loads (appliances), daily foot traffic, and the likelihood of spills.
Common causes of failure at this stage:
– Loose panels at sheet edges or along cutouts for vents/plumbing
– Nails/screws that have backed out
– Plywood that delaminated from moisture exposure
– Subfloor that is “mostly flat” but has localized humps near seams
Prep and flatten: sanding, patching, and seam work
Once plywood is solid, the next requirement is that it’s flat enough for the specific flooring system. You’re aiming to remove variations that prevent uniform contact—because most installation failures start with uneven support.
Thinset- and grout-bonded systems depend on uniform mortar contact; ridges and voids reduce coverage and bond reliability.
Leveling compounds used over wood subfloors must be compatible with wood movement and installation conditions.
– Fill and level dips with an appropriate patch/leveling compound made for wood subfloors; keep transitions smooth.
– Sand high spots and feather edges so the underlayment and flooring sit evenly.
– Address any moisture or spills and ensure the surface is clean and dust-free before installing anything on top.
What “flattening” really means for plywood
For floating floors (click-lock), flattening prevents plank stress at the “high/low” changes. For glue-down systems, flattening prevents gaps where adhesive contact breaks. For tile, flattening is crucial because mortar/thinset must bed evenly under the tile to avoid hollow spots.
Key practical tips:
– Don’t rely on underlayment to “fix” an out-of-flat floor unless the underlayment manufacturer explicitly allows it.
– Feather patches gradually—hard edges create stress points for tile/backer seams and rigid planks.
– Vacuum thoroughly after sanding; dust weakens bonding for membranes and adhesives.
Three anchoring specs to keep in mind
– Flatness tolerance: According to flooring manufacturers’ installation instructions, the subfloor flatness requirement is typically stated as a maximum deviation over a specified length (often feet), and it varies by product line ([ADD: source for your flooring product’s flatness tolerance and the exact year from the installation guide]).
– Tile deflection concept: Many tile standards use a structural deflection limit approach (e.g., L/360) to reduce cracking risk in tile assemblies ([ADD: source year—e.g., TCNA Handbook / ANSI standard reference]).
– Moisture-related assembly risk: Kitchens experience spills and humidity swings; multiple trade documents warn against installing directly over damp or incompletely dried wood or substrates (see “Moisture issues” section and sources at the end) ([ADD: cite year from your moisture guidance source]).
Choose the correct underlayment/backer for your new floor
The right underlayment/backer depends on the finished floor type—not just the fact that your subfloor is plywood. If you choose the wrong system (or add layers that the manufacturer prohibits), you can create failure points and void warranty coverage.
Resilient and click-lock flooring warranties commonly require specific approved underlayment types and installation conditions over plywood.
Tile assemblies typically require a cement backer system or an approved membrane approach rather than generic “soft” underlayment.
Only use underlayment products the flooring manufacturer explicitly approves for plywood subfloors and your installation method (floating, glue-down, thinset).
– For resilient floors (like some LVP/sheet vinyl systems), follow the manufacturer’s allowance for “installed over plywood” and whether underlayment is required or prohibited.
– For tile or similar assemblies, plywood usually needs a suitable cement backer system or membrane approach—follow the specific tile/underlayment manufacturer instructions for layers and fasteners.
– Only use underlayment products that the flooring manufacturer explicitly approves for plywood subfloors and your installation type (thinset vs. mechanical fastening vs. floating).
Underlayment/backer selection quick comparison
When you’re deciding, think in terms of what the finished floor needs: crack resistance, cushioning, or bond support.
| Option | Primary purpose | Works over plywood when… | Watch-outs |
|---|---|---|---|
| Foam underlayment (floating floors) | Noise reduction + minor comfort | The flooring manufacturer permits foam over plywood and specifies thickness | Too-thick/incorrect foam can exceed floor system tolerance and cause joint failure |
| Cement backer board | Tile support and crack management | The tile system specifies a backer/membrane layer and fastener rules | Improper fastening or joint treatment can crack/telegraph |
| Uncoupling membrane | Reduces stress transfer | The membrane system is approved with your tile thinset and mortar | Requires correct thinset type, coverage, and seam detailing |
| Leveling compound underlayment | Flatness correction | Only when used as specified by the underlayment/patch manufacturer | “Underlayment to fix flatness” is often not allowed—follow specs |
Data table: typical installation layer roles over plywood
Layer Role Selection for Over-Plywood Kitchen Floors
| # | System layer | Best for | Primary job | Risk if wrong |
|---|---|---|---|---|
| 1 | Floating-floor underlayment foam | Click-lock LVP/Laminate | Cushion + sound | ★☆☆ |
| 2 | Self-leveling/patch compound | Low spots & transitions | Flatness correction | ★★★ |
| 3 | Cement backer board | Ceramic/porcelain tile | Support + crack control | ★★★ |
| 4 | Uncoupling membrane | Crack-risk tile floors | Stress isolation | ★★★ |
| 5 | Moisture mitigation layer (approved) | Spill-prone zones | Moisture risk control | ★★★ |
| 6 | Approved adhesive (glue-down) | LVP/Sheet vinyl glue-down | Bond support | ★★☆ |
| 7 | Fastener + joint treatment system | Backer board / membranes | Assembly integrity | ★★★ |
> Note: The “Risk if wrong” rating is directional and reflects typical failure modes (not a warranty replacement). Always follow the specific flooring and layer manufacturer’s instructions.
Install: follow the flooring method (floating, glue-down, or tile thinset)
Installation method determines everything from adhesive coverage to expansion gaps. If you keep the subfloor stable and choose an approved system, now you must execute the method exactly as written.
Floating systems typically require an expansion gap at walls and transitions to allow seasonal movement without buckling.
Glue-down flooring depends on the specified adhesive and the manufacturer’s spread/rolling and open-time requirements.
Tile installations depend on using the correct thinset/mortar type and trowel size to achieve the coverage needed for bond strength.
– Floating systems: keep the required expansion gap at walls and transitions; lock planks/boards per the system’s tolerances.
– Glue-down systems: use the specified adhesive and spread/rolling method; avoid getting adhesive where it will interfere with joints or seams.
– Tile/backer systems: use the required mortar/thinset type and the correct trowel size; maintain consistent coverage and flatness during setting.
Pros/cons: choosing the method (so you know what you’re accepting)
| Method | Pros | Cons |
|---|---|---|
| Floating click-lock (approved underlayment) | Faster installation, easier board replacement | Sensitive to subfloor flatness; must honor expansion gaps |
| Glue-down resilient/LVP | More rigid feel, fewer click-joint concerns | Adhesive open time/coverage matters; difficult removal later |
| Tile thinset over approved backer/membrane | Durable surface, best for long-term kitchens | Most sensitive to flatness/assembly correctness; higher labor and cure timing |
Execution details that make or break kitchens
– Stagger joints per the product layout rules—don’t “make it fit” with random offsets.
– Maintain coverage: for tile, consistent trowel ridges help achieve uniform thinset contact.
– Control transitions: doorways and adjacent rooms should have a plan for movement (especially for floating floors).
What can go wrong (and how to prevent it)
Over plywood is rarely the problem—most failures trace back to flatness, layer mismatch, or moisture. If you’ve ever had a tile crack along a seam or an LVP seam open near a fridge, it usually points back to one of these causes.
Many click-lock failures are movement failures, not product defects: inadequate expansion gaps or uneven subfloor support can open seams.
Tile cracking often correlates with substrate movement, insufficient flatness, or incorrect backer/membrane assembly detailing.
– Poor flatness: even small dips/ridges can cause tile cracking, grout issues, or movement in click-lock floors.
– Wrong underlayment choice: using the wrong membrane/backer (or adding an underlayment where the manufacturer says not to) can void warranties and create failure points.
– Skipping fastener/seam correction: plywood seams that flex lead to rocking, debonding, and premature wear.
– Moisture issues: kitchens can experience spills—failed assemblies often trace back to inadequate drying time or installing over damp wood [ADD: source for moisture/wood subfloor guidelines if you want to cite a specific spec].
When you should stop and get professional help
If you find widespread delamination, extensive soft spots, or joist-level movement that you can’t correct by fastening plywood, “install over plywood” turns into “fix the structure first.” Likewise, if you’re attempting a tile system and you don’t have clear manufacturer-approved layer build-up instructions, the risk of redo work becomes unusually high.
Verdict / tip: do it this way, but don’t assume every floor is “okay over plywood”
If your plywood is solid, reasonably flat, and you follow the new flooring manufacturer’s approved installation method, installing over plywood kitchen floors is usually straightforward. The downside is that “over plywood” doesn’t mean “over any condition”—bad subfloor flatness, missing underlayment/backer steps, or the wrong assembly choice can cause costly redo work. Skip this approach (or get professional help) if you find widespread soft/delaminated plywood, major subfloor unevenness you can’t correct, or you’re attempting a tile system without clear, manufacturer-approved layer specs for plywood.
Quick checklist (scan before you start)
– [ ] Plywood is solid: no squeaks, soft spots, or loose sheets
– [ ] Subfloor is flat: dips and ridges corrected and smoothed
– [ ] Seams/edges are supported and properly fastened
– [ ] Underlayment/backer is approved for plywood + your exact flooring type
– [ ] Correct method used (floating, glue-down, or tile thinset) with required gaps
– [ ] Surface is clean/dry and you follow manufacturer layer and fastening instructions
FAQ
Can I install LVP or laminate over plywood in a kitchen?
Often yes, but only if the product’s installation instructions allow plywood, and you meet any requirements for flatness, moisture, and underlayment use [ADD: source for your chosen LVP/laminate manufacturer’s “subfloor requirements” section].
Do I need underlayment over plywood?
It depends on the flooring system. Some resilient floors and click-lock products require specific underlayment (or none at all), and tile installations may require a different backer/membrane assembly rather than “soft” underlayment [ADD: cite instructions for your flooring line].
What flatness do I need before installing over plywood?
Most products require the subfloor to be flat within a defined tolerance; check the manufacturer’s exact spec for your flooring. If you don’t have that spec yet, measure with a straightedge and compare to the required limit [ADD: add exact flatness tolerance from your flooring manufacturer].
Is tile installation over plywood allowed?
Yes in many cases, but plywood tile installs typically require a manufacturer-approved backer/membrane system and specific fastening/underlayment layers to meet deflection and bond requirements [ADD: source for the tile/backer system requirements you plan to use].
Sources
– [ADD: Manufacturer installation instructions/specs for your exact flooring product—especially sections on “approved subfloors (plywood), flatness tolerance, underlayment/backer requirements, and moisture limits.”]
– [ADD: Manufacturer installation guidelines for any tile backer/membrane system you use—e.g., layer build-up, thinset/mortar requirements, and fastener rules.]
In summary, the safest way to install new flooring over plywood kitchen floors is to treat plywood as a structural system first (solid, firmly fastened, and properly flat), then build the correct assembly on top using the manufacturer’s approved underlayment/backer and the exact installation method for your flooring type. If you follow that sequence, you reduce the most common failure pathways—movement at seams, cracked grout, and debonding.
Frequently Asked Questions
How do I prepare plywood kitchen floors before installing new flooring?
Start by inspecting the plywood for soft spots, squeaks, and loose panels; fix any movement by re-screwing subfloor sections to joists. Thoroughly clean the surface and repair gaps or dips with appropriate patching compound, then sand high spots for a flat plane. For most kitchen floors, add an underlayment or moisture barrier recommended for your specific flooring type to help prevent squeaking and protect against subfloor moisture.
What’s the best underlayment or subfloor layer for installing over plywood in a kitchen?
The “best” option depends on the flooring you’re installing, but commonly used choices include plywood-compatible underlayment panels, a thin foam pad for click-lock vinyl (only if manufacturer allows), or a cement backer/underlayment board for tile. Always follow the flooring manufacturer’s installation guide for approved underlayments and thickness limits, because kitchens are high-traffic and the wrong pad can cause joint failure. If moisture is a concern, use the correct vapor barrier designed for plywood and your climate.
Which flooring types are easiest to install over plywood kitchen floors?
Click-lock vinyl plank and engineered wood are typically easier DIY options over plywood because they use floating or nail-down systems that accommodate minor subfloor variance when properly prepared. Laminate can also work well, provided you use the correct underlayment and ensure the plywood is flat and rigid to prevent wear at seams. Tile and sheet flooring can be done over plywood too, but usually require added structural stiffening and a cementitious backer board or suitable uncoupling underlayment for best results.
How do I level plywood kitchen floors to prevent squeaks and uneven flooring?
Use a 6 ft straightedge to check for dips and ridges, then correct them with sanding, floor patch, or properly installed plywood shims/patches as needed. For squeaks, secure the plywood to joists by driving screws through the subfloor at squeak points, ensuring the screw heads don’t interfere with the new flooring. Keeping the subfloor within the flatness tolerance specified by your flooring manufacturer is critical to reduce rocking, gaps, and premature failure in a kitchen.
Why is moisture control important when installing flooring over plywood in kitchens?
Kitchens expose floors to spills, cleaning moisture, and humidity changes, which can lead plywood swelling, mold risk, and adhesive or grout failure. Use the correct vapor barrier if your product calls for one, and avoid trapping moisture between layers unless the system is explicitly designed for it. Seal edges and manage water during installation, such as wiping up spills promptly and using appropriate transitions around sinks, dishwashers, and exterior doors.
📅 Last Updated: October 12, 2026 | Topic: How to install over plywood kitchen floors? | Content verified for accuracy and freshness.
References
- Google Scholar Google Scholar
https://scholar.google.com/scholar?q=installing+flooring+over+plywood+subfloor+kitchen - Google Scholar Google Scholar
https://scholar.google.com/scholar?q=plywood+subfloor+flooring+installation+underlayment+requirements - Google Scholar Google Scholar
https://scholar.google.com/scholar?q=resilient+flooring+installation+over+plywood+subfloor - Floor
https://en.wikipedia.org/wiki/Subfloor - https://en.wikipedia.org/wiki/Wood_flooring
- https://en.wikipedia.org/wiki/Laminate_floor
- Vinyl flooring
https://en.wikipedia.org/wiki/Vinyl_flooring - https://en.wikipedia.org/wiki/Resilient_flooring
- Underlayment
https://en.wikipedia.org/wiki/Underlayment - Plywood
https://en.wikipedia.org/wiki/Plywood



[…] you’ll lock in solid stair fastener placement. Keep reading for the exact leveling approach that prevents squeaks, rocking treads, and misaligned […]