
Wondering how to install patio floors on stairs without slips, gaps, or uneven risers? This step-by-step guide delivers the fastest, most reliable method for installing patio flooring on stairs patio floors, from surface prep and layout to cutting and securing each tread and riser. Follow it closely and you’ll get a clean, durable finish that holds up to outdoor weather and foot traffic.



Installing patio flooring on stairs is mostly about proper prep (flatness and edge stability) and selecting an exterior-rated system that handles both abrasion and water runoff. Get slip resistance right, use the correct thinset/mortar or paver base build-up for exterior stairs, and secure every tread edge detail before you start setting tile or pavers.
If you’re a homeowner or DIYer working on front steps, backyard stair patios, or walkout entries—where water, splashback, and shoe abrasion are constant—this guide walks through a practical installation workflow. If your stair structure is moving, the substrate is crumbling, or you’re unsure whether the existing surface is already waterproofed, pause and verify requirements with your flooring manufacturer or a qualified installer.
Planning the stair layout and materials first
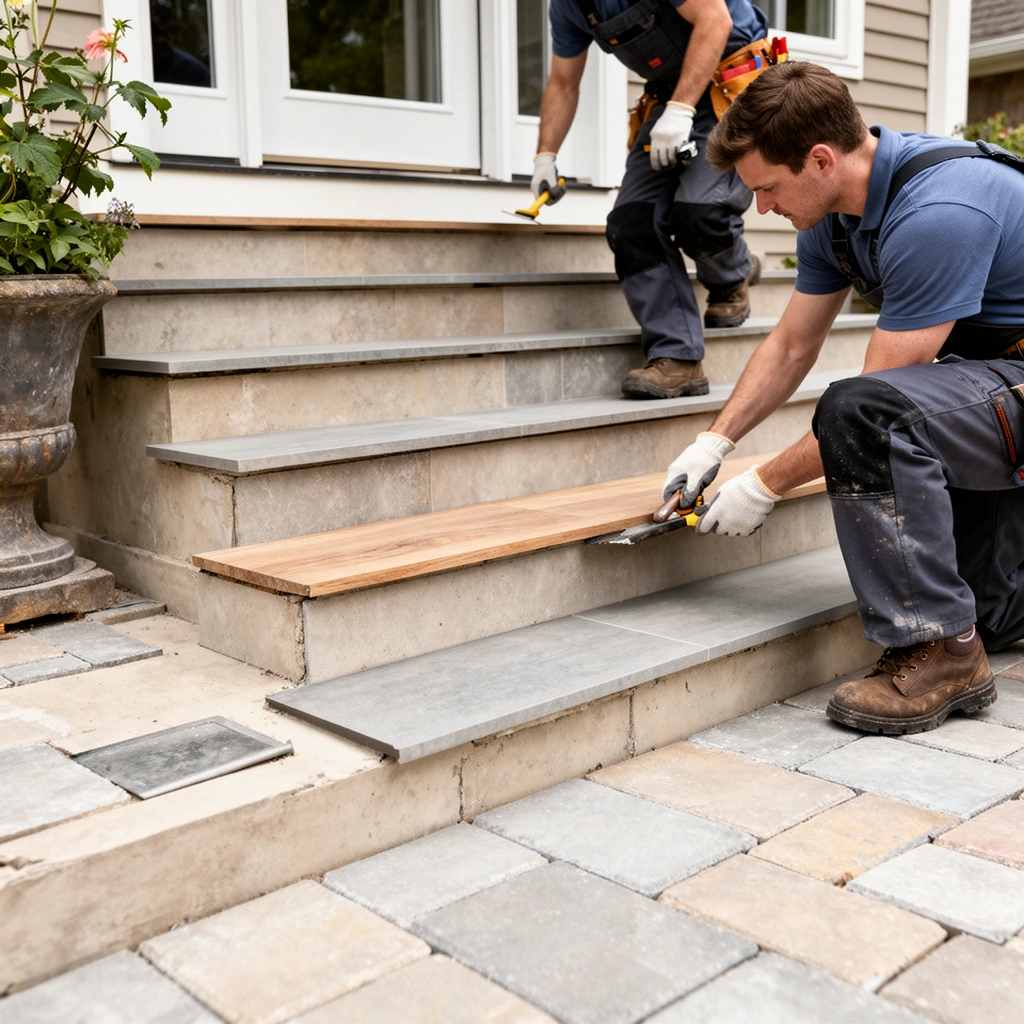
Proper planning prevents the most common stair-install failures: bad cut placement, inconsistent joint lines, and surfaces that feel slick when wet. Plan the layout around tread edges and risers first, then match your materials to exterior stair exposure and local freeze/thaw conditions.
Exterior stair tile/stone installs require an exterior-rated bonding system (thinset/mortar) and exterior exposure details; “interior-only” products are a common root cause of failures.
The ideal stair layout minimizes small, vulnerable edge cuts on the most visible tread noses and keeps joint lines consistent across treads and risers.
Slip resistance matters most on stairs because every step is a braking event; choose a surface finish designed to remain grippy when wet.
Pick the correct product system for exterior stairs
Start by confirming the flooring and installation system are explicitly rated for “exterior,” “freezing conditions,” and “stairs/walkways” (wording varies by manufacturer). For tile/stone, you’re not just buying tile—you’re buying a complete assembly: tile + exterior mortar/thinset + grouts (and often waterproofing/anti-fracture where required).
Key terms you’ll see in specs:
– Thinset/mortar: the bonding material between substrate and tile/stone.
– Anti-fracture layer / membrane: a system layer intended to reduce cracks telegraphing through tile/stone.
– Slip resistance: often addressed through surface profiles/textures and, sometimes, referenced test methods in product data.
Measure stair geometry and dry-lay before you bond anything
Stairs are unforgiving because tolerances stack up. Measure:
– Tread depth (front-to-back)
– Riser height (vertical)
– Stair width
– Nosing geometry (especially if you’ll use bullnose or trim)
Then dry-lay the tile/pavers on the treads and plan the riser cuts. The goal is to avoid “micro-cuts” at the nosing and to keep grout joints visually uniform across the stair run.
Decide drainage and slip resistance early
Water runoff should move off the tread nose, not pool near the riser edge. If your design allows it, choose:
– a texture/profile that maintains traction when wet,
– a finish that doesn’t become dangerously slick after rain,
– and a joint/grout approach that won’t wash out under repeated splash.
According to ANSI A137.1 (porcelain tile standard), porcelain tile has very low water absorption (typically ≤ 0.5% absorption), which helps resist water uptake in wet exterior conditions. (ANSI A137.1, Porcelain Tile specification)
According to ANSI A108.5 (tile installation mortar contact), thinset/mortar coverage/contact requirements are minimum targets intended to support bond performance. (ANSI A108.5, Installation of Ceramic Tile with Dry-Set Portland Cement Mortar or Latex-Portland Cement Mortar)
> [ADD: source for slip-resistance test method and minimum performance targets used by your specific flooring system/manufacturer.]
Common stair layout choices (pros/cons)
| Option | Best for | Pros | Cons |
|---|---|---|---|
| Bullnose/edge tile for tread nose | Tile/stone on stairs | Cleaner, supported edges; natural water shedding | Must match exterior rating; requires correct trim/bed support |
| Stair-trim profiles over cut edges | Both tile and stone | Protects vulnerable cut edges; improves uniformity | Adds system components; still needs correct substrate support |
| Continuous paver set with edging restraint | Pavers | Easy visual transitions; straightforward replacement | Edge restraint is non-negotiable to prevent shifting |
Surface prep: make it stable, clean, and level
The most important step in a stair patio floor install is getting the substrate stable and properly prepared for the bonding system you chose. If the base is loose, uneven, or missing the required moisture/water protection, your top finish can fail even if the tile/pavers are perfect.
Tile or stone requires a solid, sound substrate with the correct flatness range for the bonding method; “close enough” becomes a lippage/cracking problem on stairs.
Remove bond breakers, coatings, and loose material fully—adhesion depends on the bonding surface being clean and receptive.
Exterior stair assemblies often need waterproofing/anti-fracture layers depending on the substrate and the tile/stone system requirements.
Remove everything that blocks bond
Before you install, remove:
– paint/sealers/coatings (unless specifically approved as a bondable surface by the manufacturer),
– loose mortar or failing cementitious layers,
– efflorescence and contaminants,
– anything that prevents the mortar/thinset from forming a reliable bond.
If you’re working over concrete, you still need to verify the surface isn’t contaminated and is structurally sound.
Repair cracks/spalling correctly—don’t patch with the wrong material
Exterior stairs are subject to thermal movement and abrasion. Repair cracks and spalls with an exterior-rated patching compound appropriate for your substrate type (concrete, mortar bed, or masonry). Avoid generic interior patch products that may break down under freeze/thaw or moisture cycling.
If you see active movement, continuing cracking, or substrate displacement, stop—surface patches won’t solve movement issues.
Verify flatness and strength for your chosen build-up
Even small unevenness becomes dramatic at stair edges because you’re combining:
– gravity,
– foot traffic,
– repeated impact at tread noses,
– and drainage directing water across the tread surface.
Plan for the required flatness tolerances from your mortar/thinset and tile/stone system documentation.
> [ADD: exact flatness requirement from your tile/stone system spec (e.g., “X mm over Y”)—use the manufacturer’s stated tolerance.]
Moisture protection: match the system
Whether you need waterproofing or an anti-fracture membrane depends on:
– the substrate,
– the tile/stone type,
– the exterior exposure category (wet, freezing, freeze/thaw),
– and the manufacturer’s installation instructions.
The TCNA Handbook is a key reference for exterior tile assemblies (including when membranes are required). (TCNA Handbook for Ceramic Tile Installation, exterior methods)
> [ADD: the TCNA method number and/or your manufacturer’s membrane requirements for exterior stairs.]
Mandatory data table: exterior stair moisture resistance by common flooring materials
Water Absorption Benchmarks for Wet-Use Exterior Flooring (Common Material Types)
| # | Material (typical stair patio use) | Water absorption (benchmark) | Best use on wet stairs | Wet exposure rating |
|---|---|---|---|---|
| 1 | Porcelain tile (per ANSI A137.1) | ≤ 0.5%* | Top choice for wet exposure when properly installed | ★★★★☆ |
| 2 | Vitrified ceramic tile (typical) | Low (often ~0.5–3%)* | Good option; confirm exterior rating | ★★★☆ |
| 3 | Concrete pavers (typical) | Usually a few %* | Excellent drainage when base is compacted | ★★★★☆ |
| 4 | Brick pavers (typical) | Moderate (varies)* | Works well if jointing and edging are correct | ★★★☆☆ |
| 5 | Travertine (natural stone) | Higher than porcelain* | Use only with proven exterior/stone system support | ★★☆☆☆ |
| 6 | Slate (natural stone) | Variable (depends on quarry) | Often good traction; confirm exterior durability | ★★★☆☆ |
| 7 | Quarry tile (historical benchmark) | Typically higher* | Can work, but must be chosen for exterior and sealed appropriately | ★★☆☆☆ |
Water absorption benchmarks vary by specific product standard and test results; always confirm the exact absorption and exterior rating in your specific tile/paver/stone manufacturer data sheet.
Install with the right build-up for stairs
Stair installation succeeds when the build-up is designed for exterior movement, water exposure, and edge loading—not just for flat floors. Use the correct method for tile/stone versus pavers, and treat tread edges as structural details, not finishing trim.
For exterior tile/stone, mortar coverage and proper bedding (including back-buttering when specified) are required to support bond performance under traffic and moisture.
For pavers, compacted base and rigid edging restraint prevent stair tread shifting, which otherwise creates trip hazards over time.
Edge transitions on stairs (tread noses, bullnose trims, and profiles) need secure support so movement doesn’t crack grout or loosen units.
For tile/stone: thinset/mortar coverage and leveling discipline
Follow your manufacturer’s exterior stair instructions and use the specified:
– exterior-rated thinset/mortar,
– trowel size (driven by tile format and system requirements),
– and mortar coverage/contact targets.
In many systems, installers must maintain consistent ridging and achieve required mortar contact; back-buttering may be mandatory for certain tiles/formats.
From a practical standpoint:
– work in small sections so mortar doesn’t skin over,
– keep the tread plane consistent,
– and pay special attention at the tread nose where lippage becomes both a trip risk and a water-splash target.
> [ADD: mortar coverage percentage requirement from your specific thinset and tile system documentation.]
For pavers: build a base that resists edge movement
Paver stairs fail most often at the edges because the tread units experience torsion and repeated impact. To prevent shifting:
1. Excavate to the required depth for bedding + base layers.
2. Compact bedding and base thoroughly.
3. Install edging restraints designed to hold stair-line forces.
4. Confirm drainage so water doesn’t saturate and soften layers.
When you set pavers:
– maintain consistent height and slope,
– lock transitions with the correct edging or stair trim strategy,
– and keep jointing consistent so water doesn’t penetrate and undermine bedding.
Use stair-specific edge details (trim/nosing) and control joints
Stairs need finishes that can handle both movement and water. Choose:
– exterior-rated bullnose/edge units for tile/stone (or compatible stair profiles),
– trims designed to protect cut edges,
– and joint spacing/methods that keep lines uniform across treads and risers.
For grout joints, remember stairs are wear zones: joints at the nosing often see the fastest erosion and water exposure.
TCNA Handbook methods are commonly used to determine when membranes, anti-fracture layers, and specific mortar/thinset coverage are required for exterior installations. (TCNA Handbook for Ceramic Tile Installation, relevant exterior stair/wet-area methods)
Grouting, sealing, and finishing details
Finishing is where a good stair install becomes a long-lasting one. Use exterior-rated grout products, follow cure times, and only seal when the system specifies it (and on the correct components).
Exterior stair grout needs proper cure and the right product rating because joint wear and water splash accelerate failure at the tread nose.
Sealing is not universal—many exterior tile/stone systems specify either “no sealer” or limited sealer types and recoat intervals.
Transitions and movement joints at stair edges must match the assembly design so grout doesn’t crack from expected movement.
Choose exterior grout and respect cure times
Use grout intended for exterior exposure and follow the manufacturer’s mixing and cure guidance. Don’t rush traffic on stairs—the tread surfaces are directly impacted by shoes and will expose uncured grout.
> [ADD: your grout’s minimum cure time before foot traffic and before full wet exposure, from the grout product data sheet.]
Seal only if your system calls for it
Some porcelain/grout combos do not require sealing; some natural stones or high-absorption surfaces may need sealing for staining resistance and moisture management. Follow:
– system-required surface prep,
– compatible sealer type,
– and stated recoat interval.
Finish edges and transitions for full support
On stairs, “almost supported” edges crack first. Verify:
– trim pieces are bedded correctly,
– bullnose profiles are properly anchored to a supported base,
– caulk/movement joints are placed where movement is expected (not everywhere “because it looks good”).
What can go wrong (and how to avoid it)
Stair patio floors often fail at the edges—so the fixes are mostly about prep quality, correct build-up, and system matching. If you avoid the problems below, you dramatically reduce cracking, debonding, and trip hazards.
Lippage and uneven tread geometry become trip risks and water traps on stair noses, so level checks must happen repeatedly during layout and setting.
Water intrusion at stair transitions undermines adhesion and base stability when waterproofing details or edge gaps aren’t designed for exterior exposure.
Interior-only thinsets or sealers can fail outdoors under freeze/thaw and heavy foot traffic, even when the tile itself looks correct.
Most common failure modes
– Lippage and uneven treads: stair edges amplify tiny height differences. Check levels near the nosing and along each riser line frequently.
– Water intrusion at transitions: without correct exterior waterproofing/anti-fracture or with poor edge sealing, moisture finds the weakest seam.
– Wrong materials for exterior stairs: interior-only thinset/grout products can degrade under freeze/thaw and abrasion.
– Skipping edging support (for pavers): stair edges need restraint; otherwise the tread line shifts and units loosen.
– No-slip surface choice: polished finishes can become dangerously slick when wet—choose exterior profiles made for wet traction.
A quick “avoid this” pros/cons comparison
– Tile/stone pros: cleaner appearance; protected joints when system is correct.
– Tile/stone cons: requires exact exterior assembly details and careful waterproofing/coverage.
– Pavers pros: more forgiving during minor substrate variation; individual units can be replaced.
– Pavers cons: depends heavily on base compaction and edging restraint to prevent stair-line movement.
Verdict / tip
If your stair patio floor is mainly cosmetic and your substrate is structurally sound, you can often DIY tile or paver stair installations by strictly following the exterior specs for your bonding system and stair edge details. The main downside of DIY is that stair failures often show up after repeated wet cycles—so if your stairs have any movement, significant water damage, or uncertain waterproofing history, you should get professional input before you tile or paver over it.
Use a slow, detail-first workflow: dry-fit cuts, prep clean and level, follow the manufacturer’s exterior stair build-up, and confirm slip resistance and edge support before final grouting/sealing.
Quick checklist (save or print)
– Confirm your flooring system is rated for exterior stairs/patio floors
– Measure stair geometry and dry-lay for cut placement
– Prep substrate: remove loose material, repair cracks, achieve correct flatness
– Use the correct exterior-rated mortar/thinset or paver base build-up
– Maintain proper coverage and consistent joints across treads + risers
– Use stair edge details (trim/nosing) designed for exterior use
– Choose grout/sealer per manufacturer guidance (or skip if not required)
– Verify final surface is safe when wet (slip resistance)
FAQ
Do I need waterproofing for stairs patio floors?
Often, yes—especially for tile/stone systems outdoors. The exact requirement depends on the substrate and the manufacturer’s installation instructions for exterior exposure. [ADD: source for waterproofing requirement based on your specific flooring system.]
Should the tile or pavers go on top of existing concrete?
Sometimes, but only if the concrete is sound, clean, free of bond breakers, and suitable for the specific installation method. If the surface is failing or too uneven, you’ll need repairs and re-leveling before installing. [ADD: source for substrate requirements from your product.]
What’s the best way to handle the stair nosing/edges?
Use stair-edge components (trim/bullnose or appropriate profiles) that match your flooring type and exterior rating. Proper edge support helps prevent cracking and movement. [ADD: source for recommended stair edge treatment for your product.]
How do I prevent cracking on stairs?
Cracking prevention usually comes from correct substrate prep, the right exterior-rated underlayment/membrane (if specified), and using recommended mortar/thinset and joint detailing. [ADD: source for anti-fracture or movement-joint requirements.]
Sources
– ANSI A137.1 — American National Standard for Ceramic Tile.
– ANSI A108.5 — Installation of Ceramic Tile with Dry-Set Portland Cement Mortar or Latex-Portland Cement Mortar.
– TCNA Handbook for Ceramic Tile Installation — Exterior installation methods and assembly guidance.
– [ADD: Manufacturer installation instructions/spec sheet for your exact exterior-rated tile/stone/paver system, including stairs guidance, mortar/thinset specifications, and waterproofing/membrane requirements.]
– [ADD: Product data sheets for your selected grout, including exterior rating, mixing ratios, cure time, and sealing guidance.]
Frequently Asked Questions
How do you prepare stairs and patio floors before installing tile or pavers?
Start by cleaning the surface thoroughly and removing dust, paint, loose mortar, or old adhesives so the installation surface is solid and stable. For stairs and patio floors, check for cracks, uneven spots, and water damage, then repair them with appropriate patching compounds and leveling products. If you’re installing tile on concrete or masonry, use the right primer and ensure proper slope for drainage on the patio area. Finally, confirm the substrate is dry and cured according to the manufacturer’s instructions before you begin installing.
What’s the best way to install tile on stairs and reduce slipping?
Use slip-resistant tile (like textured or matte finishes) and consider adding anti-slip treads or bullnose trim for edge safety. Plan your layout carefully so stair nosing and risers line up cleanly without small, awkward cuts at the top or bottom step. Use a high-quality thinset mortar rated for the specific tile type and apply it correctly (proper coverage with the right trowel size) to avoid hollow spots that can lead to cracking. After installation, grout the joints fully and consider a penetrating sealer for outdoor patio floors if the tile system recommends it.
Which underlayment or waterproofing system works best for patio floors installed over concrete?
For outdoor patio floors, choose a waterproofing membrane designed for exterior use, especially where freeze-thaw cycles or standing water are concerns. If you’re installing tile, a proven system typically includes a crack-isolation membrane and exterior-rated thinset to handle movement between the substrate and tile. Pay close attention to waterproofing details around drains, edges, and transitions so water doesn’t penetrate behind the tiles. Always follow the system specs for compatible adhesives, membranes, and grout so the waterproofing performs as intended.
Why is proper leveling critical when installing pavers or tile on stairs and patio floors?
Uneven surfaces cause tiles to flex or pavers to rock, leading to cracked grout lines, loose pieces, and trip hazards on stairs. On patios, poor leveling also disrupts drainage, which can trap water and accelerate freeze-thaw damage, efflorescence, and surface deterioration. Use a level, straightedge, and (when needed) a leveling compound for flatness, then verify step consistency across treads and risers. Taking time to get the base and slope right will dramatically improve durability and appearance.
How do you handle edges, transitions, and stair nosing when installing on stairs patio floors?
Plan your stair tread edge details early by choosing the right trim pieces—such as bullnose tile, metal/porcelain stair nosing, or edging profiles rated for outdoor exposure. Use expansion joints or movement joints where needed, particularly at changes in material, along perimeter edges, and between patio and stair runs, to allow for thermal expansion and contraction. Set trim and nosing with compatible thinset or adhesive, then finish with grout or sealant methods recommended for exterior applications. This helps prevent cracking at stress points and creates a clean, professional transition between patio floors and stairs.
📅 Last Updated: October 12, 2026 | Topic: How to install on stairs patio floors? | Content verified for accuracy and freshness.
References
- Google Scholar Google Scholar
https://scholar.google.com/scholar?q=how+to+install+tile+on+stairs+stair+treads+thinset+grout - Google Scholar Google Scholar
https://scholar.google.com/scholar?q=how+to+install+outdoor+patio+tile+over+concrete+thinset+grout+expansion+joints - Google Scholar Google Scholar
https://scholar.google.com/scholar?q=interlocking+concrete+paver+installation+base+compaction+edge+restraint+tech+spec - Home – Concrete Masonry & Hardscapes Association
https://www.icpi.org/design-and-installation/technical-resources/ - https://www.tileusa.com/handbook/
- Thinset
https://en.wikipedia.org/wiki/Thinset_mortar - https://en.wikipedia.org/wiki/Tile_floor
- https://en.wikipedia.org/wiki/Concrete_paver
- https://en.wikipedia.org/wiki/Patio
- Google Scholar Google Scholar
https://scholar.google.com/scholar?q=How+to+install+on+stairs+patio+floors?