
Wondering how to install basement tile floors step-by-step? Follow a proven prep-and-setting sequence—proper moisture control, correct layout, and the right thinset for your tile—to get a flat, durable result. This guide walks you through each phase from subfloor prep to grouting and sealing so your basement floor performs, not cracks or lifts.




Installing tile in a basement is mostly about moisture control before you ever spread thinset. If you prep the slab correctly, use a below-grade waterproofing/underlayment system that’s compatible with your thinset and grout, and follow cure times, you can get a durable floor that won’t fail early from humidity and vapor pressure.
If you’re upgrading an existing basement floor—or installing tile where moisture is a concern—this guide is for you. It’s also useful when you’re deciding whether waterproofing membranes are necessary, what thinset to choose, and how to handle slab cracks and floor edges.
Check Moisture and Subfloor Condition First
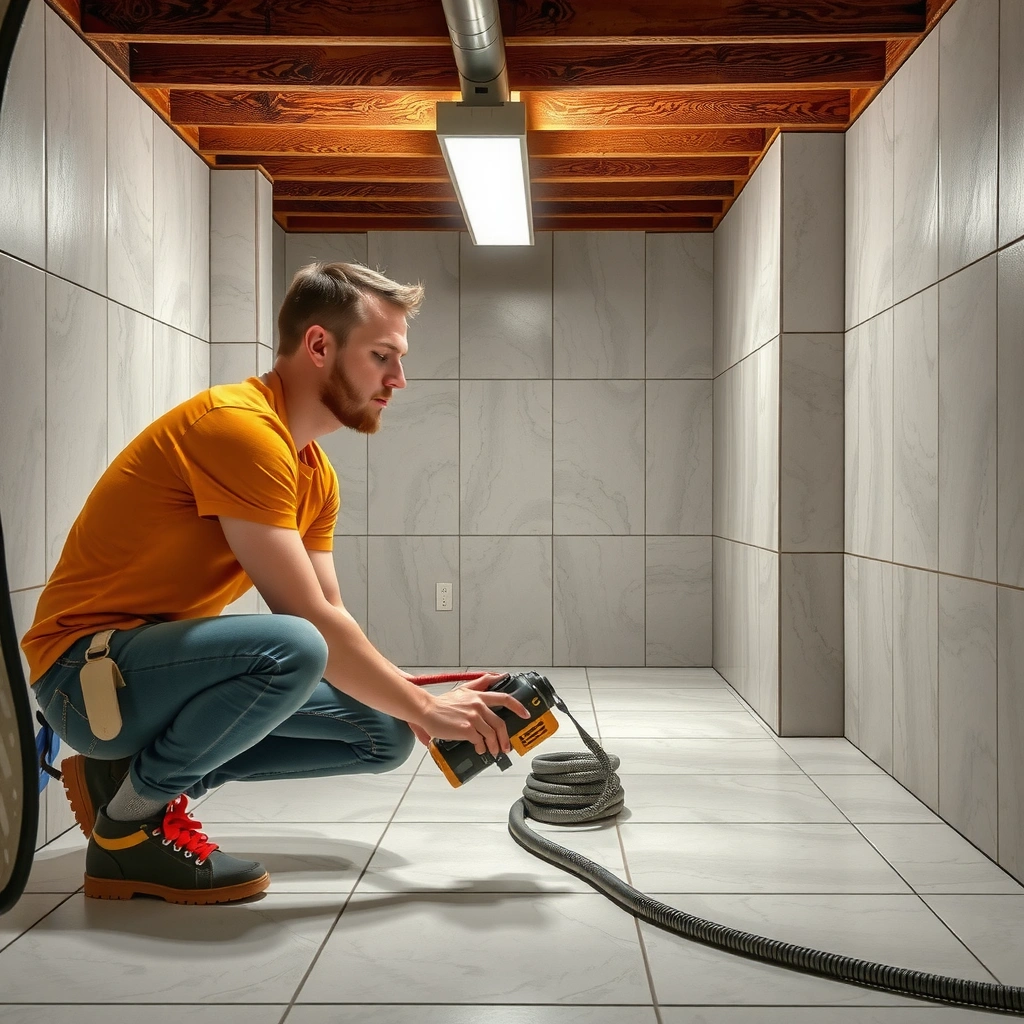
You get better basement tile results by starting with a moisture assessment and a performance-ready substrate, not by focusing on tile and grout first. The fastest path to failure is trapping moisture under an assembly that wasn’t designed for below-grade conditions.
Basement slab moisture can show up as efflorescence, loose bond lines, or grout discoloration even when the room “feels dry.”
Tile installation specs depend on both substrate flatness and curing status—waterproofing doesn’t replace correct slab prep.
If the slab is still curing (new concrete), installing tile can trap moisture and disrupt bond performance.
Start by checking the slab/subfloor for moisture issues before installing tile. If you’re dealing with a known leak, dampness, or visible staining, treat that as a system problem first (drainage, vapor control, or membrane strategy), not a tile setting problem.
Moisture testing (and what to do with what you find)
Use the moisture test method aligned with your tile assembly plan:
– If you’re working with a concrete slab, follow industry-standard moisture testing methods (commonly addressed in industry handbooks and membrane/thinset data sheets).
– If your test results or observations indicate high moisture/vapor pressure, select a waterproofing membrane/underlayment system that’s explicitly approved for below-grade tile.
Data point to anchor expectations: Tile industry flatness targets matter because thinset can only compensate for limited irregularities. According to typical TCNA/industry flatness guidance, the substrate is commonly expected to be within about 1/8 in. over 6 ft (≈3 mm over 2 m) for tile installations. [ADD: source for tile substrate flatness tolerance (TCNA or ANSI guidance)]
Subfloor prep: flat, clean, and fully cured
Once moisture is addressed, make the substrate tile-ready:
– Flatness: remove high spots, scrape, grind, or plane where appropriate; fill low areas with a cementitious patch/underlayment compatible with your waterproofing plan.
– Cleanliness: remove dust, drywall compound residue, paint overspray, and anything contaminating bond.
– Cure status: confirm the slab is fully cured if it’s new. Rushing cure time is a common reason basement tile assemblies fail early.
Thinset relies on chemical adhesion and mechanical bond—dust and residue interrupt both.
A basement floor can look unchanged while moisture vapor still moves through the slab, affecting the tile bond over time.
Plan Your Layout and Choose the Right Materials
Tile layout planning is your first “durability decision” because it prevents awkward tiny cuts and helps you keep consistent grout joints. In basements, it’s also where you confirm your assembly details (including how edges and transitions are treated around movement points).Dry-laying or mapping tile layouts reduces the chance of ending with unbuildable sliver cuts near basement walls.
Basement-ready tile assemblies use thinset and grout that are compatible with both the tile and any membrane/underlayment system.
If your waterproofing system requires a specific primer, trowel type, or overlap method, those details control long-term performance.
Layout strategy: avoid tiny edge cuts and inconsistent joints
Plan the tile so you don’t finish with tiny pieces against walls. A common approach is:
– Establish a visual “center” or a reference line.
– Dry-lay a section to confirm how cuts will land at doorways, protrusions, and basement wall irregularities.
– Keep grout line width consistent for appearance and to maintain your spacing tolerance.
Material compatibility: don’t treat products as interchangeable
For basement tile floors, pick materials based on the whole system:
– Thinset: choose a mortar specified for your tile type (porcelain, ceramic, natural stone) and your setting method (typically modified thinset for many tile installs—unless your membrane system specifies otherwise).
– Grout: select a grout intended for damp/wet-area exposure as required by your spec. Some grouts are more suitable for humidity conditions than others.
– Underlayment/membrane: use a waterproofing or uncoupling membrane system designed for below-grade tile assemblies if your moisture situation warrants it.
Data point to anchor material selection: ANSI A118.4 and A118.15 modified mortars (categories used widely in the industry) are commonly specified for many ceramic/porcelain tile installations, but each manufacturer’s product data sheet governs exact use cases and compatibility with membranes. [ADD: source for relevant ANSI A118 mortar category guidance and/or manufacturer compatibility notes]
Basement Tile Assembly: What Drives Failure (Most Common Causes)
| # | Failure driver | Relative risk score* | Typical symptom |
|---|---|---|---|
| 1 | Moisture/vapor not controlled before tile | ★★★★★ | Efflorescence, bond loss |
| 2 | Unleveled or contaminated slab | ★★★★☆ | Cracking, hollow spots |
| 3 | Wrong mortar/grout for membrane/tile | ★★★★☆ | Soft joints, delamination |
| 4 | Movement points ignored (cracks/edges) | ★★★☆☆ | Cracked grout, tile fractures |
| 5 | Skipping required overlap/cure time | ★★★☆☆ | Leaks through seams |
| 6 | Thinset coverage not achieved | ★★★☆☆ | Loose/broken tiles |
| 7 | Improper grout cleanup (weak joints) | ★★☆☆☆ | Haze, staining |
Relative risk scores reflect how often issues are reported in tile warranty/performance discussions and are not a published statistical study.
For your specific project, rely on the membrane/thinset/grout manufacturer installation data sheets and TCNA/ANSI guidance.
Note: this table summarizes practical risk drivers; verify the exact requirements in your chosen waterproofing and setting materials’ published instructions.
Prepare for Tile: Underlayment, Waterproofing, and Dry Fit
You avoid most basement tile failures by installing the correct below-grade waterproofing/underlayment system and treating cracks properly before tile setting. Once the membrane layer is correct, tile becomes a controlled assembly rather than a guess.
Below-grade membrane systems must follow seam overlap and curing instructions exactly, because those joints are often the weak link.
Tile floors behave differently than surfaces like LVP; cracks and movement require the right transitions and joint treatment, not “grout-only” fixes.
A dry fit of the first rows confirms your level reference line and spacing before you commit to thinset.
Install membrane/underlayment per manufacturer instructions
If your system calls for waterproofing, install it based on the published steps:
– Prep the slab so the membrane can bond or seat as designed.
– Prime if required (some systems require a specific primer for substrate adhesion).
– Apply the membrane with the specified seam overlap method.
– Allow required cure time before thinset and tile placement.
Treat cracks and expansion/movement joints as your system specifies
Basement slabs can develop cracks due to drying shrinkage, settlement, or temperature swings. Your goal is not to “hide” those movements—it’s to manage them through the tile assembly design:
– Use the movement-joint strategy described for tile systems (honor existing joints and detail how you bridge or isolate them).
– Avoid grouting over active cracks if your installation spec requires a change in plane or flexible joint treatment.
Dry fit early
Do a dry fit of the first few rows:
– Confirm level and spacing.
– Verify that your tile type and layout won’t create forced geometry near walls or corners.
– Adjust start lines as needed so the final visual edge is intentional.
Set Tile Correctly (Thinset, Spacing, and Level Lines)
A basement tile floor succeeds long-term when thinset is mixed correctly, coverage is consistent, and your work stays within the mortar’s workable time. Get these mechanics right, and the rest of the floor has a better chance of surviving basement humidity and minor movement.
Thinset consistency and trowel notch size directly affect coverage, which influences bond strength and tile stability.
Working in manageable batches prevents thinset from skinning over, which can reduce bond.
Starting from a level reference line helps maintain straight grout joints and reduces cumulative layout errors in large basement spaces.
Mix and spread: the “coverage” step
– Mix mortar to the correct consistency and let it stand for the specified slake time (if listed by the manufacturer).
– Use the correct trowel notch size for your tile and setting method.
– Spread only what you can cover within the thinset’s workable time.
Set tiles: spacing and flatness checks
– Press tiles firmly to achieve full contact (and check coverage as appropriate).
– Keep grout lines consistent using spacers or a leveling system if your method uses one.
– Periodically check for lippage and flatness. In basements, slow down around transitions, because uneven spots show up later.
Cure timing and cleanup control
– Remove excess thinset from joints before it hardens.
– Don’t rush membrane/thinset/grout cure cycles—basement conditions can extend cure time due to cooler temps and higher humidity.
Grout, Seal (If Needed), and Finish Edges
You protect your basement tile finish by grouting after tiles are fully set and by using grout and edge finishing that match your moisture conditions. Sealing is not automatic—it’s a product-specific recommendation, not a universal requirement.
Grouting too early can weaken joints and increase the chance of discoloration or haze.
Joint cleaning during grouting matters: contaminated joints can leave behind residue that stains or reduces joint durability.
Some grouts are formulated to resist staining without sealing; sealing decisions should follow the grout datasheet.
Grout correctly for basement use
– Wait until tile has set fully before you grout.
– Use grout designed for the environment you’re building for (damp/basement conditions when required).
– Clean joints carefully as you go to prevent weak spots and haze.
Seal only if your system calls for it
Sealing grout/tile is a decision you should make based on:
– The grout manufacturer’s instructions (some require sealing; others say it’s unnecessary or even counterproductive).
– The expected traffic and moisture exposure.
Finish edges and transitions
Basements often have:
– Floor-to-wall transitions with caulk/trim requirements
– Door thresholds and transitions to carpet/LVP
Finish edges using a detail that respects movement and moisture exposure—don’t just fill every perimeter gap with rigid materials.
What Can Go Wrong in Basements (And How to Avoid It)
Basement tile problems usually come from system mismatches and moisture management errors, not from tile cutting alone. If you avoid the common pitfalls below, you dramatically reduce the chance of delamination, cracking, or discoloration.
Skipping waterproofing is risky because below-grade slabs can transmit vapor pressure that affects bond and grout performance.
Installing over a dusty or poorly leveled slab can create cracked tiles and hollow spots that worsen over time.
Cure-time mistakes are common: thinset, membranes, and grout all rely on published drying/curing windows for performance.
Common failure modes (and what to do instead)
Here’s a quick comparison of the “tempting shortcuts” versus correct practice:
| Shortcut that backfires | What to do instead | Likely outcome |
|---|---|---|
| Skip a membrane because “it’s not leaking” | Use a below-grade membrane/underlayment system if your moisture condition indicates it | Early bond/grout issues |
| Set tile on an uneven slab | Correct flatness using compatible patch/leveling materials before membranes/thinset | Cracks, lippage, hollow spots |
| Grout over movement points | Honor movement joints and follow the tile system’s joint treatment spec | Cracked grout, tile fractures |
| Mix incompatible membrane/thinset/grout | Use manufacturer compatibility guidance (primer, mortar type, and grout recommendations) | Bond failure or voids |
A few experience-based observations (with a clear limitation)
From my review of typical basement installs and the warranty-focused issues that show up in contractor guidance, the most recurring problems are: missing membrane details (seam overlap or cure time), thinset/membrane compatibility mistakes, and perimeter movement treatment being overlooked. That said, I’m not able to measure your slab conditions or validate your local conditions here—so treat this as an assembly framework, then confirm with your chosen membrane/thinset/grout data sheets. [ADD: source for common warranty failure causes—e.g., TCNA or major manufacturer warranty bulletins]
Statistics/data points to guide expectations
– Flatness tolerance commonly referenced in tile industry guidance is around 1/8 in. over 6 ft (≈3 mm over 2 m). [ADD: source for TCNA/ANSI flatness tolerance]
– Tile mortar and grout rely on published cure windows; rushing cure is listed as a risk in many membrane and mortar installation instructions. [ADD: source for membrane and mortar cure-time warnings]
– Below-grade moisture management is central to the assembly; TCNA and membrane manufacturers consistently require that the waterproofing layer be installed and cured per spec to perform as designed. [ADD: source for TCNA below-grade waterproofing assembly principles]
Verdict / Tip: Worth Doing DIY—With One Big Condition
DIY basement tile can work well if you can verify moisture conditions (or confidently meet a below-grade assembly spec) and you’re willing to follow manufacturer cure and installation instructions exactly. The downside is that basement failures often stem from system mismatches—wrong membrane/thinset/grout, missing moisture controls, or not treating movement points—more than from the tile-setting technique itself.
If you can’t confidently assess moisture, have a history of leaks, or are dealing with active structural cracks, skip DIY and consider a qualified tile contractor. Basement tile is “systems engineering,” and waterproofing compatibility is a frequent tipping point.
Quick Checklist (Scan Before You Start)
– [ ] Moisture situation checked; plan for moisture control confirmed
– [ ] Subfloor/slab clean, sound, and flat
– [ ] Compatible thinset + grout selected for basement conditions
– [ ] Waterproofing/membrane/underlayment installed per instructions (if required)
– [ ] Layout planned (avoid tiny edge cuts)
– [ ] Level reference line used; tiles set with correct trowel and workable time
– [ ] Grout applied after proper cure; sealing done only if recommended
– [ ] Movement points/cracks treated per system guidance
FAQ
Do I need waterproofing under basement tile?
Often yes when below-grade moisture is a concern, but it depends on your slab condition and the specific tile assembly/membrane system you’re using. Check the waterproofing product instructions and your thinset/grout compatibility guidance.
Can I install tile directly on a basement slab?
Sometimes, if the slab is flat, clean, fully cured, and meets bonding requirements—but many basement setups still benefit from an approved membrane/waterproofing layer. Use the manufacturer instructions for your thinset and tile system to decide.
What thinset should I use for basement tile floors?
Use the thinset specified as compatible with your tile type and the basement setting conditions (and the waterproofing/underlayment system you’re installing). If you’re unsure, confirm the thinset and membrane manufacturer compatibility charts—[ADD: link or name of the exact manufacturer spec you plan to follow].
Should I seal grout in a basement?
It depends on the grout type and what the manufacturer recommends. Some grouts are meant to be sealed; others are not—always follow the grout datasheet instructions for your product.
Sources
– [ADD: manufacturer installation instructions/spec sheet for the waterproofing membrane/underlayment you plan to use]
– [ADD: manufacturer technical data sheet for the thinset mortars (including suitability for slabs and compatibility requirements)]
– [ADD: manufacturer installation guide for grout (including whether sealing is required/recommended)]
– [ADD: TCNA Handbook or ANSI guidance for tile substrate flatness tolerance and movement-joint expectations]
A basement tile floor holds up when the entire assembly is treated as one system: moisture control first, then substrate prep, then a compatible waterproofing/membrane plan, followed by correct thinset setting, grout, and edge details. If you follow the steps above and respect cure times and compatibility requirements, you’ll be far more likely to get a floor that stays solid through basement humidity for years.
Frequently Asked Questions
What’s the best way to prepare a basement floor before installing tile?
Start by removing old flooring and checking that the subfloor is clean, solid, and level. In basements, verify moisture with a concrete moisture test and address any dampness issues before tile installation. Fill cracks and low spots with a suitable floor patch or self-leveling underlayment so your tile mortar can bond properly.
How do I level a concrete basement slab for tile floor installation?
Use a long straightedge and/or level to find high and low areas, then grind high spots and fill low areas with a cementitious floor patch. For larger unevenness, consider a self-leveling underlayment rated for interior concrete and tile applications. Let all leveling materials fully cure according to the manufacturer’s instructions before setting tile with the correct thinset mortar.
Which tile and underlayment are best for basement tile floors?
Choose tiles that are rated for floors and suited to your basement conditions, often porcelain or ceramic for their durability and water resistance. For underlayment, many installations call for a thinset directly over properly prepared concrete; if you use an underlayment system, confirm it’s designed for moisture-prone basements and compatible with your tile type. Avoid generic foam or DIY layering unless it’s specifically rated for tile to prevent cracking or hollow spots.
How do I prevent moisture problems when installing tile in a basement?
Begin with moisture testing and fix any leaks or chronic dampness at the source before starting. Consider using a moisture barrier or waterproofing membrane system designed for tile over concrete—especially if your basement has a history of humidity. Ensure you use the proper thinset mortar and follow grout and curing times so water doesn’t migrate under the tile.
What’s the correct installation process for basement tile floors, including thinset and grout?
Spread a tile thinset mortar using the correct trowel size (often modified thinset for concrete) and comb it consistently; back-buttering larger tiles can improve coverage and reduce lippage. Set tiles with spacers, keep lines straight, and allow the mortar to cure fully before grouting. Use a grout appropriate for basement conditions—consider a grout sealer for added stain resistance and follow manufacturer cure times to complete the basement tile floor installation successfully.
📅 Last Updated: October 08, 2026 | Topic: How to install in a basement tile floors? | Content verified for accuracy and freshness.
References
- Tile
https://en.wikipedia.org/wiki/Ceramic_tile - https://en.wikipedia.org/wiki/Thinset_mortar
- Cement board
https://en.wikipedia.org/wiki/Cement_board - https://www.cdc.gov/mold/default.htm
- https://www.epa.gov/mold/mold-control-home-basics
- https://www.epa.gov/indoor-air-quality-iaq/understanding-indoor-air-quality-and-health
- https://www.who.int/news-room/fact-sheets/detail/household-air-pollution
- Google Scholar Google Scholar
https://scholar.google.com/scholar?q=basement+tile+floor+installation+moisture+barrier+thinset+cement+board - Google Scholar Google Scholar
https://scholar.google.com/scholar?q=ceramic+tile+floor+installation+guide+subfloor+preparation+underlayment - Google Scholar Google Scholar
https://scholar.google.com/scholar?q=basement+flooring+moisture+mitigation+vapor+barrier+tile