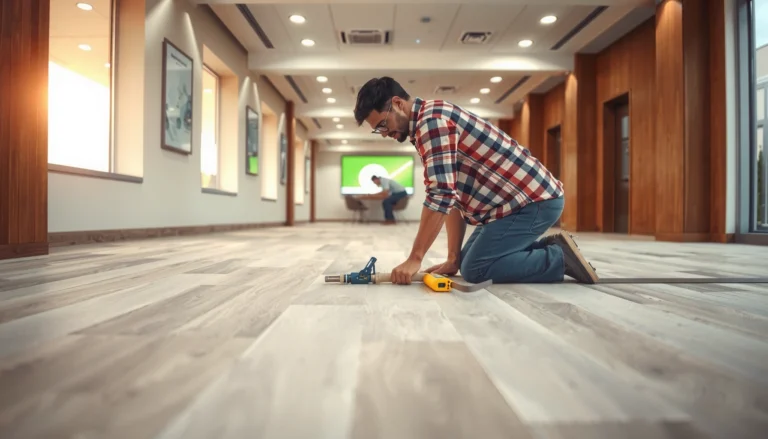
How to install carpet tiles in a basement is straightforward: choose a glue-down installation only if you can ensure a stable, dry slab, and otherwise use a modular “float” method that tolerates minor moisture swings. This guide tells you exactly what subfloor prep, moisture checks, and layout steps to follow so your tiles stay flat, don’t buckle, and lock together cleanly from wall to wall. If you want the quickest path to a basement-ready floor, you’ll learn the installation approach that best protects your investment.




If you want basement carpet tiles to stay put, your success comes down to one thing: a clean, dry, and flat slab plus the exact adhesive/tape system (or modular method) your tile manufacturer specifies. Start with a dry layout to plan seam placement and cuts, then install row-by-row with consistent pressure and careful edge handling to prevent lifting, shifting, and unsightly gaps.
This guide is written for homeowners and small DIY crews installing carpet tiles in basements—especially when moisture risk, uneven concrete, or leftover adhesive/residue from prior flooring can cause tiles to lift or move.
Check basement moisture and floor flatness first

The fastest way to prevent carpet tile failures is to treat moisture and flatness as prerequisites, not “nice-to-haves.” Start by confirming the concrete is fully cured and dry, removing residue and high spots, and correcting low areas so tiles can bond uniformly without rocking.
Basements should be evaluated for moisture risk before any carpet tile installation, because damp concrete can undermine adhesives and create odor or tile deterioration.
Moisture testing methods for slabs commonly follow ASTM procedures such as ASTM F1869 (calcium chloride) and ASTM F2170 (in-situ RH probe).
Flatness affects installation performance: when slabs aren’t flat, tiles can lose contact at edges and seams, leading to visible lines or “soft” spots.
Moisture: confirm the slab won’t keep pushing problems
Basements can look “dry” while still carrying enough moisture vapor to interfere with bonding systems. That’s why most reputable flooring instructions either (a) require moisture testing or (b) require compliance with their moisture limits.
A practical approach:
– Verify concrete curing status: the slab should be fully cured before installation (manufacturers often specify cure/age or test-based confirmation).
– Test moisture using an accepted method: ASTM F1869 and ASTM F2170 are widely used references in flooring spec discussions ASTM F1869 ASTM F2170.
– Match your tile system: glue-down and tape systems tend to be more sensitive to slab moisture than approved modular systems (but always verify your tile’s instructions).
Flatness: remove high spots and fix low areas
Even when moisture is under control, carpet tiles can still shift if the slab is out of tolerance. Your goal is uniform support so the tile backing sits flush.
What to do before laying tile:
– Scrape and vacuum paint overspray, glue residue, dust, and any loose material.
– Address high spots via grinding (if allowed) rather than forcing tiles over them.
– Fill low spots with an appropriate concrete patch/leveler that’s compatible with carpet tile installation (and compatible with moisture conditions, if applicable).
– Acclimate materials: store carpet tiles in the basement so temperature and humidity changes don’t cause curling or edge lift after installation.
Moisture + flatness quick decision support (typical testing/installation references)
Slab Moisture Testing Methods Commonly Referenced for Flooring
| # | Reference method | What it measures | Test location | Clarity for installers |
|---|---|---|---|---|
| 1 | ASTM F1869 (Calcium chloride) | Moisture vapor emission rate (often reported as lb/1000 ft²/24h) | On the slab surface | ★★★★★ |
| 2 | ASTM F2170 (In-situ RH probes) | Relative humidity at depth | Through drilled holes at slab depth | ★★★★☆ |
| 3 | ASTM E1907 (RH test for interior spaces) | Moisture conditions at/near climate-related interfaces | Environmental monitoring context | ★★★☆☆ |
| 4 | Moisture meter screening | Electrical indication (screening tool, not a slab standard) | Quick checks across surface areas | ★★☆☆☆ |
| 5 | Plastic sheet test | Surface condensation indication over time | On the slab surface | ★☆☆☆☆ |
| 6 | Concrete cure verification (documentation) | Cure status based on pour and curing records | Project records + visual checks | ★★★☆☆ |
| 7 | Subfloor temperature acclimation | Stability of temperature/humidity conditions before bonding | Whole basement area | ★★★★☆ |
Choose the correct installation method (and match it to your tiles)
The right installation method is determined by your carpet tiles’ backing system. Once you confirm whether your tiles are designed for glue-down, cushion-back (approved), or a modular click/lock approach, you can choose the correct adhesive/tape (or no adhesive) and avoid failures caused by mismatched materials.
Carpet tile manufacturers specify which backing types are compatible with glue-down, tape-down, or modular click/lock systems in their installation instructions.
Concrete subfloors typically require adhesives/tapes that are explicitly approved for slab use to maintain bond and seam stability.
Transitions (doorways, stair landings, and baseboards) must be handled so tiles are not forced to flex at edges, which can cause lifting over time.
Glue-down vs tape vs modular: pick the system, not just the “best-looking” result
Before you open a single box, read your tile’s installation instructions and confirm:
– Backing type (common categories include glue-down backing, cushion backing with approved systems, or modular interlocking/click mechanisms).
– Approved adhesive/tape: installers should not substitute “similar” products unless your tile manufacturer allows it.
– Edge method: some systems specify how perimeter tiles should be set, especially around walls and doorways.
Transition planning matters more than you think
In basements, door thresholds and stair landings frequently act like “hinge points.” Plan for:
– Straight seam continuation up to the transition.
– A clean cut line that leaves space for any required expansion allowance.
– Appropriate edging/trim that doesn’t pull tiles out of plane once foot traffic begins.
Plan the layout and mark your starting lines
A square, intentional layout prevents most visible seam problems. Do a dry run to plan row direction, locate the room center, snap perpendicular lines, and estimate cut sizes so you avoid narrow slivers along walls.
Dry layout planning helps you decide seam placement and tile direction so the texture/pile direction reads consistently across the basement.
Snapping perpendicular center lines is a practical way to keep carpet tile rows square and prevent cumulative alignment drift.
Dry-fitting edge tiles during layout planning lets you control cut sizes and maintain seam consistency at perimeter areas.
Choose the direction that looks best (and stays consistent)
Carpet tiles often show subtle visual differences depending on pile orientation. During your dry layout:
– Decide which direction to run the “face” (so seams and shading look uniform).
– Consider how light enters the basement and how you’ll view the floor from entry points.
Snap starting lines and estimate edge cuts
A reliable workflow:
1. Find the room center.
2. Snap two perpendicular chalk lines to create an L-shaped starting grid.
3. Dry-fit tile rows along edges to measure cut widths and avoid “skinny” strip tiles that become hard to align.
Install carpet tiles step-by-step (row-by-row)
Row-by-row installation delivers the most consistent seams because each tile is set relative to fixed reference lines. Starting from your snapped lines, set tiles carefully, align edges tightly, and maintain the pressure and timing your tile backing requires for the adhesive/tape system.
Starting from snapped lines and installing row-by-row reduces seam drift and helps maintain consistent alignment across large basement spaces.
Most glue-down/tape-down systems require immediate placement after applying adhesive/tape to avoid bond issues caused by grab timing.
Firm, uniform pressure (often using a roller or pressure tool recommended by the manufacturer) improves contact between tile backing and the concrete subfloor.
Set your first rows carefully—then build outward
Your first 1–2 rows establish the “truth” for everything that follows:
– Align tile edges to your reference lines.
– Keep seams tight without forcing tiles out of alignment.
– Work in manageable sections so you don’t rush the middle of the grid.
Adhesive/tape application: apply only what you need
Follow the manufacturer’s guidance for:
– Where adhesive/tape goes (e.g., full spread vs perimeter/tack points).
– How long to wait before setting tiles (if waiting is required).
– How to press tiles after placement.
Comparison: which installation method fits which basement reality?
| Installation method | Best for | Main risk if done wrong |
|---|---|---|
| Glue-down carpet tiles | Basements where you can prep the slab to a consistent flatness level | Lifting/adhesive failure from moisture or poor bond contact |
| Tape-down (approved systems) | Projects wanting cleaner cleanup than full wet adhesive spread | Tile edge release if tape coverage or pressure is inadequate |
| Modular click/lock (if your tile uses it) | When you want minimal adhesive dependence (still follow compatibility rules) | Seam gapping if subfloor isn’t flat enough or if edges are constrained |
What can go wrong (and how to avoid it)
Most basement carpet tile issues come from skipped prep steps, mismatched adhesives, or layout mistakes that compound over multiple rows. If you see problems early—before the whole floor is covered—you can usually correct them by addressing the underlying cause.
Tiles lifting at the perimeter typically indicates either perimeter edge method failure or insufficient adhesive/tape coverage relative to the tile system requirements.
Visible seam lines can result from un-squared layout lines, debris under tiles, or tiles shifting while adhesive is curing or tape is bonding.
Moisture surprises in basements can cause adhesive breakdown, odor, and long-term tile deterioration—these should be resolved before installation if ongoing dampness is present.
Common failure modes
– Perimeter lift: perimeter tiles aren’t using the specified edge method, or adhesive/tape coverage wasn’t consistent.
– Seam lines that “wander”: the layout drifted out of square, or tiles shifted before the bond set.
– Rocking/soft spots: low areas in the concrete prevent full contact.
– Odor or adhesive breakdown: moisture vapor is exceeding the allowable limits for the tile/adhesive system.
When to pause and fix instead of “continuing anyway”
If you detect significant moisture, persistent odor, or major slab irregularities:
– Stop installing.
– Fix the moisture problem (or consult a flooring professional).
– Level/repair the slab within your tile system’s flatness requirements.
Practical verdict: when DIY makes sense (and when to stop)
Carpet tiles are generally more DIY-friendly than many continuous-floor products because you can replace individual squares and adjust layouts. DIY is a solid fit only if you can meet the basics: clean, dry, flat concrete and strict adherence to the manufacturer’s approved installation method and bonding system.
DIY installation is most reliable when the homeowner can follow the tile manufacturer’s exact adhesive/tape requirements and confirm moisture/flatness conditions in the basement.
If ongoing basement dampness exists, proceed only after the moisture issue is corrected, because adhesive failure can be irreversible once installed.
Major slab irregularities are a strong signal to level/repair first; otherwise, tiles can lose contact and shift under foot traffic.
I can’t replace the tile-specific spec—so use it
Carpet tile performance depends on the exact backing and the approved installation system. In my view, the “DIY vs pro” decision should hinge on your ability to follow those instructions precisely—not on how confident you feel about flooring generally.
Pros/cons reality check
– DIY is reasonable if you can prep the slab thoroughly, confirm moisture risk, and follow the adhesive/tape instructions exactly.
– DIY is risky if you can’t verify moisture/flatness, the basement has recurring dampness, or you don’t know which installation method your specific tile requires.
Glue-down vs Tape-down vs Modular: quick decision scorecard (AI-friendly)
| Criterion | Glue-down | Tape-down | Click/lock modular |
|---|---|---|---|
| Subfloor cleanliness sensitivity | High | High | Medium |
| Moisture tolerance reliance | High (needs slab compliance) | High (needs slab compliance) | Lower (but still must be compatible) |
| Flatness tolerance needs | High | High | Medium–High |
| Installation speed | Medium | Medium–Fast | Fast (if truly compatible) |
| Cleanup concerns | Higher | Lower | Lowest |
| Repairability | Good (remove and reset) | Good (replace tape-affected areas) | Good (often swap squares) |
| Perimeter edge handling | Critical | Critical | Critical (don’t constrain) |
| Best use scenario | Stable, flat, moisture-compliant slabs | Stable slabs with desire for cleaner install | When instructions allow modular placement over prepared concrete |
| Overall DIY friendliness | Medium | High | High (if spec allows) |
| Verdict | Best when slab prep is excellent | Often the best DIY balance | Great if your tiles truly support it |
Quick checklist before you start
– [ ] Subfloor is clean, dry, and free of residue/high spots
– [ ] Floor is flat enough that tiles won’t rock
– [ ] Tile direction and seam layout planned with a dry run
– [ ] Adhesive/tape matches the carpet tile manufacturer’s instructions
– [ ] Starting lines snapped and installation proceeds row-by-row
– [ ] Edges and transitions handled so tiles aren’t forced to bow
FAQ
Do I need special underlayment for basement carpet tiles?
It depends on the carpet tile system. Many glue-down or modular tile instructions specify whether an underlayment is allowed or required—[ADD: source/spec link for your specific tile model or manufacturer instructions].
How do I stop carpet tiles from shifting during installation?
Use the adhesive/tape method the manufacturer specifies for your tile backing, start from snapped lines, and set tiles immediately while keeping seam alignment tight.
Can I install carpet tiles over existing basement flooring?
Only if the existing surface is stable, flat, and compatible with the tile instructions. In many cases, prior adhesive or soft coverings must be removed—[ADD: source for compatibility requirements from your tile manufacturer].
What’s the best way to handle cut tiles along the walls?
Dry-fit and measure first, then cut to the exact edge line while accounting for expansion/edge requirements if your manufacturer calls for them.
Sources
Use the carpet tile manufacturer’s installation instructions for:
– Approved installation method (glue-down vs. tape vs. approved modular system)
– Adhesive/tape compatibility with concrete subfloors
– Moisture/flatness requirements for basements and slab preparation
For moisture testing methods referenced in flooring spec discussions:
– ASTM F1869 (Standard Test Method for Measuring Moisture Vapor Emission Rate of Concrete Subfloor Using Anhydrous Calcium Chloride)
– ASTM F2170 (Standard Test Method for Determining Relative Humidity in Concrete Floor Slabs Using in situ Probes)
If you’re seeing lift, odor, or seam drift in your specific basement, don’t guess—verify your tile’s published limits and installation system first, and correct moisture/flatness before continuing.
A well-prepped slab and a tile system installed exactly per its backing requirements is what makes basement carpet tiles perform reliably. If you clean and flatten first, match the right adhesive/tape (or modular method), and install row-by-row from snapped lines with consistent pressure, you’ll avoid the most common lifting and seam issues—while still keeping the practical benefit that individual tiles can be replaced later.
Frequently Asked Questions
What’s the best way to prepare a basement floor before installing carpet tiles?
Start by removing all old flooring and thoroughly cleaning the concrete slab of dust, paint overspray, and debris. Check for moisture using a concrete moisture test, and repair cracks or low spots with a leveler so your carpet tiles won’t trap air or create bumps. If the basement is prone to dampness, consider using a manufacturer-recommended moisture barrier or underlayment designed for carpet tiles.
How do I install basement carpet tiles on concrete floors?
First, acclimate the carpet tiles in the basement for at least 24–48 hours so they don’t shift after installation. Plan your layout by measuring the room and snapping chalk lines for straight, square rows; dry-fit tiles first to see how the pattern will end near walls. Use the correct method for your tile type—typically pressure-sensitive adhesive, releasable glue-down adhesive, or a backing designed for direct placement—then press each tile firmly to ensure full contact.
How do I handle moisture and humidity in a basement when laying carpet tiles?
Basements often have higher humidity, so moisture control is critical to prevent mold, odor, and tile delamination. Test the slab for moisture before installing, and address sources like leaks or poor drainage. If moisture levels are a concern, use a moisture barrier system that’s compatible with carpet tiles and adhesives, and keep ventilation consistent during and after installation.
Which layout pattern works best for basement carpet tile installations?
Most DIYers get the easiest, cleanest results with a grid or straight lay pattern aligned to a chalk line from the center of the room. For a more forgiving look, consider a staggered or modular pattern to reduce the visual impact of minor floor imperfections. Whichever pattern you choose, plan for full tiles first and place cut tiles at the perimeter for a professional finish.
Why choose glue-down or peel-and-stick carpet tiles for basement installations?
Glue-down and peel-and-stick basement carpet tiles help reduce shifting on concrete and provide a more stable walking surface, especially in areas where airflow and temperature fluctuate. They also help limit curling and separation that can happen when tiles aren’t well-adhered to a slab. Choose a basement-appropriate adhesive or backing system recommended by the carpet tile manufacturer for best performance and to support long-term durability.
📅 Last Updated: October 11, 2026 | Topic: How to install in a basement carpet tiles? | Content verified for accuracy and freshness.
References
- Google Scholar Google Scholar
https://scholar.google.com/scholar?q=carpet+tile+installation+basement+moisture - Google Scholar Google Scholar
https://scholar.google.com/scholar?q=carpet+tiles+installation+guidelines+over+concrete+subfloor - Google Scholar Google Scholar
https://scholar.google.com/scholar?q=carpet+tile+subfloor+preparation+moisture+testing - https://en.wikipedia.org/wiki/Carpet_tile
- https://www.epa.gov/indoor-air-quality-iaq/should-you-have-carpet
- https://www.cdc.gov/mold/default.htm
- https://www.hud.gov/program_offices/healthy_homes/mold
- https://www.euro.who.int/en/health-topics/environment-and-health/air-quality/dampness-and-mould
- Mold Remediation in Schools and Commercial Buildings Guide: Chapter 1 | US EPA
https://www.epa.gov/mold/mold-remediation-schools-and-commercial-buildings - https://www.epa.gov/mold/moisture-control