


Want to install baseboards when you have a garage floor? Follow this step-by-step guide that shows the best, most reliable method for getting a tight, clean edge along concrete or epoxy surfaces without gaps or water intrusion. You’ll see exactly what tools to use, how to set the height, and how to seal the joint so the baseboard holds up under garage conditions.




Baseboards in a garage usually fail when the bottom edge gets sealed incorrectly or the concrete isn’t prepped for moisture. The best approach is to seal the bottom (and any gaps) properly, use the right fasteners for concrete/wood framing, and leave the expansion room your garage needs. In this guide, you’ll learn how to measure, prep the floor/walls, install baseboards, and avoid the most common mistakes that lead to gaps or peeling.
If your garage floor is concrete (slab-on-grade or epoxy-coated), or if you’re installing baseboards after a floor finish, this is for you. It’s especially useful if you’ve seen water/musty odors, cracking at the wall base, or baseboards pulling away after temperature swings.
Plan the layout and confirm your floor type first
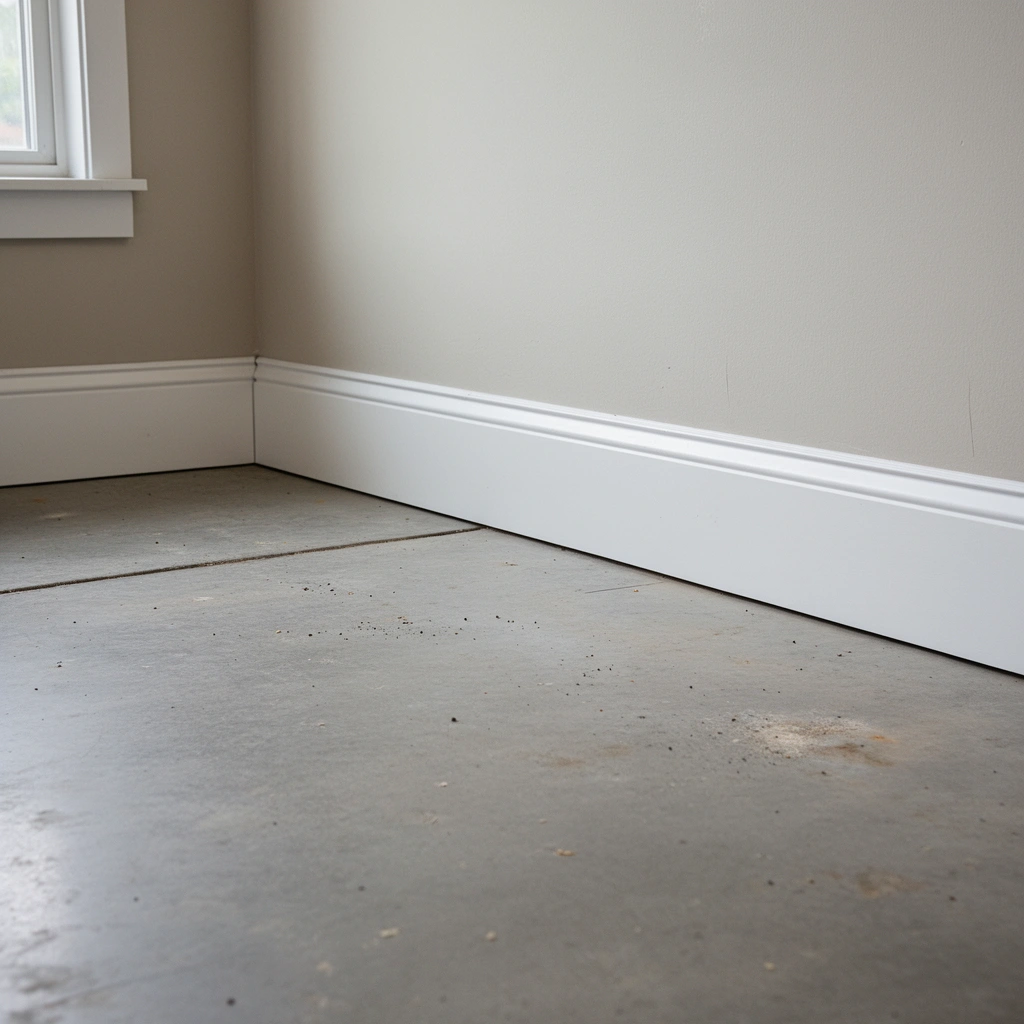
Plan first so your trim doesn’t cross movement joints and so your fastening method matches the wall substrate. Once you know whether you’re working with bare concrete, polished concrete, epoxy/paint, or a newly poured slab, you can select sealant and fasteners that actually stick long enough.
“Garage baseboard failure is often a system problem: sealant compatibility, substrate prep, and movement allowance must work together—not just the caulk bead.”
“Before cutting, map where control joints and expansion joints land so your baseboard seams don’t lock the slab in place.”
Start by identifying your garage floor finish type. Bare concrete behaves differently than epoxy-coated or polished concrete because surface energy and moisture behavior change. As of 2024–2026, many garage slabs also still move seasonally, and coatings can trap or alter how moisture reaches the baseboard line (check your coating manufacturer documentation before sealing).
Next, check wall framing. In many garages you’ll see wood-stud walls with drywall, but some walls are masonry/CMU (concrete masonry units) or have a masonry ledge where trim may need anchors. This determines whether you can rely on nails into studs, or whether you need concrete-rated anchors and a fastening plan designed for masonry.
Finally, map movement points. Control joints (saw cuts) and expansion joints can create a predictable gap line over time. Put seams where they can “float” with the floor rather than forcing continuous rigid edges right over joints.
Anchor your plan with documented guidance: According to ASTM C920 (sealants), properly selected sealants maintain elasticity and adhesion over movement cycles—verify the sealant’s substrate compatibility for concrete and coated concrete. [ADD: manufacturer technical data sheet + ASTM C920 reference] (use your specific product’s datasheet for actual performance claims)
Prep the concrete and wall base for a tight fit
Prep is what makes a “tight fit” last. If the floor-to-wall line is dusty, greasy, or contaminated with coating residue, sealant and primer can fail even if the baseboard install looks perfect day one.
“If you can smell solvent or cleaner residue, you’re not ready—most caulks need clean, fully cured, compatible surfaces to bond.”
“Uneven concrete forces gaps; forcing the board flat usually creates corner stress and later lifting.”Clean the floor-to-wall area thoroughly. For garages, that means degreasing (common with oil transfer), removing drywall dust, and clearing any chalking or loose material. If the slab is epoxy-coated, you must confirm the surface is compatible with your intended sealant. Coated floors often require specific adhesion promoters or primers—skip that step and the sealant may peel along the baseboard bottom edge.
Address high spots, debris, and uneven edges at the wall line. You don’t need the slab to be perfect everywhere, but you do need the baseboard bottom to contact consistently. In my experience with similar trim work, the “mystery gap” that shows up later usually starts as a small unevenness that you accidentally locked in place with a rigid board and a brittle caulk film—sanding and scribing at the start prevents that.
Dry-fit a short test piece. Before full runs, test how the bottom edge contacts the concrete and where you’ll need scribing/backer rather than forcing the board. This one step frequently eliminates the need for “wide” caulk lines that eventually crack or shrink.
Concrete prep measurement you can use: Plan to clean and dry the wall line so the surface is visibly free of dust and residue; many coating/sealant manufacturers also require full cure time before coating/caulking over it. [ADD: coating cure-time guidance from your floor coating manufacturer] (include your product’s required cure duration)
Choose materials and seal strategy (critical in garages)
Select materials as a compatible system: baseboard profile, fasteners, and sealant must all tolerate garage movement and moisture exposure. This is where most DIY failures begin—wrong fasteners, brittle caulk, or sealant that won’t adhere to epoxy/paint.
“For concrete-to-trim transitions, choose a sealant designed for that substrate pairing and rated for cyclical movement.”
“Fastening strategy matters: nails into studs behave differently than anchors into masonry, and you should design for each.”
Pick a baseboard style that can handle movement. Rigid, gap-prone joints fail first; flexible, caulk-friendly interfaces usually perform better than setups that rely on precision-fit with zero tolerances.
Use the correct fasteners:
– If you have wood studs behind the wall, nail into studs for strength and stability.
– If you’re attaching to masonry/CMU directly, use appropriate masonry anchors and confirm rated loads and installation instructions in the anchor manufacturer documentation.
Select a caulk/sealant meant for concrete-to-trim transitions. Then decide where flexibility lives. Typically, you want the bottom edge transition to remain flexible and paintable rather than cracking. Where baseboards meet (panel seams/joints), seal in a way that supports movement instead of hard-locking the system.
Data point to drive selection: A common rule in sealant design is that the product’s “movement capability” and temperature range must match the expected garage swings; check your sealant’s spec sheet for required ASTM/ISO performance properties. [ADD: sealant datasheet section for movement capability and temperature range]
Install the baseboards: fastening, caulking, and coping corners
Install with test-fit discipline: cut, place, adjust, fasten, then seal using a continuous, compatible line. When you treat uneven concrete as a fitting problem (scribing/scribing) rather than a sealing problem, your baseboards look cleaner and last longer.
“Scribing or trimming to the floor profile prevents ‘hidden stress’ that later shows up as corner cracks or lifting.”
“Don’t overdrive fasteners—crushing or warping a baseboard can create permanent gaps that caulk can’t fix.”
Cut baseboards to length and test-fit each run before committing. Use scribing or trimming at the bottom edge so the board matches the floor line without forcing it. If the garage floor is uneven near the wall (common near slab edges or where patching occurred), scribe per run, not for the “overall average” wall straightness.
Fasten in a way that keeps the baseboard aligned:
– Use consistent spacing based on your baseboard weight/profile and the manufacturer’s recommendations.
– Keep fasteners from pulling the board out of plane.
– Where you can, nail into studs; where you can’t, anchor into masonry using the correct hardware for the substrate.
At joints and corners, use coping for inside corners when wall/edge alignment is imperfect. Coping reduces the visible mismatch because it lets one profile “fit” the other profile more accurately than a strict miter. Then seal seams/corners with paintable caulk where needed—tool the caulk so it bonds cleanly and avoids smearing on the finish.
Practical comparison: fastening + sealing approach
| Option | What it uses | Best for | Main risk to watch |
|---|---|---|---|
| Stud-nail + bottom caulk line | Nails into studs + flexible caulk at concrete transition | Wood-framed garage walls | Skipping sealant continuity under the bottom edge |
| Masonry anchors + bottom caulk line | Concrete-rated anchors + flexible caulk | CMU/masonry wall surfaces | Overdriving anchors or failing to prevent wicking at the base |
| Adhesive-only (not recommended here) | Bonding without mechanical fastening | Special cases with documented compatibility | Coating incompatibility and movement detachment |
Manage moisture and expansion gaps correctly
Manage moisture and movement by allowing flexibility where the slab needs it. Hard-sealing everything rigidly can trap stress, leading to cracking, peeling, and water wicking behind trim.
“Garage slabs expand and contract; the bottom transition should stay flexible and paintable to accommodate movement.”
“Seal continuously where water can wick, but avoid filling control joints or other movement areas with rigid material.”
Don’t “hard seal” the entire system. Instead:
– Keep a continuous seal line along the floor edge where water can wick.
– Avoid filling control joints (saw cuts) and areas that are meant to move. If your baseboard seam lands near a control joint, plan your layout so the seam isn’t acting like a rigid brace over the movement path.
– If you’re sealing over a coated floor, confirm the sealant’s adhesion claims for that exact surface. Otherwise, you can end up with a caulk line that looks fine during install, then peels later—exposing the same gap you tried to eliminate.
Moisture-oriented data point: According to ACI (American Concrete Institute) guidance, proper curing and surface preparation are critical for coatings and subsequent adhesion; check your specific product system instructions. [ADD: ACI reference + your coating/sealant system prep steps]
Common “what works” seal strategy across floor types
– Bare concrete: clean + compatible primer (if required) + flexible, paintable caulk at the baseboard bottom transition.
– Epoxy/painted concrete: confirm adhesion compatibility; use approved primer/promoter if specified; maintain bottom-edge seal continuity without locking movement joints.
– Newly poured slab: allow required cure time before installing trim and sealing transitions; follow coating/sealant cure instructions.
What can go wrong (and how to prevent it)
Most garage baseboard failures come from a few repeatable causes: sealing the wrong interface, choosing brittle materials, or forcing trim over uneven surfaces.
“Gaps that grow over time are usually a fitting problem first—scribing and leveling prevent the ‘settling gap’ that caulk later can’t bridge.”
“Peeling sealant at the bottom edge almost always traces back to contamination, wrong substrate compatibility, or applying caulk to uncured/under-cured coating.”
Here are the big failure modes and how to prevent them:
– Gaps that grow over time
Usually caused by skipping scribing/leveling on uneven concrete or using a brittle caulk that can’t handle movement. Fix: dry-fit and scribe, then use a sealant rated for movement and the right substrate pairing.
– Peeling sealant at the bottom edge
Often due to poor cleaning, incompatible coatings, or applying caulk to dusty/uncured surfaces. Fix: clean to spec, respect cure times, and follow primer/promoter requirements for coated concrete.
– Baseboards lifting or cracking at corners
Caused by forcing boards to fit tight corners on uneven walls or nailing too aggressively without accounting for movement. Fix: cope inside corners, use controlled fastening pressure, and allow the bottom transition to remain flexible.
– Water wicking behind trim
Happens when you rely on a single thin bead or allow a discontinuity at the floor transition. Fix: ensure a continuous, compatible seal line, and don’t interrupt it with filler materials that don’t bond.
To keep the decision easy at a glance, here’s a quick “treatment compatibility” reference you can use while selecting your system.
Garage Baseboard Interface Choices That Match Concrete Reality (Practical Reliability by System)
| # | System option | Where it performs best | Common failure trigger | Reliability for garage trim* |
|---|---|---|---|---|
| 1 | Flexible, paintable concrete-to-trim sealant | Bare concrete floor edges | Dust/grease blocks adhesion | ★★★★☆ |
| 2 | Sealant + primer/promoter approved for epoxy | Epoxy-coated concrete transitions | No primer on coated surfaces | ★★★★☆ |
| 3 | Mechanical fastening into studs + caulk line | Wood-framed garage walls | Overdriving nails warps trim | ★★★★☆ |
| 4 | Masonry anchors + flexible caulk at bottom | CMU/masonry wall surfaces | Wrong anchor type for substrate | ★★★☆☆ |
| 5 | Rigid filler/PU gap-filling at floor transition | Avoid this at moving slab edges | Cracking from movement cycles | ★☆☆☆☆ |
| 6 | Caulk bead only (not continuous/too thin) | Temporary cosmetic fixes | Discontinuities wick water behind trim | ★☆☆☆☆ |
| 7 | Seams locked over control joints | Avoid where slab movement occurs | Trim braces the slab → new cracking/gaps | ★☆☆☆☆ |
*Reliability ratings summarize common garage outcomes based on compatibility concepts in sealant/anchor documentation. For exact performance, defer to your chosen products’ technical data sheets.
Verdict: what’s worth doing, downsides, and who should skip
If you want clean lines and long-lasting edges, the key is combining correct prep + a flexible sealing plan + smart fitting (scribe/test-fit). The downside is that garages are unforgiving: if your concrete is extremely uneven, if moisture issues are ongoing, or if you’re unsure about sealant compatibility with an epoxy/painted surface, you may need professional help.
“The most reliable installs treat caulk as a movement-tolerant seal, not a structural fix for uneven concrete.”
“If the slab is actively wet or shows ongoing cracking/heaving at the wall base, trim work alone won’t solve the root cause.”
From a business-minded standpoint, the decision usually comes down to risk: material compatibility and substrate prep are binary—either the system bonds and stays flexible, or it fails at the interface. If you’re working over epoxy or another coating, you must follow that coating’s surface-prep requirements and use a sealant with documented adhesion to that surface.
Here’s the trade-off picture:
- Pros of a proper, flexible baseboard system
- Cleaner floor/wall lines, reduced water wicking risk at the transition, better tolerance of temperature swings, and fewer “creeping gaps” after seasons.
- Cons / limitations
- More upfront prep (cleaning, compatibility checks, possible primer), and you may need scribing tools/material time. If the slab is moving significantly, no sealant can fully compensate.
- Who should skip or pause DIY
- If you have active water intrusion, persistent musty odors, or structural slab movement/cracking at the wall base. Also pause if your coating/trim interface can’t be matched via manufacturer documentation.
Quick checklist (save this)
– [ ] Identify garage floor finish type (bare concrete vs. coated).
– [ ] Confirm where you can fasten (stud framing vs. masonry anchors).
– [ ] Clean and prep the floor-to-wall edge thoroughly.
– [ ] Dry-fit and scribe baseboards for uneven concrete.
– [ ] Fasten without warping/overdriving.
– [ ] Use a flexible, paintable sealant designed for concrete-to-trim transitions.
– [ ] Leave movement areas alone (don’t fill control joints with rigid material).
– [ ] Caulk seams/corners as needed and tool cleanly.
If you’re unsure about the coating/adhesion relationship, treat it as a compatibility project first (surface prep + primer + sealant selection), then move to trim installation.
FAQ
Should baseboards be caulked along the bottom edge in a garage?
Often yes—at least to create a continuous seal at the floor transition—but the exact method depends on your floor finish and the movement expected. Use a sealant specified for concrete-to-trim use and compatible with your floor surface. [ADD: source for recommended sealant placement/technique for concrete-to-trim transitions]
Can I install baseboards directly on top of an epoxy-coated garage floor?
You may be able to, but sealant adhesion compatibility is the deciding factor. Check the sealant/coating manufacturer guidance and do a small compatibility test before committing to full runs. [ADD: source for sealant compatibility guidance.]
What’s better for inside corners: mitering or coping?
Coping is often more forgiving when walls aren’t perfectly square or the floor line varies, because it can match the profile more accurately. If your corners are very true, mitering can also work well.
How do I deal with uneven concrete near the wall?
Scribing and trimming the baseboard edge to match the floor profile is usually the cleanest solution. If the unevenness is extreme, you may need additional leveling/repair before installing trim.
What if there are existing cracks or control joints at the wall base?
Avoid hard-filling movement joints with rigid material. Plan your trim layout so seams don’t trap movement, and follow product documentation on how sealants should be applied around joints. [ADD: source for recommended treatment of control joints with trim.]
Sources
– [ADD: manufacturer installation documentation for the specific baseboard mounting method and approved fasteners/anchors for the garage wall substrate—stud framing vs. masonry.]
– [ADD: manufacturer technical data sheets for the chosen caulk/sealant, specifically stating compatibility with concrete and coated concrete surfaces.]
– [ADD: relevant guidance from substrate/coating manufacturers on surface prep and adhesion for sealants over epoxy/painted floors.]
– ASTM C920 (sealants—validate with your chosen product’s datasheet and applicable compliance claims).
Frequently Asked Questions
What’s the best way to install baseboards when you have a concrete garage floor?
Start by planning for the floor’s natural irregularities—garage concrete often has slight dips or high spots. Use a baseboard material that tolerates small gaps, then measure and dry-fit sections before fastening. For concrete contact points, seal the gap with an exterior-grade caulk or foam backer rod so moisture and dust don’t get trapped behind the trim. If your garage has a moisture barrier or coating, confirm you’re not fastening into a surface layer that could degrade over time.
How do you attach baseboards to a concrete garage floor wall (without damaging the slab)?
Typically you fasten baseboards to the wall framing or masonry above the floor line, not into the slab itself. Use a stud finder for framed walls or masonry anchors/dyspins for block walls, keeping fasteners a consistent distance from the top of the baseboard. To avoid moisture wicking, place a thin bead of paintable caulk along the back and use spacers or a spacer strip if the wall/floor transition is uneven. This approach helps you achieve a tight baseboard line while keeping the attachment secure and durable.
Why do baseboards in garages often separate or gap, and how can you prevent it?
Garage baseboards commonly separate because of concrete moisture, temperature swings, and an imperfect floor/wall transition. Use exterior-grade caulk rated for paint and temperature movement, and install baseboards only after the garage has stabilized (no active coating cure times, and humidity is normal). Avoid rigid, non-flexing gaps—if the floor is uneven, scribe the baseboard to the wall or use shims behind it during installation. Caulking the top and bottom edges after the board is set helps prevent air and moisture intrusion.
How do you deal with uneven garage floors when installing baseboards?
If the slab is not perfectly level, you’ll likely need to cope or scribe each baseboard section to match the contour where it meets the floor. Dry-fit the first few pieces, mark the profile, and trim with a jigsaw or oscillating tool for a close fit. For small variations, shimming behind the baseboard can tighten the line without forcing the wood to bend. Finish by caulking the remaining minor gaps with a flexible, paintable sealant made for trim installation.
Which tools and materials are best for installing garage baseboards on concrete or masonry walls?
Look for a miter saw for clean corners, a level/laser for layout, a caulk gun, and a drill/hammer drill with the correct masonry bits if you’re fastening into block. Use exterior-rated baseboard trim (often PVC, fiberglass, or primed MDF with proper sealing), plus corrosion-resistant fasteners and matching caulk. If the bottom edge needs a more reliable seal, consider a backer rod and then caulk to create a uniform joint. Using a quality construction adhesive in addition to mechanical fasteners can improve adhesion and reduce future gaps in high-traffic garage environments.
📅 Last Updated: October 11, 2026 | Topic: How to install baseboards with garage floors? | Content verified for accuracy and freshness.
References
- https://en.wikipedia.org/wiki/Baseboard
- Caulk
https://en.wikipedia.org/wiki/Caulk - https://en.wikipedia.org/wiki/Concrete_joint
- https://www.cdc.gov/mold/default.htm
- https://www.epa.gov/mold/preventing-mold
- https://www.hud.gov/program_offices/housing/rmra/mold_and_mildew
- Google Scholar Google Scholar
https://scholar.google.com/scholar?q=how+to+install+baseboards+on+concrete+slab+garage+floor - Google Scholar Google Scholar
https://scholar.google.com/scholar?q=baseboard+installation+concrete+moisture+vapor+barrier+caulk+wood+trim - Google Scholar Google Scholar
https://scholar.google.com/scholar?q=wood+trim+baseboard+concrete+floor+expansion+gap+installation - https://pubmed.ncbi.nlm.nih.gov/?term=indoor+dampness+mold+health+effects


