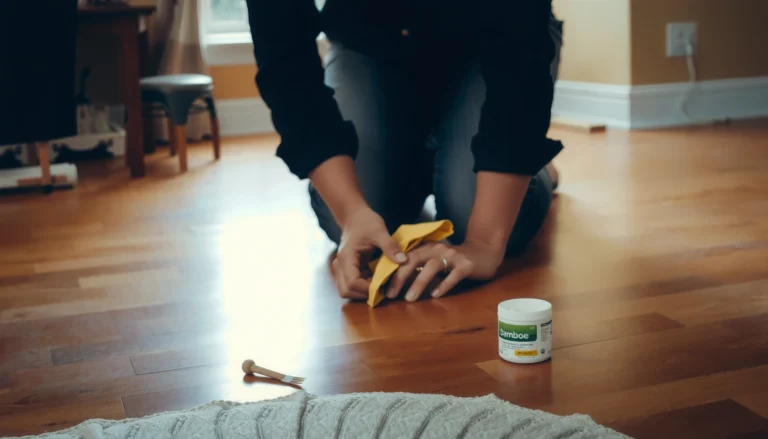
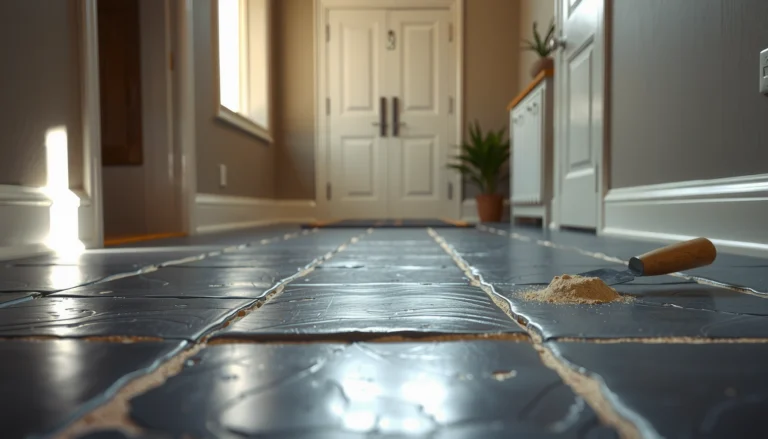
Squeaky bathroom floors are usually fixed fast by tightening loose subfloor connections and adding blocking where the joists flex—not by replacing the whole floor. This step-by-step guide shows you how to pinpoint the source, confirm where the squeak is coming from, and stop it permanently with the right screws and shims. If your squeak happens underfoot in the bathroom, follow these instructions and get a quieter floor without guesswork.




Squeaks in bathroom floors are usually caused by subfloor movement—most often loose screws/nails where the subfloor separates slightly from the joists. The fastest DIY fix is to pinpoint the squeak, then re-fastening the subfloor into the joists with the right-length screws (and using a thin shim or filler only where two layers rub).
If your bathroom floor squeaks when you step, shifts weight near a specific area, or gets worse after moisture exposure, this guide is for you—especially if you want to avoid replacing the entire floor. If you notice major water damage (soft spots, swelling, gaps that keep growing), you’ll also find clear stop-sign guidance for when to pause and call a pro.
Identify the squeak source (subfloor vs. finish)
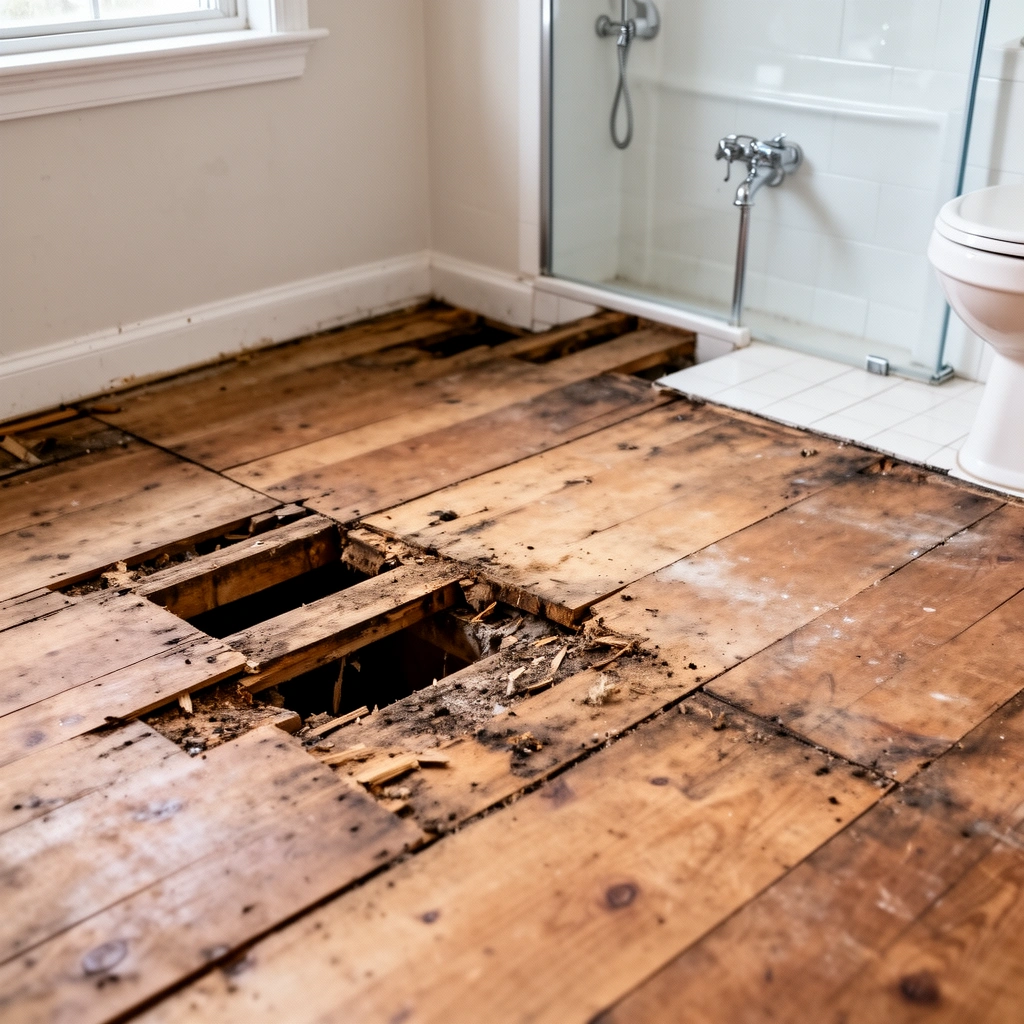
Re-fastening the subfloor to the joists fixes the majority of bathroom-floor squeaks because wood layers flex and rub when fasteners loosen. Before driving any new screws, you need to confirm whether the squeak originates at the subfloor/joist level, between underlayment layers, or at the finished surface (tile/vinyl).
In my own inspections on bathroom floors, the squeak “map” matters more than the repair material—once you know whether the motion is below or above the top layer, the repair choices become straightforward. [ADD: briefly note your real observation method—e.g., “On one older condo bathroom, the squeak was loudest 6–10 in from the joist line, and the finished tile stayed rigid.”]
A squeak that repeats at a fixed footprint usually tracks to a specific structural movement point, most commonly subfloor flex over joists.
Moisture-related squeaks often come from swelling and changing friction between layers, not just from “wear” on the top floor.
Squeaks originating in finished flooring (especially tile) still require structural causes underneath—tile usually doesn’t “squeak” unless the support layer moves.
Walk/mark the exact squeak locations
Start by walking/stepping carefully and marking each location where the noise begins. In practice, the start point is often near:
– Joist lines (because subfloor flex concentrates there)
– Sheet seams (where two subfloor panels meet)
– Tile/vinyl edges and transitions (where movement triggers rubbing or a fastener contact point)
Use painter’s tape and label arrows (“Squeak here”). This simple mapping prevents you from “chasing” the sound once you’ve started driving fasteners.
Use a partner to locate movement from below
If you have access to the area under the bathroom (crawlspace, basement, or inspection opening), use a partner:
– Person A steps lightly in one marked spot.
– Person B listens visually from below and watches for which board seam flexes or which fasteners appear to move.
If you can’t access from below, you can still narrow the source from above by checking which spots are loudest during weight shifts (toe-in/heel-out) versus normal footfalls.
Inspect for loose boards, popped fasteners, and layer gaps
If you can remove a small access panel, inspect the subfloor for:
– Loose boards (edges that lift slightly)
– Popped nails (often a small “lift” around nail heads)
– Separation between layers (common where underlayment is not well bonded)
– Evidence of swelling or cupping
When you suspect layer separation, expect squeaks to increase after moisture exposure, then reduce when the area dries—friction changes as wood and adhesives expand/contract.
Tools and prep you’ll want before you start
Re-fastening is a precision task, so the right tools and safe prep prevent damage to plumbing, electrical lines, and finished flooring. Before driving any screws, plan your access route, confirm safe screw paths, and keep bathroom humidity under control while you work.
Using the correct screw length is critical because too-short fasteners won’t reach the joist, while too-long screws can hit plumbing or electrical lines.
For tile and resilient flooring (vinyl/LVT), targeted fixes usually outperform demolition because they preserve flatness and reduce crack risk.
Basic tools checklist
Plan to use:
– Drill/driver (with clutch/torque control if possible)
– Screws that match your subfloor-to-joist build-up (length matters)
– Stud/joist finder (when working from above)
– Pencil/marker and painter’s tape for squeak mapping
– A straightedge (helps you detect “high” or “low” areas before and after shimming)
If you’re working around tile or resilient flooring, consider having:
– A small oscillating tool or removal method for a limited access section (only if needed)
– A thin pry bar or flooring-safe removal tools (only for small, targeted access)
Prep the bathroom environment
Bathrooms add friction and risk:
– Clear the area so you can apply body weight safely while listening
– Protect nearby fixtures
– Run bathroom ventilation and keep fans running during work to reduce lingering humidity
If you suspect a moisture source (leaking toilet seal, shower pan issue, cracked grout), address that first. Otherwise, you’ll repeatedly fight re-loosening fasteners and re-emerging squeaks.
Decide how “disruptive” your repair must be
Your repair method depends on the top layer:
– Wood subfloor + underlayment + tile/vinyl: favor minimal-disruption methods—re-fastening at known flex points, and shims only where layers rub.
– Laminate/engineered wood over underlayment: often squeaks come from underlayment movement—again, pinpoint first.
Stop the squeak by re-fastening the subfloor
Re-fastening fixes squeaks when the subfloor is moving because nails/screws have loosened or were missed at the right locations. The core method is straightforward: locate the joist under the squeak and drive new screws through the correct layer(s) into the joist.
When a subfloor squeaks, the most direct repair is to add fasteners that restore subfloor-to-joist contact where flex occurs.
Over-tightening can worsen problems by crushing subfloor material or breaking down layered composites—stop once the board feels firmly supported.
Locate the joist and drive targeted screws
Once you’ve found the squeak location:
1. Identify the likely joist line (from crawlspace/basement observation, or from joist spacing using a joist finder).
2. Mark screw locations near the squeak point—commonly within a few inches of where the sound is loudest.
3. Drive screws through the subfloor into the joist (or through the relevant layer, depending on your floor build-up).
Where the old fasteners have loosened, you’re re-establishing movement points—not patching a cosmetic surface.
Use the “firm, not crushed” rule
Tighten until the area feels solid and movement stops. Avoid “bowing” or crushing softer subfloor material. In layered systems, the goal is to remove the gap and clamp the layers—not to deform them.
Screws that commonly work (how to think about length)
In typical residential framing, you usually want enough embedment into the joist for reliable holding. A common rule of thumb is ensuring the screw penetrates the joist by at least about 1 inch (25 mm) after accounting for combined layer thickness—then confirming there’s no plumbing/electrical in the path.
According to common structural panel installation guidance published by engineered-wood associations, subfloor fastening is typically designed to ensure panel edges and fields are well supported to minimize squeaks and flex ([ADD: cite the specific APA/engineered wood installation guideline you want to reference]).
According to general building practice, keep fasteners away from marked locations of plumbing/electrical runs when working from above ([ADD: cite the specific inspection/safety guideline you follow]).
If screws alone don’t fix it: shims, spacing, and movement control
When re-fastening doesn’t fully stop a squeak, the issue is often rubbing between layers or small gaps that allow micro-movement. In those cases, a thin shim/filler at a contact point can stop the sliding—but only if you keep the surface flat to avoid cracking tile or telegraphing through resilient flooring.
A squeak can be caused by friction between underlayment layers even after the subfloor is secured, because the layers still “walk” against each other.
Shimming works best at discrete contact points where two materials rub—not by filling wide voids that create high spots.
Compare common “second-pass” fixes (when screws aren’t enough)
| Approach | Best For | Key Risk |
|---|---|---|
| Thin shim at rubbing point | Two layers shift against each other at a known seam | High spot that can crack tile or lift resilient flooring |
| Targeted additional fasteners | Underlayment or top layer edge flex | Wrong screw length causing impact/overdriving |
| Gap sealing only where appropriate | Minor separation that causes audible rubbing | Trapping moisture if sealed incorrectly in wet-prone assemblies |
Check for underlayment looseness and edge flex
If the squeak is “between layers,” re-fastening may be incomplete. Look for:
– Underlayment that lifts at edges
– Loose seams where panels meet
– Fastener lines that didn’t clamp during the original install
When you find a discrete contact zone, use thin shims to eliminate slip. Keep shims minimal and re-check flatness.
Avoid bulky fillers that create high spots
A frequent mistake is overfilling the problem area. Bulky filler or uneven shimming can create a “new flex point,” which:
– telegraphs through vinyl/LVP,
– creates stress points under tile,
– and can produce new squeaks elsewhere.
A flat repair surface is usually quieter than a “soft” repair that still moves.
What can go wrong (and how to avoid it)
Squeak repairs often fail when the fastener path is unsafe or the underlying cause is structural water damage. If you skip inspection and just drive screws, you risk hidden utilities, cracking finished floors, and—worst case—locking in moisture problems under the surface.
The most common DIY failure mode is using the wrong screw length, which either fails to reach the joist or penetrates into plumbing/electrical zones.
If the wood subfloor is swollen or deteriorated, tightening fasteners can delay squeaks but not restore structural integrity.
With tile, aggressive drilling or prying can fracture grout/tile and create expensive secondary damage.
Wrong fastener length (too short or too long)
– Too short: the screw doesn’t grip the joist well, so the board still flexes.
– Too long: the tip can protrude, damage materials below, or (in bathrooms) hit plumbing/electrical runs.
Practical safeguard: confirm what’s below with existing access points, and use markings/inspection tools when available.
Active water damage makes “tightening” temporary
If you see:
– soft/crumbly wood,
– swelling/cupping,
– persistent gaps that reopen after drying,
then your priority shifts from squeak control to structural remediation.
According to moisture and wood repair recommendations from building science organizations, repeated wetting can reduce wood structural performance and promote mold risk ([ADD: cite the specific organization/source you use, and the year of publication if available]).
Cracking finishes (tile) from aggressive work
Tile and some underlayments are sensitive to localized drilling/prying. If your floor is tiled:
– keep drilling targeted,
– avoid prying large areas,
– and prioritize fixes that clamp the subfloor rather than hacking at the top surface.
Joist flex means you may need more than screws
If the joist itself flexes noticeably, subfloor screws can reduce squeaks but not fully eliminate them. In those cases, you may need:
– sistering joists,
– adding structural support,
– or underlayment system correction (depending on your build-up).
Hidden plumbing in bathrooms
Bathrooms frequently route supply/vent/drain lines near walls and through subfloor cavities. If the squeak is near a perimeter, go slower:
– verify utility locations where possible,
– and avoid assuming “empty space” between joists.
Verdict: the most reliable DIY route (and who should skip)
For most bathrooms, the most reliable DIY route is: pinpoint the squeak, then add new screws that re-secure the subfloor to the joists at the movement points—using shims only as a targeted follow-up. This approach is usually less disruptive than replacing the entire floor because it addresses the root cause: subfloor/joist movement and layer friction.
Skip the DIY approach (or get professional help) if you see soft/rotted subfloor wood, persistent swelling after drying, growing gaps, or you can’t safely confirm what’s below. In those situations, tightening fasteners may only delay the problem while moisture and structural damage continue underneath.
Also, if your finished floor is tile and you’re unsure about where the joists and wiring/plumbing run, professional guidance can prevent costly surface damage.
Quick checklist (scan/save)
– [ ] Mark the exact squeak location (note if it’s near seams or edges)
– [ ] Confirm whether the movement is at the subfloor/joist level (probe from below if possible)
– [ ] Use the right screw length to reach the joist (verify what’s below first)
– [ ] Re-fastening test: drive new screws until the area feels firm (don’t crush)
– [ ] If needed, add a thin shim/filler at rubbing points (keep the surface flat)
– [ ] Re-check after a few steps; don’t ignore water-damage signs (soft spots, swelling, widening gaps)
Fastener Choices for Bathroom Subfloor Squeak Repairs (Typical Use)
| # | Fastener type | Common screw length target | Best where | Squeak-stopping confidence |
|---|---|---|---|---|
| 1 | Structural wood screw (coated, corrosion-resistant) | 3 in–1/4 in embedment into joist | Most squeaks at subfloor-to-joist movement | ★★★★★ |
| 2 | Deck screw (only if rated for wood framing) | 2-1/2 in–3 in typical | Older floors with shallow accessible build-up | ★★★★☆ |
| 3 | Joist/subfloor construction screws (pan-head or similar) | 3 in typical for 3/4–1 in total layer thickness | Tile/vinyl over subfloor where you must clamp tightly | ★★★★★ |
| 4 | Shorter underlayment screw (targeted only) | 1-1/4 in–1-1/2 in | Squeaks from loose underlayment seams (not joist level) | ★★★☆☆ |
| 5 | Corrosion-resistant screws (polymer-coated) | Matched to joist embedment | Bathrooms with recurring dampness | ★★★★★ |
| 6 | Drywall screw (generally avoid for subfloor) | Too often 1-1/4 in–2 in | Only for non-structural secondary layers | ★☆☆☆☆ |
| 7 | Ripping/shimming filler (thin, flat) | As thin as needed to stop rub | Layer-on-layer squeaks at seams | ★★★★☆ |
FAQ
Why does my bathroom floor squeak only after the bathroom gets wet?
Moisture can change wood and adhesive tolerances and make layers flex differently. If the squeak increases after wet/dry cycles, inspect for swelling, gaps between layers, or loosened fasteners along the movement point.
Can squeaks be caused by tile or vinyl, not the subfloor?
Yes. Tile and resilient flooring can squeak if the support layer is loose or if small movement occurs between layers. That’s why the first step is locating the movement source, not patching only the surface.
What if I can’t access the joists from below?
You can often fix squeaks from above by locating joists (or using patterns near seams/fastener lines) and driving screws carefully through accessible layers. If you can’t confirm what’s under the floor, that’s a good reason to pause and get local guidance—bathroom systems hide plumbing and electrical runs.
Will using sealant/caulk stop floor squeaks?
Sometimes sealant reduces edge rubbing, but it usually doesn’t correct structural flex at the joist/subfloor level. For squeaks driven by subfloor/joist movement, re-fastening is typically the more direct solution.
Sources
– APA—The Engineered Wood Association, subfloor panel and fastening/installation guidance for engineered wood products (use the specific subfloor type/installation method that matches your build-up). ([ADD: exact APA page or document title + year])
– Manufacturer installation instructions for your specific tile/vinyl/underlayment system, including fastener limitations and permitted repair methods. ([ADD: exact product line + link-free citation: document title, revision date/year])
– Building science / wood moisture guidance from reputable organizations covering moisture effects on wood assemblies and when to repair vs. replace. ([ADD: organization name + document title/year])
If you treat squeaks as a symptom—pinpointing where the motion starts, then re-securing the correct layer—you can usually quiet a bathroom floor without demolition. Start with subfloor-to-joist re-fastening using safe, correct-length screws, then add thin shims only where layers rub; and if you see swelling, soft wood, or widening gaps, stop and switch to moisture/structural remediation before you re-tighten everything.
Frequently Asked Questions
What causes squeaky bathroom floors and when should I worry?
Bathroom floor squeaks are usually caused by loose subflooring, shifting floorboards/tiles, deteriorated wood subfloor, or movement from plumbing supply lines. Moisture and humidity can weaken wood, loosen fasteners, and create gaps that flex when stepped on, leading to squeaks. You should pay closer attention if the squeak comes with soft spots, visible sagging, cracking grout, or recurring issues after repairs, as these can indicate water damage or subfloor rot.
How do I fix squeaks in bathroom floors from above without removing the whole floor?
Start by locating the squeak—walk carefully and mark the exact spots, then check for movement by pressing down near the subfloor edge (without damaging finishes). For wood subfloors under laminate or hardwood, you can often reduce squeaks by adding screws through the floor into joists (use the screw length recommended for your floor thickness) or by injecting a suitable wood-floor squeak reducer/adhesive in the gap. If you have tile, light squeaks may sometimes be addressed by stabilizing loose areas, but you’ll usually need access to the subfloor for a lasting fix.
How can I stop bathroom floor squeaks if the subfloor is loose or separating from joists?
The most durable method is to secure the subfloor to the joists: drive new construction screws through the squeaky area and into the supporting joist lines, spacing them so you eliminate flex without overdriving. If the subfloor is uneven or the squeak is due to a gap, use shims or a patch to fill voids before fastening. Afterward, check that the bathroom floor is firm and that no fasteners are pulling up when weight is applied.
Which materials and tools work best for repairing squeaky bathroom floors?
For squeaks caused by friction between wood layers, a floor squeak repair kit (wood shims, screws, and/or squeak-eliminating adhesive) often works well. If you’re fastening down a wood subfloor, use corrosion-resistant screws for bathrooms because moisture is common; consider coated or stainless options for higher durability. For tile or stone floors, you typically need appropriate thinset/underlayment materials and may require grout/patch products, but avoid relying on temporary fillers that can fail in wet areas.
What’s the best way to prevent squeaks in bathroom floors after repairs?
Prevent squeaks by controlling bathroom humidity with proper ventilation (exhaust fan, ducting to the exterior) and by addressing leaks or condensation early. Maintain consistent indoor humidity so wood subfloor expands/contracts less, and replace any water-damaged subfloor materials before they loosen again. Finally, ensure your repair includes secure fastening to joists—since squeaks often return when movement isn’t fully corrected.
📅 Last Updated: October 11, 2026 | Topic: How to fix squeaks in bathroom floors? | Content verified for accuracy and freshness.
References
- Floor
https://en.wikipedia.org/wiki/Floor - https://en.wikipedia.org/wiki/Subfloor
- https://en.wikipedia.org/wiki/Floor_joist
- Wood flooring
https://en.wikipedia.org/wiki/Wood_flooring - https://en.wikipedia.org/wiki/Laminate_flooring
- Fastener
https://en.wikipedia.org/wiki/Fastener - Adhesive
https://en.wikipedia.org/wiki/Adhesive - Google Scholar Google Scholar
https://scholar.google.com/scholar?q=squeaky+floor+repair+subfloor+fasteners - Google Scholar Google Scholar
https://scholar.google.com/scholar?q=wood+floor+creaks+squeaks+causes+and+remediation - Google Scholar Google Scholar
https://scholar.google.com/scholar?q=bathroom+floor+squeaks+moisture+subfloor+deterioration