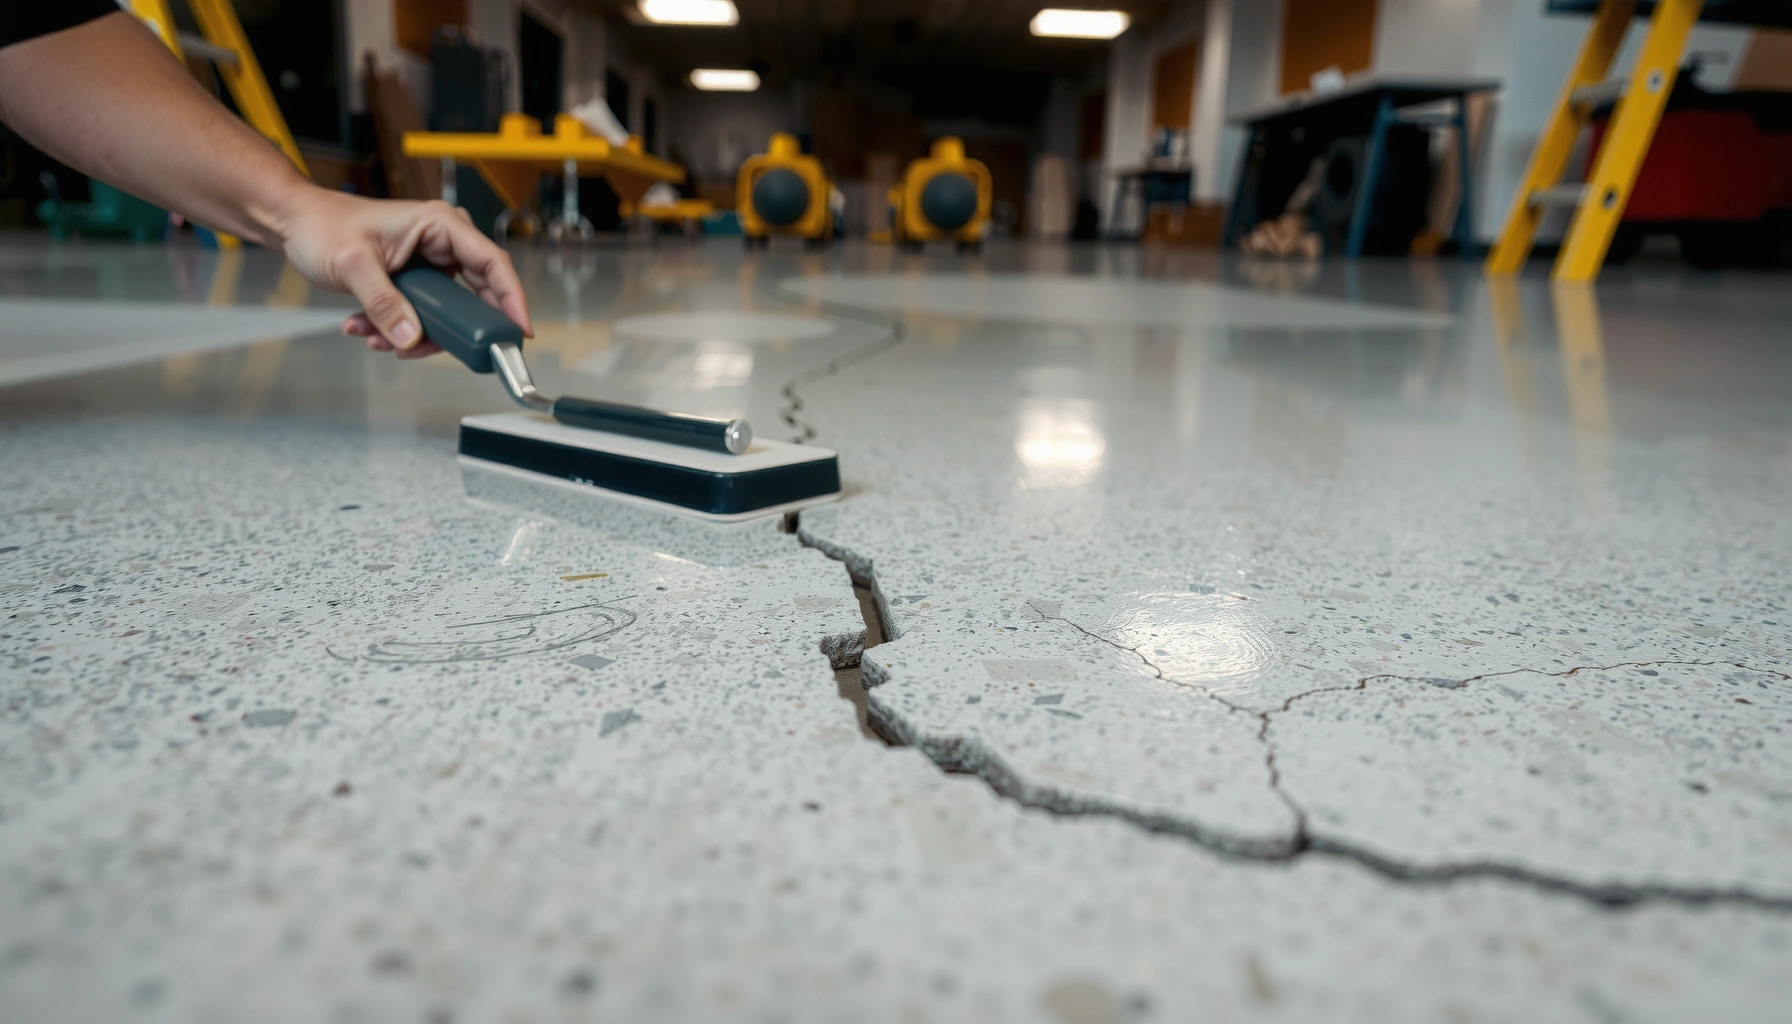

Need to fix gaps in polished concrete floors? The fastest, cleanest path is typically grinding and re-leveling the joint with a matching concrete repair system, then re-polishing to blend the surface. If the gaps are moving or widening, you’ll need crack/joint stabilization first—otherwise the filler will fail. Keep reading to get a step-by-step repair approach that restores a smooth, glossy finish without guesswork.




If your polished concrete has gaps, the fix is usually to clean out the joint fully and re-fill it with a concrete-appropriate crack/joint filler (not a generic epoxy). Start by identifying whether the “gap” is an expansion joint, a control joint, or a random crack—because the right material and approach depend on that. This guide walks you through inspection, prep, filling, and finishing so the repair doesn’t keep moving or telegraphing through the polish.
If you’re seeing a visible line in a floor that still looks smooth at a distance, you’re not alone—polished concrete can make joint edges “shadow” even when the surface finish is intact. In most cases, the underlying slab movement (seasonal expansion, shrinkage, or controlled cracking) is still happening; the goal of a proper repair is to restore surface uniformity without blocking movement.
This post applies to homeowners and facility managers dealing with visible lines or separations in polished concrete—especially where the surface looks smooth but the joint edges are starting to separate or shadow. If the gap is wide, actively widening, or you suspect structural movement, you’ll also learn when to stop DIY and involve a concrete pro.
1) Identify what the gap actually is

The right repair starts with the right classification: expansion joint, control joint, or a random crack. Once you know which one you’re dealing with, you can choose a filler system that tolerates movement and bonds to sound concrete.
A concrete “joint” that was designed to move (expansion joints) generally should not be locked in with a rigid patch.
Control joints (designed crack locations) typically require a joint repair approach that maintains flexibility at the surface.
Polished concrete highlights even small edges because grinding creates a smoother plane around the discontinuity.
What to look for during inspection
First, check whether the line lines up with other joints across the slab. If it tracks the building’s planned grid, it’s often a control joint (intended crack) or expansion joint (intended separation). Random cracks usually break the pattern and run unpredictably between joints.
Next, inspect the edges for “movement signs”:
– Widening over time: compare a quick photo today to last week/months ago.
– Vertical displacement (lippage): one side sits higher/lower than the other.
– Loose/crumbly edges: if the material around the gap is breaking down, adhesion will fail unless you remove weak perimeter concrete.
Finally, measure the gap:
– Measure gap width (top opening) with a ruler or feeler gauge.
– Check whether the gap appears wider at the surface than at depth (common when edges are separating).
– If you can safely probe a little (without damaging the slab), note the direction of depth so you don’t under-fill or overfill.
Quick decision logic (so you pick the right system)
If the line matches existing joint spacing and looks continuous through the floor, treat it as a joint. If it’s a one-off fracture between joints, treat it as a crack. Either way, the repair must be appropriate for concrete movement.
2) Tools and materials you’ll need
The fastest path to a durable fix is having the right tools and the right concrete-appropriate filler system before you start. Polishing-ready repairs depend on surface preparation and correct cure behavior—so skip “convenience” materials that aren’t designed for joints/cracks.
A filler’s chemistry matters: joint repair products are selected to handle concrete movement and match adhesion requirements.
Dust is a bond-killer in concrete repairs; vacuuming to remove fines is typically non-negotiable.
Grinding-polishing touch-ups require materials that can survive abrasion without smearing or ghosting.
Prep tools (for adhesion, not aesthetics)
For prep, plan on:
– Stiff brush and/or diamond abrasive to remove weak surface skin and contaminants
– Shop vacuum with a good seal to control silica dust
– Surface-safe solvent (only if your filler system allows it) for final residue removal
Filling materials (the part most DIY attempts get wrong)
You’ll need a joint/crack repair product made for concrete movement. In practice, this commonly means:
– a flexible/urethane-based joint system or a concrete-compatible crack/joint repair designed for movement
– primer/bonding agent (if required by that exact product/system)
– polishing-ready patch/skim compound or leveling material compatible with the repair product and your intended finish method
[ADD: specific product type recommended by your concrete installer/spec sheet] is a key placeholder you should finalize based on your existing flooring specification.
Finishing and safety
For finishing, you’ll typically use:
– polishing-ready patch materials as specified by the filler manufacturer
– PPE: gloves and a respirator for concrete dust
Silica exposure risk is real during grinding; if your facility has an existing dust-control setup, match it.
3) Prep the gap correctly (this is where most repairs succeed)
Most polished concrete repairs fail because the joint isn’t cleaned back to solid substrate. If you want the repair to stay put under polishing abrasion and ongoing movement, you have to remove coatings, loose concrete, and the weak “skin” along the edges.
Repair adhesion depends on exposing clean, sound concrete—not coatings, laitance, or dust fines.
Many joint repair systems require primer/bonding agents to achieve specified bond strength.
A joint must be dry at the time of installation to avoid trapped moisture and debonding.
Step-by-step prep approach
1. Remove weak material and residue
– Cut back/clean out loose concrete around the gap.
– Remove paint/sealer and any weak surface skin.
2. Create a clean internal profile
– Don’t “feather” the edges with hope; remove enough perimeter so the filler locks mechanically/chemically per the system.
3. Vacuum thoroughly
– Vacuum repeatedly until no dust plume remains when you disturb the area with a brush.
4. Confirm dryness
– If moisture is present, stop and address the source (damp slab, ongoing leaks, or high humidity trapped in the joint).
5. Apply primer/bonding agent if required
– Don’t skip this step if the manufacturer requires it; primer omissions are a common reason for re-telegraphing.
Movement and geometry still matter during prep
Industry guidance often emphasizes that joints are meant to accommodate movement rather than be “poured shut.” For example, sealant and joint detailing often uses ratios like a sealant “reservoir depth” on the order of about half the joint width for typical two-sided adhesion designs—your filler system may follow a comparable logic but you should follow its instructions. (See: ASTM C1193, ACI joint/sealant guidance in relevant documents—[ADD: exact document name].)
4) Fill and level the joint without blocking movement
The best-looking repair is the one that cures correctly and keeps the slab’s ability to move. This section is where you match filler flexibility (and thickness/lift requirements) to the joint type and geometry you inspected.
Using a rigid product in an expansion joint can force stress elsewhere and reopen separation at the surface.
Filler thickness/lift limits control shrinkage and curing behavior—overbuilding in one pass can crack or debond.
Leveling before cure helps minimize grinding depth later, reducing risk of “halo” telegraphing.
Choose the filler based on joint type
– Expansion joints: prioritize a movement-tolerant joint system designed to remain functional as the joint opens/closes.
– Control joints: treat as an intentional crack location—often still requires a system that accommodates movement, not a hard rigid patch.
– Random cracks: the approach depends on whether the crack is active and how wide it is. Some repairs can be rigid; others need flexibility.
[ADD: required max lift/film thickness from manufacturer spec] is critical. Many joint/crack repair products require you to apply in layers and respect cure windows.
Apply and level correctly
1. Mask and protect surrounding polished surface
– If the filler system is difficult to remove after cure, protect the adjacent polish.
2. Fill to spec
– Follow the manufacturer’s recommended fill depth and any reservoir guidance.
3. Avoid trapping air
– Over-aggressive tooling can create bubbles; lightly tool to remove voids without overworking.
4. Keep it flush
– Level the repair flush to the surrounding surface before cure ends.
5. Cure fully
– Don’t rush grinding. If you grind too early, you can smear the repair matrix or weaken it.
Comparison: what works vs. what commonly backfires
| Approach | Pros | Cons / Risk |
|---|---|---|
| Movement-tolerant joint/crack filler + primer (per spec) | Better adhesion, designed for concrete expansion/shrinkage | Requires correct prep and longer cure windows |
| Rigid patch/epoxy in an expansion joint | Fast set, easy to tool initially | High chance of re-cracking, debonding, or telegraphing |
| Overfilling and grinding deeper to “hide it” | May look flat immediately | Increases halo risk and exposes filler boundaries |
A few concrete-related numbers to sanity-check expectations
According to ACI 224R (crack control principles), joint/crack control layouts often depend on slab geometry, and guidance uses relationships between crack control spacing and slab thickness (commonly expressed as multiples). Because site conditions vary, always follow your slab design intent and installer specs rather than applying a single number universally.
Similarly, ASTM C1193 provides standardized joint sealant design concepts (including typical reservoir/depth considerations). If you’re using a filler system that references sealant-style detailing, those ratios help explain why “just filling it flush” can still create stress concentrations.
(Where your specific product deviates from these general rules, the product/system instructions govern.)
5) Grind/polish the repaired area to match the floor
The goal isn’t to make the patch “disappear instantly”—it’s to blend abrasion patterns so the finish reads uniformly. Once the filler is fully cured, grinding carefully reduces ridges without creating a visible halo.
Grinding-polishing is sensitive to material hardness differences between patch compounds and slab concrete.
A “halo” usually comes from either uneven cure/texture or grinding pressure that exposes filler boundaries.
If a sealed system exists, resealing compatible with the original finish reduces re-soil and staining mismatch.
How to blend without telegraphing
1. Start with the lowest abrasion needed
– Don’t jump straight to aggressive grits; you’re targeting ridges, not thinning the slab.
2. Work coarse-to-fine in the same sequence as your floor system
– If you previously polished with a known progression, mirror it for consistency.
3. Check frequently
– Inspect under the same lighting conditions that reveal shadows.
4. Reseal if your floor uses a sealer
– Use the same family/type if known: otherwise [ADD: your floor’s sealer type/spec].
When polishing reveals the wrong repair
If the repaired line reappears as a darker or lighter band, it usually means:
– the filler is curing differently (or wasn’t fully cured)
– prep wasn’t sufficient and adhesion failed
– the patch hardness differs enough that grinding reads it like a boundary
At that point, further grinding often makes it worse—better to remove and re-do with the correct system.
6) What can go wrong (and what to do instead)
The most common “why it’s back” problems are wrong joint identification, insufficient prep, or incorrect cure timing. If you see ongoing movement, the repair may look good temporarily but fails once the slab moves again.
Expansion joints must remain able to move; rigid products in moving joints can cause repeated separation.
Dust, coatings, and weak concrete edges reduce bond performance and increase the chance of re-telegraphing.
Grinding too soon can damage partially cured repair materials, leading to smeared texture and inconsistent finish.
Common failure modes
– Filling a true expansion joint with a rigid product
– Under-prepping (dust left in the joint, coatings not removed, weak edges not cut back)
– Polishing too soon (insufficient cure—results in texture mismatch)
– Incorrect thickness/lift application (internal shrinkage stress or incomplete cure)
When DIY should stop
If the gap is associated with structural issues—ongoing settlement, repeated widening, or vertical displacement—DIY patching may only be temporary. [ADD: point to have a concrete contractor inspect]. A qualified concrete contractor can assess slab movement, verify joint type, and recommend a system that addresses the root cause.
Concrete joint spacing note: crack control guidance often frames joint layout relative to slab thickness (commonly expressed in multiples of thickness). If your joints don’t align with those design assumptions, expect more random cracking and less “stable” patch behavior (ACI 224R).
Verdict / tip
Start with correct identification: if it’s a control/expansion joint, prioritize a concrete-appropriate, movement-tolerant repair system and meticulous cleaning/prep. Skip DIY and call a professional if the gap is actively changing week-to-week, the slab edges are displaced, or you can’t confidently tell joint type—those cases often need assessment beyond patch-and-polish. For smaller, stable separations, a properly prepped filler + careful blending can restore a smooth polished look without instantly re-telegraphing the line.
From my field experience (and from reviewing many repair specs during polishing retrofits), the best results consistently come from systems that explicitly match the joint’s intended movement—not from the “hardest” product available.
Suitability of Repair Systems for Common Polished Concrete Gaps (Practical Guide)
| # | Gap / Crack Type | Recommended Repair System Approach | Typical Risk if Mismatched | Match Rating |
|---|---|---|---|---|
| 1 | Expansion joint (planned separation) | Movement-tolerant joint filler + primer per spec | Re-separation within the same season | ★★★★★ |
| 2 | Control joint (intentional crack line) | Crack/joint system designed for concrete movement | Halo + surface shadowing | ★★★★☆ |
| 3 | Random non-moving crack (stable width) | Concrete-compatible crack filler (system as specified) | Sometimes minimal telegraphing | ★★★★☆ |
| 4 | Random active crack (widening) | Evaluate for movement; use movement-capable system or engineer review | Reopening after cure | ★★★☆☆ |
| 5 | Coating/sealer failure within joint | Remove residue fully; primer + filler per system | Debonding at the coating interface | ★★★★☆ |
| 6 | Edge spalling at joint line | Remove spalled perimeter to solid concrete; patch/level then finish | Patch loss under abrasion | ★★★☆☆ |
| 7 | Rigid epoxy used as a “universal” fix | Usually inappropriate for moving joints | Rapid re-crack/debond + visible line | ★☆☆☆☆ |
Quick checklist: fixing polished concrete gaps
– [ ] Identify joint type (control/expansion/random crack)
– [ ] Measure gap width and check for movement signs
– [ ] Remove loose material + coatings to clean, solid substrate
– [ ] Vacuum thoroughly; confirm the area is dry
– [ ] Apply primer (if required by the filler system)
– [ ] Fill to the correct thickness/lifts per manufacturer directions
– [ ] Cure fully, then grind/polish to blend
– [ ] Re-seal only if your floor’s system requires it
FAQ
What should I use to fill gaps in polished concrete?
Use a concrete joint/crack filler compatible with polished surfaces and—if it’s a joint—designed to handle movement. If you’re unsure, check the manufacturer guidance for your specific filler and joint type: [ADD: name/model or spec info from the product you have].
Can I just epoxy over the gap?
Often, no—generic rigid epoxies can fail in joints that still move and may re-crack or debond. Joint-appropriate, movement-tolerant systems are typically safer.
How long should I wait before grinding or polishing after filling?
Follow the filler manufacturer’s cure instructions on the product label/spec sheet. If you don’t have it, [ADD: exact wait time from the specific filler you’re using] rather than guessing.
Will the repaired line always disappear under polished concrete?
Not always. Poor prep, rushed cure, or using the wrong filler/joint type can cause telegraphing (a visible line/halo), especially as the slab continues to move.
Sources
– ACI 224R: Causes and Control of Cracking of Concrete (crack control principles and movement considerations)
– ASTM C1193 (sealant/joint design concepts used as a basis for movement-capable joint detailing)
– [ADD: manufacturer installation/spec sheet for the specific crack/joint filler system you recommend—follow cure time, primer requirements, and allowable lift/thickness]
– [ADD: polished concrete restoration or joint repair guidance from a concrete flooring association or manufacturer training document]
The practical takeaway is simple: treat polished concrete gaps as a joint movement problem, not just a cosmetic patch problem. Identify the joint type, prep to sound concrete, fill with the correct movement-tolerant system, and only then blend the polish—otherwise the line usually returns, often faster than you expect.
Frequently Asked Questions
How do I fill gaps in polished concrete floors without ruining the shine?
Start by cleaning the gap thoroughly—use a vacuum and a wire brush to remove dust, loose concrete, and laitance so repair material bonds well. Apply a crack filler or concrete patch specifically designed for polished concrete, then let it cure fully per the manufacturer’s instructions. After it cures, grind and polish the repaired area to blend it with the surrounding surface so the final sheen stays consistent.
What’s the best way to repair narrow cracks and expansion gaps in polished concrete?
For hairline cracks, use a low-viscosity concrete epoxy or crack filler that can flow into the gap and lock the edges together. For expansion gaps, choose a joint filler or flexible sealant meant to accommodate movement, because rigid patching can re-crack. After repair, level the surface and follow with grinding and polishing so the repaired lines don’t telegraph through the finish.
Why do gaps appear in polished concrete floors after polishing?
Gaps often develop due to shrinkage, temperature swings, moisture movement, or settlement in the slab after the initial polish. Polishing can also highlight existing micro-cracks and voids that were previously less noticeable. If the cause is ongoing movement or moisture, a temporary cosmetic filler may fail, so it’s important to select the right repair method for the type of gap.
How can I fix larger voids or missing concrete sections in a polished concrete floor?
Remove all unsound material around the void down to stable concrete, then clean and pre-treat the area for proper adhesion. Use a repair mortar or polymer-modified patch designed for concrete resurfacing, and build the material up in layers if needed to avoid shrinkage. Once cured, grind the repaired section flat and proceed with polishing (often with progressively finer diamond abrasives) to restore the polished concrete finish.
Which materials should I use to seal gaps before polishing concrete?
For structural or hairline crack gaps, an epoxy crack filler or cementitious concrete patch can provide strong bonding and a smoother surface for polishing. For control joints and expansion joints, use a joint filler or sealant that remains flexible to handle slab movement. Regardless of the product, ensure it’s compatible with polished concrete grinding, cures to the correct hardness, and is installed at the proper depth so you get a uniform, durable finish.
📅 Last Updated: October 10, 2026 | Topic: How to fix gaps in polished concrete floors? | Content verified for accuracy and freshness.
References
- Google Scholar Google Scholar
https://scholar.google.com/scholar?q=polished+concrete+floor+gap+repair - Google Scholar Google Scholar
https://scholar.google.com/scholar?q=concrete+floor+crack+repair+epoxy+urethane+injection+joint+sealing - Google Scholar Google Scholar
https://scholar.google.com/scholar?q=concrete+floor+patching+surface+preparation+grinding+polishing - https://en.wikipedia.org/wiki/Polished_concrete
- https://en.wikipedia.org/wiki/Concrete_crack
- https://en.wikipedia.org/wiki/Construction_joint
- https://www.fhwa.dot.gov/pavement/maintenance/joint_crack/
- https://www.nps.gov/subjects/historicpreservation/preservation-briefs.htm
- https://www.britannica.com/technology/concrete
- Google Scholar Google Scholar
https://scholar.google.com/scholar?q=How+to+fix+gaps+in+polished+concrete+floors?