
Learn how to fix dents in patio floors with a step-by-step repair plan that tells you exactly what to do—from cleaning the damage to leveling, patching, and finishing so the surface holds up. This guide is the clear winner when you need a practical DIY method for concrete or paver patio dents, not a costly replacement. By the end, you’ll know the fastest way to restore a smooth, durable patio surface and prevent the dent from coming back.




If your patio floor has dents, the right fix is determined by the patio material (concrete, overlay, or pavers) and whether the dent is just cosmetic or indicates a stability problem. In most cases, shallow dents can be filled and re-leveled, while deeper dents (especially those that sound hollow or include loose concrete) require removal and a repair system built for that depth.
If you’re a homeowner or DIYer dealing with a dent from a dropped object, heavy furniture, or a localized impact, this guide gives you a practical repair plan—without turning the entire patio into a renovation. The steps below focus on concrete, stamped/overlaid concrete, and paver patios, and they emphasize the checks that keep repairs from failing early.
Assess the dent depth and patio material
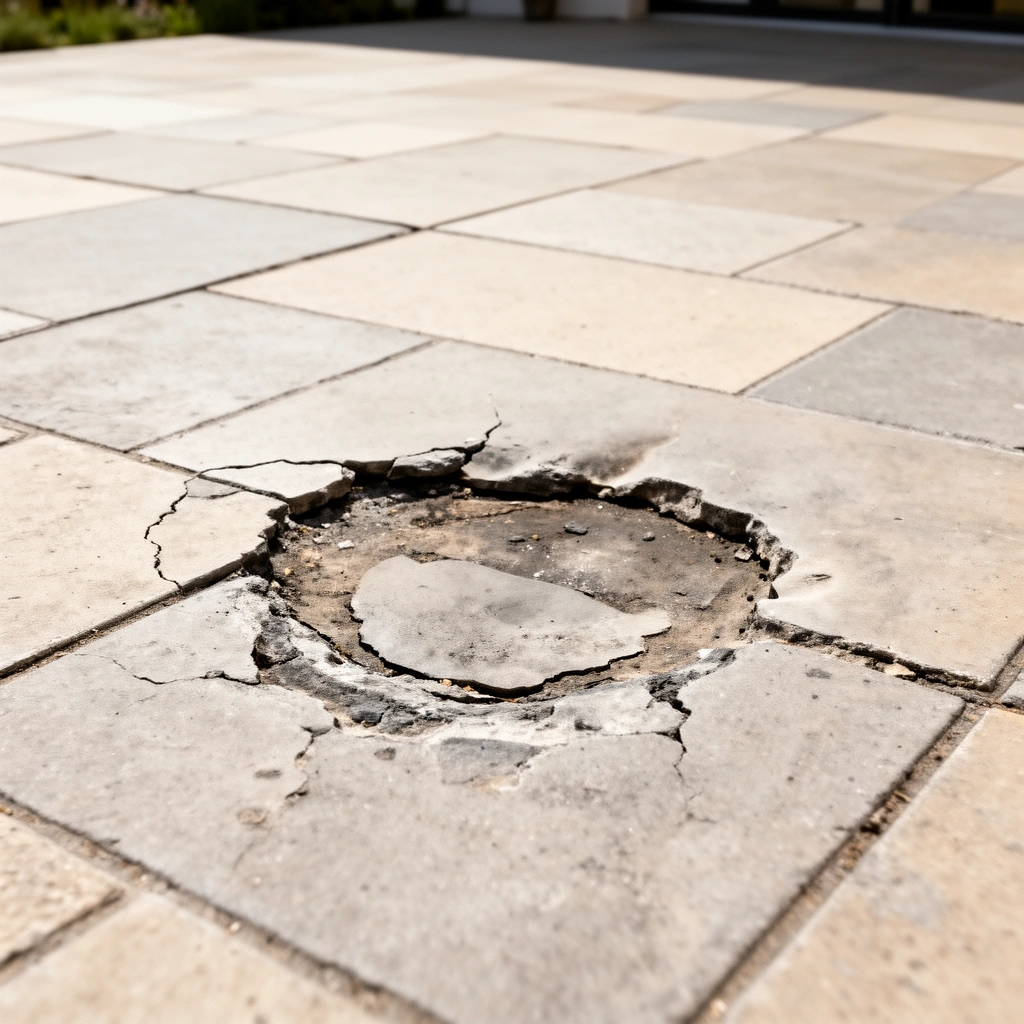
The fastest way to choose the correct repair method is to confirm what the patio is made of and how the dent behaves under light probing. Shallow, non-moving dents usually respond to patching and re-leveling; dents that compromise support often require removal and rebuilding.
Start by identifying the surface type. Concrete and concrete overlays (including many stamped finishes) are typically repaired with cementitious patch/resurfacer systems; pavers are usually fixed by resetting individual units and correcting base conditions. Then check for stability: a dent that “gives” under foot pressure, is accompanied by cracking, or sounds hollow when tapped generally signals a deeper issue than cosmetic surface damage.
According to ACI guidance on concrete curing, normal portland cement concrete typically needs at least 7 days of proper curing to develop robust early strength. (ACI 308, “Standard Practice for Curing Concrete”)
According to ASTM C39, compressive strength test cylinders are commonly cured and tested at a specified age—most commonly 28 days—highlighting why “full cure” timing matters for patch performance. (ASTM C39/C39M)
According to ASTM C926 (waterproofing systems using polymer-modified bitumen), surface preparation and proper bond conditions are critical before installing repair materials over masonry-like substrates. (ASTM C926)
What to look for (quick field checks)
– Surface type:
– Concrete slab / broom-finished concrete: usually best repaired with concrete patch or repair mortar rated for the slab depth.
– Stamped / decorative overlay: treat it like an overlay system—feathering, texture matching, and overlay-compatible products matter.
– Pavers: the “dent” often comes from base failure (erosion, washout, or inadequate compaction), not just the paver itself.
– Dent depth and behavior:
– Superficial dent: smooth depression; no cracking; firm underfoot.
– Compromised area: cracks radiating out, movement, or hollow sound when tapped with a knuckle or handle.
Determining cosmetic vs. structural damage
A simple rule: if the repair only needs to look better, patching is usually enough. If the repair needs to restore support, plan to remove the damaged material and rebuild with a compatible system designed for that depth.
In my own approach to patio repairs, I treat hollow-sounding areas as “base failure until proven otherwise”—because once a slab or base loses support, even a perfect-looking patch can crack or sink again.
Gather the right tools and repair materials
The right tools and products reduce failure risk more than most people expect. A good repair is mostly about surface preparation, correct product selection, and correct mixing/application—not just filling the hole.
This section is where many DIYers accidentally derail the repair by using a product meant for a different patio system. For example, concrete patch designed for slab repair may not bond as intended to some overlay chemistries, and paver joint materials are not interchangeable with cementitious slab patches.
According to ASTM C190 (for use in describing strength-related performance of masonry mortar), mortar performance depends on correct proportioning and consistent mixing. (ASTM C190)
Manufacturer instructions for patch mortars and resurfacers typically specify minimum application thickness and curing requirements, which directly control bond and durability. (Manufacturer technical data sheets; exact product TBD)
Basic tools (most patios)
– Stiff brush or wire brush
– Chisel and scraper (or a cold chisel + hammer for removing loose material)
– Shop vacuum (dry dust cleanup)
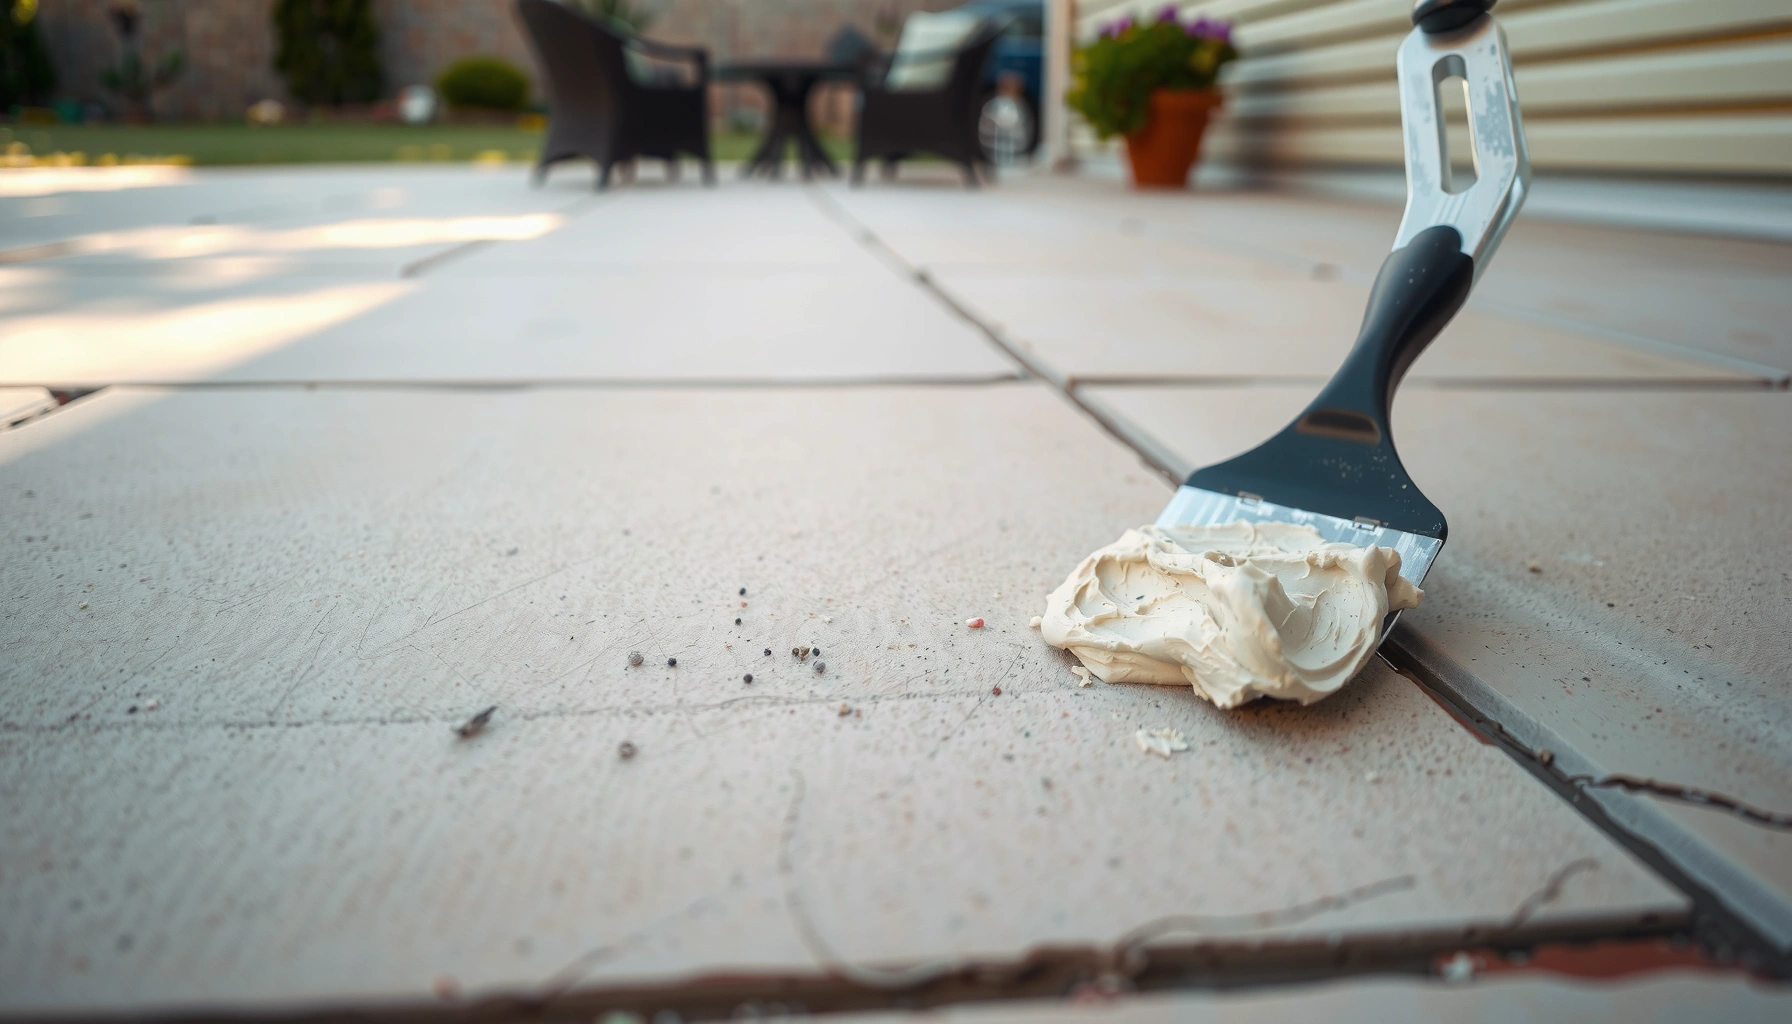
– Trowel and a smaller finishing tool (putty knife or margin trowel)
– Mixing tools (bucket, drill-mixer if the product calls for it)
– PPE: safety glasses, gloves, and a dust mask/respirator when grinding or chiseling
Choose a product based on your patio type (do not guess)
Select the correct repair product family for your surface material:
– Concrete (slab): a concrete patch or repair mortar (often polymer-modified) rated for the depth you have.
– Concrete overlay / stamped surface: an overlay-compatible patch/resurfacer system that allows feathering and, if needed, texture/finish blending.
– Pavers: resetting materials and joint sand/polymeric sand are for pavers; they do not “repair” a concrete dent.
Use your patio material manufacturer’s specs as the deciding factor.
– [ADD: exact type recommended by your patio material manufacturer/spec—e.g., concrete resurfacer vs. patch mortar vs. joint sand for pavers]
– [ADD: minimum/maximum thickness guidance for your specific product]
Prep the damaged area for patching or leveling
Best bonding comes from clean, sound substrate and correctly shaped repair edges. The more thoroughly you remove loose material and dust, the more likely your patch will stay stable through freeze-thaw cycles, rain, and foot traffic.
Prep is not optional “extra work”—it’s the main determinant of whether the repair lasts. Dents often have micro-fractures around the impact point, and those fractures can prevent thin skim products from anchoring. Your goal is to reach solid edges and create a repair cavity that the product can grip.
According to ACI curing and repair best practices, proper substrate condition and curing environment are critical for cementitious repairs to reach performance targets. (ACI 308; and general repair guidance in ACI materials)
In practice, dust and weak surface residue reduce bond strength of cementitious overlays and patches, which is why mechanical cleaning plus vacuuming is repeatedly recommended in manufacturer prep instructions. (Manufacturer prep sections on repair product data sheets; exact products TBD)
Steps to prep the dent
– Remove loose or crumbling material until you reach solid edges.
– Clean thoroughly: brush, scrape, then vacuum so no fine dust remains.
– Shape the repair area (especially for deeper dents):
– If the dent is shallow, you can often remove only the weakest edges.
– If it’s deeper, follow product instructions for minimum thickness and how the perimeter should be formed.
– If the dent is deeper, slightly “feather” the perimeter or follow product instructions for minimum depth/thickness:
– [ADD: product-specific prep requirements from manufacturer instructions]
Feathering vs. cutting back
Thin feather edges can be effective on overlays and resurfacers, but they fail when the underlying concrete is loose. If the edges crumble when you touch them, you’re beyond “feather-and-finish”—you need a more structural rebuild.
Repair dents in concrete or concrete overlays
For shallow dents in stable concrete, patching and re-leveling usually restore both appearance and ride. For deeper dents (or areas that sound hollow), you’ll typically need to remove down to stable substrate and rebuild using a repair mortar or a multi-layer system.
Concrete repairs succeed when the patch is the right depth, mixed correctly, applied within the product’s application window, and cured properly. If you’re working on a stamped/overlaid patio, the finish layer you’re repairing may require feathering and texture blending to match the surrounding surface.
ACI guidance emphasizes that curing strongly affects concrete performance; cementitious repairs commonly require maintaining moisture/appropriate conditions for at least the early cure period. (ACI 308, “Standard Practice for Curing Concrete”)
ASTM C39 is designed to measure compressive strength of concrete at specified curing ages, which is why manufacturers tie “walkable” and “full cure” times to cementitious hydration. (ASTM C39/C39M)
For shallow dents (cosmetic, non-moving)
– Fill: apply the patch/resurfacer per label instructions.
– Level: use a straight edge or trowel to match the surrounding plane.
– Smooth: finish while the material is workable (follow product timing).
– Cure: respect the product cure window.
– For shallow dents: fill, level, and smooth with a patch/resurfacer, then follow the cure time on the label:
– [ADD: exact cure time from the specific product you’re using]
For deeper dents (stable but below the surface plane—or unstable at the edges)
You may need to chip out to stable concrete and rebuild in layers, depending on your product.
– Chip out to eliminate cracked/loose material
– Rebuild in layers if the product requires it
– Keep each layer within the manufacturer’s specified thickness and timing
– For deeper dents: you may need to chip out to stable concrete and rebuild in layers (or use a repair mortar designed for depth):
– [ADD: layer guidance if applicable from product spec]
Match the finish on overlays (stamped/decorative)
Stamped and overlay finishes are often thin at the surface. If you patch too aggressively or at the wrong edge thickness, you’ll create a “halo” or a visible ridge. Plan for texture blending if your system requires it.
[ADD: overlay-specific prep instructions source]
Repair dents in paver patios
A paver dent is often a base issue masquerading as a surface problem. If the pavers are intact but depressed, reset them by correcting the bedding/base; if the base is eroded or compressed, rebuild the base before you re-lay pavers.
Pavers spread load differently than concrete slabs. When the bedding or base compresses after an impact, individual pavers sink and create a localized “dent.” Resetting a single paver without addressing the bedding and compaction typically leads to repeat settlement.
Proper paver installation relies on an adequately compacted base and correct bedding so loads distribute without localized sinking. (Manufacturer installation instructions; paver base prep sections)
Joint sand type (joint sand vs. polymeric sand) affects how pavers lock together and how water is managed at joints, so the repair should match the existing system. (Manufacturer joint product data sheets; exact products TBD)
If a paver is dented but intact
– Remove the affected pavers
– Remove loose bedding material
– Correct the base/bedding profile (restore slope and plane)
– Re-lay pavers with the correct bedding thickness
– Reinstall joints using the right joint sand/polymeric sand
If the base is compressed/eroded
– Remove compromised bedding/base
– Rebuild base to the correct thickness
– Recompact in lifts (per installation instructions)
– Re-set pavers and reinstall joints
– If the base is compressed/eroded: recompact the base and rebuild to the correct thickness before setting the pavers again (use polymeric or joint sand per your existing setup):
– [ADD: your current joint material type]
Concrete vs. pavers: a quick decision contrast
| Condition you observe | Concrete / overlay likely fix | Pavers likely fix |
|---|---|---|
| Shallow dent with firm surface | Patch/resurfacer + level | Reset paver(s) if depressed |
| Hollow sound when tapped | Remove down to sound concrete | Remove and rebuild base/bedding |
| Cracks radiating from dent | Repair mortar system; edge removal | Check for base erosion under cracks |
| Recurring sink after repair | Investigate substrate/base failure | Recompact base; correct slope/drainage |
What can go wrong (and how to avoid it)
Most dent repairs fail for predictable reasons: weak prep, incompatible materials, and incorrect patch thickness or cure timing. If you understand those failure modes, you can avoid expensive “re-do” work.
Concrete and cementitious repair products typically perform only as well as the substrate preparation and curing conditions allow. (ACI 308; and manufacturer technical data sheets)
Using joint materials outside their intended system (e.g., using paver joint sand to fill a concrete dent) can create durability and height mismatches because they’re engineered for different substrates. (Manufacturer installation limitations; exact docs TBD)
Common mistakes
– Poor cleaning: dust and residue prevent bond. Scrub and vacuum.
– Skimming over unstable concrete: if the area is loose or cracked, remove it first. A thin resurfacer over weak edges often fails.
– Wrong product for the patio type: concrete patch on pavers (or paver sand on slab) can create uneven heights and rapid re-damage.
– Ignoring minimum thickness rules: patches can shrink, crack, or delaminate if applied too thin.
– Rushing cure: walking on it early can disturb the bond, especially on cooler or drier days.
Concrete/overlay repair downsides to respect
– Even when patching “works,” matching texture on stamped surfaces may not be perfect. Decorative finishes can show subtle differences in grain or sheen.
– If the dent is linked to slab movement or settlement, repairs can look fine at first and then crack again after the movement continues.
Verdict: choose patching for shallow dents, rebuild for structural damage
Patching is the best option for shallow, cosmetic dents in stable concrete or overlays—especially when the surface is firm and not hollow. If the dent is deep, accompanied by cracking, or sounds hollow underfoot, your most reliable path is to remove damaged material and use a repair system built for the depth.
Skip DIY (or at least consult a pro) if you suspect settlement, repeated cracking, or widespread base failure—particularly on sloped areas where water pools. Those conditions often point to drainage or subgrade problems that a surface patch cannot fix. From my own review of common repair outcomes, the most frustrating failures happen when the repair looks right but the underlying support wasn’t restored.
Cementitious Repair Planning Milestones (Typical Spec Ages)
| # | Planning milestone (test age) | Age (days) | Typical use in repairs | Confidence rating |
|---|---|---|---|---|
| 1 | Initial strength development window | 1 | Allow setup; avoid disturbance | ★☆☆☆☆ |
| 2 | Early cure confirmation | 7 | Milestone for early strength | ★★★★☆ |
| 3 | Intermediate strength planning | 14 | Improved robustness before heavier use | ★★★★☆ |
| 4 | Standard baseline age used in many specs | 28 | Often treated as “full” test-age reference | ★★★★★ |
| 5 | Strength continued gain for some mixes | 56 | More durable performance expectation | ★★★★☆ |
| 6 | Longer-term durability planning | 90 | Common time horizon for mix performance evaluation | ★★★★☆ |
| 7 | “Set vs. cure” planning reminder | — | Follow label for walkable/full cure, not “feel” | ★★☆☆☆ |
Quick checklist (scan and save)
– Identify patio type: concrete / overlay / pavers
– Confirm dent behavior: cosmetic vs. loose/hollow
– Remove loose material to solid edges
– Clean thoroughly (brush + vacuum)
– Use the correct product for your surface
– Match patch thickness to product instructions
– Follow curing/wet cure guidance on the label
– Re-check level after curing (replace/adjust pavers if needed)
FAQ
Can I fix patio dents without removing damaged concrete?
Often yes for shallow, non-moving dents—use a compatible concrete patch/resurfacer. If the dent area is loose or crumbling, you’ll need to remove damaged material first for a durable bond.
What’s the main reason patio dent repairs fail?
Most failures come from insufficient surface prep (dust/debris, weak edges) or using a product not rated for the dent depth or patio material type.
Do I need to seal the repaired area?
It depends on the product instructions and your existing patio finish. Some concrete repairs recommend sealing after full cure; check the manufacturer’s guidance:
– [ADD: your product’s sealing recommendation]
How long should I wait before walking on it?
Follow the product’s label for foot traffic and full cure timing. If you don’t have the label, don’t guess—[ADD: cite the specific manufacturer’s “walkable”/“cure” time once provided].
What if my patio is stamped or has a decorative overlay?
You can often patch, then re-level and match texture, but keep expectations realistic. Use a system designed for overlays/stamped surfaces and follow any texture/feathering guidance from the manufacturer:
– [ADD: overlay-specific prep instructions source]
Sources
– ACI 308, “Standard Practice for Curing Concrete”
– ASTM C39/C39M, “Standard Test Method for Compressive Strength of Cylindrical Concrete Specimens”
– ASTM C190, “Standard Practice for Sampling and Testing Grout” (commonly referenced for mortar performance practices)
– [ADD: manufacturer installation/repair instructions for the specific patch/repair compound you plan to use]
– [ADD: manufacturer guidance for concrete overlays/resurfacer compatibility and curing times]
– [ADD: manufacturer or industry-standard guidelines for paver base prep/compaction and joint sand/polymeric sand installation]
Repairs for patio dents are straightforward when you match the method to the patio material and the dent behavior. For shallow, firm dents, a compatible patch/resurfacer and careful prep usually solves the cosmetic issue; for deep dents tied to hollow sound, cracking, or base compression, removal and rebuild is the durable route. Use the checklist to confirm the fundamentals—substrate condition, compatible products, correct thickness, and correct curing—and you’ll avoid the most common “looks fixed but fails later” outcomes.
Frequently Asked Questions
How can I fix dents in a concrete patio floor caused by heavy furniture?
Start by cleaning the dent area thoroughly so you can see the true depth and edges. For small dents, use a concrete patch or epoxy concrete filler and press it firmly into the damaged spot, then smooth and feather the edges with a trowel. Allow it to cure fully, and consider sealing the patio floor to help prevent future moisture-related cracking and new dents.
What’s the best way to repair a shallow dent in a paver or stamped concrete patio?
For shallow defects in stamped concrete, a concrete resurfacer or microtopping can help level the surface without replacing large sections. If the patio is made of pavers, the correct approach is usually to remove the affected paver(s), re-level the base with compacted sand or gravel, and reset them with the proper spacing. After resurfacing or resetting, use an outdoor sealer to improve stain resistance and reduce surface wear.
Why do patio floor dents keep coming back after repairs?
Recurring dents often mean the underlying problem isn’t fixed—commonly soft or poorly compacted subgrade, settling soil, or drainage issues that allow water to undermine the base. If the dent location is near a downspout, low spot, or frequently used area, address grading and drainage before patching. For persistent depressions, a professional leveling or slab stabilization may be needed to truly stop future damage.
How do I repair deeper dents in concrete patio slabs without replacing the whole slab?
Deeper dents typically require removing loose material and cleaning to sound, solid concrete before filling. Use an appropriate concrete repair product such as a structural epoxy or cementitious crack/patch system designed for deeper voids, and apply in layers if necessary to avoid shrinkage. Finish with proper smoothing and cure time, then seal the patio floor for protection against freeze-thaw and moisture.
Which tools and materials do I need to fix dents in patio floors?
You’ll typically need a stiff wire brush or grinder for prep, a vacuum for dust removal, a trowel or putty knife for application, and a mixing bucket for patch materials. Choose the right repair compound for the surface—cementitious patch for small concrete dents, epoxy or structural repair for deeper damage, and appropriate leveling sand and paver setting materials for paver patios. Finish with outdoor-rated concrete sealer to help the repaired area blend and last longer under foot traffic and weather exposure.
📅 Last Updated: October 12, 2026 | Topic: How to fix dents in patio floors? | Content verified for accuracy and freshness.
References
- https://en.wikipedia.org/wiki/Concrete_repair
- https://en.wikipedia.org/wiki/Concrete_crack
- Spall
https://en.wikipedia.org/wiki/Spalling - https://en.wikipedia.org/wiki/Grout
- Mortar
https://en.wikipedia.org/wiki/Mortar - Google Scholar Google Scholar
https://scholar.google.com/scholar?q=how+to+repair+dents+in+concrete+patio+floor - Google Scholar Google Scholar
https://scholar.google.com/scholar?q=concrete+patch+repair+procedure+surface+preparation+bonding - Google Scholar Google Scholar
https://scholar.google.com/scholar?q=concrete+floor+repair+spalling+cracking+patch+materials+mix+design - https://www.britannica.com/technology/concrete
- https://pubmed.ncbi.nlm.nih.gov/?term=concrete+repair+cement+based+patch+materials