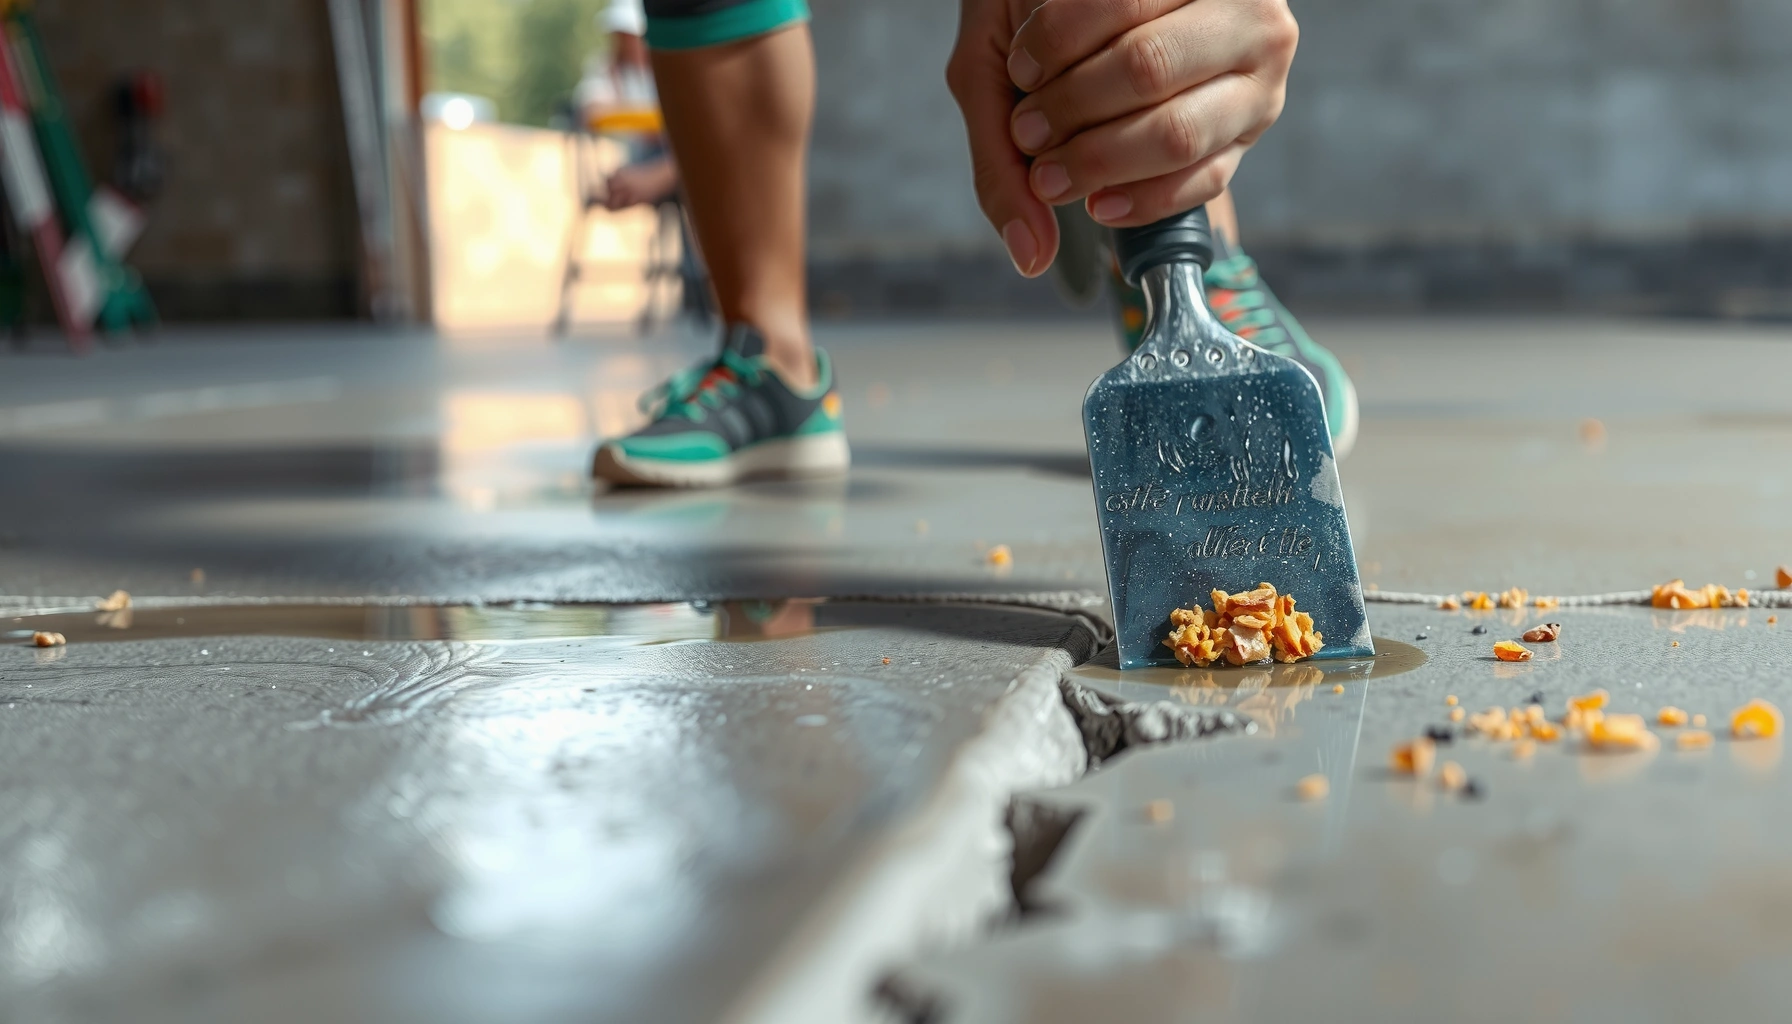

Fixing dents in outdoor floors is most reliably done by cleaning the damaged area, then filling and leveling with an exterior-rated patch compound or concrete resurfacer matched to your floor type. If you need a durable repair that resists water and freeze-thaw cycles, this step-by-step approach beats quick fixes like temporary filler. You’ll learn exactly how to prep the surface, apply the repair material, and finish for a smooth, weather-ready result.



If your outdoor floor has dents, the right repair comes down to the surface material (concrete, pavers, wood, or composite) and whether the dent is cosmetic or structural. Start by cleaning and removing anything loose, then use a repair method that matches the substrate—patch/level for small dings, and leveling or replacement for deeper or movement-related damage.
This guide is for homeowners and property managers handling everyday dents from heavy furniture, foot traffic, dropped items, and seasonal movement—especially on patios, walkways, pool decks, and entry paths.
Identify the floor material and dent depth
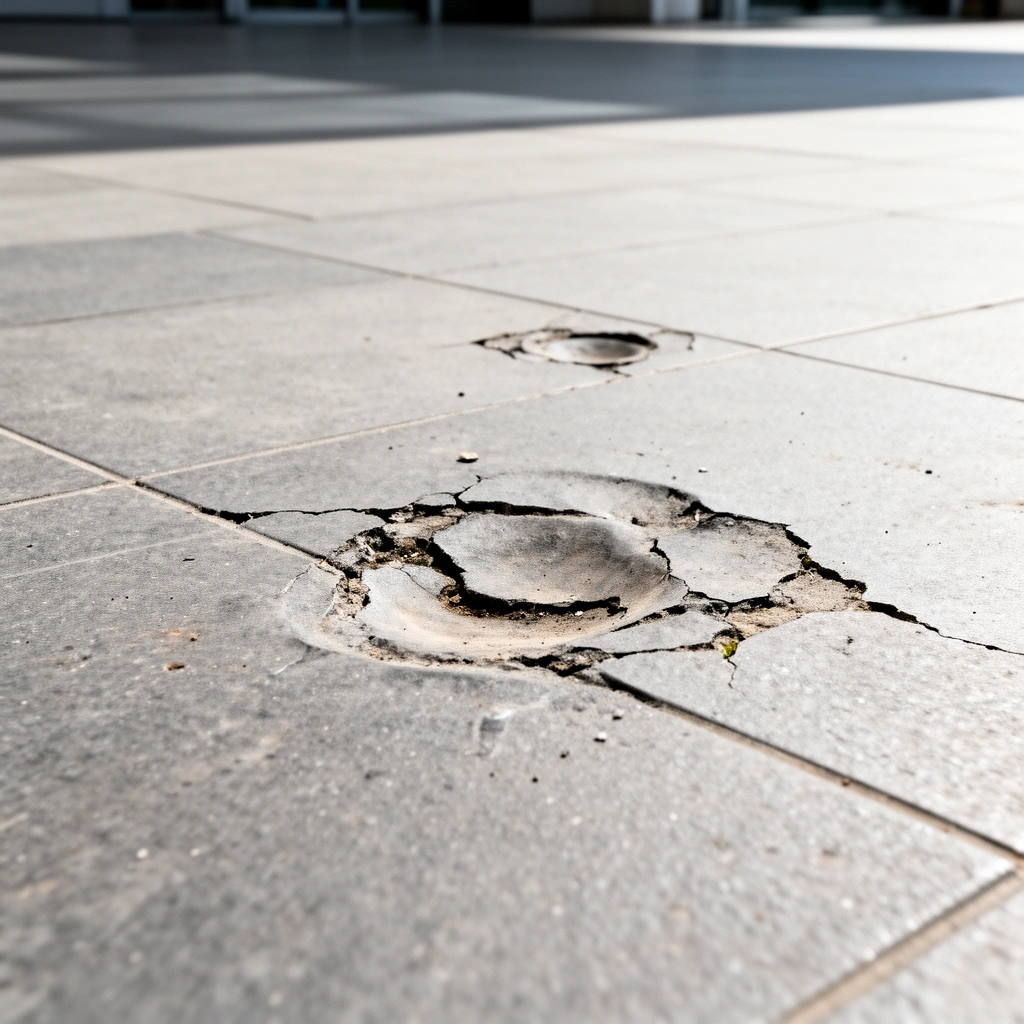
You’ll get the best result when you identify the floor material first, because each one behaves differently under load and weathering. Then confirm whether the dent is shallow (typically repairable with patching) or structural (often requiring base/substrate fixes or replacement).
Concrete repairs usually depend on bonding a cementitious patch to sound, clean substrate; if the underlying slab is loose or moving, patching alone won’t hold.
ICPI guidelines for segmental pavers emphasize correct bedding and jointing because settlement and drainage issues can re-create surface depressions.
– Check whether the surface is concrete, asphalt (less common for “floors” but can appear in driveways), pavers, natural stone, wood decking, or composite decking.
– Estimate the dent size (diameter/width) and depth:
– Shallow cosmetic dent: surface depression without cracked, crumbling, or soft substrate.
– Deeper structural dent: the area feels unstable, cracks radiate nearby, or the dent reappears after spot fixes.
– Perform a quick “soundness” check:
– If you press along the dent edges and it feels hollow, soft, or shifts, you may have an issue beneath the surface (subbase, joists, or bedding).
Also look for drainage problems. Standing water near the dent often signals slope or subgrade issues, not just surface impact.
Quick field thresholds that guide repair choices
Concrete and paver installers commonly use depth bands to decide between resurfacing/patching versus base rework. Use these as practical starting points:
Practical Dent-Depth Bands and Typical Repair Path (Field Use)
| # | Dent depth band | Typical example | Most reliable approach | Repair confidence |
|---|---|---|---|---|
| 1 | 0–3 mm (0–1/8 in) | Foot scuff or light impact ding | Patch/level surface material | ★★★★★ |
| 2 | 3–13 mm (1/8–1/2 in) | Furniture skid mark or localized spall | Spot repair + edge prep | ★★★★☆ |
| 3 | 13–25 mm (1/2–1 in) | Deep impact with nearby cracking | Patch in lifts or targeted replacement | ★★★☆☆ |
| 4 | >25 mm (>1 in) | Board/sub-base collapse or major settled paver zone | Base/joist correction + replacement | ★☆☆☆☆ |
| 5 | Soft/rotted feel | Local sponge-like decking area | Remove compromised substrate | ★☆☆☆☆ |
| 6 | Cracking around dent | Radiating cracks, spalling edges | Investigate slab/base movement | ★★☆☆☆ |
| 7 | Dent returns after re-leveling | Repeated depressions in same spot | Address drainage/subgrade | ★☆☆☆☆ |
(These bands are practical decision aids. For code/compliance and manufacturer-specific limitations, always follow the repair product’s instructions.)
Clean and assess damage before you repair
Cleaning and assessment is the step that prevents 80% of “pretty repairs” from failing. You want a stable, dry substrate so your filler, patch compound, bedding material, or decking repair can bond or seat correctly.
Cement-based repair materials generally require clean, sound, properly prepped concrete to achieve designed bond strength; dust and laitance reduce adhesion.
For wood and composite decking, localized dents can be symptoms of structural movement (loose joists), so inspection should include fasteners and support spans.
– Remove debris and loose edges:
– Sweep/vacuum first, then use a scraper or chisel to lift any crumbly concrete, lifted paver edges, or splintered decking fibers.
– Rinse and dry thoroughly:
– For cementitious patches and bonding repairs, moisture trapped under the repair can prevent proper hydration and lead to debonding.
– Take close-up notes (or photos) of:
– Cracks nearby (direction and length)
– Any aggregate exposed on concrete
– Any soft spots on wood decking
– Any rocking pavers that indicate bedding failure
Use small tests to avoid big rework
– Concrete “tap test”: tap around the dent with a hammer handle. A hollow sound often indicates delamination you’ll need to remove.
– Paver “rock test”: step on adjacent joints. If the area rocks, plan for lifting and re-bedding.
– Deck “flex test”: press along the board and watch whether fasteners or adjacent boards move.
According to ACI guidance on concrete curing and repair best practices, minimum curing periods and proper moisture conditions matter for durability (commonly 7 days for many normal conditions) (ACI 308 / manufacturer technical guidance). Repair systems still differ, so product instructions control the exact timeline.
Fix dents in concrete or stamped concrete
For concrete dents, you typically repair by removing loose material and rebuilding the surface with the correct exterior-rated patch compound. If the slab is still stable, surface patching works; if the slab moves or cracks keep growing, you must address the cause or consider replacement.
Many concrete repair systems require “chipping out loose edges” and creating a sound perimeter (not a smooth feather-over of failing concrete) to improve mechanical bonding.
Layer-by-layer patch buildup is common in cementitious systems because excessive thickness can increase shrinkage cracking and reduce final bond quality.
– For minor dents/spalls:
1. Chip out loose material until you reach sound concrete.
2. Feather the edges only where the substrate is stable (avoid patching over crumbling “skin”).
3. Apply an exterior concrete patch/repair compound and strike/smooth level with the surrounding surface.
– For larger damaged areas:
– Build up in layers as the product instructs, then finish and cure correctly to reduce cracking and shrinkage.
– Protect during cure:
– Keep traffic and heavy loads off the repaired spot while it reaches handling strength and full cure per the specific patch product.
Stamped concrete: don’t erase the pattern
Stamped concrete dents often need attention to texture and drainage. Even if you hide the patch, water can collect where the surface flatness changes.
– Recreate texture only if the patch product supports imprinting/stamping.
– Maintain slope away from buildings and avoid “high crowns” that trap water.
Fix dents in pavers or outdoor stone
For pavers and most natural stone, dents are usually caused by localized settlement or bedding failure—not the surface material itself. The reliable fix is to lift, correct the base/bedding, then reinstall and re-sand/joint properly.
If a paver dent is caused by settlement, lifting the unit(s) and restoring bedding thickness is the correct repair path; filling from above rarely corrects the movement.
Joint sand and bedding materials influence drainage and stability; incorrect materials can lead to rocking, washing out, or recurring depressions.
– If the dent is from a moved/settled paver:
1. Lift the affected paver(s) carefully.
2. Check the bedding layer and remove any washed-out or voids.
3. Re-level using the correct bedding/base materials recommended for your paver system.
– If the stone is cracked or crumbling:
– Replace the damaged unit. “Filling” cracked stone like concrete usually won’t restore structural integrity or freeze/thaw durability.
– Reinstall:
– Level carefully.
– Sweep joint material back in (polymeric sand if your system specifies it, otherwise the manufacturer-recommended jointing material).
– Verify drainage:
– Ensure the surface drains away from structures—pavers don’t fail “in a vacuum.” Bad drainage accelerates washout and re-settlement.
Concrete isn’t interchangeable with pavers
Even though both can use patch materials, pavers and stone repairs are governed by seating and base mechanics, not just surface flatness.
| Scenario | Best action | Why it works | What to avoid |
|---|---|---|---|
| Rocking paver at dent | Lift and re-bed | Corrects sub-support that causes re-denting | Spot-filling the depression only |
| Cracked stone unit | Replace stone | Preserves structural and freeze/thaw performance | Bonding filler over a failing substrate |
Fix dents in wood or composite decking
For wood and composite decking, dents are often tied to flexing—meaning the surface is absorbing impact because the boards or support below are under-deflected. Minor dents can sometimes be sanded/filled, but permanently deformed boards typically need replacement.
If a dent comes from repeated flex, the lasting fix is to correct joist spacing or support conditions—not just repair the board surface.
Many composite decking systems specify compatible fillers and advise against using cementitious patches on flexible, moisture-sensitive boards.
– Minor dents in wood:
– Sand smooth where appropriate, clean dust out of the area, and apply an exterior-rated filler/patch designed for decking surfaces.
– Composite decking:
– Use the manufacturer-compatible repair approach. Composite typically needs products designed for its polymer/wood-fiber composition.
– If the dent came with flexing:
– Check for loose joists, insufficient blocking, or unsupported spans.
– Fixing the board only can lead to repeated re-denting because the underlying deflection remains.
– Compromised boards:
– If the board is permanently deformed or shows rot/softness (wood) or structural loss (composite with severe damage), replacement is usually the most reliable route.
Seasonal movement matters
As of recent best-practice guidance for exterior decks, thermal expansion and moisture cycling can change board position. Composite has its own expansion behavior, and wood will move with humidity. The practical implication: a surface-only repair may “look fine” until the next high-moisture or hot-season cycle.
What can go wrong (and how to avoid it)
Most dent repairs fail due to substrate problems or product mismatch, not because the repair was applied “messily.” Avoiding these failure modes keeps you from repeating work after the first rain cycle or freeze/thaw season.
Using cementitious patch on flexible or moving substrates can lead to debonding or cracking because the patch can’t accommodate movement.
Ignoring drainage and subgrade issues allows water to pool or wash out bedding, which creates recurring dents even after a clean, well-finished patch.
Common pitfalls:
– Wrong repair type:
– Cement patch on flexible decking, or filler on cracked stone.
– Skipping edge prep:
– Leaving loose material under a patch reduces bond and invites delamination.
– Repairing on wet or dusty surfaces:
– Cementitious and bonding systems generally need clean, properly dried surfaces.
– Ignoring drainage and subgrade:
– If the base shifts, the dent returns.
– Overfilling and not feathering:
– High spots trap water or create trip hazards at the repaired area.
Pros/cons: patching vs base correction (quick decision view)
| Approach | Pros | Cons / risk |
|---|---|---|
| Surface patch / leveling | Fast, low disruption; best for stable, sound substrates | Fails if the slab/deck/base is still moving or drainage is wrong |
| Base or structural correction | Prevents dent “recurrence”; addresses root cause | More labor; may require permits/inspections depending on scope |
Verdict / tip: choose repair by material, and don’t ignore soft spots
For small, stable dents, patching or leveling is usually the fastest and most cost-effective option. But if you notice hollow areas, ongoing cracking, movement, or soft/rotted decking, skip purely cosmetic fixes—address the underlying structure/base first or plan replacement.
From a property-management perspective, the most economical path is often the one that stops recurrence (fix drainage, bedding, or joist support) rather than repeatedly resurfacing the same weak spot. If you’re unsure about your outdoor floor material or the dent pattern, [ADD: ask a local contractor/inspect for structural softness] before you start.
Quick scan checklist (save this)
– Identify material: concrete / pavers / wood / composite
– Measure dent size and check for nearby cracks or flex
– Remove loose debris and prep edges (don’t patch over unstable material)
– Verify surface is dry (especially before cementitious repairs)
– Choose a repair product meant for that exact surface type
– Follow cure/handling guidance before loading
– Re-check drainage and leveling after repair
FAQ
Can I fix dents in outdoor floors with just spackle or lightweight filler?
It depends on the surface. Spackle/lightweight fillers are often not appropriate outdoors or for concrete/paver-level damage—use an exterior-rated patch/repair compound designed for your specific material. [ADD: source for recommended filler type for your surface]
How long should I wait before walking or placing furniture on the repaired area?
Follow the curing time on the repair product you use; different patch compounds have different handling windows. If you don’t have the label, [ADD: check the manufacturer’s cure/handling instructions].
Why does my patch keep cracking after I repair a dent?
Common causes are patch applied too thick without layer-by-layer build-up, poor surface prep, repairing over moisture/dust, or missing proper cure conditions. Also consider whether the underlying base is still moving.
Is it better to replace a damaged paver/board or patch it?
Replace when the unit is cracked, crumbling, permanently deformed, or when the surface flexes due to sub-support issues. Patch/repair is best for small, stable dents where the substrate is sound.
What’s the first thing to check if multiple dents keep appearing?
Check load patterns and foundation/base movement (settlement, inadequate bedding, or drainage problems). Repeated denting usually points to a recurring support or subgrade issue.
Sources
– ACI 308 — “Standard Practice for Curing Concrete” (curing duration and moisture maintenance principles).
– [ADD: manufacturer instructions for the specific concrete patch/repair compound you plan to use]
– [ADD: manufacturer installation guidance for pavers/stone bedding and joint materials]
– [ADD: decking manufacturer care/repair guidance for sanding/filler compatibility]
– [ADD: relevant ICPI / ASTM references for paver bedding thickness, jointing materials, and drainage principles]
– General best-practice surface prep and curing guidance from [ADD: relevant cement/repair product technical data sheets or manufacturer documentation]
If you match the repair method to the material and correct the root cause (especially drainage, bedding, and support), dent repairs on outdoor floors hold up through the next season. Start with clean, sound prep; choose the right product system; and treat “soft spots” and repeating depressions as structural information—not just cosmetic damage.
Frequently Asked Questions
How can I fix dents in an outdoor concrete patio safely?
Start by cleaning the dented area so you can see the full extent of the damage and remove loose debris. For shallow dents, use an exterior concrete patch or resurfacer, applying it with a trowel and smoothing to match the surrounding surface. If the dent is deeper, you may need a concrete repair mortar and possibly a bonding primer to improve adhesion before finishing and curing.
What’s the best way to repair dents in outdoor pavers without removing them?
If the paver is dented or cracked, lift it carefully and inspect the base—dents often come from settlement or poor compaction. Re-level the sand or bedding layer, compact it firmly, and reinstall the paver with the proper spacing so water can drain. For small chips or surface dents on the paver, use a paver repair compound that’s rated for outdoor use and follow curing times for long-lasting results.
Which filler or patch should I use to fix dents in outdoor wood decking?
For wood decking dents, choose an exterior wood filler or epoxy filler that can withstand moisture and temperature changes. Clean the area, dry it completely, and lightly sand the surrounding surface for better bonding. After filling, sand smooth once cured and seal with a penetrating deck sealant or stain to protect against future dents and weathering.
Why do dents happen on outdoor floors, and how do I prevent them after repair?
Dents are commonly caused by heavy loads, freeze-thaw cycles, water pooling, or an unstable sub-base that shifts over time. Fixing the visible dent without addressing the underlying cause can lead to repeat damage, especially on patios, driveways, and walkways. Improve drainage, ensure proper compaction under the surface, and use mats or protective pads under heavy objects to reduce stress points.
How do I repair dents in an outdoor floor when the area is cracked or uneven?
For dented areas that are also cracked or uneven, you’ll need to stabilize the surface first—remove any failing material and check for movement beneath. Use a concrete crack filler or patching compound appropriate for exterior conditions, and consider a thin resurfacing overlay if the surrounding area is uneven. Finish with a weather-resistant sealant to help prevent water intrusion and future cracking from rain and freeze-thaw cycles.
📅 Last Updated: October 12, 2026 | Topic: How to fix dents in outdoor floors? | Content verified for accuracy and freshness.
References
- Google Scholar Google Scholar
https://scholar.google.com/scholar?q=repairing+concrete+dents+outdoor+patio+slab+depression - Google Scholar Google Scholar
https://scholar.google.com/scholar?q=filling+depressions+and+spalls+in+exterior+concrete+slabs - Google Scholar Google Scholar
https://scholar.google.com/scholar?q=repairing+wood+deck+damage+dent+scratch+surface+refinishing - https://en.wikipedia.org/wiki/Concrete_repair
- Floor
https://en.wikipedia.org/wiki/Floor - Pavement Preservation – Design & Analysis – Pavements – Federal Highway Administration
https://www.fhwa.dot.gov/pavement/preservation/ - https://www.epa.gov/safepestcontrol/repairs-and-maintenance-for-structural-concrete
- https://www.cdc.gov/niosh/topics/heatstress/default.html
- concrete repair – Search Results – PMC
https://www.ncbi.nlm.nih.gov/pmc/?term=concrete+repair - Historic Preservation (U.S. National Park Service)
https://www.nps.gov/subjects/historicpreservation/index.htm